Recently in Photography

  Page 88 of 385 in Photography  

Symmetry in Street Photography

There are so many different things to look for when exploring urban areas. Of course, we're always hoping for a decisive moment. But there are satisfying shots even in the quiet moments.

apartments-new-orleans.jpg "For Rent" - Olympus PEN-F with 14-42mm EZ zoom. Photo by Derrick Story.

One of the things that I look for is symmetry. Whether it's the pattern of two iron emergency staircases on the outside of a brick building, or a set of steps leading up to a duplex apartment, these images can add texture to your presentation. And if you can subtly disrupt the balance with a closed curtain or For Rent sign, all the better.

You can call it your quiet moment photography.

You can share your thoughts at the TDS Facebook page, where I'll post this story for discussion.

This is The Digital Story Podcast #591, July 4, 2017. Today's theme is "Frederic VJ Lives; New Orleans." I'm Derrick Story.

Opening Monologue

Some of my favorite moments during the Rail Adventure Workshop were our one-on-one meetings during the 19-hour train journey through the South to New Orleans. And one of the names that often came up during our discussions was my friend Frederick Van Johnson and his podcast, TWiP. Friends asking about friends, Southern hospitality, street photography, and so much more... all on today's TDS podcast.

Frederick Van Johnson Lives

Before we get to New Orleans itself, I want to address an issue that came up along the way: the well being of Frederick Van Johnson. As soon as I returned from my trip, I dropped him a note asking if he'd make an appearance on the show to discuss what he's been up to, and how he's been. Here's what he had to say.

To-Trains-1024.jpg

The City of New Orleans

It was supposed to rain every day we were in NOLA. And yet it stayed dry (relatively speaking) until 10 minutes after our workshop ended, when a downpour began. So other than the weather itself, here are my five favorite moments in New Orleans.

  • Shrimp Tacos in the French Market - I know that I shouldn't lead off with food, but how can you not when visiting Louisiana? In addition to the freshest shrimp taco I've ever had, I ate my way through the South trying a variety of local specialties, including my introduction to Tasso.
  • Wednesday Morning in the French Quarter - We were out the door early on Wednesday, lead by local photographer Tillie Van Etten. There's something special about photographing places like the Quarter as it slowly comes to life in the morning.
  • Breakfast in the Classroom - Each morning we dined together enjoying a full breakfast served by the staff at Hotel Provincial. In the evening, we also ate together in the restaurants, but these mornings were just us. And I loved being there with everyone.
  • Sergeant Mark Mumme - For our evening shoot in the Quarter, we hired Sergeant Mark of the New Orleans Police Dept. to watch our backs as we worked. I've never had security before during an urban shoot. But I loved it. And it was wonderful being able to just focus on our photography.
  • Class Presentation - After all the miles, photo shoots both in Chicago and New Orleans, everyone chose eight shots to share and discuss to close out the workshop. Reliving all of those moments with our crew was special indeed.

How to Choose a Color for Your Photo Mat

A mat can be described as a field of light or colour around a picture, in width usually 1/2 to 1/3 of the image's narrowest side. Mats can be of different shapes and kinds - rectangular, oval, multi-layered, with decorative insertions, etc. The mat creates a neutral zone between picture and its frame, helping the viewer to focus on the art work itself.

Here are five tips to keep in mind while designing a mat.

  • The color of a light mat should be a tone darker than the lightest color of the image. If using a dark mat, its color must be one tone lighter than the darkest color on the photo.
  • Using a colored mat is a good way to attract attention to important segments of a photograph. In this case, the surrounding color must be the same as the brightest segment of the image, but in more muted tones.
  • The simple trick of a double mat will give a personality to an artwork. Two or even three mats of different shades can be applied. The color of the inner mat is usually chosen from a particular tone in the image, which may be lighter or darker than the outside mat.
  • It is important to remember that colors and shades of a mat must be chosen to complement the color of the frame and the main color of the picture.

ImageFramer offers a huge selection of mats, as well as frames that play the role of a mat, which is especially good for oil paintings. Besides the usual colors, which accompany photographs and watercolors, you can select the color of your mat, using any color from your photo.

Read the complete article, How to Choose Mats for Photos for lots more information about framing your artwork.

Special Offer! ImageFramer celebrates Canada Day & July 4th with a 34% discount store-wide. No coupons necessary! (New Frames Too). You can learn all about it here.

We want everyone to enjoy the benefits of the new ImageFramer. ImageFramer 4.0 is a free upgrade for ImageFramer 3 customers. Note that it requires macOS 10.11 (El Capitan) or later. TDS listeners can receive a 20 percent discount by visiting: our ImageFramer landing page.

Updates and Such

Big thanks to all of our Patreon members!

Registration invitations have gone out to Reserve List members for the Autumn in Wine Country Photography Workshop. If you are on the Reserve List, but didn't get your invite, please contact me. You can learn more about the workshops by visiting the TDS Workshops Page.

B&H and Amazon tiles on www.thedigitalstory. If you click on them first, you're helping to support this podcast. And speaking of supporting this show, and big thanks to our Patreon Inner Circle members.

And finally, be sure to visit our friends at Red River Paper for all of your inkjet supply needs.

Texas-based Red River Paper recently announced a new fine art paper, Palo Duro Etching. The new paper is a 100 percent cotton rag paper and is free of optical brightener additives. The paper is designed to offer warm white tones, deep blacks and a subtle texture to accurately recreate traditional darkroom fine art prints.

See you next week!

More Ways to Participate

Want to share photos and talk with other members in our virtual camera club? Check out our Flickr Public Group. And from those images, I choose the TDS Member Photo of the Day.

Podcast Sponsors

ImageFramer 4 - ImageFramer is used by artists, professional and amateur photographers, scrapbookers, framers, and people who simply want their family photos to look better.

Red River Paper - Keep up with the world of inkjet printing, and win free paper, by liking Red River Paper on Facebook.

The Nimbleosity Report

Do you want to keep up with the best content from The Digital Story and The Nimble Photographer? Sign up for The Nimbleosity Report, and receive highlights twice-a-month in a single page newsletter. Be a part of our community!

Want to Comment on this Post?

You can share your thoughts at the TDS Facebook page, where I'll post this story for discussion.
Smartphones are highly convenient. But they are not always the perfect choice.

iPhone-Togs-1024.jpg "iPhone Photographers" - Millennium Park, Chicago. Photo by Derrick Story with an Olympus PEN-F.

I watched these young women grapple with their iPhone in bright sunlight and was pulling for them that they would get the shot.

The sun had emerged from behind the clouds in Chicago's Millennium Park, and the contrast was incredible at 1:30 in the afternoon. Light was bouncing around everywhere. And even though our cameras were more than capable of recording images in these conditions, composing on LCD screens was difficult at best.

Having a camera with a viewfinder is such an advantage in these types of conditions. I looked through the optics of my Olympus PEN-F, rotated the exposure compensation ring that's positioned conveniently around the shutter button (my custom setting), then captured this shot.

The entire process took just a few seconds. The iPhone photographers were still working as I strolled away.

You can share your thoughts at the TDS Facebook page, where I'll post this story for discussion.

B&W in New Orleans

Before we departed for our evening shoot in the French Quarter, I decided that I was going to record in monochrome with the Olympus PEN-F, using only the Panasonic 20mm f/1.7 at maximum aperture.

P6281312.jpg "Street Performer, NOLA" - Olympus PEN-F, monochrome mode, Panasonic 20mm f/1.7 - Photos by Derrick Story.

The fast aperture with an every so slightly wide field of view was perfect for navigating Royal and Bourbon Streets as the party warmed up.

Bartender, NOLA "Bartender, NOLA" - Olympus PEN-F, monochrome mode, Panasonic 20mm f/1.7 - Photos by Derrick Story.

I set the PEN-F to RAW+Jpeg, Mono-2, ISO 1600 or 3200 and locked the aperture to f/1.7 in aperture priority mode.

Mask, NOLA "Mask, NOLA" - Olympus PEN-F, monochrome mode, Panasonic 20mm f/1.7 - Photos by Derrick Story.

The images you see here are the JPEGs created using the Mono-2 profile. I haven't even looked at the RAW files yet. Perhaps I'll take a peek once I get home.

Musician, NOLA "Musician, NOLA" - Olympus PEN-F, monochrome mode, Panasonic 20mm f/1.7 - Photos by Derrick Story.

You can share your thoughts at the TDS Facebook page, where I'll post this story for discussion.

Rotating Bar, NOLA "Rotating Bar, NOLA" - Olympus PEN-F, monochrome mode, Panasonic 20mm f/1.7 - Photos by Derrick Story.

This is The Digital Story Podcast #590, June 27, 2017. Today's theme is "Out of Chicago." I'm Derrick Story.

Opening Monologue

It was the day after Summer Solstice when we touched down at O'Hare Airport. You could feel the heat seeping through the cracks in the covered walkway that connected the plane to airport. There was no mistake. It was summer and I was in Chicago. And what transpired over the next few days is the top story for today's show.

Out of Chicago

Jackson-Station-1024.jpg

Later that night I was awakened from my sleep by the sound of rain blowing hard against my window. And there was thunder as well. I had a pre-conference workshop the next morning that included a photo walk.

"What is our Plan B?" I asked myself. "I don't know," I answered.

I picked up my phone and checked the weather. The rain was predicted to stop by 8 am. And what was predicted to follow was three days of glorious spring-like weather.

"If that's true," I thought, "then we're in for a great conference." I rolled over and fell asleep again.

It was true, and we had a fantastic event. Here are some of the highlights with a few embarrassing moments mixed in.

My Favorite and Slightly Embarrassing Moments in Chicago

  • A Favorite: Catching up with Valerie Jardine (Hit the Streets podcast) about her transition away from Street Focus on TWiP.
  • Embarrassing: When I accidentally called one of my favorite people on staff Michelle when her name is really Malinda.
  • A Favorite: Watching participants in my Analog workshop try to figure out what camera the wanted to choose while they were all hidden from sight in old Crown Royal cloth bags.
  • Embarrassing: Privately swearing to conference organizer Chris Smith when he was joking with me about my needing a meal break after a very long day. He later said he didn't even remember the incident. (Nice guy!)
  • A Favorite: Finding the best street taco joint on State Street for my first lunch in Chicago.
  • Embarrassing: Not realizing that I had met Scott Wyden Kivowitz years earlier at Photo Plus Expo.
  • A Favorite: Seeing a room full of people waiting for my printing talk to begin.
  • A Favorite: All of the TDS listeners who introduced themselves to me at the conference, in restaurants, and on the streets of Chicago.

Mirrorless Panel Discussion

On Sunday I moderated a panel discussion with a terrific slate of mirrorless photographers including Giulio Sciorio, Mike Boening, and Jamie MacDonald. I thought that you might want to hear part of the discussion, so here's an excerpt for your listening pleasure where I'm talking about sensor size, then turn it over to Guido for his thoughts. After that, Jamie and Mike chime in.

Using ImageFramer 4 with Lightroom

ImageFramer's Lightroom plugin is a Post-Processing Action plugin that will add itself to your Export flow. After the plugin is installed, it will be listed in the bottom-left panel of the Export dialog and a "Process with ImageFramer" section appears in the right panel, if the plugin is enabled.

To use the plugin, type the name of the template in ImageFramer that you want to use (case sensitive). During Export, after all the Lightroom adjustments are applied, ImageFramer will be launched, the image will be processed with the template and saved back into Lightroom's flow.

So, if you want to create your own greeting cards and original art from images stored in Lightroom, ImageFramer can be a terrific tool for you.

ImageFramer is used by artists, professional and amateur photographers, scrapbookers, framers, and simply people who simply want their family photos to look better.

ImageFramer helps you to:

  • Themed frames: Frames for holidays, seasonal frames, kid frames, romance (for weddings) and many more creative designs. Great for greeting card designs, scrapbooking, enriching family photos etc.
  • Overlays: Text or image overlays can be used for adding copyright notices, signatures, descriptions, and even automatic data, like file name, date (file or EXIF), location, caption and headline from IPTC metadata. New in version 4: Snapping overlays to center or edges and simplified interaction with text color and fonts.
  • Design Templates. ImageFramer comes with some preset templates. It's easy to add your own templates. These can be used in-app or through Lightroom or in built-in Batch Processor. New in version 4: Saving templates to files and importing them into a another ImageFramer installation.
  • Mats. ImageFramer has a special color mat frame types that can look beveled with control over bevel width, and the colors of both the mat and the bevel. Size of mat can be different in each direction (often useful to have a wider mat on the bottom). Multiple mat (and frame) layers allow limitless combinations.
  • Integration with Workflows: Adobe Lightroom Export plugin, Photos.app, Sharing extension. Useful for portfolios, web site exports, printing (even simple designs like overlays or a simple white border).

We want everyone to enjoy the benefits of the new ImageFramer. ImageFramer 4.0 is a free upgrade for ImageFramer 3 customers. Note that it requires macOS 10.11 (El Capitan) or later. TDS listeners can receive a 20 percent discount by visiting: our ImageFramer landing page.

Updates and Such

Big thanks to all of our Patreon members!

While you're listening to this, I'm most likely on a train heading south to New Orleans. The anticipated weather looks a lot more challenging than the first leg of the trip here in Chicago. I'll share the inside scoop in next week's podcast.

Registration invitations have gone out to Reserve List members for the Autumn in Wine Country Photography Workshop. If you are on the Reserve List, but didn't get your invite, please contact me. You can learn more about the workshops by visiting the TDS Workshops Page.

B&H and Amazon tiles on www.thedigitalstory. If you click on them first, you're helping to support this podcast. And speaking of supporting this show, and big thanks to our Patreon Inner Circle members.

And finally, be sure to visit our friends at Red River Paper for all of your inkjet supply needs.

Texas-based Red River Paper recently announced a new fine art paper, Palo Duro Etching. The new paper is a 100 percent cotton rag paper and is free of optical brightener additives. The paper is designed to offer warm white tones, deep blacks and a subtle texture to accurately recreate traditional darkroom fine art prints.

See you next week!

More Ways to Participate

Want to share photos and talk with other members in our virtual camera club? Check out our Flickr Public Group. And from those images, I choose the TDS Member Photo of the Day.

Podcast Sponsors

ImageFramer 4 - ImageFramer is used by artists, professional and amateur photographers, scrapbookers, framers, and people who simply want their family photos to look better.

Red River Paper - Keep up with the world of inkjet printing, and win free paper, by liking Red River Paper on Facebook.

The Nimbleosity Report

Do you want to keep up with the best content from The Digital Story and The Nimble Photographer? Sign up for The Nimbleosity Report, and receive highlights twice-a-month in a single page newsletter. Be a part of our community!

Want to Comment on this Post?

You can share your thoughts at the TDS Facebook page, where I'll post this story for discussion.
I've always preferred shooting at twilight in the city compared to the dark of night. Having just a little luminance in the sky rounds out the image so nicely.

Chicago Night Scene.jpg Chicago with Train at Twilight - Olympus PEN-F, Panasonic 40mm f/1.7, ISO 3200. Processed in Photos for macOS and Luminar. Photo by Derrick Story.

But color comes into play here as well. And with a little bit of adjustment on your end, you can take advantage of a complementary color scheme for additional visual appeal.

Complementary colors directly oppose each other in the color spectrum. In our case, we're working with blue and orange. Red and green are also a popular complementary tandem. These colors, when combined in the right proportions, produce white light. They also are attractive to viewers' eyes.

In the case of our twilight cityscape, the blue will come from the sky after the sun has set. We often refer to this time of day as blue hour. The orange is provided by the city lights themselves. Get them in the right combination, and image really glows.

When creating the shot, I typically have to tame the orangish/yellow tones of the city lights. They can overpower the composition. I do this by shooting with the white balance set to Tungsten, then backing off the blueish tones in post. Or I can capture in auto white balance and deal directly with the oranges in the editor.

Choose the method that works best for you. But once you're aware of this compositional element, you can use it to further enhance your cityscapes.

You can share your thoughts at the TDS Facebook page, where I'll post this story for discussion.
Recently I wrote about ACDSee Pro for iOS and how easy it is to shoot in RAW with an iPhone.

clouds-over-aurora-1024.jpg "Clouds Over Aurora" captured with an iPhone 6S and ACDSee Pro. Photo by Derrick Story.

One of the subjects I was looking forward to capturing in RAW was the landscape from above while flying. I wasn't disappointed.

Using ACDSee Pro, my images were stored as both Jpegs and DNGs. I saved the RAW files to my Camera Roll, which added them to iCloud as well. Once I reached my hotel room, I opened the images in Photos for macOS and quickly processed them using Luminar Neptune and the native tools in Photos.

And this is just quick and dirty stuff. Later on, if I want to apply noise reduction or other advanced adjustments, those RAWs will hold together nicely while doing so.

Having those DNGs, instead of Jpegs, for challenging subjects like this made my iPhone all the more valuable as a travel camera. I really like this workflow.

Photos for macOS as Your Digital Darkroom

You can learn more about using Luminar as an editing extension in my lynda.com training, Photos for macOS: Advanced Editing Extensions.

And if you'd prefer to cozy up with a book, check out The Apple Photos Book for Photographers that features chapters on basic editing, advanced post processing, and editing extensions.

You can share your thoughts at the TDS Facebook page, where I'll post this story for discussion.
Photography and the Apple Watch

You're not going to show off your portfolio on an Apple Watch, but there are a few photographer tricks that come in handy. Here are my favorites.

apple-watch-1024.jpg

The Camera App Companion

This app is included with the watch and adds functionality to your iPhone camera. You can find it by looking for the gray icon that shows a shutter release. And that's its primary function: allowing you to remote release the camera on your iPhone.

But if you explore it a bit more, the Camera App Companion has other tricks up its sleeve. For example, once it displays what the lens is viewing on the watch, you can change the focus point by tapping the area you want focused on the watch face image.

If you tap and hold, then a menu appears that allows you to change to the FaceTime camera, adjust the flash setting, control HDR, and even turn on and off Live View.

For single shot images, tap the shutter button on the watch face. For burst images, tap the 3s icon.

So, essentially, you have a full remote control for your iPhone camera. Combine this with a portable stand or tripod mount, and you can substantially expand its capabilities.

DxO One Camera Remote

If you shoot with the DxO ONE camera, then you can also use your Apple Watch to remotely trigger that camera when it's connected to the iPhone.

The Apple Watch app comes bundled with the iOS version of DxO ONE for the iPhone. With this configuration, you now have a full 1" sensor that can be remote released for long exposure shots or for compositions that require some separation between you and the phone. It's a handy bonus always having a remote release on your wrist.

And More...

Other apps that have watch compatibility include ProCamera, ProCam 4, Camera Plus, and Hydra. If you have any of these apps, and they are not showing on your watch, simply go to the My Watch app on the iPhone, scroll down the list of iOS apps, tap on the app you want to enable, then move the slider to green for: Show App on Apple Watch.

Soon after that, the watch app will appear in the software cluster on your device. You can add it to your dock if you plan on using it often.

Once I realized the additional capability that I have with the watch interacting with my camera phone, it expanded my use of the iPhone itself. If nothing else, always having a remote release is really handy.

You can share your thoughts at the TDS Facebook page, where I'll post this story for discussion.
This is The Digital Story Podcast #589, June 20, 2017. Today's theme is "ISO 3200 is the New 400." I'm Derrick Story.

Opening Monologue

My nimble lifestyle depends a lot on not having to carry large, expensive lenses in my daily messenger bag. And thanks to the great design of my micro four thirds optics, I don't have to. But the one thing I do have to sacrifice for the zooms is a fast maximum aperture. That has become less of an issue with the latest crop of cameras providing terrific ISO 3200 performance. We'll take a closer look in today's show.

ISO 3200 is the New 400

I'm going to open today's show with a story about my latest photo shoot in San Francisco. I hadn't plan on it, but there it was nonetheless.[Tell the Vanagon story and why I needed ISO 3200.]

coming-home-1024.jpg

What's Inside My Bag for Chicago/New Orleans

ImageFramer 4 as an Editing Extension

ImageFramer is used by artists, professional and amateur photographers, scrapbookers, framers, and simply people who simply want their family photos to look better.

But it's also a powerful editing extension for Photos for macOS. Here's how to use it.

  • Install ImageFramer 4 on your Mac.
  • Go to System Preferences > Extensions > Photos and check the box next to "Frame In ImageFramer".
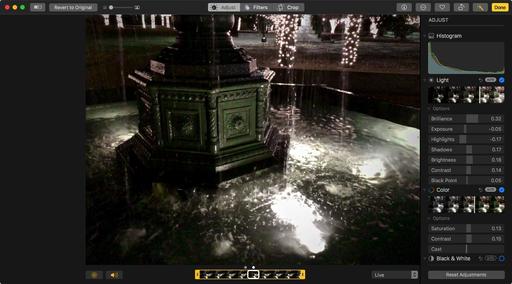
  • Open a picture and go into Edit mode by pressing the Return key.
  • Go to Extensions at the bottom of the Tools list, and choose Frame In ImageFramer from the popup menu.
  • Design your frame, then go to File > Save Image. Close the ImageFramer design window, then click on Save Changes in the Photos window.
  • You can continue working on your shot in Photos. Once you're finished, click the Done button. You can always Revert to Original if you change your mind and want a different frame.

What's even wilder, is that even once you've created a frame for a picture, you can open it again in ImageFramer and continue to adjust it.

We want everyone to enjoy the benefits of the new ImageFramer. ImageFramer 4.0 is a free upgrade for ImageFramer 3 customers. Note that it requires macOS 10.11 (El Capitan) or later. TDS listeners can receive a 20 percent discount by visiting: our ImageFramer landing page.

Updates and Such

Big thanks to all of our Patreon members! You will be receiving a free copy of my next eBook!

Registration invitations have gone out to Reserve List members for the Autumn in Wine Country Photography Workshop. If you are on the Reserve List, but didn't get your invite, please contact me. You can learn more about the workshops by visiting the TDS Workshops Page.

B&H and Amazon tiles on www.thedigitalstory. If you click on them first, you're helping to support this podcast. And speaking of supporting this show, and big thanks to our Patreon Inner Circle members.

And finally, be sure to visit our friends at Red River Paper for all of your inkjet supply needs.

Texas-based Red River Paper recently announced a new fine art paper, Palo Duro Etching. The new paper is a 100 percent cotton rag paper and is free of optical brightener additives. The paper is designed to offer warm white tones, deep blacks and a subtle texture to accurately recreate traditional darkroom fine art prints.

See you next week!

More Ways to Participate

Want to share photos and talk with other members in our virtual camera club? Check out our Flickr Public Group. And from those images, I choose the TDS Member Photo of the Day.

Podcast Sponsors

ImageFramer 4 - ImageFramer is used by artists, professional and amateur photographers, scrapbookers, framers, and people who simply want their family photos to look better.

Red River Paper - Keep up with the world of inkjet printing, and win free paper, by liking Red River Paper on Facebook.

The Nimbleosity Report

Do you want to keep up with the best content from The Digital Story and The Nimble Photographer? Sign up for The Nimbleosity Report, and receive highlights twice-a-month in a single page newsletter. Be a part of our community!

Want to Comment on this Post?

You can share your thoughts at the TDS Facebook page, where I'll post this story for discussion.
With the introduction of the Accent AI filter in Luminar Neptune, you can create what Macphun calls the "Quick and Awesome" workflow that yields beautiful images quickly.

looking-down-19th.jpg

Photos for macOS users have it even better because Luminar is also an editing extension for their host application. So not only do you get the built-in tools in Photos, but you can tap the additional power of the rapidly evolving Luminar. Here are the steps.

  • Open your image in Photos, then press the Return key to enter Edit mode.
  • If you have a Jpeg/RAW stack, switch to RAW mode via Image > Use RAW as Original.
  • Click on Extensions at the bottom of the tools panel, and choose Luminar from the popup menu.
  • Once the file opens in Luminar, choose the Quick & Awesome Workspace (as shown in the illustration below).
  • Use the Boost slider in the Accent - AI filter to adjust your image.
  • Tap Save Changes to return to Edit mode in Photos.

quick-awesome.jpg

Once you back in Photos, you can use the M key to toggle the before and after. You can continue to refine the image, let's say adding Definition or Sharpness, if desired. But it probably won't need much.

Then, thanks to iCloud, your awesome photo will be updated and live on all of your devices.

This is a wonderful, powerful, and to be honest, fun workflow. If you haven't explored Luminar Neptune yet, I highly recommend it.

Photos for macOS as Your Digital Darkroom

You can learn more about using Luminar as an editing extension in my lynda.com training, Photos for macOS: Advanced Editing Extensions.

And if you'd prefer to cozy up with a book, check out The Apple Photos Book for Photographers that features chapters on basic editing, advanced post processing, and editing extensions.

You can share your thoughts at the TDS Facebook page, where I'll post this story for discussion.