Recently in Photography

  Page 17 of 386 in Photography  

You're going to hear a lot of pros and cons about the just-released iPad version of Capture One, just like you would with any V1 software. But the fact of the matter is that this is a great start for mobile photographers who like to shoot RAW.

capture-one-ipad-1024.jpeg

And to make it an even better start for you, here are 5 tips to get you headed in the right direction.

Its Minimum Specs are Conservative

Technically, according to the FAQs, Capture One only runs on newer iPads. For example, my iPad mini 5 is not officially supported, but I've been using the software on that device without any problems since the official release.

There is a 7 day free trial period if you want to test your iPad. If you're only a generation off, I would definitely try it out.

Dig Out Your iPad SD Card Reader

The joy of Capture One on the iPad is its beautiful RAW processing. And unlike tossing around Jpegs wirelessly from device to device, a SD card reader is the best way to go for RAW files.

So, it's time to dig around in the bottom of your gadget bag to retrieve that iPad card reader. You'll be glad you did.

Load All of the Styles You Own on to the iPad

The user interface for the adjustment tools on the iPad are good, but your existing Styles for the desktop version of the app work on the iPad as well, and they are easy to use.

You'll always know which Style you applied, which is really helpful if you want to use it again on another image. And it's easy to stack Styles too.

Here are the instructions for adding Styles to the iPad. I really like using them with this workflow.

Add Cloud Transfer

At the moment, Cloud Transfer isn't anything to get really excited about. But it is the easiest way to move an album of freshly edited iPad images to your desktop application.

cloud-transfer.jpg Add Cloud Transfer to your desktop app toolbar.

The first thing you'll want to do is add Cloud Transfer to your top toolbar in Capture One Pro on the computer. Here are the instructions for setting up Cloud Transfer.

IMG_0255.jpeg An album of iPad images being uploaded from the iPad to the cloud.

This is one area that we will see workflow improvements in the coming versions.

Remove from Cloud after Transfer

Since you're driving on a one way street here (iPad to desktop), you should remove transfers from the cloud server after completion.

"Once you have transferred your photos, you can go back to your iPad and in the three-dot menu for an album you will find an option to "remove from cloud". This will free up space for your next uploads. If you also want to remove the photos from the iPad, you can delete them by selecting them and pressing the delete button. They will be moved to the trash if you want to restore them; if you remove them from the trash too, they will be completely gone from your iPad."

How you manage the RAW files you've uploaded to the iPad will depend on your particular workflow. Some folks will want to keep some of the images on the mobile device to play with while on the go. For others, once the files have been moved to the desktop application, they will want to free up space on their device and in the cloud.

Final Thoughts

Once I dug into Capture One on the iPad, I enjoyed editing my images there. You can bring in content from Files, Photos for iOS, and of course camera memory cards.

It's too early to tell how my workflow will shake out with this new option. But the journey looks like a lot of fun.

You can share your thoughts at the TDS Facebook page, where I'll post this story for discussion.

This is The Digital Story Podcast #849, June 28, 2022. Today's theme is "And Yet, Things Still Go Wrong." I'm Derrick Story.

Opening Monologue

As I see it, a major difference between the analog age and modern digital times, is there are more ways to screw up today than ever. Whether it's a flagship mirrorless camera, state of the art Apple watch, or an all electric SUV, their amazing powers at times seem to hang in a delicate balance. On today's TDS Podcast, I share a few recent examples. I hope you enjoy the show.

Digital Photography Podcast 849

Tune-In Via Your Favorite Podcast App!


podcast-icon.jpeg

Apple Podcasts -- Spotify Podcasts -- Stitcher

Podbean Podcasts -- Podbay FM -- Tune In

And Yet, Things Still Go Wrong

DSCF0694.jpeg

No RAWs in Slot #1

I'm still not sure how this happened, but I came away from an important shoot with only Jpegs.

Snap Out of Focus

I pulled the camera out of my bag to grab a quick shot of a decisive moment only to have 5 frames of fuzz.

Power Misalignment

On the same day, I misaligned my Apple Watch on its recharging stand and my iPhone on its wireless pad.

All Systems Not Go

I get into my EV and it promptly tells me that the system isn't working properly and that I should contact the dealer. I turn off the car, count to 10, and power up again. Everything is fine. Sound familiar?

The Internet is Broken!

So often when I'm in public spaces, my iPhone tells me that it can't connect to the Internet, even though I have 4 bars on my cellular. But instead of using that, it decides to connect to some bogus WiFi network that is a bridge to nowhere.

So, while all of this is going on, back at the house my Timex quartz is ticking away, my Pentax LX still has a half a roll of film and is patiently waiting for me to finish it off, and the Audi A3 has 8 gallons of premium petro ready to blast off.

I'm beginning to think that to survive in today's world, enjoy the convenience of digital when it's working, but it doesn't hurt to have an analog backup -- just in case.

Free, Open-Source Photo Manager DigiKam Gets a Big Update

You can read the entire article on PetaPixel.com.

DigiKam, the free open-source multi-platform digital photo management application, has released version 7.7 for Windows, macOS, and Linux that adds new features, support for more cameras, and fixes a bunch of bugs.

The update to the free professional photo management software comes just a few months after the last major feature release that brought support for the AOM AV1 image file format as well as adding and updating the read/write support for the JPEG-XL image format in all supported bundles.

The 7.7 update brings support for the Olympus OM-1 mirrorless micro four-third system allowing the new camera and lens combinations to be recognized by the application, bringing the number of supported RAW cameras up to more than 1180.

Version 7.7 also includes 84 crash, bug, and maintenance fixes to improve the overall experience and performance, including better support of the HEIF images from the various iPhone cameras, updated operating system support (Windows/Mac/Linux), and adds features like Pinterest exporting, Picasa 3 migration, and the ability to export PSD files to Google Photos.

Apple explains how it's making your iPhone a full-fledged webcam for your Mac

You can read the entire article on The Verge.

Apple software engineer Karen Xing spent some time explaining how the new Continuity Camera feature for macOS Ventura will actually work at WWDC 2022 -- and it sounds seriously impressive. It could make your iPhone a full-fledged camera for Mac, one that does most everything you'd expect and more.

macOS will detect your iPhone as a camera and microphone, period, so every camera app should work. While Apple only showed off FaceTime and mentioned Zoom, Teams, and Webex during the big WWDC 2022 keynote, developers shouldn't need to do anything to their apps for them to work.

You get Portrait Mode, "Studio Light," and Center Stage options regardless of the app, too. They're in a Control Center dropdown menu, alongside your iPhone's battery.

FaceTime isn't the only app that'll "magically" switch to your iPhone when you plop it down. Xing demoed that with Zoom, and Apple's offering up an automatic camera selection API that other apps can use, too. macOS Ventura will automatically switch to your iPhone if it's mounted on a stand and either plugged in via USB or detected as "nearby" using Bluetooth and Wi-Fi.

There's an API for Apple's nifty Desk View mode, too. Apple figured out a way to bend and crop images from the iPhone's super-ultrawide lens to let you show off things on the surface of your desk without moving your phone. That's available for app devs, too, and Xing showed it off as a way to present in Zoom.

Unfortunately, none of this works with those old iPhones you've got sitting in a drawer. Continuity Camera requires iOS 16 in addition to macOS 13, Xing revealed -- and unfortunately, the iPhone 6S, 7, and first-gen iPhone SE and earlier won't be getting the iOS 16 software update. That's a shame because it feels like it could be a great way to make use of an older phone that doesn't have resale value. Still, there are other ways to turn an old spare phone into a webcam.

DPI vs PPI

You can read the entire article on theWanderlingLens.com site.

There's a lot of good info in this article about printing. And one gem deals with DPI, which stands for Dots per Inch regarding ink droplets on paper, and PPI, which stands for Pixels per Inch and refers to resolution of digital images on screens.

When printing, the standard is 300 dpi.

Virtual Camera Club News

Have you been unsubscribed? A number of listeners have let me know that they were unceremoniously unsubscribed from the show. If that happens to you, just go back to the app and click on subscribe.

Inner Circle Members: A big thanks to those who support our podcast and our efforts! We are having a blast at our new Inner Circle hangout, the private group I've set up at DerrickStoryOnline. We'd love it if you join us. You can become an Inner Circle Member by signing up at our Patreon site. You will automatically be added to the new hangout.

My Writing on Medium.com: I now have 51 published articles on Medium.com. And if you haven't visited the site, and enjoy good writing on a variety of topics, I suggest that you may want to take a look. You can just go to the home page and enter "Derrick Story" in the search field. And if you like what you read, then follow me!

The New Donation Kit for Carefree Shipping of Found Film Cameras - If you've discovered a film camera that's no longer being used, our new Donation Kit makes it easy to pack and ship. Just visit the Contact Form on thenimblephotographer.com, click the box next to Donating a Film Camera, and let me know what you have. In your note, be sure to include your shipping address.

Affiliate Links - The links to some products in this podcast contain an affiliate code that credits The Digital Story for any purchases made from B&H Photo and Amazon via that click-through. Depending on the purchase, we may receive some financial compensation.

Red River Paper - And finally, be sure to visit our friends at Red River Paper for all of your inkjet supply needs.

See you next week!

You can share your thoughts at the TDS Facebook page, where I'll post this story for discussion.
This is The Digital Story Podcast #848, June 21, 2022. Today's theme is "5 Tips for Photographers Who Shoot with iPhones." I'm Derrick Story.

Opening Monologue

I think it's safe to say that photographers approach their iPhone cameras just a little bit different than everyone else. And they are more likely to tap the software's advanced features. In that spirit, I have a show just for you, nimble photographer, who realizes the value of photography with any device, even the one in your pocket. I hope you enjoy the show.

Digital Photography Podcast 848

Tune-In Via Your Favorite Podcast App!


podcast-icon.jpeg

Apple Podcasts -- Spotify Podcasts -- Stitcher

Podbean Podcasts -- Podbay FM -- Tune In

5 Tips for Photographers Who Shoot with iPhones

Derrick-1024.jpeg A One-Handed Selfie Shot captured with the front camera of an iPhone 12 Pro Max using Portrait Mode with a depth of f/2.8. Photo of Derrick Story by Derrick Story.

In my latest Medium article titled, My Favorite iPhone Portrait Tricks, I tell the story of me showing up at a family gathering without any of my mirrorless cameras. So I felt a little sheepish when asked to make a couples portrait.

Fortunately, I've had plenty of practice with my iPhone 12 Pro Max. And thanks to that knowledge, I pulled it off.

That got me thinking that this might be a good time to share some of my favorite techniques with you. So let's get right to it.

  • The Back Tap Camera Wake - A photographer's eye often detects decisive moments before others. To ensure that your camera reacts as quickly as you need, set up the Back Tap Camera Wake. Settings > Accessibility > Touch > Back Tap. There are lots of options here. I use the Double Tap for the Camera, and the Triple Tap for the Flashlight.
  • Angle Bracket Pointing Down - There's an angle bracket at the top of the camera interface, and it is usually point upward. Tap on it to angle it downward, and it will reveal an entire row of camera settings right above the shutter button, including proportions, flash controls, exposure compensation, self timer, and filters. If you're in Portrait mode, you can set the Depth f/stop here. In Time-Lapse, you can adjust the exposure there.
  • One-Handed Selfie Shot - Use the Volume Down button on the side of the phone to take a one-handed selfie shot. Start by switching to the front camera, then grip the phone in one hand with your thumb on the volume down button. Direct your eyes to the glowing green dot (that's where the camera is), then squeeze your thumb to take the picture.
    You can use this technique in Portrait Mode, which is really cool, especially around f/2 for the Depth. Also, this is much easier with the case removed providing easier response from the volume button.
  • Lens Correction - The Ultra Wide Lens gets even better when you enable Lens Correction in the Camera Settings. You also have many other useful option here sun as View Outside of the Frame and Preserve Settings.
  • Long Exposure Trick - My all time favorite. Enable Live Photo, hold the camera steady right before, during, and after exposure. Then open the image in Photos, and choose Long Exposure fro the "Live" menu. You can also use this technique creatively by moving the camera before and during exposure.

I also recommend that you read my My Favorite iPhone Portrait Tricks on Medium.com. There's a really nice portrait workflow in that article that can serve you well in a pinch.

Tell a Friend

I was thinking the other day about how people love to tell me about their favorite podcasts, which I appreciate!

Then, I started thinking, we should be telling our friends about The Digital Story podcast. It's available on every service that's commonly used: Apple Podcasts, Google Play, Amazon, Spotify, and on and on.

If each or our regular listeners told just one friend about this podcast and encouraged them to listen, those should be substantial numbers.

So let's try it! Tell a friend about the TDS Photography Podcast.

Senators Want US to Follow EU and Adopt a Common Charging Cable

You can read the entire article on ThPetaPixel.com.

A group of United States senators has written a letter to the U.S. Commerce Department advocating that the country should follow the European Union's decision to force all electronics manufacturers to adopt a common charging cable.

Senators Ed Markey (D-MA), Elizabeth Warren (D-MA), and Bernie Sanders (I-VT) authored the letter to Commerce Secretary Gina Raimondo to argue for a standardized charging system. The three Senators say that the consumer electronics industry's largest players have hurt consumers by failing to establish a uniform charging accessory standard and forcing them to frequently change their charging accessories instead.

"This planned obsolescence is expensive and frustrating for consumers, and drives the proliferation of electronic waste," the senators write.

"The lack of interoperability standards for charging and other device accessories also results in e-waste and environmental damage. As specialized chargers become obsolete with the introduction of new products, or as consumers change the brand of phone or device that they use, their outdated chargers are usually just thrown away," the senators continue.

"When electronics are not disposed of properly, e-waste can spread toxins in water, pollute soil, and degrade the air we breathe. In 2019, humans generated a staggering 53.6 million metric tons of e-waste, and only 17 percent of this waste was recycled. Chargers that are discarded or never used create more than 11,000 tons of e-waste annually. This is a global issue, with a lasting impact on our environment and public health.7 The U.S. government must respond."

The three argue that the European Union (EU) has recognized this in the passing of legislation that requires manufacturers to adopt a common charger for electronic devices.

Tool Panel Redesign in Capture One Pro 15.3

You can read the entire article on TheDigitalStory.com.

One of my favorite aspects of the new 15.3 update to Capture One Pro 22 is the Tool Panel Design. I used this fresh look as motivation to clean up my entire Tools area.

Start by Removing Tool Tabs You Don' Need

First you want to clear up a little space at the top of the Tool Tab by removing any Tool Tabs that aren't part of your daily workflow. In my case, the Tether Tab is the first to go. I rarely use is, and I don't need it taking up valuable real estate.

Go to View > Customize Tools > Remove Tool Tab and select from the list the one you want to take off the top of the column. Keep in mind that this Tool Tab isn't deleted, just repositioned.

Also note that you can customize the tools within any tab. So if you want to remove the Refine Tab, but want Sharpening easily available, you could add that tool to another tab such as the new Quick Tab.

Customize Within the Tool Tabs

Once you get your basic categories set at the top of the Tools column, you will probably want to customize a few of the Tools within each tab. Open the Tab you want to modify, then go to View > Customize Tools > Add Tool to [selected] Tab. You can also remove tools as well to tailor each Tab exactly to your liking.

If you want to reorder the Tab icons at the top of the Tools column, hold down the Command key and drag the icon to its new location.

Save Your Workspace

It's a great feeling to get your Capture One Pro house in order. Now is the time to save your Workspace so you can return to it at any time. This is particularly handy if you have different workspaces for different workflows, or if you have multiple photographers using the same computer.

Click on the three vertical dots at the top of the Tool Tab column. Save the Workspace, and you're set. This is also where you can move the Tool Tabs column from one side of the interface to the other.

Top 10 E-M1X & E-M1 Mark III Menu Secrets

You can read the entire article on the GetOlympus site.

Here's one in particular that I liked, and it works with the OM-1 as well!

Low ISO Processing - On Custom Menu E1. Exp/ISO/BULB (E-M1 III and E-MX) you will find a feature called Low ISO Processing (on OM-1 it's Camera Menu 1, Low ISO Processing) with two options called Detail Priority and Drive Priority. A quick explanation is that when shooting at low ISO's, if we set this option to Detail Priority, the camera will prioritize image resolution and reducing noise, and in Drive Priority it will focus on frame rate (the number of images per second). So, for my camera bodies and/or custom modes that are set for landscape and macro photography, I choose Detail Priority since frame rate is generally not critical. For wildlife photography, I choose Drive Priority since frame rate is more critical and I am not always shooting at a low ISO.

Virtual Camera Club News

Have you been unsubscribed? A number of listeners have let me know that they were unceremoniously unsubscribed from the show. If that happens to you, just go back to the app and click on subscribe.

Inner Circle Members: A big thanks to those who support our podcast and our efforts! We are having a blast at our new Inner Circle hangout, the private group I've set up at DerrickStoryOnline. We'd love it if you join us. You can become an Inner Circle Member by signing up at our Patreon site. You will automatically be added to the new hangout.

My Writing on Medium.com: I now have 51 published articles on Medium.com. And if you haven't visited the site, and enjoy good writing on a variety of topics, I suggest that you may want to take a look. You can just go to the home page and enter "Derrick Story" in the search field. And if you like what you read, then follow me!

The New Donation Kit for Carefree Shipping of Found Film Cameras - If you've discovered a film camera that's no longer being used, our new Donation Kit makes it easy to pack and ship. Just visit the Contact Form on thenimblephotographer.com, click the box next to Donating a Film Camera, and let me know what you have. In your note, be sure to include your shipping address.

Affiliate Links - The links to some products in this podcast contain an affiliate code that credits The Digital Story for any purchases made from B&H Photo and Amazon via that click-through. Depending on the purchase, we may receive some financial compensation.

Red River Paper - And finally, be sure to visit our friends at Red River Paper for all of your inkjet supply needs.

See you next week!

You can share your thoughts at the TDS Facebook page, where I'll post this story for discussion.
One of the new features in the Capture One Pro 15.3 update is a redesigned tools panel. This is where you access everything from Exposure to Spot Removal. And if you haven't customized your Tools panel in a while, the timing couldn't be better to do so.

Start by Removing Tool Tabs You Don' Need

Remove-Tool-Tab-1024.jpg Removing tools you don't need.

First you want to clear up a little space at the top of the Tool Tab by removing any Tool Tabs that aren't part of your daily workflow. In my case, the Tether Tab is the first to go. I rarely use is, and I don't need it taking up valuable real estate.

Go to View > Customize Tools > Remove Tool Tab and select from the list the one you want to take off the top of the column. Keep in mind that this Tool Tab isn't deleted, just repositioned.

Also note that you can customize the tools within any tab. So if you want to remove the Refine Tab, but want Sharpening easily available, you could add that tool to another tab such as the new Quick Tab.

Customize Within the Tool Tabs

Add-Tool-1024.jpg Adding a Tool to a Tool Tab

Once you get your basic categories set at the top of the Tools column, you will probably want to customize a few of the Tools within each tab. Open the Tab you want to modify, then go to View > Customize Tools > Add Tool to [selected] Tab. You can also remove tools as well to tailor each Tab exactly to your liking.

If you want to reorder the Tab icons at the top of the Tools column, hold down the Command key and drag the icon to its new location.

Save Your Workspace

save-workspace.jpg

It's a great feeling to get your Capture One Pro house in order. Now is the time to save your Workspace so you can return to it at any time. This is particularly handy if you have different workspaces for different workflows, or if you have multiple photographers using the same computer.

Click on the three vertical dots at the top of the Tool Tab column. Save the Workspace, and you're set. This is also where you can move the Tool Tabs column from one side of the interface to the other.

Final Thoughts

Customizing your Tools workspace feels good and improves efficiency. And now that we have new tabs with a fresh design, this is the perfect time to tidy up your Capture One Pro interface.

You can share your thoughts at the TDS Facebook page, where I'll post this story for discussion.

This is The Digital Story Podcast #847, June 14, 2022. Today's theme is "Cropped Sensors Aren't Going Anywhere, Nor Should They" I'm Derrick Story.

Opening Monologue

"Mine is bigger than yours" seems to permeate every crevice of the male psyche. We compare the size of our trucks, houses, paychecks and practically anything else that can be measured, quantified, or weighed. We even do it with the girth of our lenses and size of our sensors. And yet, after multiple predictions of their demise, APS-C and MFTs are not only still here, but thriving. A closer look on today's TDS Photography Podcast. I hope you enjoy the show.

Digital Photography Podcast 847

Tune-In Via Your Favorite Podcast App!


podcast-icon.jpeg

Apple Podcasts -- Spotify Podcasts -- Stitcher

Podbean Podcasts -- Podbay FM -- Tune In

Cropped Sensors Aren't Going Anywhere, Nor Should They

canon-r7-web.jpg

What do the Canon EOS R7, Fujifilm X-H2S, Canon EOS R10, Nikon Z fc, Sony a6400, OM System OM-1, and Panasonic GH6 all have in common? None of them have a full frame sensor.

The Canon R7, R10, and Fujifilm X-H2s are new releases that we're waiting for to land on store shelves, the a6400 is just now going back into production. Nikon Z fc is suddenly a golden child. And it isn't very easy to get your hands on the new OM-1, which seems to be always out of stock.

If the smaller cropped sensor camera is so inferior to their larger siblings, why is Canon, Sony, Nikon, Fujifilm, OM System, and Panasonic investing so much in them?

The short answer is (get it?) that people like 'em. And here are five reasons why.

  • They tend to be smaller and easier to carry around.
  • Thanks to today's technology, the image quality is fantastic.
  • You can get smaller, lighter lenses that still have amazing optical quality.
  • They generally cost less.
  • And yes, sometimes you want a little extra depth of field.

On pro photo assignments, I stand shoulder to shoulder with my full frame brothers and sisters. My shoulders are less tired. And I get hired just as often as they do. (And I'm spending far less on my gear.)

Believe me, cropped sensor cameras aren't going anywhere.

Tell a Friend

I was thinking the other day about how people love to tell me about their favorite podcasts, which I appreciate!

Then, I started thinking, we should be telling our friends about The Digital Story podcast. It's available on every service that's commonly used: Apple Podcasts, Google Play, Amazon, Spotify, and on and on.

If each or our regular listeners told just one friend about this podcast and encouraged them to listen, those should be substantial numbers.

So let's try it! Tell a friend about the TDS Photography Podcast.

TikTok is Convincing People to Scratch Their Camera Lenses with Rocks

You can read the entire article on Petapixel.com.

Some photographers on TikTok are trying an unconventional technique for unusual results: taking a rock to the front of their lenses, scratching the glass, and destroying them in the process.

Photographer Illumitati posted a video of her using a rock to mortally wound her Canon 50mm f/1.8 in response to a viral video made by Andres Videography where he appeared to do the same to his lens.

However, Andres didn't actually scratch his lens; eagle-eyed viewers will notice that he was actually scratching a lens filter placed on his Sony 85mm.

But in Illumitati's case, she actually takes a rock to the front element of her 50mm. Speaking to PetaPixel she explains what happened.

"I saw another person do it with a filter, and my intrusive thoughts told me to try it on the lens for real," she says.

"This came up on my 'for your page' and as a photographer, I'd never cringed harder in my life," Illumitati says in her TikTok video.

"But then I was so curious to see what a photo from that camera would look like I actually destroyed one of my lenses," she continues. "Then I set it down and got ready to take a couple of portraits and to my surprise, it actually gave it this glow. I don't recommend doing this to your lenses but hey, it's kind of cool."

When asked by PetaPixel, the portrait and fashion photographer seemed to have no regrets over the video.

"I really did scratch it, and the photos were actually not bad at all. The lens is really not great in the first place so I don't think I'd use it," she says.

Leica announces $20,000 M-A' Titan' set featuring titanium film camera and lens

You can read the entire article on DPReview.com.

Leica has announced a new limited-edition film camera and matching APO-Summicron-M 50 F2 ASPH lens. The Leica M-A 'Titan' set is Leica's sixth limited-edition camera with a titanium exterior. The first titanium exterior Leica was the Leica M6 TTL' Titanium,' released in 2001. The high-end, limited M-A 'Titan' camera and lens are milled from solid titanium, a material known for its durability. The titanium also gives the M-A 'Titan' set a distinct, striking look.

The Leica M-A is a purely mechanical camera, relying on no power or data connections. Leica writes that the M-A is 'the epitome of Leica's philosophy to concentrate on the essential: a return to photography in its purest form.' The Leica M-A doesn't even include a light meter, unlike the Leica MP. The special edition version includes the classic 'Ernst Leitz Wetzlar' script on the top plate.

The matching APO-Summicron-M 50mm F2 ASPH lens, whose external components are built using titanium for the 'Titan' set, is modeled after the first 50mm Summicron-M lens, introduced in 1956. To maintain the special aesthetic, the lens' included round lens hood is made of solid titanium.

The Leica M-A 'Titan' set doesn't come cheap. The set is limited to just 250 units worldwide and will set you back $19,995. The camera and lens are engraved with special-edition serial numbers, and the set comes in a special presentation box lined with black silk.

If the idea of a purely mechanical Leica film camera is up your alley, but the M-A' Titan' is too expensive, you can purchase the Leica M-A in black chrome or silver chrome for $5,965. The Leica M-A works with a wide of Leica M lenses, ranging from 16mm to 135mm.

Virtual Camera Club News

Have you been unsubscribed? A number of listeners have let me know that they were unceremoniously unsubscribed from the show. If that happens to you, just go back to the app and click on subscribe.

Inner Circle Members: A big thanks to those who support our podcast and our efforts! We are having a blast at our new Inner Circle hangout, the private group I've set up at DerrickStoryOnline. We'd love it if you join us. You can become an Inner Circle Member by signing up at our Patreon site. You will automatically be added to the new hangout.

My Writing on Medium.com: I now have 51 published articles on Medium.com. And if you haven't visited the site, and enjoy good writing on a variety of topics, I suggest that you may want to take a look. You can just go to the home page and enter "Derrick Story" in the search field. And if you like what you read, then follow me!

The New Donation Kit for Carefree Shipping of Found Film Cameras - If you've discovered a film camera that's no longer being used, our new Donation Kit makes it easy to pack and ship. Just visit the Contact Form on thenimblephotographer.com, click the box next to Donating a Film Camera, and let me know what you have. In your note, be sure to include your shipping address.

Affiliate Links - The links to some products in this podcast contain an affiliate code that credits The Digital Story for any purchases made from B&H Photo and Amazon via that click-through. Depending on the purchase, we may receive some financial compensation.

Red River Paper - And finally, be sure to visit our friends at Red River Paper for all of your inkjet supply needs.

See you next week!

You can share your thoughts at the TDS Facebook page, where I'll post this story for discussion.

This is The Digital Story Podcast #846, June 7, 2022. Today's theme is "It's Official: Capture One for the iPad in June" I'm Derrick Story.

Opening Monologue

Capture One users and those thinking about migrating to the robust photo management app finally get the news they have been waiting for: the iPad version will be released this month! Our lead story will look at what's included and what isn't. Plus a few top of mind thoughts on the new MacBook Pro 13" M2, and more. I hope you enjoy the show.

Digital Photography Podcast 846

Tune-In Via Your Favorite Podcast App!


podcast-icon.jpeg

Apple Podcasts -- Spotify Podcasts -- Stitcher

Podbean Podcasts -- Podbay FM -- Tune In

It's Official: Capture One for the iPad in June

Capture-One-iPad.jpg

"No wine will be released before its time," and such is the case with Capture One software as well. But finally they are confident enough in the iPad version to share it with the world.

Cost and Availability

The software will be available on June 28 at 1 PM CEST, will cost $4.99 a month, and will be available through the App Store.

Version 1 Features

More will be added to C1P iPad in the future, but for starters users can expect:

  • Import from camera roll, files, a plugged-in camera or an SD card - Create albums - Sort and filter.
  • Culling with Star rate and Color tag.
  • Quick Editing with styles and presets - Create styles and presets - Import styles and presets.
  • Crop and Rotate.
  • Editing: White balance (wb & tint) - Exposure (exposure, contrast, brightness, saturation) - Dynamic Range (highlights, shadows, whites, blacks) - Clarity and structure - Dehaze (auto and manual) - Basic color editor, with color picker - HSL - B&W conversion - Vignetting - Sharpening (amount, radius, threshold, halo) - Noise reduction (luminance, details, color, single pixel) - Film grain (modes, impact, granularity) - Moiré - Histogram.
  • Before/After - Undo/Redo/Reset - Display basic metadata - Copy and apply (selective adjustments).
  • Add album to the cloud, to be imported into CO Pro desktop - Export jpgs (predefined recipes) - Export EIPs - Watermark (text-only) - Share to any relevant app, including cloud storage ones, or save to files - Airdrop.

Upcoming Features

Tethering, Masks and Layers, Cloud improvements for file transfer and ultimately, synchronization.

Understanding Their Approach

Capture One iPad app is not intended to be a replacement for the desktop app, but instead its best companion. Even though the iPad app works perfectly well on its own, it is built to be a part of an ecosystem where you can work smoothly across devices to get the most out of your time, money, and images.

With the Capture One iPad app you can plug your camera directly into your iPad, import hundreds of photos, organize them and get to culling. See your images in all their glory on the iPad screen, quickly swipe through them, and rate or color tag them. Filter your best ones and start editing using either Styles or manual adjustments.

Once you are done editing, you can show your images directly on the screen to team members and clients when together on location or by exporting them as JPEGs. If you would like to refine your images even further when you get home, upload your album to the cloud, import it into Capture One Pro on desktop, and continue working exactly from where you left off.

The 2022 TDS Workshops Update

We have great events lined up for this year, and there are a few more coming. Here's a recap of what we have so far:

  • May 2022 - Infrared Photography Workshop (online event) - Sold Out
  • August 2022 - Ultimate B&W Photography Workshop (online) - Sold Out
  • Sept. 2022 - Eastern Sierra Photo Workshop (physical) - Sold Out
  • Nov. 2022 - Oregon Coast Photography Workshop (physical) - 3 Seats Available

You can learn more about all of these events and register by visiting TheNimblePhotographer.com.

What the Heck Was Apple Thinking with the New 13" MacBook Pro?

Since I'm still working with all Intel processor Macs, I was hoping that the M2 MBP 13" would be the computer that I could upgrade to. I guess I'll have to keep waiting.

First, let's start with the basic specs:

  • 13.3-inch Retina display
  • Apple M2 chip
  • Up to 24GB memory
  • Up to 2TB storage
  • Up to 20 hours battery life
  • Touch Bar and Touch ID
  • Two Thunderbolt/USB 4 Ports
  • One Headphone/Mic jack
  • Starting price: $1,299 - Available in July.

Those are nearly the exact same specs as the new MacBook Air that starts at $1,199, but includes a slightly bigger screen and a MagSafe power port. The new Air doesn't include the TouchBar (that practically nobody cares about) and gets 18 hours of battery life compared to 20.

So tell me, what is Pro about the 13" MacBook Pro? Only 2 Thunderbolt ports (one of which has to be used for charging since there is not a MagSafe port), no SD card slot, and no other ports period.

I guess we'll see what happens next time.

Fujifilm announces X-H2S high-end APS-C stills/video hybrid

You can read the entire article on DP Review.com.

Fujifilm has announced the X-H2S, a high-end stills/video APS-C mirrorless camera. It's built around a stabilized 26MP Stacked CMOS sensor that lets it shoot at up to 40 frames per second with full AF. It can also shoot 4K video at up to 120p in a wide range of codecs.

The X-H2S uses its fast-readout sensor and new X-Processor 5 chip to add subject recognition AF (Humans, Animals, Trains, Planes, Motorbikes, Cars and Birds), and more sophisticated AF tracking even with subject-detection disengaged. This combines with the ability to shoot at up to 40fps and a buffer that allows up to 184 JPEG or 175 Raw files at this fastest rate, and over 1000 JPEGs or 400 Raw images at 15fps using its mechanical shutter.

On the video side of things the X-H2S can capture DCI or UHD 4K at up to 60p using the full width of its sensor to give footage sampled from 6.2K width. It can also shoot 3:2 6.2K footage using its entire sensor area or 4K at up to 120p from a 1.29x cropped area. Footage can be recorded in a choice of 8-bit H.264, 10-bit H.625 or ProRes 422HQ, 422 or 422 LT with the option of ProRes Proxy capture in parallel. 4K at up to 120p can be output over HDMI or a Raw stream for encoding as ProRes RAW or BRaw using external recorders.

The Fujifilm X-H2S will be available from early July at a recommended price of $2499.

Virtual Camera Club News

Have you been unsubscribed? A number of listeners have let me know that they were unceremoniously unsubscribed from the show. If that happens to you, just go back to the app and click on subscribe.

Inner Circle Members: A big thanks to those who support our podcast and our efforts! We are having a blast at our new Inner Circle hangout, the private group I've set up at DerrickStoryOnline. We'd love it if you join us. You can become an Inner Circle Member by signing up at our Patreon site. You will automatically be added to the new hangout.

My Writing on Medium.com: I now have 51 published articles on Medium.com. And if you haven't visited the site, and enjoy good writing on a variety of topics, I suggest that you may want to take a look. You can just go to the home page and enter "Derrick Story" in the search field. And if you like what you read, then follow me!

The New Donation Kit for Carefree Shipping of Found Film Cameras - If you've discovered a film camera that's no longer being used, our new Donation Kit makes it easy to pack and ship. Just visit the Contact Form on thenimblephotographer.com, click the box next to Donating a Film Camera, and let me know what you have. In your note, be sure to include your shipping address.

Affiliate Links - The links to some products in this podcast contain an affiliate code that credits The Digital Story for any purchases made from B&H Photo and Amazon via that click-through. Depending on the purchase, we may receive some financial compensation.

Red River Paper - And finally, be sure to visit our friends at Red River Paper for all of your inkjet supply needs.

See you next week!

You can share your thoughts at the TDS Facebook page, where I'll post this story for discussion.
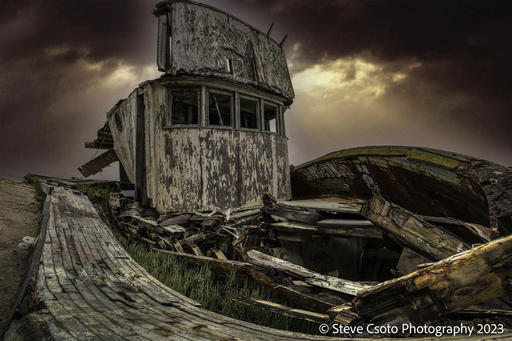
This is The Digital Story Podcast #845, May 31, 2022. Today's theme is "Capturing the Joy of Celebration with Photography" I'm Derrick Story.

Opening Monologue

We certainly have had our share of images filled with heartbreak and anguish lately. Mass shootings, war, and disease fill our newsfeeds. But the month of June can help balance those emotions. The sense of accomplishment captured in graduation ceremonies, Father's Day and the debut of summer activities can brighten our spirits. And if we get out our cameras and capture those moments, we can help spread the joy. More about that on today's TDS Photography Podcast. I hope you enjoy the show.

Digital Photography Podcast 845

Tune-In Via Your Favorite Podcast App!


podcast-icon.jpeg

Apple Podcasts -- Spotify Podcasts -- Stitcher

Podbean Podcasts -- Podbay FM -- Tune In

Capturing the Joy of Celebration with Photography

P5296189-Graduation-1024.jpg

For the first time in months, I welled up during a photo shoot. I was standing in the middle of a post-graduation ceremony at Santa Rosa Junior College watching a family converge on a young woman in a cap and gown holding her certificate.

Mom was crying, dad was beaming, and the siblings were looking up in admiration at the accomplishment of their oldest sister. Against the odds of the pandemic, assured financial challenges, and demanding course work, she was graduating and ready for the next chapter of her life. The top of her cap was decorated in sequins that spelled UCLA. She was on her way.

I was there with my camera drinking in every life-affirming drop of joy. Finally, something beautiful.

June is here and it's time to add some balance to my life. I have gatherings planned with friends and family, photo assignments on the books, workshops on the calendar, and as much nature as I can squeeze in between.

I'm tired of reading the newsfeed on my phone that emphasizes the darkness in our world. I know it's here. I know it's real. But I also know there is light. And I'm ready for the brightness of summer.

When I capture one of those moments that warms my heart or makes me smile, not only do I get to experience it live, but get to relive the joy countless times afterward via a well-crafted photograph. This is the magic of photography.

I bring this up because these moments are available to any of us. A playful pet, wondrous child, a little league homerun celebration, a quiet sunrise - these moments are everywhere, especially this time of year.

And when we get tired of celebrating those quiet moments on the bright side of life, our social media feeds will still be there - just in case you get tired of the light.

The 2022 TDS Workshops Update

We have great events lined up for this year, and there are a few more coming. Here's a recap of what we have so far:

  • May 2022 - Infrared Photography Workshop (online event) - Sold Out
  • August 2022 - Ultimate B&W Photography Workshop (online) - Sold Out
  • Sept. 2022 - Eastern Sierra Photo Workshop (physical) - 2 Seats Available
  • Nov. 2022 - Oregon Coast Photography Workshop (physical) - 3 Seats Available

You can learn more about all of these events and register by visiting TheNimblePhotographer.com.

Photographer Teaches Posing to Prove Anyone Can Be Photogenic

You can read the entire article at PetaPixel.

A posing coach and portrait photographer has a mission to help people who believe they aren't photogenic. David Suh, from Sacramento, California, runs a course entitled "How to be Photogenic in 30 Days," as well as sharing quick and easy tutorials from his TikTok page.

The 26-year-old has posted dozens of clips where he explains how to pose properly for different kinds of photos. He offers tips on how to "level up" Instagram selfies, how to pose for graduation photos, and explains the best outfits for photo shoots.

Suh's overarching philosophy is based confidence and authenticity, but he has specific poses that he likes to teach such as leaning against a wall.

"Kick the hip out a little bit away from the wall, then lean into the wall. Then use natural hand placements from grabbing the jacket button to grabbing the fingers," he says in a YouTube video.

While this is a standard pose, Suh then likes to direct the subject to a more "fashion" pose by doing something more unusual against the wall.

"I love putting an editorial and magazine twist to my portraits. I don't want it to look too traditional of a LinkedIn headshot kind of vibe," he explains.

"Something you can do is stand further away from the wall and lean with your shoulder. What makes this have that fashion look is the fact that we don't do this every day. A lot of fashion poses are meant to be striking so it captures the viewer's attention so doing an exaggerated move is what gives that fashion look."

Another pose Suh likes is using a flight of stairs, a common feature in cities.

"One of my favorite things to do is give a strong masculine look by sitting wide-legged. You can go for various leans forward while keeping your chest forward. Opening up your energy towards the camera is what gives off a commanding badass energy."

"You can also very easily turn this around and make it a softer look by turning to the side slightly and doing a leg crossover instead. As we turn our energy away from the camera we have a softer look. Turning to the side can also have a slimming effect."

Master Your Craft: Why you should re-edit older photos using new skills

You can read the entire article on Imaging-Resource.com.

Much like your photography skills improve with time and practice, so do your editing skills. Over time, you acquire new editing skills, software improves, and you develop new and different styles. What happens when a professional photographer like Pye Jirsa of SLR Lounge re-edits a photo he captured more than a decade ago?

When Jirsa started doing wedding photography in 2009, his editing style was very different. The image in question is HDR-esque with a lot of contrast and high saturation. I'm sure we all have images like this, especially from when we started photography or learned specific new techniques. The video shows why keeping your original raw files is so important. You never know how your style and taste will change over time. It's always good to have an original file that you can edit again rather than be stuck with a processed file that you no longer like.

Virtual Camera Club News

Inner Circle Members: A big thanks to those who support our podcast and our efforts! We are having a blast at our new Inner Circle hangout, the private group I've set up at DerrickStoryOnline. We'd love it if you join us. You can become an Inner Circle Member by signing up at our Patreon site. You will automatically be added to the new hangout.

My Writing on Medium.com: I now have 51 published articles on Medium.com. And if you haven't visited the site, and enjoy good writing on a variety of topics, I suggest that you may want to take a look. You can just go to the home page and enter "Derrick Story" in the search field. And if you like what you read, then follow me!

The New Donation Kit for Carefree Shipping of Found Film Cameras - If you've discovered a film camera that's no longer being used, our new Donation Kit makes it easy to pack and ship. Just visit the Contact Form on thenimblephotographer.com, click the box next to Donating a Film Camera, and let me know what you have. In your note, be sure to include your shipping address.

Affiliate Links - The links to some products in this podcast contain an affiliate code that credits The Digital Story for any purchases made from B&H Photo and Amazon via that click-through. Depending on the purchase, we may receive some financial compensation.

Red River Paper - And finally, be sure to visit our friends at Red River Paper for all of your inkjet supply needs.

See you next week!

You can share your thoughts at the TDS Facebook page, where I'll post this story for discussion.
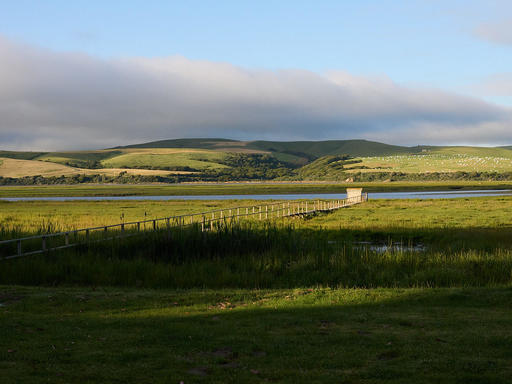
This is The Digital Story Podcast #844, May 24, 2022. Today's theme is "How Much Fill Flash Do You Really Need?" I'm Derrick Story.

Opening Monologue

Fill flash is a fundamentally sound practice that improves portraits in many situations. But some photographers shy away from it because they don't want to carry a cumbersome hotshoe flash. But is there a nimble option that provides the desire results without adding bulk to your kit? There is, and that's the first story on today's TDS Photography Podcast. I hope you enjoy the show.

Digital Photography Podcast 844

Tune-In Via Your Favorite Podcast App!


podcast-icon.jpeg

Apple Podcasts -- Spotify Podcasts -- Stitcher

Podbean Podcasts -- Podbay FM -- Tune In

How Much Fill Flash Do You Really Need?

SIFF3100-LatinX-1024.jpg Fill flash used for this outdoor portrait. Photo by Derrick Story.

Believe me, no one dislikes excessive bulk more than me. And I got rid of my clumsy hotshoe flashes years ago. But I do carry a shirt pocket Metz 26 AF-2 that has saved my bacon time and time again.

How? By providing just enough fill light for backlit people when working outside. That's the beauty of fill light. You can hold on to some background tonality while still rendering a pleasant exposure on the main subject.

The thing that I've learned over time is that I only need a little fill light for this magic to work. And that has allowed me to rely on pop-up flashes and shirt-pocket sized accessories.

The magic begins by shooting everything in RAW. In contrasty situations, the fill does help balance the lighting, but it can still be a bit overpowered by the background. Shooting in RAW gives me the extra latitude I need to get all the tones balanced.

Next, raise the ISO. There's a world of difference in flash output at ISO 1600 compared to 200. If I'm not getting the results that I want at the lower ISOs, I have no problem increase the sensor's sensitivity. Today's cameras shoot beautifully at ISO 1600.

And finally, work with a short zoom lens to ensure you stay close enough to your subject. Most of my fill flash shots are between 28mm and 50mm. Not only do you get a more personal vibe at these focal lengths, you're close enough for your pocket-sized flash to reach.

Metz-Flash-1024.jpeg The Metz 26 AF-2 is a good example of a nimble fill flash.

The Metz 26 AF-2 has been discontinued. What a shame. But the MEIKE MK-320P Mini Flash is available for $69, and it too is super nimble.

  • Fit panasonic and Olympus or other M43 mount camera
  • Supports manual, ttl, optical slave(s1,s2),stroboscopic mode ,front/rear curtain-sync,overheating protection,automatic sleep mode
  • Built-in LED auxiliary lighting ,external USB interface
  • Weighs only 150g , small and easy to carry
  • Metal hot shoe , support ON-Camera and OFF-Camera Flash Triggering

You can also use the pop-up flash on your camera. And Olympus users receive a nifty, super-portable hotshoe flash in the box with their camera.

If you haven't been using fill light outdoors because you didn't want to carry a bunch of extra gear, give one of these options a try. I think you will be very please with the results.

The 2022 TDS Workshops Update

We have great events lined up for this year, and there are a few more coming. Here's a recap of what we have so far:

  • May 2022 - Infrared Photography Workshop (online event) - Sold Out
  • August 2022 - Ultimate B&W Photography Workshop (online) - Sold Out
  • Sept. 2022 - Eastern Sierra Photo Workshop (physical) - 2 Seats Available
  • Nov. 2022 - Oregon Coast Photography Workshop (physical) - 3 Seats Available

You can learn more about all of these events and register by visiting TheNimblePhotographer.com.

The Nine Volt AirCap Camera Body Cap Hides an Apple AirTag

You can read the entire article at PetaPixel.

Camera and computer accessory brand Nine Volt has created a camera body cap that on the surface looks normal, but secretly hides a slot to hold an Apple AirTag so that photographers can always locate their equipment.

In major cities, cameras are often targeted by thieves because of how quickly and easily they can be flipped for large sums of cash. In San Francisco, the problem is so rampant that some thieves not only target photographers in broad daylight (stealing from PetaPixel contributor Jefferson Graham and even local news crews) but they also have been caught breaking into cars while they're stuck in traffic.

A recent report showed that stolen equipment is often separated from bags and luggage within a few minutes of being stolen, so hiding an AirTag in the lining of a camera bag or Pelican case will only work for a very short amount of time. Nine Volt, a computer and camera accessory brand, recognized this problem and has come up with a solution.

Nine Volt says its AirCap is a carbon fiber composite camera body cap that is made to keep a photographer's camera sensor protected like a standard body cap, but it also includes a hidden rear compartment within the cap that holds an AirTag. The company says that the hidden compartment shows no obvious signs that it is removable and is secured with four strong neodymium magnets. To access the hidden compartment, a photographer needs to twist the inside of the AirCap to release the magnets and then invert the cap.

Nine Volt manufactures the Air Cap for Canon RF, Fujifilm GFX, Sony E, Nikon Z, Phase One XF, and PL mount. Each cap retails for $49 and the AirTag is not included. While similar-looking caps for lenses are visible in Nine Volt's Instagram video, the company doesn't seem to offer lens caps with an AirTag compartment.

The TIPA World Awards 2022

You can read the entire article at the TIPA website.

Founded in 1991, the Technical Image Press Association, TIPA, is composed of many member publications in the photo/imaging field published in print and online. These publications cover the full range of the industry, including consumer, professional, business-to-business, and fine art photography and imaging.

Member magazines and their online presence have wide reach and readership in many languages and cover markets around the world in Europe, Asia, Australia and North and South America.

Editors and their staff make up a global panel of knowledgeable experts who have earned a reputation for honest and trustworthy appraisal of photo and imaging products. Their magazines and websites have built a loyal following among their readers. Each member publication is engaged in the selection and final vote in the TIPA WORLD AWARDS process to name the Best Photo and Imaging products of the year.

  • Best MFT Camera: OM System OM-1.
  • Best APS-C Camera: Nikon Z fc.
  • Best Full Frame Expert Camera: Sony Alpha 7 IV.
  • Best Full Frame Professional Camera: Nikon Z9.
  • Best Camera Innovation: Canon EOS R3.
  • Best Rangefinder Camera: Leica M11.
  • Best Professional 4K Hybrid Camera: Panasonic LUMIX DC-GH6.
  • Best Medium Format Camera: Fujifilm GFX 50S II.

Virtual Camera Club News

Inner Circle Members: A big thanks to those who support our podcast and our efforts! We are having a blast at our new Inner Circle hangout, the private group I've set up at DerrickStoryOnline. We'd love it if you join us. You can become an Inner Circle Member by signing up at our Patreon site. You will automatically be added to the new hangout.

My Writing on Medium.com: I now have 51 published articles on Medium.com. And if you haven't visited the site, and enjoy good writing on a variety of topics, I suggest that you may want to take a look. You can just go to the home page and enter "Derrick Story" in the search field. And if you like what you read, then follow me!

The New Donation Kit for Carefree Shipping of Found Film Cameras - If you've discovered a film camera that's no longer being used, our new Donation Kit makes it easy to pack and ship. Just visit the Contact Form on thenimblephotographer.com, click the box next to Donating a Film Camera, and let me know what you have. In your note, be sure to include your shipping address.

Affiliate Links - The links to some products in this podcast contain an affiliate code that credits The Digital Story for any purchases made from B&H Photo and Amazon via that click-through. Depending on the purchase, we may receive some financial compensation.

Red River Paper - And finally, be sure to visit our friends at Red River Paper for all of your inkjet supply needs.

See you next week!

You can share your thoughts at the TDS Facebook page, where I'll post this story for discussion.
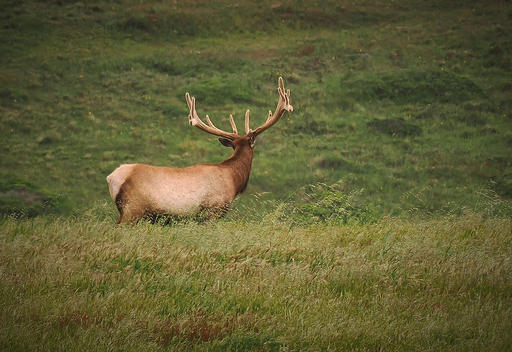
A big photo shoot with hundreds, if not thousands of RAW files can stress your photo management workflow. If it's an event where I need to use burst mode for recording the action, my deliverables are about 200 files for every 1,000 captured. So what to do with the other 800?

fashion-Sequence-1024.jpg

Culling Before Importing

These days, most of the rejects don't even make it on to my computer. When Capture One Pro introduced the Import Browser, that allowed me to begin culling at the first step of the workflow. Instead of simply downloading everything from the memory card on to the computer, I make an initial Yay/Nay pass and separate the wheat from the chaff with the Import Browser.

Yes, it takes more time on the front end, but I have fewer large RAW files to manage on my computer, easing the strain on my internal drives and backups. (If you're not familiar with the Import Browser, here's a short piece on how it works.)

Rating the Keepers

Generally speaking, I'm now only importing about half the shots from the memory card thanks to culling out losers during import using the browser. The second step is to add star ratings to the images that do make the cut.

I've found it easier to accurately rate pictures during this step because I've already seen everything once, and I have a feel for the overall shoot. This is the point where I whittle down the deliverables from 500 to about 200. (I keep all 500, but the 200 that go to the client now get their own album in the photo management software.)

Only Adjusting the Remaining Survivers

I go through those survivors one more time for cropping, exposure, and color adjustments. I then export the finals out of Capture One and send them to the client. The entire 500 images are also backed up using my normal archiving process.

What to do with the Rejects?

The only remaining question is: what to do with the files that are on the memory card that never made it to the computer? For me, the answer depends on how I captured them in the first place.

If it was an action shoot where I was using burst mode and have sequences where I've culled out the keepers from any given burst, I'm ok with letting the rejects go. I've already backed up half of the shots, and only a percentage of those were deliverables.

I have a harder time deciding what to do with single frame shoots. In those situations, it's not a burst of a dozen images, but rather a frame by frame capture with each image its own unique picture.

For those shoots, I'm dumping the entire memory card on a large backup hard drive, just in case I ever have to go back through them to look for a particular shot. I may never open those folders again, but there's some peace of mind knowing that I could if needed.

Regardless of how I decide to handle the rejects, I don't format the memory cards until I've secured at least one backup of the images that did make it into my photo management system.

The real point here is this: You may not necessarily need to archive every frame you shoot. That can really add up over time, especially if you shoot RAW with a high resolution camera. And how often are you tapping those archives anyway?

Put some thought into a plan that you can live with, considering the variables that come with different types of shoots. Hopefully you'll find a sweet spot that balances common sense with the price of storage.

You can share your thoughts at the TDS Facebook page, where I'll post this story for discussion.
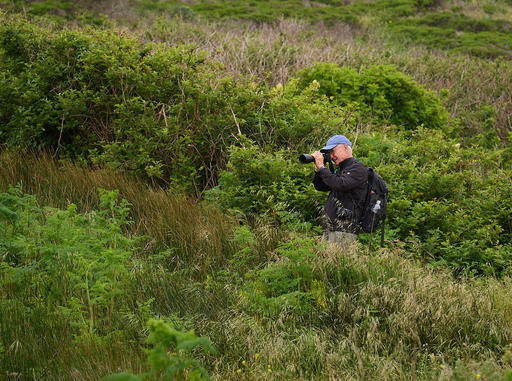
This is The Digital Story Podcast #843, May 17, 2022. Today's theme is "The Camping Gear Special for Photographers." I'm Derrick Story.

Opening Monologue

Camping and photography are the peanut butter and chocolate of outdoor actives. It's an understatement to say they go together well. And over the years I've learned that the more comfortable I am in nature, the better my pictures turn out. In that spirit I'm sharing with you some of my favorite camping gadgets and tips to help you maximize your experiences. I hope you enjoy the show.

Digital Photography Podcast 843

Tune-In Via Your Favorite Podcast App!


podcast-icon.jpeg

Apple Podcasts -- Spotify Podcasts -- Stitcher

Podbean Podcasts -- Podbay FM -- Tune In

The Camping Gear Special for Photographers

DSCF2164-Gualala-1024.jpg

Before going forward, let's step back for a minute, quite a ways back. I remember the very moment that I decided that I needed to buy a camping vehicle. It happened during a frosty October morning in the Eastern Sierra when the ground was as hard as concrete.

I struggled a bit to get my jeans on in the two-man tent, crawled out the front opening on my hands and knees, and staggered toward the camp stove to begin a cup of coffee. As I stretched the kinks out of my back, I thought to myself, there has got to be a more comfortable way to do this.

One month later I bought the VW Vanagon with fold out double bed. And my outdoor life has never been the same.

The Vanagon has moved on to a new owner, but my camping life continues to improve. These days, I'm sleeping soundly, eating well, and brimming with creativity as I work outdoors.

A few carefully selected items have mad all the difference. And the totality of them fit easily in the electric SUV. I thought you might enjoy learning about the gear that has transcended my wilderness mornings from creaky to comfortable. Here are my recommendations.

Clean, Convenient Fire

Fire is at the heart of any camping experience. It cooks your food, adds glowing ambience to the evening, and helps warm the bones. Let's start with the most essential item: the camp stove.

Coleman 2 Burner Grill/Stove $89 - If you don't like washing dishes and pots while camping, and you want to keep packaging waste to a minimum, then a grill is definitely the way to go.

DSCF2103-Gualala-1024.jpg

This Coleman combo works great, is easy to clean, and includes a regular burner as well for that pot of breakfast coffee. Even though the stove is affordable, it has held up well over time for me.

Tip: an 11" x 11" griddle fits perfectly over the grill making it easy to cook pancakes and eggs for breakfast.

Ignik Refillable Gas Growler Deluxe 5-Pound Propane Tank $149 This refillable propane tank is quite compact, yet it replaces 5 Coleman bottles that end up in the landfill.

DSCF2119-Gualala-1024.jpg

The kit comes with a 5-Pound tank, adapter hose for your propane stove, and a carry case. It all zips up nicely and fits in the back of your vehicle without taking up much room. So much better than disposable 1-lb bottles, and far more compact that a full size tank. And enough fuel for days of camping.

Portable Propane Gas Fire Pit Outdoor Firebowl $135 - Sitting around a fire ring is fun, but the smoke and mess isn't. You can still tell scary stories around a fire with a propane-powered fire pit.

This is a perfect match for the propane growler tank I mentioned earlier. It's compact, easy to set up, smoke free, and you don't have to worry about hazardous embers. And yes, you can make s'mores over its flames.

Turning Your Car into a Home

SlimShady Awning OG $249 This lightweight room-mounted awning transforms your car campsite into a homy patio. You'll get the best price directly from Yakama, but you will need crossbars for your roof rack if you don't have them already.

IMG_1419.jpeg

You can set it up solo in about 15 minutes, but it's much easier with 2 people. I like the 6.5' awning that's comfortable for a couple chairs and a table. Be prepared to answer a few questions from others in the campground, because people seem to really like this rig.

Breathable Mesh Car Window Shades - I sleep much better in the back of my VW ID.4 now that I have mesh screens for the rear windows. This allows me to have cross ventilation at night which is both refreshing and eliminates condensation inside the car.

The most important thing is that they fit your window snugly so you don't have to worry about pests entering the cabin at night. They also help keep your car cool during the day because you can leave the screens in place and roll down the rear windows all the way.

Camco Aluminum Side Table $17 - These portable side tables fold flat taking up very little storage space, but provide great utility in camp.

I recommend getting a couple of them. One to serve as a side table for snacks and drinks while lounging in your camp chair, and a second as an ottoman to raise your feet. I clip a braided placemat to the top to make it even more comfortable for my legs.

Bessport Camping Blanket $32 - Lightweight camping blankets come in so handy around the site. Great for draping over legs as the sun goes down, using as a morning cape while brewing coffee, or adding an extra layer of warmth to your bed. I keep one in the VW at all times, but use it most in the campsite.

RoverTac Camping Accessories Gear Tools Multitool Hatchet Survival Gear Axe $21 - Great for pounding in tent stakes, chopping up tinder, and dozens of other uses.

Bonus Item

Bisquick Shake 'n Pour Pancake Mix - Remember my quest for no messy dishes or bowls? Just add 1 1/2 cups of water to the Shake n Pour container, shake for 30 seconds, and pour the batter on to a hot griddle. In just a few minutes you will have delicious, fluffy pancakes.

DSCF2107-Gualala-1024.jpg

Makes enough for four with egg and fruit side dishes, or plenty for two with just the cakes. Once the batter is gone, recycle the container, wipe off the griddle, and you're done.

Bonus Tip: I use paper plates for my camping. All I have to wash are my utensils.

Final Thoughts

These little comforts make a big difference during the outing. Not only will you be more comfortable, but I'm betting more creative as well.

The 2022 TDS Workshops Update

We have great events lined up for this year, and there are a few more coming. Here's a recap of what we have so far:

  • May 2022 - Infrared Photography Workshop (online event) - Sold Out
  • August 2022 - Ultimate B&W Photography Workshop (online) - Sold Out
  • Sept. 2022 - Eastern Sierra Photo Workshop (physical) - 2 Seats Available
  • Nov. 2022 - Oregon Coast Photography Workshop (physical) - 3 Seats Available

You can learn more about all of these events and register by visiting TheNimblePhotographer.com.

OM System OM-1 review

You can read the entire review at Preview.com.

The OM-1 excels in situations such as wildlife shooting, where its power and compact telephoto lenses mean it's able to offer an unmatched combination, but it can also be a pretty capable sports camera or a general, everyday photographers' camera expected to shoot a bit of everything. So, while it can't generally match a comparably priced full-frame camera for image quality, but there's nothing else that offers this level of all-round capability (shooting speed, AF performance, IS performance, weather sealing) in such a small package.

The OM-1 brings speed, improved AF and more detailed video to a system that already offered great image stabilization and small and light camera/lens combinations. This makes it a powerful all-rounder with particular strengths for wildlife. That compactness comes as a trade-off for absolute image quality but a series of computational multi-shot modes can help close the gap in certain circumstances. It's a lot of capability for the money.

Overall Score: 87 percent with a Silver Award. More than 1,600 comments.

Virtual Camera Club News

Inner Circle Members: A big thanks to those who support our podcast and our efforts! We are having a blast at our new Inner Circle hangout, the private group I've set up at DerrickStoryOnline. We'd love it if you join us. You can become an Inner Circle Member by signing up at our Patreon site. You will automatically be added to the new hangout.

My Writing on Medium.com: I now have 51 published articles on Medium.com. And if you haven't visited the site, and enjoy good writing on a variety of topics, I suggest that you may want to take a look. You can just go to the home page and enter "Derrick Story" in the search field. And if you like what you read, then follow me!

The New Donation Kit for Carefree Shipping of Found Film Cameras - If you've discovered a film camera that's no longer being used, our new Donation Kit makes it easy to pack and ship. Just visit the Contact Form on thenimblephotographer.com, click the box next to Donating a Film Camera, and let me know what you have. In your note, be sure to include your shipping address.

Affiliate Links - The links to some products in this podcast contain an affiliate code that credits The Digital Story for any purchases made from B&H Photo and Amazon via that click-through. Depending on the purchase, we may receive some financial compensation.

Red River Paper - And finally, be sure to visit our friends at Red River Paper for all of your inkjet supply needs.

See you next week!

You can share your thoughts at the TDS Facebook page, where I'll post this story for discussion.