Recently in Photography

  Page 301 of 385 in Photography  

Some shooters will do anything to avoid image noise, even if it means missing the shot all together. Today's cameras have improved their high ISO performance, including many compacts. Yet a lot of photographers insist on keeping the ISO setting low, even in dimly lit environments. Why? Is it that old habits die hard, or is there a real reason to keep the dial turned down? Find out what I think in this week's podcast.

Listen to the Podcast

You can also download the podcast here (21 minutes). Or better yet, subscribe to the podcast in iTunes.

Monthly Photo Assignment

Embrace is the Dec. 2009 Photo Assignment. You can read more about how to submit on our Member Participation page. Deadline for entry is Dec. 31, 2009.

More Ways to Participate

Want to share photos and talk with other members in our virtual camera club? Check out our Flickr Public Group. It's a blast!


twitter.jpg Follow me on Twitter

-


Podcast Sponsors

SiteGrinder lets you take ownership of your websites. Effortlessly output pages right from Photoshop.

Red River Paper -- Try the $7.99 Sample Kit.

Add Magic to Your Slideshows -- FotoMagico presentations are so amazing that your audience will be asking how you did it.


Technorati Tags: , , , , ,

"Feet" are expressive. And the Oct. 09 Photo Assignment participants created a "soleful" gallery of images that show how beautiful trotters can be.

The December 2009 assignment is "Embrace." Start working on your contribution now. Details can be found on the Member Participation page. You can submit photo assignment pictures up to 600 pixels in the widest direction.

Please follow the instructions carefully for labeling the subject line of the email for your submission. It's easy to lose these in the pile of mail if not labeled correctly. For example, the subject line for next month's assignment should be: "Photo Assignment: December 2009." Also, if you can, please don't strip out the metadata. And feel free to add any IPTC data you wish (These fields in particular: Caption, Credit, Copyright, Byline), I use that for the caption info.

Photo by Anthony Zahra. You can read more about how Anthony captured this shot, plus see all of the other great images on the Oct. 09 Gallery page.

Good luck with your December assignment, and congratulations to all of the fine contributors for October. It's a great collection of images.


twitter.jpg Follow me on Twitter

-


Now Available! The Digital Photography Companion. The official guide for The Digital Story Virtual Camera Club.

  • 25 handy and informative tables for quick reference.
  • Metadata listings for every photo in the book
  • Dedicated chapter on making printing easy.
  • Photo management software guide.
  • Many, many inside tips gleaned from years of experience.
  • Comprehensive (214 pages), yet fits easily in camera bag.

Technorati Tags: , ,

Olympus placed a sizable bet that four features would carry the new E-P2: the black metallic body, continuous autofocus tracking, EMA-1 microphone adapter, and the VF-2 Electronic Viewfinder. So, today, I'm going take a look through the VF-2 and tell you what I see.

Let's start with the physical aspects. The VF-2 does add height to the camera. Without the viewfinder attached, the E-P2 is 2.75 inches (30mm) tall. When you mount the viewfinder in the hot shoe, the height of the camera increases to 4.25 inches. The VF-2 communicates with the camera through a data port on the back of the hot shoe. Keep in mind that the Olympus E-P1 does not have this data port, so the electronic viewfinder can only be used with the E-P2. It's easy to mount because all you have to do is slide it in the hot shoe and everything lines up nicely. The VF-2 is very light and it comes with a pouch to protect it when not in use.

The viewfinder is mounted with a hinge that enables you to rotate it upward as far as 90 degrees. So if you want to shoot at a lower angle, you can look down into the VF-2 to compose your shot and operate the controls. This feature adds a lot of versatility to the handling of the E-P2.

The electronic viewfinder is very responsive as you zoom through the range of the 14-42mm lens, providing virtual realtime composition. The refresh rate is decent, normal for an electronic viewfinder. If you pan quickly in any direction, there's a slight blurring during the pan, but the image becomes crisp the instant you stop.

Once thing to keep in mind with the VF-2 is that is comes with the camera. When you buy the Olympus E-P2 for $1,099, it's included in the kit with the 14-42mm lens. Now that doesn't mean that you have to use the electronic viewfinder to take pictures. When it's not mounted, the camera behaves as you would expect. The 3-inch, 230,000 dot LCD lights up ready for you to compose your shot.

When you slide the VF-2 into the hot shoe, it remains inactive until you turn it on using the button on the back. This switches the image signal from the LCD to the VF-2. You can't have both on at once. It's one or the other. But the camera does remember which one you used last when you power down. So if you were using the VF-2 when you turned off the E-P2, it would be active when you powered back up. Same goes for the LCD.

Looking through the electronic viewfinder is fun. It's bright and sharp. You can adjust the diopter ring around the eyepiece to fine tune the image for your vision. It has a long eye relief so you can use it while wearing glasses and still see the image corner to corner. When it's bright outside, the VF-2 is a welcome relief compared to trying to discern the image on the LCD. When the lights are low, it brightens up the scene making it easier to compose.

If you're used to judging exposure off the LCD, however, then the VF-2 might throw you for a curve because it does brighten up the composition. I recommend that you switch to the LCD temporarily by pushing the VF-2 button, judge your exposure, then switch back to the viewfinder. Another route to go is to press the Info button on the back of the camera to enable the live histogram. It looks great in the VF-2, and it's a more accurate way to judge exposure.

You can use the VF-2 for anything that you would use the LCD for. Menus are crisp and easy to read. Looking at your images via playback is like viewing them on a small, sharp TV screen. And since the VF-2 is removable, you can stash it in your pocket or camera kit when you want to keep a low profile, such as shooting with the 17mm lens and the LCD.

How often you use the electronic viewfinder will depend on your shooting style. In my case, I found it very helpful outside in bright light and for low angle photography. It seems easy on the battery, so there might be some savings there compared to leaving the LCD on all of the time. And when you mount it on the E-P2, it's quite secure. So you don't have to worry about it sliding off the camera. If you decide that the VF-2 Electronic Viewfinder just isn't your cup of tea, you can go with the Olympus E-P1, and save yourself $300. Both options give you a quality micro four thirds camera.

More on the Olympus E-P2

Olympus E-P2 Black Body and Electronic Viewfinder


twitter.jpg Follow me on Twitter

-


Don't Let Flash Kill the Party

One of my favorite party photo opportunities is the cake shot. And there's no faster way to ruin the image than with an overzealous flash. So when we lit the candles to celebrate the 13th birthday of these twin boys, I pulled the compact Canon S90 from my pocket, set the mode to Low Light, and let the camera take it from there.

Face Detection really helped me tame the situation. Not only did it set the focus accurately, but you'll notice that the exposure and white balance were corrected for the boys' skin tones. It's fun to watch how the camera figures out the lighting, then makes the appropriate adjustment. The dominate light source was tungsten, which the camera identified. The byproduct of that correction was the bluish background from daylight outside. If I wanted, I could pull down that blue tone in post production, but I left the color balance alone in this shot so you could see how the original image came out of the camera.


Canon S90 set in Low Light mode (on the mode dial) with zoom at 28mm. ISO 1600, 1/60 at f/2.0 (Click on image to enlarge)


Once again, this is where the ability to capture with high ISO makes this all possible. Otherwise, the shutter speed would be too slow to freeze the action. So when possible, try existing light. And if the environment just won't let you go down that road, then it's good to know you can add supplemental light as needed.

More Articles About the Canon S90

Five Lesser Known (but very cool) Features on the Canon S90

Canon S90 Raw Processing Comparison: DPP vs ACR 5.6 RC

DigiScoping Pro Basketball with the Canon S90

Did Canon Really Improve Image Noise with the PowerShot S90?

"Compacts for Serious Shooters" - Digital Photography Podcast 201

Is the Canon S90 the New G11?


twitter.jpg Follow me on Twitter

-


Huntington Beach Pier at Sunset

On a walk back from the Huntington Beach Pier last night at sunset, I lined up this shot with the Canon PowerShot S90. The camera was set to ISO 800 using Raw+Jpeg. I then processed the Raw file in Canon Digital Photo Professional. This is the type of shot that typically gives compacts a problem at high ISO settings, but the noise is quite reasonable here.

Photo by Derrick Story. Canon S90, 1/13th sec at f/4.5, ISO 800. (Click on image to enlarge). You can see a larger version on the TDS Flickr page.

More Articles About the Canon S90

Five Lesser Known (but very cool) Features on the Canon S90

Canon S90 Raw Processing Comparison: DPP vs ACR 5.6 RC

DigiScoping Pro Basketball with the Canon S90

Did Canon Really Improve Image Noise with the PowerShot S90?

"Compacts for Serious Shooters" - Digital Photography Podcast 201

Is the Canon S90 the New G11?


twitter.jpg Follow me on Twitter

-


Photoshop Elements Black Friday Special

photoshop_elements.png

Now through Nov. 30, you can get big discounts on Adobe Photoshop Elements if you order through Adobe.com. Here's how these specials shake out:

$50 discount for Photoshop Elements 8 and Premiere Elements 8 Bundle (Windows). Only $99 after US$20 instant discount and US$30 mail-in rebate.

$50 discount for Photoshop Elements 8 Plus and Premiere Elements 8 Plus Bundle (Windows). Only $129 after US$20 instant discount and US$30 mail-in rebate.

$40 discount for Photoshop Elements 8 (Windows). Only $59 after US$20 instant discount and US$20 mail-in rebate.

$40 discount for Photoshop Elements 8 for Mac. Only $59 after US$20 instant discount and US$20 mail-in rebate.


twitter.jpg Follow me on Twitter

-


Here's my list of tempting gift ideas for that special photographer in your life, and that includes you! We start with the super affordable Kingston card reader at $11.95 and work our way up from there. Some of these selections are my perennial favorites, while others are brand new for this year's Top 10.

Listen to the Podcast

You can also download the podcast here (26 minutes). Or better yet, subscribe to the podcast in iTunes.

The List (with links)

kingston_reader_sm.png

$11.95 -- The Kingston 19-in-1 USB 2.0 Flash Memory Card Reader. I've been using this reader for a few months now, and I love it. Everyone else likes it too because people are constantly asking me where I bought it.

$12.37 -- The Giottos AA1900 Large Rocket Blaster. Nothing works better than a Rocket Blaster for cleaning lenses and sensors. I'd love to have a dozen of them.

$16.49 -- Signed copy of The Digital Photography Companion. Just send me your mailing address and I will send you a signed author's plate for inside the book.

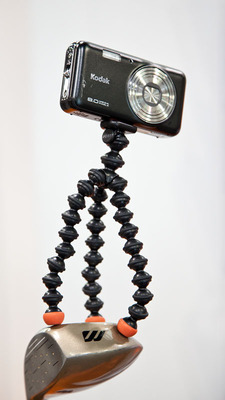
$21.95 -- The Joby GP1-E1EN Gorillapod Flexible Tripod for compact cameras. Super light, versatile and affordable. They also make bigger sizes for bigger cameras.

$23.25 -- The Pedco UltraClamp Assembly. With this device, you can convert any roller suitcase into a light stand or tripod, not to mention a table, chair, shelf, and dozens of other common items. Super handy.

lowepro_gloves.png

$29.95 -- Lowepro Thermax Photo Gloves, Large for any cold weather activity where you still need to work delicate equipment. Soft, warm gloves made of Lycra, with DuPont® Thermax® to wick away moisture, and Control Dots to ensure a firm grip on delicate camera and tripod controls. Ideal for cold weather photography and bicycling.

$49.95 -- The Photoflex MultiDisc Reflector 5-n-1 Kit 22". You can tackle just about any outdoor portrait assignment with this super cool, super handy reflector and diffuser kit.

$89.95 -- The Lowepro Fastpack 250. For that shooter on the go who needs to carry a laptop too. Holds DSLR kit, personal items, and still fits anywhere on an airplane. My favorite bag.

$149.95 -- The Nikon 8221 Trailblazer 10 X 50mm All Terrain Binoculars. These terrific binoculars are great for outdoors, sporting events, and just about anywhere else you need a closer look at the action. They look great too!

$429 -- The Canon PowerShot S90. I think it's the best subcompact on the market right now. Shoots high ISO, includes a fast f/2.0 lens, and is beautiful.

Monthly Photo Assignment

Wrinkles is the Nov. 2009 Photo Assignment. Keep in mind that side lighting increases texture and front lighting hides it. So you should be thinking angled lighting for this one. You can read more about how to submit on our Member Participation page. Deadline for entry is Nov. 30, 2009.

More Ways to Participate

Want to share photos and talk with other members in our virtual camera club? Check out our Flickr Public Group. It's a blast!


twitter.jpg Follow me on Twitter

-


Podcast Sponsors

SiteGrinder lets you take ownership of your websites. Effortlessly output pages right from Photoshop.

Red River Paper -- Try the $7.99 Sample Kit.

Add Magic to Your Slideshows -- FotoMagico presentations are so amazing that your audience will be asking how you did it.


Technorati Tags: , , , , ,

Digiscoping is the art of using a spotting scope to increase the lens magnification of a compact camera. I first heard about the practice when birders with expensive monoculars would try to get photos of their subjects by holding their digicams up the eyepieces of their scopes and taking pictures.

When I was at the very top of Oracle Arena Friday night for a Warriors game, I had the Canon PowerShot S90 in my pocket and an Orion EagleEye 8x32 Wide-Angle Monocular around my neck.


Both of these images are from the upper part of the second deck at Oracle Arena in Oakland, CA. The top shot was digiscopped while the bottom image was captured with the Canon S90 at 105mm. (Click to enlarge.)


Right before tip-off, I had what I call a Reese's moment: what if I did my own brand of digiscoping using the monocular as a tele-extender for the S90? After all, the S90 can handle high ISOs and the zoom lens seemed like it would fit OK with the eye piece for the Orion. And did I mention that I was way up there in the cheap seats?

My first digiscoping inclination was to zoom the S90 all the way out to 105mm so the image filled the frame while I held the monocular in front of the lens. But I had a hard time getting a sharp image with this configuration. So I then back it off to 85mm, and finally got the best results at 50mm. The only downside to this approach was that I had an image circle in the middle of the frame with black all around it. But it was worth it to get the sharper picture. You can see this effect with the Greg Oden photo. For the shot of the jump ball (top of the article), I cropped out the black area.


Here's Greg Oden of the Portland Trailblazers preparing to shoot a free throw. The scoping effect will be cropped out later. (Click to enlarge.)


I played with a lot of settings on the S90, and most of them worked OK. I had to keep the ISO at 800 or above to deal with the lighting and the optics. At one point, I switched to the Low Light setting on the mode dial, and just left it there. Even though I lost some resolution doing so, it was just so easy, and the images looked better than at many of the other settings.

Obviously this kind of DIY rig isn't for serious work. If I were covering this game as a shooter, I'd be down on the floor with my DSLR and fast glass. But on this night, I was just a spectator in the cheap seats with a little time on my hands. And this is yet another example of: the best camera is the one you have with you.

More Articles About the Canon S90

Five Lesser Know (but very cool) Features on the Canon S90

Canon S90 Raw Processing Comparison: DPP vs ACR 5.6 RC

Did Canon Really Improve Image Noise with the PowerShot S90?

"Compacts for Serious Shooters" - Digital Photography Podcast 201

Is the Canon S90 the New G11?


twitter.jpg Follow me on Twitter

-


Of all the DIY projects we write about, light modifiers are still my favorite. I have a nifty collection of flash diffusers and unusual lighting tricks that I think you'll want to keep in your back pocket.

The DIY Flash Diffuser with Paper and Rubber Band is one of the coolest and simplest devices to date. All you need is an old press release and a rubber band.

paper_flash_diffuser.jpg

And don't forget about this Ring Flash Diffuser for a compact camera. Finally, a legitimate use for styrofoam.

Here's a collection of Five Poorman's Lighting Mods from DIYPhotography.net. I think the barf bag flash diffuser might be my favorite from this list.

And finally, one of the all time classics is to use a windshield reflector from your car as a fill light for outdoor portraits. My favorite of these reflectors (designed to keep your car cool on hot days) has white on the inside and silver on the out. This gives you two surfaces to choose from depending on how intense your fill light needs to be. Give it a try!


twitter.jpg Follow me on Twitter

-


Raw processing: it's harder than it looks. I was thrilled to see that Adobe has released Adobe Camera Raw 5.6, Lightroom 2.6 Release Candidates that supports 19 new Raw profiles, including for the Canon PowerShot S90. I like using the Bridge/ACR workflow for quick turnaround jobs, and being able to bring the S90 into that flow is terrific news.


Comparison of an S90 raw file processed in Canon's Digital Photo Professional (left) and ACR 5.6 RC (right). The Bridge preview (middle) shows just how much work the two processors do before you ever move a slider. You can see full size versions on the Digital Story Flickr page. (Click to enlarge).


But Raw processing often includes more than just getting the exposure and color right. In the case of the S90, it also has to correct for distortion and handle other important aspects of making the picture look good. I had already processed Raw files using Canon's own Digital Photo Professional, and the images shaped up nicely. How would the Adobe ACR 5.6 Release Candidate stack up?

As it turns out, quite well. I've included an S90 shot here that was captured at the wide end of the lens (7.5 mm, or about 35mm in standard terms). There was quite a bit of distortion as you can see in the uncorrected version that I previewed in Bridge (middle). But when I opened the picture in ACR 5.6 RC (right), you can see that much of the distortion was corrected. Wow! I expected DPP to do that (left), but was crossing my fingers that ACR was up to the task as well. And it is.

You can see bigger versions of all three images on the Digital Story Flickr page. You'll notice that ACR does interpret the file differently than DPP. I used the "Standard" profile for DPP, and the "Camera Standard" profile in ACR. I tried to add the same amount of sharpening in ACR that DPP automatically adds, but didn't make any other adjustments in either application. I then took a high resolution, 100 percent, screenshot of each of the processed previews.

I like the interpretations by both DPP and ACR. I give the initial processing nod to DPP, but have better tools for adjustment in ACR. Compare either to the preview in Bridge, and you'll see just how excellent they both are.

For my own work, I'll probably use ACR 5.6 or Lightroom 2.6 most of the time for the Canon S90. But for certain images, I won't hesitate to open them up in Digital Photo Professional to see how Canon renders the file. Options are good, and we have two excellent ones here.


twitter.jpg Follow me on Twitter

-