Recently in Photography

  Page 200 of 385 in Photography  

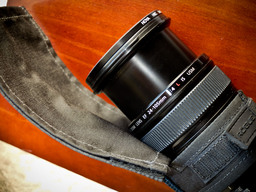
To help protect the front element of my Olympus M.Zuiko 17mm lens,I like the $7.29 Rainbowimaging 37mm Vented Metal Hood Shadethat screws into the front threads. The vented hood is extremely light, which is important as to not stress the autofocusing mechanism of the 17mm prime.

vented_lens_hood

I did a vignette test with the Rainbowimaging lens hood on the 17mm just to make sure they were compatible. It looks pretty good. Just a smidge in the corners. But you decide for yourself.

vignette_test.jpg Vignette test for Rainbowimaging lens shade on Olympus 17mm f/2.8 pancake lens.

Personally, I like the way the Rainbowimaging lens shade looks on the 17mm, especially on my PEN mini. It's a good value and well made.


Take a look at the Olympus Micro Four Thirds Gear Guide for an overview of cameras, lenses, and accessories.

Macworld/iWorld on January 31

macworld_2013.jpg

I'm be hanging out at the Macworld/iWorld event in San Francisco on the afternoon of Thursday, Jan 31, 2013. If you're in town and attending the show at Moscone West, be sure to look me up and say hi.

Best way to connect will be at the Digital Photography Panel Discussion (on main stage, I believe) led by Macworld Editor Jackie Dove at 2pm on Thursday. I'm on the panel with other Macworld writers including Mark Spencer, Gary Adcock, and Jeff Carlson. After the 45-minute panel, I'll explore the exhibit hall.

The Macworld event itself looks terrific. Lots of interesting talks and exhibitors. Hope to see you there.

Aperture Tips and Techniques

To learn about Aperture, check out my Aperture 3.3 Essential Training (2012) on lynda.com. Also, take a look at our Aperture 3 Learning Center. Tons of free content about how to get the most out of Aperture.


The Digital Story on Facebook -- discussion, outstanding images from the TDS community, and inside information. Join our celebration of great photography!


I've had a hankering to play with fisheye photography, but didn't have the budget for a lens for my OM-D. So I spent $16 and bought the 3in1 Fisheye Wide Angle Macro Lens kitfor my iPhone 4S. I went with this budget kit because it was affordable and included a snap-on case for the iPhone. That way I didn't have to apply any adhesive to the phone itself.

Plastic Vitamin Water Bottle
Inside of a plastic Vitamin Water bottle

I carry the lens in my pocket, then make crazy photography shots when I have a moment or two of downtime during my everyday life.

Beauty Salon
Beauty Salon

I'm having a blast, and I'm "scratching that fisheye itch" without dinging my credit card.


Join me on my Instagram site as I explore the world of mobile photography.

I like making short movies and publishing them online. And I like trying different looks. So I decided to give the Dramatic Tone art filter a spin for my latest YouTube endeavor. The art filters for the Olympus OM-D E-M5can be used for both still photography and movies.

Since this was a "quickie," I recorded the piece using the onboard microphone for the OM-D. A Joby GP3 GorillaPodsteadied the camera while recording. And for the lens, I used the Panasonic LUMIX G X VARIO 12-35mm/F2.8 zoomwith the aperture set wide open. I edited the clips and added the Ken Burns effect in Aperture 3.4

The Dramatic Tone look intrigues me. For some scenes, like the first shot of the wall safe, I really like it. For skin tones, I don't care for it at all.

For a more sophisticated movie project, I'd probably limit the use of the filter to specific scenes. The trick would be blending the overall visual feel for the video using different filters and lighting.

But the only way you really get to know this stuff is to fire up the camera and make a movie. After doing so, you can analyze what you like and don't like, then incorporate that knowledge into your next project.


Take a look at the Olympus Micro Four Thirds Gear Guide for an overview of cameras, lenses, and accessories.

This week stories: Hands on with the Canon PowerShot N, falling in lust with the Fujifilm X20, and the Return of Drobo, Part 4.

Story #1 - The Canon PowerShot Nfeatures a powerful 28-224mm optical zoom, 12 MP sensor, touchscreen LCD that flips open, one button WiFi connectivity to your mobile device, stunning creative filters that can automatically be applied, and it's "shirt pocket" small. Price will be $299 this April.

I thought it was the most innovative consumer camera at CES.

But is it innovative enough for nimble photographers to slide into their pockets when they already have a capable smartphone?

Story #2 - The Fujifilm X20 ($599)reminded of just how handsome and capable a compact camera can be. Inside its die-cast magnesium body is a new 12MP 2/3" X-Trans CMOS II sensor coupled to a Fujinon 28-112mm f/2-2.8 zoom lens. Fuji's sensor is larger than much of its competition, including the Canon G15 and Panasonic LX7 that both use 1/1.7" chips.

The X20 now features an advanced optical zooming viewfinder that has an information overlay so you can see the current exposure settings while composing the shot. This is well implemented, and a welcome upgrade to the x10's viewfinder, which was good to begin with.

Additional features include an Intelligent Hybrid AF System, full HD 1080 video at 60fps, RAW capture, built-in film filters.

Story #3 - The Return of Drobo, Part 4. Since only my MacBook Pro Retina Display has Thunderbolt connectors, which I had been using for this project, I decided to try out the Drobo 5D using its buff USB cord included in the kit, and connecting it to my second generation (2009) MacBook Air.

For sorting and viewing images in Aperture reading the library located on the Drobo, performance was quite good. Where I noticed a difference was loading the data for RAW files in the Adjustments Inspector. There was a short delay from the time I opened the image until the adjustment tools were ready for use.

My conclusion is that I can view images, add metadata, and sort from the Aperture library using the humble USB 2 connection from my older MBP Air. But if I want to engage in serious image editing of RAW files, I should use the Thunderbolt connectivity on my newer MBP Retina Display.

Keep in mind however, that the USB port on the 5D is version 3. I was using USB 2 on my MBP Air. In the next installment, we'll see how USB 3 fares on the newer MBP.

Listen to the Podcast

You can also download the podcast here (29 minutes). Or better yet, subscribe to the podcast in iTunes. You can support this podcast by purchasing the TDS iPhone App for only $2.99 from the Apple App Store.

Monthly Photo Assignment

The January 2013 photo assignment is Self Timer.

More Ways to Participate

Want to share photos and talk with other members in our virtual camera club? Check out our Flickr Public Group. And from those images, I choose the TDS Member Photo of the Day.

Podcast Sponsors

Red River Paper -- Keep up with the world of inkjet printing, and win free paper, by liking Red River Paper on Facebook.

Make Your Photos Sizzle with Color! -- SizzlPix is like High Definition TV for your photography. Special Offer! They're offering a 14% discount for Valentine's Day gifts to significant others, spouses, children ... pix of pets, etc. Valentines day is a month from now, Feb. 14. Orders received by January 30 shipped in time. Just add TDS to the comments field to receive your discount.

Need a New Photo Bag? Check out the Lowepro Specialty Store on The Digital Story and use discount code LP20 to saven 20% at check out.

lomography_film_scanner.jpg

I know I'll never digitize my entire film catalog. But with the The Lomography Smartphone Film Scanner, I can choose images from my catalog, scan them with my iPhone, and use them immediately on Flickr, Instagram, Twiter, Facebook, and The Digital Story.

It's a Kickstarter program that still has openings at the $50 level and above. Delivery is scheduled for March 2013.

It's a clever idea that not only allows us to use our old slides and negatives, but encourages photographers to fire up their film cameras and burn a roll or two. I'll report more when I have the scanner in hand.


twitter.jpg Follow me on Twitter


It's easy to create your own image effects in Aperture, complete with previews. Think of them as recipes that you can replicate time and time again "This is delicious! Can you make this again?" "Indeed I can!" Here's a "vintage look" that I use to soften the color and create a more timeless rendering.

save_as_effect.jpg

The settings are easy: Set Vibrancy to -1, Saturation to 0.72, and Sepia Tone to .13 - plus I like to add a little Devignette too. Use the "Add Adjustment" popup menu to include any of these settings that might not already appear in your Adjustments Inspector.

Then go to the Effects popup menu, to the right of Add Adjustment, and select Save as Effect from the menu. By doing so, you'll jump over to the Edit menu with an "Untitled Effect" added to the list (that is holding the image adjustments you've used for the photo). Give your new effect a name and hit Return. Then drag it to the group of effects where you'd like it to reside.

previewing_preset.jpg

In my case, I called this effect "Vintage 2" and added it to my Color set. I can now preview this effect on any image by simply mousing over its name to generate a smaller popup with the effect applied. If I like the way it looks on a different photo, I simply click on the effect name, and presto!

You can create as many effects as you wish. So, if you stumble up a good look while image editing, save it as an effect. You can then apply it to other images up the road.

Aperture Tips and Techniques

To learn more about Aperture, check out my Aperture 3.3 Essential Training (2012) on lynda.com. Also, take a look at our Aperture 3 Learning Center. Tons of free content about how to get the most out of Aperture.

Canon PowerShot N to the Rescue?

In my recent TechHive article titled, Can Canon save the point and shoot?, I noted that compact camera sales have languished over the last two years.

Canon PowerShot N Canon aims to shake up the point and shoot market with a truly unique camera.

I think there are three primary reasons for the doldrums.

  • Money is tight and consumers probably already have an older camera around the house.
  • Tantalizing smart phones such as the iPhone and Galaxy S have terrific cameras; good enough to be seen as replacements for aging compacts.
  • Point and Shoots were not innovating. This year's model looked just like last year's.

My guess is that Canon started working on the PowerShot N a couple years ago when the decline began. What they came up with is innovative, attractive, functional, and refreshing. The PowerShot N complements your mobile photography; it doesn't compete with it.

It features a powerful 28-224mm optical zoom, 12 MP sensor, touchscreen LCD that flips open, one button WiFi connectivity to your mobile device, stunning creative filters that can automatically be applied, and it's "shirt pocket" small.

It looks different than every other compact on the planet, and once paired with the Canon CameraWindow app for iOS or Android, will help you post more impressive images on Instagram, Flickr, Facebook, and Twitter.

I've already preordered the PowerShot N in black for $299 to use for my mobile photography. I'll let you know when I receive it, hopefully in April as planned.

For more details about the camera itself, check out my TechHive article.


Join me on my Instagram site as I explore the world of mobile photography.

klearscreen_cloth.jpg

My MacBook Pro Retina Display screen didn't like my existing cleaning cloths. All I would get smear instead of clear. In fact the only thing that worked at all was the small cloth Apple included in the kit. So my quest began for a nice, large microfiber cloth that worked on all of my Retina displays, including the MacBook Pro.

My salvation was realized at CES. Over at the Klear Screen booth they introduced me to the Klear Screen DMT Antimicrobial Microfiber Cloth for $9.95. Unlike my existing Klear Screen cloths, this one has two distinct textures. That extra "tooth" is what I needed to get the gunk off my super glossy MacBook Pro screen. And the big size is much easier to work with than the small Apple cleaning cloth.

The DMT works great on the iPad and iPhone too. As a bonus, the antimicrobial treated cloth is designed to eliminate up to 99 percent of the bacteria inside the cloth after cleaning a surface. I'll take it!

I keep the Klear Screen DMT Microfiber Cloth in my backpack and now have shiny, clean screens on all my devices. It's the small things in life that make it better.


twitter.jpg Follow me on Twitter


fujifilm_x20_front.jpg

Fujifilm has tempted me since initially releasing the X10. Now they've done it again with the X20.

DPReview just published their Fujifilm X20 hands-on preview, and it looks like my temptation will become even more intense.

I spent some time with the Fujifilm X20 at CES and was reminded of just how handsome and capable this compact camera is. Inside its die-cast magnesium body is a new 12MP 2/3" X-Trans CMOS II sensor coupled to a Fujinon 28-112mm f/2-2.8 zoom lens. Fuji's sensor is larger than much of its competition, including the Canon G15 and Panasonic LX7 that both use 1/1.7" chips.

In terms of use, the X20 now features an advanced optical zooming viewfinder that has an information overlay so you can see the current exposure settings while composing the shot. This is well implemented, and a welcome upgrade to the x10's viewfinder, which was good to begin with.

But what really brings all of these specs to life is the look and feel of the camera. It is flat-out handsome, and feels solid and competent in the hand. This quality comes at a price. You can preorder either the black, or the new silver and black model pictured here, for $599 at B&H Photo. Considering the specs I mentioned earlier, plus the Intelligent Hybrid AF System, full HD 1080 video at 60fps, RAW capture, built-in film filters, and more, this camera is a quality investment for photographers looking for a capable all-in-one camera to complement their DSLR kit.


twitter.jpg Follow me on Twitter