Recently in Photography

  Page 291 of 385 in Photography  

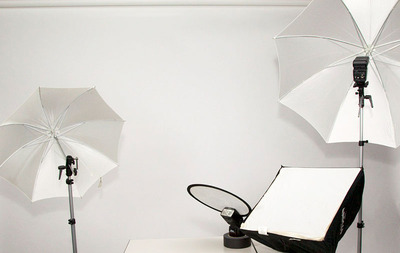
"A local photo group held a 'practice with models' photo shoot," writes Jo-Ann Ash Fairbanks. "I thought the photographers were more interesting than the models, so I spent my evening shooting the shooters."

Photo by Jo-Ann Ash Fairbanks. Click on image to zoom to larger size.

If you have a candid you'd like to share, take a look at our Submissions page, then send us your Grab Shot. We'll try to get it published for you on The Digital Story.

And you can view more images from our virtual camera club in the Member Photo Gallery.


The Digital Story Podcast App is the best way to stream or download weekly TDS podcast episodes. No more syncing your iPhone or iPod Touch just to get a podcast. And there's more! Tap the Extras button for free passes and discounts and the current Grab Shot by our virtual camera club members. Each podcast episode has its own Extras button, too, that contains more goodies such as pro photo tips. And the best part is, The Digital Story Podcast App is your way to help support this show.Download it today!


twitter.jpg Follow me on Twitter

-


Technorati Tags: , , ,

String Monopod

How about a monopod that weighs less than half an ounce? TDS virtual camera club member Brian Reynolds writes:

"I never really liked traditional monopods. What I have found to be very useful is what some people call a string monopod.

Here's how to make one version of this device.You need a 1/4x20 eyebolt, two 1/4x20 nuts, and a length of clothes line (or any line that doesn't stretch). Put both nuts on the eyebolt, and then carefully attach the eyebolt to the camera's tripod mount. If you over tighten the eyebolt you can damage the camera's bottom plate. Gently tighten one of the nuts against the camera's bottom plate, and then tighten the other nut against the first. The nuts will prevent you from over tightening the eyebolt when you re-attach the eyebolt later. Now you tie the rope to the eyebolt.

To use the string monopod attach it to the camera, drop the rope on the floor, step on it, and then pull up to put tension on the rope.

I've had very good luck with this. For last year's Solo Photo Book Month project, I shot on the streets of Manhattan with a handheld Yashica Mat 124G and a string monopod. I was able to use shutter speeds as low as 1/30 second.

So, if you're not the trekking pole type, the string monopod might be just the solution for you on the trail.

Thanks Brian! If you have a great outdoor tip, or favorite piece of equipment, send it along to me. I'll feature reader submitted tips on a regular basis.

Previously in Outdoor Gear for Photographers

"The Great Outdoors" - Digital Photography Podcast 218

Portable Camera Stability - Outdoor Photo Tip #2

Sunset Portraits - Outdoor Photo Tip #1

New Series on Outdoor Gear for Photographers


twitter.jpg Follow me on Twitter

-


auto_curves_buttons.jpg

When Apple added the Curves adjustment brick to Aperture 3, they pulled out all of the stops. In addition to the typical "set a point and drag it" curves dialog, there are two Auto adjustments -- Auto Curves Combined (left button) and Auto Curves Separate (right button). "Combined" makes an auto adjustment based on total luminance without affecting color. "Separate," the flavor that interests me more, also corrects color because Aperture individually evaluates and sets curves for each channel: red, green, and blue. You can see a before and after on the images below (click to enlarge).

Before Curves Adjustment

Master file before Auto Curves Separate adjustment in Aperture 3

Auto Curves Separate Adjustment

Image after Auto Curves Separate adjustment in Aperture 3

For my tastes, I get the best results from this useful tool by going to the Advanced tab in Aperture 3 Preferences, and setting the "Auto adjust Black Clip" and "Auto adjust White Clip" to 0%.

aperture_preferences.jpg

This prevents overly contrasty auto adjustments that have to be manually corrected later. I'm not implying that Auto Curves Separate is always the final solution. But for many images, it's the only global exposure and color correction you many need. It's worth a close look.

More Aperture Tips and Techniques

To learn more about Aperture 3, check out my Aperture 3 Essential Training on Lynda.com. Also, take a look at our Aperture 3 Focus Section. Tons of free content about how to get the most out of Aperture.


twitter.jpg Follow me on Twitter


Snail Close Up with LP-Micro Litepanel

I recently added a Litepanels LP Micro Compact LED Light to my DSLR kit. In part, because I wanted a continuous light for close up photography and for video with the Canon 5D Mark II. I chose the Litepanels Micro because it has good output for a small light, is 5600K daylight balanced, has an adjustable intensity knob, uses 4 AA batteries, and it's virtually heat free.

Even though the panel is over 3" wide, the light sometimes seemed a little harsh for certain subjects. I decided that I wanted to make a diffuser for the Litepanel, so I constructed one using only a letter-sized sheet of paper and a large rubber band.

First thing I did was mount the LP Micro backwards in the hot shoe so it sat back on top of the camera. I then folded the paper as shown to create a larger surface area and attached it to the Litepanel with a rubber band. I cranked the power all the way up, mounted my Sigma 50mm f/1.4 lens on the Canon 5D Mark II, and increased the ISO to 1600. I shot in Aperture Priority mode at f/2.8 for this shot of the snail. (Click on the image for an enlarged view.)

LP-Micro DIY Diffuser

With the diffuser, the quality of the light was much softer, yet, there were still nice highlights in the photo. I shot the picture at night when the snails were out having their meals. Even diffused, there was enough output from the Litepanel for me to shoot at 1/30 at f/2.8 in the darkness. Because the light is continuous, I can better compose the shot, and work quickly.

The Litepanels LP Micro Compact LED Light is not cheap: about $275. But I like having it in my kit along with a regular flash for these types of subjects.

Photographs by Derrick Story. Click on images to enlarge.


twitter.jpg Follow me on Twitter

-


Nature and photography. Talk about a match created in heaven. In this podcast I give you some background on the brand new series of articles covering life in the great outdoors. I've enjoyed camping, backpacking, and day hiking since I was a kid, and have learned quite a few things along the way. Now, on The Digital Story, I've created a series of articles that combines photography and outdoorsmanship. Whether you're an avid adventurer or armchair naturalist, I think you're going to enjoy this series.

REI Halfdome 2 Tent

Photo of an REI Half Dome 2 Tent in the foreground (without rain cover) captured with a Canon S90 compact.

Listen to the Podcast

You can also download the podcast here (24 minutes). Or better yet, subscribe to the podcast in iTunes. You can support this podcast by purchasing the TDS iPhone App from the Apple App Store.

Previously in Outdoor Gear for Photographers

Portable Camera Stability - Outdoor Photo Tip #2

Sunset Portraits - Outdoor Photo Tip #1

New Series on Outdoor Gear for Photographers

Monthly Photo Assignment

Flash is the March 2010 Photo Assignment. You can read more about how to submit on our Member Participation page. Deadline for entry is March 31, 2010.

More Ways to Participate

Want to share photos and talk with other members in our virtual camera club? Check out our Flickr Public Group. It's a blast!


twitter.jpg Follow me on Twitter

-


Podcast Sponsors

Red River Paper -- Try the $7.99 Sample Kit.

Make Your Photos Sizzle with Color! -- SizzlPix is like High Definition TV for your photography.


Technorati Tags: , , , , ,

Lightroom 3 Public Beta

New goodies in the latest release of Photoshop Lightroom 3 beta include: "tethered shooting support for select Nikon and Canon cameras, the ability to import and manage video files from DSLR cameras for a streamlined workflow and additional behind-the-scenes architecture enhancements for faster importing and loading of images. The addition of luminance noise reduction to the color noise reduction options already available in the beta helps photographers achieve overall exceptional image quality from high ISO images. The import experience and watermarking functionality have also been modified to reflect feedback received from the Lightroom community during the first beta period."

Some serious stuff indeed. I love the video handling capability and have been waiting to test the luminance noise reduction. Life just keeps getting better and better.

You can download the latest version from Adobe Labs.


twitter.jpg Follow me on Twitter

-


star_camera.jpg

You've invested time and money in your photography. Wouldn't it be nice to earn a little in return? I just read a pretty good article on Virtural Photography Studio titled 12 Ideas To Make Money With Your Photographs. There were a few things on the list that had never crossed my mind, such as networking with local designers and contractors to provide artwork for model homes and helping to decorate local furniture stores.

Freelance photography is fun, and the income provides a means to reinvest in your passion. Maybe this article will lead to a good business idea for you.


twitter.jpg Follow me on Twitter

-


One of the biggest challenges when you're a sports fan is getting a few memorable shots from the event and stay within the venue rules for photography equipment. Fortunately, with my compact Olympus PEN E-PL1and an old Zeiss 135mm f/2.8 lens from my Contax film days, I'm able to sit in the (not so) cheap seats and still come away with a few nice images. The E-PL1 doesn't look like a pro camera with its stock lens mounted, so I don't raise any eyebrows when passing through security.

Andrew Bynum Dunk

This shot of the Lakers center, Andrew Bynum, dunking the ball was recorded from the upper deck. Since the E-PL1 is a micro four thirds camera, it doubles the focal length of any lens I mount on it. So using an adapter, my 135mm Zeiss becomes a 270mm f/2.8 telephoto. Shooting wide open at f/2.8 with an ISO of 1600, I was able to use an action-stopping shutter speed of 1/640. (Click on image to see larger version.)

As with any sporting event, there are lots of missed shots too. But as long as I'm able to come away with a handful of keepers, and have a good time, I'm thrilled with the outcome.

More Articles About the Olympus E-PL1

Olympus E-PL1 Review: Working in iAuto

Hands On Preview of the New Olympus E-PL1 PEN

Micro Four Thirds - Digital Photography Podcast 216


twitter.jpg Follow me on Twitter

-


Scene modes on your compact camera are useful shortcuts for dealing with difficult lighting conditions. In this free, 4-minute video tutorial from my Lynda.com title: Getting Pro Results from a Compact Camera, I show you the most important scene modes and how to use them.

If you haven't seen my course, Getting Pro Results from a Compact Camera , it's a combination of studio live action (as seen here), live action in the field showing actual shooting techniques, and screencasting where we review the results on a computer and discuss how the techniques worked. I think it's one of my most effective training titles. I hope you check it out.


twitter.jpg Follow me on Twitter

-


TrekPOD

Stabilizing your camera, especially if you zoom out the lens for telephoto shots, can be important on the trail. We have a couple options here for you to consider.

TrekPod GO! PRO Monopod/Tripod/Walking Stick Combination with MagMount Pro Ballhead

TDS member Ed Shields writes: "I've used a TrekPod GO PRO, which is a great concept; combination monopod, tripod, hiking stick, but at $175, it's not cheap. Also at roughly 30 oz, I find it too heavy to use as a hiking stick, and now rarely use it except on very short hikes."

"The majority of the time that I shoot with it, I use it in its tripod configuration for long duration shots (water falls and other moving water and/or hiking group shot). If I had it to do over again, I'd just use my current Leki hiking stick and go for a small, lightweight tripod that I can carry with my day pack. I hike with a Panasonic G1."

LEKI Sierra Antishock Trekking Pole

Which leads us to a second consideration. Why not use a true trekking pole that has a tripod screw built-in? The LEKI Sierra Antishock Trekking Pole is the model I've been using for recent hiking and backpacking trips.

leki.jpg

It's light enough for all day hikes, has a removable rosewood knob on top that reveals a tripod screw with a tightening disk, and it extends to 145 cm for comfortable shooting. When on the trail, I remove the rubber cover to reveal the Carbide tip. The built-in anti-shock system is a real blessing on hard surface hiking. I also use the pole to prop up my backpack and to hang laundry while in camp. At $76, it has already provided many miles of use in the great outdoors.

If you have a favorite way to stabilize your camera when on the trail, please post a comment!

Previously in Outdoor Gear for Photographers

Sunset Portraits - Outdoor Photo Tip #1

New Series on Outdoor Gear for Photographers


twitter.jpg Follow me on Twitter

-