Recently in Photography

  Page 72 of 385 in Photography  

One of the things that I like about catching a ride with Uber or Lyft is that I can enjoy a little photography along the way.

Skateboarder.jpg "Skateboarder with Dog" - Captured from the front seat of an Uber ride when leaving Haight Ashbury for downtown SF. Olympus PEN-F, 14-42mm EZ lens, processed in Photos for macOS with the Luminar 2018 editing extension. Photo by Derrick Story.

I've never had a problem taking a seat in the front with either Uber or Lyft drivers. This enables me to shoot both ahead, and to the side. I do ask before rolling down the side window, however.

As for the straight-ahead shots, I pay close attention to the reflections in the windshield. Many times, especially in big cities with tall buildings, they're not a problem. But when on the open highway in bright sun, they can present a challenge.

I typically use a compact zoom lens for this type of photography. My goal, besides getting the shot, is not to appear too serious or professional. I don't want to make the driver or the subjects uncomfortable. I'm just a tourist enthralled by the exciting sights and sounds of the city.

Letting someone else drive the car has so many advantages, including the bounty of photo opportunities. Maybe someday, when self-driving cars become the norm, this will become even easier.

Rock Luminar with my new Essential Training

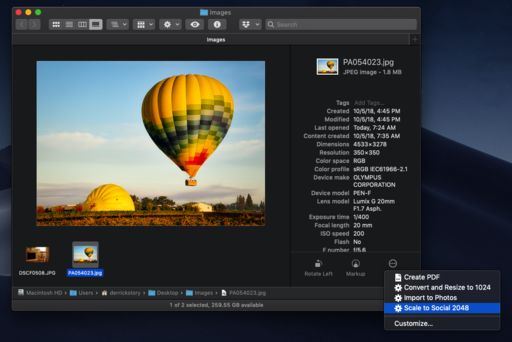
That's how I processed this shot...

You learn all the ins and outs of Luminar 2018 via my Essential Training on lynda.com and on LinkedIn Learning. It's fun, and I promise, you will learn a lot.

You can share your thoughts at the TDS Facebook page, where I'll post this story for discussion.

olympus-fisheye.png

It's amazing. With all of the great optics that I have access to, the one lens that I always have with me is the $98 Olympus Fisheye Body Cap 9mm f/8 lens.

It's about the size of an Oreo cookie, weighs 1 ounce, yet covers 140 degrees and incorporates 5 elements in four groups.

It's manual focus with 3 settings for infinity, medium range, and close up. You don't need anymore than that because of its tremendous depth of field thanks to the optical design, fixed f/8 aperture, and micro four thirds sensor. I use the "body cap" lens on all of my Olympus and Panasonic cameras.

When traveling, the fisheye allows me to capture images that I would otherwise have to pass on. For example, on the last day of our TDS San Francisco Street Photography Workshop, we celebrated our success at one of my favorite restaurants in Chinatown. I love the big round tables with a lazy susan in the middle. The food begins to arrive from the kitchen, and everyone shares in the bounty.

Chinese-Lunch-1024.jpg "Lunch in Chinatown" - We celebrated our workshop efforts, and I was able to capture it with my E-M1 Mark II and the $98 fisheye lens. Photo by Derrick Story.

That's when I pull out the fisheye (from my pocket in this case) and capture the moment. We have 9 people around the table and just as many entrees - no sweat for the 140 degree field of view with the Olympus lens.

There are certainly higher quality optics on the market. But how much space do you want to dedicate to a fisheye lens, and how much of your budget would you allocate? In this case, it's less than practically any other lens, and smaller too. And that's why I never leave home without my Olympus Fisheye lens.


Nimble Photographer Logo

TheOlympus Fisheye Body Cap lens has a high Nimbleosity Rating. What does that mean? You can learn about Nimbleosity and more by visiting TheNimblePhotographer.com.

Want to Comment on this Post?

You can share your thoughts at the TDS Facebook page, where I'll post this story for discussion.
This is The Digital Story Podcast #633, May 1, 2018. Today's theme is "Street Photography 2.0." I'm Derrick Story.

Opening Monologue

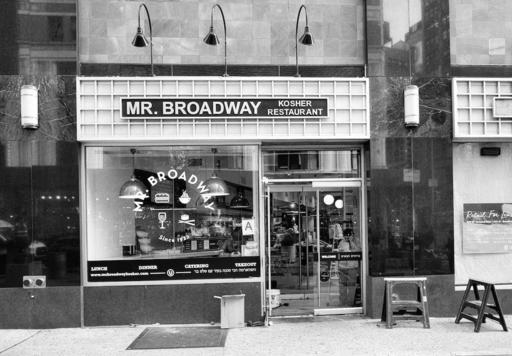
Many people think of street photography as this stealthy activity that can lead to confrontation if the subject suddenly detects their being the unsuspecting target. But there's another approach, and it's one where the photographer openly integrates with the environment instead of hiding within it. I call this technique Street Photography 2.0, and it's the subject of today's TDS podcast.

Street Photography 2.0

I think some folks are nervous about street photography because of the way it's often portrayed online. But I think it can actually be a very fulfilling activity.

P4284328-Luminar-1024.jpeg Stephanie Zhu attracting attention in Chinatown, San Francisco. Photo by Derrick Story.

Here's how:

  • It's Not Us vs Them - The idea of going to battle and engaging in confrontation might appeal to some personalities, but that's not the way I do it. Everyone has something to do when in public: going to work, shopping, visiting friends, searching for shelter, etc. Our activity on this given day is to take pictures. We are part of the ecosystem.
  • Know When to Hold Em; Know When to Fold Em - That being said, you have to have your finger on the pulse of the environment you're working in. There are times when you need to keep your gear tucked away and out of sight. And there are some people who you need to stay away from.
  • Be Complementary - When you approach a potential subject, make a note of what you find attractive about them. Is it their wardrobe, an accessory, an attitude? It could be a smile. When your introduce yourself, complement them as well and say that you would like a portrait. That complement will go a long ways toward winning them over.
  • Work Quickly - Have your camera configured for the shot before you approach the subject. Once they give you approval, complete the shoot within 20 seconds. Don't make them regret giving you permission.
  • Be a Man or a Woman of Your Word - If they ask for a copy of the picture, then give them your card, tell them to email you, and you will reply with the photo. Follow through is very important to us maintaining our reputation on the streets.

By being genuine, smart, and respectful, you can capture wonderful images on the street without drama and deceit. At the end of the day, you'll like your pictures and yourself as well.

More on DxO Labs chosing to file for Chapter 11 Bankruptcy Protection

"We are very confident that this procedure, which should not last for more than a few more weeks, will not affect our customers in any way. In fact, we are pleased to announce the following upcoming product releases:

  • In June, we will release a free update (version 1.2) of our flagship software, DxO PhotoLab. Recently awarded the TIPA 2018 Award for Best Image Processing Software, this latest version of DxO PhotoLab will include improved local correction features, and will add support for 7 cameras, including the Canon EOS 2000D and the Sony A7 III. This release will also be an opportunity for us to reiterate our commitment to the "perpetual license" model (as opposed to a subscription model) that allows our customers to update their products according to their needs, rather than in a constrained manner.
  • In June, we will release the new version of the Nik Software Collection, which DxO acquired from Google at the end of 2017. Much awaited by the Nik software community, this first "by DxO" version focuses on fixing bugs that up until now could disrupt the user experience, as well as on ensuring full compatibility with the latest Mac OS and PC platforms.

Great Online Training Titles for Efficient Learning

I have some terrific photography titles on both LinkedIn Learning and lynda.com. You may want to visit my lynda.com Author Page or my LinkedIn Learning Author Page. Here's a look at some of the titles waiting for you.

  • Capture One Pro 11 Essential Training
  • Luminar Essential Training
  • Photos for macOS High Sierra Essential Training
  • Dropbox for Photographers
  • Sharing Photos with Flickr
  • A Photographer in Cuba
  • High School Seniors Portrait Photography

Signed Print Giveaway - If you watch one chapter for any of my training videos on lynda.com or LinkedIn Training during the month of May, send me a notification after the viewing via the Contact Form on The Nimble Photographer. (You can sign up for a free trial on lynda.com.) Just say, "I watched a chapter on lynda.com or LinkedIn Learning!"

You name will be entered into a drawing for a signed print from the Maui Project. The lucky recipient will be announced on the June 5, 2018 podcast. (Promotion ends on May 31, 2018. Void where prohibited.)

Aerial Photography Workshop

Public registration is now open for the Sonoma Country Hot Air Balloon and Drone Photography Workshop, June 8-10, 2018. We're combining two very fun aerial activities into one workshop. Be sure to get on the Reserve List for this one!

Reservation Forms have been sent for the Burney Falls and Lassen Volcanic National Park Workshop

We have our cabin reservations secured for Sept. 27-29, 2018 for the Burney Falls and Lassen Volcanic National Park Workshop. I sent out reservation forms this last weekend. So if you are on the reserve list, you should have received an invite.

Updates and Such

You can become a member of our Inner Circle by clicking on this link or by clicking on the Patreon tile that's on every page of The Digital Story.

B&H and Amazon tiles on www.thedigitalstory. If you click on them first, you're helping to support this podcast. And speaking of supporting this show, and big thanks to our Patreon Inner Circle members:

And finally, be sure to visit our friends at Red River Paper for all of your inkjet supply needs.

See you next week!

More Ways to Participate

Want to share photos and talk with other members in our virtual camera club? Check out our Flickr Public Group. And from those images, I choose the TDS Member Photo of the Day.

Podcast Sponsors

Red River Paper - Keep up with the world of inkjet printing, and win free paper, by liking Red River Paper on Facebook.

The Nimbleosity Report

Do you want to keep up with the best content from The Digital Story and The Nimble Photographer? Sign up for The Nimbleosity Report, and receive highlights twice-a-month in a single page newsletter. Be a part of our community!

Want to Comment on this Post?

You can share your thoughts at the TDS Facebook page, where I'll post this story for discussion.

The Keystone correction tool can be found in the Capture One's Lens Correction tab, and it's definitely worth a look. It makes it easy to straighten both vertical and horizontal converging lines - the types of distortion that we often encounter when photographing buildings from ground level.

Generally speaking, I use it to correct vertical lines. In this short movie, you can see exactly how it works.

Straighten lines with Keystone Correction from Capture One Pro 11 Essential Training by Derrick Story

Not only does this tool work well, it's not difficult to figure it out. And just like everything else in Capture One Pro, it's non-destructive. So you can go back at any time to readjust the picture. And by using it, you can correct an everyday snapshot (such as the iPhone shot below) into a pretty nice photograph.

keystone-correction.png

This video is from my new course titled, Capture One Pro 11 Essential Training on LinkedIn Learning. You can also tune in on lynda.com if you prefer your training there. Either way, I have four hours of entertaining education that will help you master this excellent photo management and editing application.

You can share your thoughts at the TDS Facebook page, where I'll post this story for discussion.

This is The Digital Story Podcast #632, April 24, 2018. Today's theme is "Postcard Gravity." I'm Derrick Story.

Opening Monologue

In my previous life as a cubical worker, we used to have this term for high-flying good ideas that were eventually pulled back to earth to meet their inevitable demise. We called this phenomenon, "corporate gravity." And believe it or not, it has an artistic sibling for photographers that I call that "postcard gravity." And the battle against it is the subject of today's show.

Postcard Gravity

Engaging in personal projects is one of the ways we can save our artistic souls as photographers. There are no bosses, committees, focus groups, or editors to shoot down our ideas. We come up with a concept, photograph it, then determine how we feel about its merits.

friends-maui-1024.jpg "Fishing, Lahaina" - Kodak ColorPlus 200 film - From the Maui Series by Derrick Story.

But sooner or later, even our personal projects find themselves in front of others for their opinions. And how many times have you heard them thinking, "Why can't you just take a pretty picture and leave it at that?"

To help you battle Postcard Gravity, I have five techniques that I'm going to share with you right now.

  • Be clear on the concept of the project. Art for art's sake can lead you down some very weird alleys. But if you've thought through your project from start to finish, you have a better opportunity of creating something truly unique, and possible even appealing to the masses.
  • Leverage all of your technical expertise. By combining craftsmanship and artistry, you can impress viewers who might not initially grasp the concept, but appreciate your skill.
  • It's OK to explain what you're doing. You're asking a lot of your audience to perceive in seconds an idea that took you days, or even weeks to perfect. By letting your viewers know something like, "I wanted to create a very graphical look," helps them understand what you're doing.
  • Don't argue with critical feedback. It doesn't do any good.
  • But don't discount positive feedback either. This is especially helpful for a gallery of images. If people express a favorite, then consider showcasing it to promote the entire collection.

The main thing is to avoid becoming addicted to sugary likes. Everyone loves a sunset, but generally speaking, that is the artistic work of God, not the photographer.

Thomas Hawk Publishes, "My Thoughts on the SmugMug Flickr Acquisition"

In his Petapixel article, Thomas Hawk writes:

"First off, I have to say that I think that the acquisition news is very good for Flickr users and the Flickr community. While time will tell how this acquisition goes, I have much more faith in SmugMug running Flickr than I do Verizon."

"In buying Flickr, SmugMug more than anything is buying a community. I think that they are going to be very careful not to disrupt this community and look for ways to grow it thoughtfully. Having known the MacAskills (the family that owns SmugMug) for many years, one thing I can say for certain is that they LOVE photography and photographers. If you ever get a chance to visit their offices in Mountain View, do it. What you will find is wall after wall covered with the biggest prints you have ever seen in your life. These are people who are passionate about photography, not advertising."

"For SmugMug, I think what is probably most exciting is that they are getting a very large community of photographers by purchasing Flickr. I think that this will allow them to do even more with community, photowalks, meetups, etc. They will need to make sure Flickr is profitable (and it will be) but they will have a much larger group to build a bigger and stronger community with. While Google+ sort of became a place for the photographic community for a bit, before Google largely abandoned it, there really is not a good place for a larger community of photographers today and I think with the acquisition of Flickr, SmugMug hopes that it can build this and I think they have a pretty good chance at doing it."

I think both Thomas and I are excited about this announcement.

The Apple Photos Book for Photographers, 2nd Edition

The Apple Photos Book for Photographers, 2nd Ed is now available on Amazon. If you purchase the book, send me proof, and I'll send you an official book plate that you can print out on a standard 4"x6" sheet of photo paper. This offer is good until April 30, 2018. Use the Contact Form on The Nimble Photographer site. Also, feel free to post a review on Amazon once you've read the book. They're helpful to potential buyers.

Do You Have a Film Camera that Needs a Good Home?

Over the last year, I've received donations from TDS members who have film cameras that need a good home. What I do is inspect the items, repair and clean as I can, then list them in TheFilmCameraShop where I can find a good home for them. If you're interested in donating, please use the Contact Form on TheNimblePhotographer site. And thanks for you consideration!

Aerial Photography Workshop

Public registration is now open for the Sonoma Country Hot Air Balloon and Drone Photography Workshop, June 8-10, 2018. We're combining two very fun aerial activities into one workshop. Be sure to get on the Reserve List for this one!

Reservation Forms have been sent for the Burney Falls and Lassen Volcanic National Park Workshop

We have our cabin reservations secured for Sept. 27-29, 2018 for the Burney Falls and Lassen Volcanic National Park Workshop. I sent out reservation forms this last weekend. So if you are on the reserve list, you should have received an invite.

Updates and Such

You can become a member of our Inner Circle by clicking on this link or by clicking on the Patreon tile that's on every page of The Digital Story.

B&H and Amazon tiles on www.thedigitalstory. If you click on them first, you're helping to support this podcast. And speaking of supporting this show, and big thanks to our Patreon Inner Circle members:

And finally, be sure to visit our friends at Red River Paper for all of your inkjet supply needs.

See you next week!

More Ways to Participate

Want to share photos and talk with other members in our virtual camera club? Check out our Flickr Public Group. And from those images, I choose the TDS Member Photo of the Day.

Podcast Sponsors

Red River Paper - Keep up with the world of inkjet printing, and win free paper, by liking Red River Paper on Facebook.

The Nimbleosity Report

Do you want to keep up with the best content from The Digital Story and The Nimble Photographer? Sign up for The Nimbleosity Report, and receive highlights twice-a-month in a single page newsletter. Be a part of our community!

Want to Comment on this Post?

You can share your thoughts at the TDS Facebook page, where I'll post this story for discussion.

You could say that it's a crazy hybrid approach to art photography, but it's also convenient with great results. I've been shooting film, having the lab digitize it when it's processed, then printing the images with my inkjet printer using Photos for macOS and Red River Paper card stock. And they look different than anything I've created in the past.

Surfboards, Maui "Surfboards, Maui" Scanned version - Contax 159MM, Zeiss 28-70mm, Kodak ColorPlus 200 film. Photo by Derrick Story.

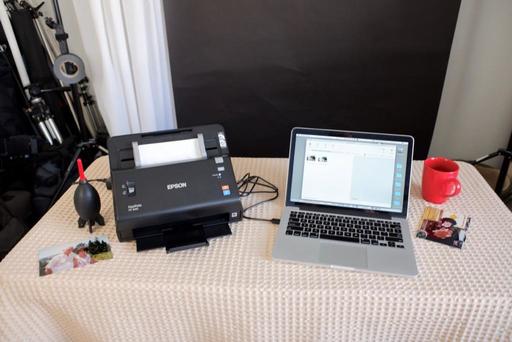
The workflow is easy. I shoot the film (which is fun in itself) then send it off to the lab for processing and scanning. I don't get lab prints, just the negatives and the scans.

Once everything comes back from the lab, I look at the negatives on a light table. I do this for a couple reasons. First, I can really tell how well I did by looking at the film under the loupe. It's just me, celluloid, and optics. I also check for light leaks and other potential issues that I might need to be aware of with how the camera is working.

I then look at the scans. This is the fun part for me, because it's my first viewing of the images in positive format. As with any film project, sometimes I'm happy, sometimes I'm sad.

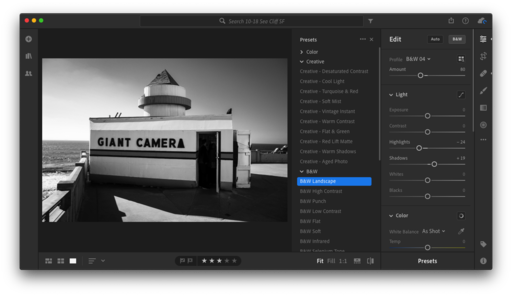
I tend not fiddle around with the images much in post production. I want to retain as much of their raw analog quality as possible. If I do have to touch them up, I can use the editing tools in Photos for macOS, or the Luminar 2018 editing extension. Lots of power with these options, and they keep me in my easy workflow.

Then it's time to print. I've been using Red River Paper Matte Card Stock for the output. It's beautiful paper that comes scored, making it easy to fold to 5"x7" finished size. I also purchase my envelopes for the cards at RRP.

surfboads-printed-1024.jpg "Surfboards, Maui" Printed version using Red River Paper card stock and Photos for macOS with an inexpensive Canon wireless printer. Image by Derrick Story.

In my book, The Apple Photos Book for Photographers, 2nd Edition, I explain how to use the Card tool in Photos to generate your own fine art greeting cards. All of your work is saved as a project in Photos, so you can go back anytime and pick up where you left off, or print more cards.

For my printer, I used an inexpensive Canon PIXMA Wireless Photo Printer ($69) that couldn't be easier to operate.

As for the final product, these cards look different than anything I've created before. The combination of analog film with modern inkjet technology is truly unique. And the fact that I can manage the entire effort in Photos for macOS keeps it all so very simple.

New Photos for macOS High Sierra Training!

Is it time for you to learn the ins and outs of the latest version of Photos? Take a look at Photos for macOS High Sierra Essential Training on LinkedIn Learning, or on lynda.com. Maximize your iPhone photography and complement the work you do with your mirrorless cameras as well. You'll love your cameras even more...

Also be sure to check out my new book, The Apple Photos Book for Photographers, 2nd Edition. It's completely up to date!

You can share your thoughts at the TDS Facebook page, where I'll post this story for discussion.

There was a time when working with RAW files in a mobile device seemed like a crazy idea. But the processing power of today's handsets like my iPhone X has made this proposition quite feasible. And one of my favorite apps for this task is RAW Power 1.1, just released from Gentlemen Coders.

raw-power-update.PNG RAW Power 1.1 on an iPhone X.

RAW Power brings to iOS the impressive RAW decoding and editing that was formerly only available in Apple's Aperture professional photo application. Using adjustments like Boost, you can improve your images using this powerful core technology. It works great for Jpegs as well. Here's what's new in 1.1:

  • New "RAW Images" Smart Album and ability to filter any album to show just RAWs
  • View complete folder and album hierarchy
  • Export images to Files.app as TIFF-8 and TIFF-16, JPEG, and PNG
  • DPI and Compression preferences
  • Delete image in the single photo view ("1-up")
  • Greatly improved Share features
  • Improved Layout and UI with larger controls
  • "Gear Down" sliders for 10x more precision when adjusting
  • 3D Touch in 1-Up
  • Full-size Curves adjustment in vertical screen mode
  • Show / Hide Thumbnails in Edit
  • Adjustable Thumbnail size in 1-up and Edit
  • Auto-histogram shows and hides itself to avoid covering the image
  • Revert Image feature greatly improved
  • Re-center button for Map

The improved user interface and the clever RAW Images smart album show that Gentlemen Coders is now focusing on our visual experience using the app as well as its under-the-hood muscle. You don't need an iPad to process and enhance your RAW files. I've been taking care of business right there on my iPhone X.

library-mgmt.PNG

RAW Power 1.1 is free to download in the iTunes App Store on your device. I recommend purchasing the one-time in-app purchase, Advanced Adjustments Pack for $4.99 that unlocks Curves and a couple other controls. This software is a great value and a joy to use.


Nimble Photographer Logo

RAW Power 1.1 has a high Nimbleosity Rating. What does that mean? You can learn about Nimbleosity and more by visiting TheNimblePhotographer.com.

Want to Comment on this Post?

You can share your thoughts at the TDS Facebook page, where I'll post this story for discussion.

This is The Digital Story Podcast #631, April 17, 2018. Today's theme is "Are There Any Benefits to Watermarking?." I'm Derrick Story.

Opening Monologue

A bad watermark is like pimple on the nose of a beautiful person. You want to enjoy the beauty, but all you can see is the pimple. But not all watermarks are bad. And in fact, they can be both tasteful and useful. And the quest to figure all of that out is the subject of today's TDS podcast.

Are There Any Benefits to Watermarking?

Watermarking Pros - They are a simple way to identify the creator of the image. Plus, they can be used as branding opportunities.

TDS-Sunset-Watermark.jpg

However, to create the best experience for your viewer, keep these tips in mind:

  • Consider why you're watermarking in the first place. If it's to prevent theft, you very well could be wasting your time. Services like Pixsy do a better job. Also make sure that your copyright information is in the metadata.
  • If you use a signature as your watermark, make sure it's legible.
  • Be careful with brand building watermarks so that don't clutter up the composition and detract from the image. This is especially true if they contains logos.
  • Position the watermark so it creates the least amount of distraction.
  • Put your watermarks on a separate layer so you can control their use, opacity, and appearance. I published an article on TDS on how to do this with Luminar.

RAW 1.1 Features Lots of Improvements

I've been working with the new iOS version on my iPhone, and I have to say that I'm quite impressed. RAW Power brings to iOS the impressive RAW decoding and editing that was formerly only available in Apple's Aperture professional photo application. Using adjustments like Boost, you can improve your images in ways that simply can't be done in any other application. It works great for Jpegs as well. Here's what's new in 1.1:

  • New "RAW Images" Smart Album and ability to filter any album to show just RAWs
  • View complete folder and album hierarchy
  • Export images to Files.app as TIFF-8 and TIFF-16, JPEG, and PNG
  • DPI and Compression preferences
  • Delete image in the single photo view ("1-up")
  • Greatly improved Share features
  • Improved Layout and UI with larger controls
  • "Gear Down" sliders for 10x more precision when adjusting
  • 3D Touch in 1-Up
  • Full-size Curves adjustment in vertical screen mode
  • Show / Hide Thumbnails in Edit
  • Adjustable Thumbnail size in 1-up and Edit
  • Auto-histogram shows and hides itself to avoid covering the image
  • Revert Image feature greatly improved
  • Re-center button for Map

Aerial Photography Workshop

Public registration is now open for the Sonoma Country Hot Air Balloon and Drone Photography Workshop, June 8-10, 2018. We're combining two very fun aerial activities into one workshop. Sign up today and join us!

The Apple Photos Book for Photographers, 2nd Edition

The Apple Photos Book for Photographers, 2nd Ed is now available on Amazon. Also, feel free to post a review on Amazon once you've read the book. They're helpful to potential buyers.

Digital Asset Management with Luminar - Nimble Classroom

Even though I have the class scheduled for April 21, I'm going to have to move it back until Skylum releases the gold copy of the DAM. If you've already signed up for the class, I will contact you directly about this. If you want to grab one of the few remaining seats, I would go ahead and do that as well. We will run the class as soon as the software is ready.

Do You Have a Film Camera that Needs a Good Home?

Over the last year, I've received donations from TDS members who have film cameras that need a good home. What I do is inspect the items, repair and clean as I can, then list them in TheFilmCameraShop where I can find a good home for them. If you're interested in donating, please use the Contact Form on TheNimblePhotographer site. And thanks for you consideration!

Reservation Forms have been sent for the Burney Falls and Lassen Volcanic National Park Workshop

We have our cabin reservations secured for Sept. 27-29, 2018 for the Burney Falls and Lassen Volcanic National Park Workshop. I sent out reservation forms this last weekend. So if you are on the reserve list, you should have received an invite.

Updates and Such

You can become a member of our Inner Circle by clicking on this link or by clicking on the Patreon tile that's on every page of The Digital Story.

B&H and Amazon tiles on www.thedigitalstory. If you click on them first, you're helping to support this podcast. And speaking of supporting this show, and big thanks to our Patreon Inner Circle members:

And finally, be sure to visit our friends at Red River Paper for all of your inkjet supply needs.

See you next week!

More Ways to Participate

Want to share photos and talk with other members in our virtual camera club? Check out our Flickr Public Group. And from those images, I choose the TDS Member Photo of the Day.

Podcast Sponsors

Red River Paper - Keep up with the world of inkjet printing, and win free paper, by liking Red River Paper on Facebook.

The Nimbleosity Report

Do you want to keep up with the best content from The Digital Story and The Nimble Photographer? Sign up for The Nimbleosity Report, and receive highlights twice-a-month in a single page newsletter. Be a part of our community!

Want to Comment on this Post?

You can share your thoughts at the TDS Facebook page, where I'll post this story for discussion.

There are many reasons to add (or not to add) a watermark to an image. For most photographers, it's not an everyday activity. But there are times when it's useful for protection or promotion.

new-image-layer.png

If you're finishing your photo in Luminar 2018, here's one way to add the watermark. I like this approach because the graphic lives on a separate layer, so you can turn it off, or on, as needed.

In this case, I'm going to add my Nimble Photographer logo to an image. But you can use this technique for "FPO" when working on publication layouts, "Proof Only" for wedding work, and other related activities.

I usually start with a PNG version because it seems to blend better than Jpegs. In Luminar, I go to Layers, click on the + icon, and choose Add New Image Layer from the popup.

When the image comes in, it will be way too big. But that's not a problem. Go to the Tools popup, choose Free Transform, and tame it. Pay close attention to the proportions of the logo and try to maintain them when using Free Transform. Clicking on the Lock icon in the Info Bar may help you with this. (Keep in mind this locks the proportions to the image you're working on, not the original graphic that you brought in. So lock may or may not be useful. But it's good to know that it's there.)

Once you have the logo the size you want, position it, then click Done. If you want to change the position later, use Free Transform to move it. You can return as many times as you want with this tool.

normal-blending-mode.png The image comes in in "Normal" blending mode, showing its white background. But I would prefer a more subtle approach.

blending-mode.png So I switch to the "Multiply" mode to eliminate the white background.

Make sure that the watermark layer is selected, then go to the blending modes popup and survey your options. For this image, the Multiply option worked great. Play with all of the blending modes and choose the one that works best for your particular shot.

The finishing touch is choosing the right opacity. For a more subtle approach, I pulled opacity down to 40 percent.

40-percent-opacity.png By pulling the opacity down to 40 percent, I can create a more subtle rendering of the watermark.

Be sure to save your work as a Luminar file - File > Save - So you can return to it another time for a different watermark treatment, or none at all. Then make sure your watermark layer is selected, and export the file - File > Export.

Watermark-TDS-1024.jpg Exported file with watermark included. I used 100 percent opacity for this example so you can better see it. But I could easily go back and change the opacity and export again.

By having complete control over the appearance and application of the watermark, this allows you to create the right look for purpose at hand. Give it a try and see what you think.

Rock Luminar with my new Essential Training

You learn all the ins and outs of Luminar 2018 via my Essential Training on lynda.com and on LinkedIn Learning. It's fun, and I promise, you will learn a lot.

Updates for both Mac and Windows versions of Luminar 2018 are available now. Existing users simply need to: Launch Luminar 2018, on the Top Menu Bar choose Luminar 2018 > Check for updates (Mac), or for Windows, on the Top Toolbar choose Help > Check for updates.

luminar-update.jpg

The improvements for each platform include:

Mac

  • Fast RAW opening
  • Super fast image editing and adjusting
  • Faster image export
  • DCP Profiles support
  • Automatic Lens Correction (fix Lens Distortion, remove Chromatic Aberration and Defringe)
  • Enhanced image quality on image view - most of the demosaic and green equilibration issues have been fixed
  • Big number of stability fixes
  • UI and UX improvements
  • Localisations updated (German, Japanese, Chinese & more)

Windows

  • Super fast image editing and adjusting
  • Faster image export
  • Batch processing feature
  • Free transform image feature
  • Flip/Rotate image feature
  • Automatic Lens Correction (fix Lens Distortion, remove Chromatic Aberration and Defringe)
  • Big number of stability fixes
  • UI and UX improvements
  • Localisations updated
  • Added ability to change localisation language in the application main menu
  • Fixes with color profiles on export/in plugin mode
  • Preview mode feature added (F hotkey)
  • Enhanced image quality on image view - fixed most of demosaic and green equilibration

I've been running the Mac version without any hiccups on a MacBook Pro with macOS High Sierra. I have seen some reports from Windows users that they are getting error messages. I don't know how widespread that is. But if you use Windows and are on a mission critical assignment, I might wait a day or so to see what the issues may or may not be.

New Luminar Jupiter Offer

Skylum is also running an update/purchase offer that includes the following bonuses:

Luminar 2018: the most powerful and technologically advanced photo editor for Mac & Windows (worth $69) - Luminar 2018 is a fast, versatile, and intuitive image editor, which can take your workflow from RAW file to fully finished image without needing to use any other image editor.

The Complete Landscape Photography Guide ebook from Photzy (worth $50) - An outstanding guide written by professional photographer and writer Kent DuFault. This ebook has something for everyone, with 237 pages packed full of information and assignments that will transform your landscape photography.

Aerial Photography & Video with Matt Granger (worth $79) - World-renowned photographer, Matt Granger will share planning, shooting and editing aerial stills and video. Matt will also demonstrate editing with Luminar 2018 on his still aerial images.

Photography Tutorial by Daniel Kordan (worth $29) - Extensive tutorial with a full workflow demonstration by expert landscape photographer Daniel Kordan. This tutorial includes shooting and post-processing images in Luminar 2018.

119 Dramatic & Romantic Sky overlays (worth $29) - This is an amazing addition to your photo editing workflow, and will help give boring skies that 'wow!' factor.

Splitsville Presets By Brian Matiash (worth $15) - Add a professional polish to your images with these cool presets.

Current users of Luminar 2017 may upgrade for $49; new users can purchase Luminar 2018 for $69. You can get an additional $10 off using coupon code: THEDIGITALSTORY

Rock Luminar with my new Essential Training

You learn all the ins and outs of Luminar 2018 via my Essential Training on lynda.com and on LinkedIn Learning. It's fun, and I promise, you will learn a lot.