Recently in Photography

  Page 27 of 385 in Photography  

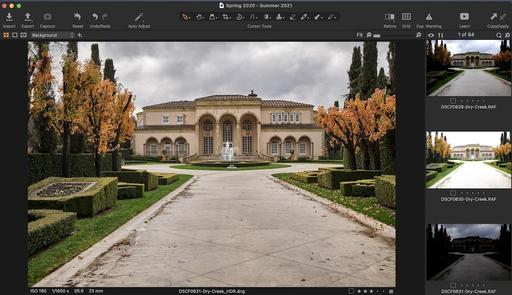
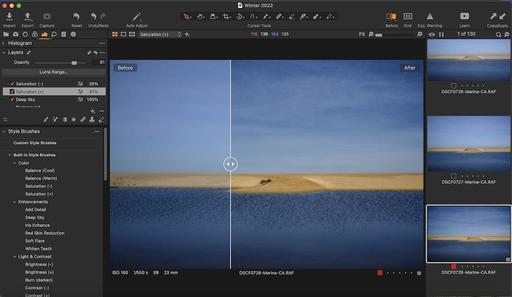
Capture One Pro 21 includes many terrific new tools, including Speed Edit, Dehaze, and HEIC support. But the feature I've been enjoying most is the Import Browser that makes it easy for me to decide what I want to bring into the catalog, and what to leave behind.

import-browser-1024.jpg The Capture One Pro 21 Import Browser

In my latest training for LinkedIn Learning, titled Capture One Pro 21 Essential Training, I cover not only Capture One Pro 21, but the new things added with the point 1 update, including the fabulous Import Browser.

Here's an overview of the training to whet your appetite.

CaptureOne-Screenshot-1024.jpg Getting to know Capture One Pro 21 from Capture One Pro 21 Essential Training by Derrick Story

Capture One Pro is a complete digital photo management and editing application for professional photographers and serious enthusiasts. Photographers who appreciate outstanding RAW processing, expert color control, and logical organization should consider Capture One Pro for its comprehensive feature set. In this course, professional photographer and instructor Derrick Story helps you learn the basics quickly, then takes you deeper into the application to master its finer points. For seasoned users, Derrick also covers all the new features in version 21, including Speed Edit, the Dehaze slider, and Style Brushes that allow you to enhance specific areas of a photo. To wrap up, he shares tips and techniques that can help you ensure your workflow is as efficient as possible.

I hope you enjoy the show!

You can share your thoughts at the TDS Facebook page, where I'll post this story for discussion.
This is The Digital Story Podcast #790, May 11, 2021. Today's theme is "Supercharge Your Editing App." I'm Derrick Story.

Opening Monologue

One of the reasons we don't move from an existing photo management app, such as Lightroom, to another is because we have so much time invested in it. Changing horses doesn't make sense. But what if we could breathe new life into our existing workflow without having to relocate a single file? That sounds more palatable. And it's the first story in today's TDS Photography Podcast. I hope you enjoy the show.

Tune-In Via Your Favorite Podcast App!


podcast-icon.jpeg

Apple Podcasts -- Spotify Podcasts -- Stitcher

Podbean Podcasts -- Podbay FM -- Tune In

Supercharge Your Editing App

Most of us are familiar with plugins. Over the years I've covered quite a few including RAW Power, Luminar, and Pixelmator. I had always wanted to include ON1 in that list, but my tests had hit bumps in the road. But now with ON1 Effects 2021, I can say that it's been a great ride.

on1-effects-1024.jpg

Can Use it with and for Practically Everything

Regardless of what your base app is - Lightroom, Photoshop, Capture One Pro, Photos for macOS, PaintShop Pro, or Affinity Photo - Effects can add creativity and capability to your existing workflow.

It includes tools for masking and retouching. There are tons of presets included, and you can create your own as well. My favorite part are the Filters. There are some truly interesting and creative ones including B&W, Glow, Grunge, Dynamic Contrast, Channel Mixer, Skin Retouching, Sun Flare, and many, many more.

Powerful, but Easy to Use Printing too

One of the delightful surprises I discovered while testing Effects was its well thought out printing module. This is something that I've been disappointed with time and time again with other applications. Not this time.

The Effects print module is easy to use, but provides the options that most photographers are looking for. And the very cool thing about it, is that you can use the print module while in plugin mode. In the case of Photos, I went to Edit, chose Effects, then set up my print job within the plugin. It worked great.

And if you load your manufacturer's print driver instead of using AirPrint, you'll have even more options in the Setup dialog.

This is very nice.

Downloading a Free Trial or Purchasing ON1 Effects 2021

You can try ON1 Effects 2021 free for 14 days. If you decide to purchase, you can buy for $69.95. Save 15% off that price by using coupon code: THEDIGITALSTORY.

Bottom Line

I started using ON1 Effects for my infrared photography because of its excellent Channel Mixer, LUTs, and presets. But I've discovered that it's useful for all of my photography. It's a robust tool for both my Photos and Capture One Pro workflows. And it's a great way to get the most out of my iPhone shots as well.

Next MacBook Air Powered by M2, To Come in Multiple Colors: Report

You can read the entire article on Petapixel.

If a new rumor is to be believed, Apple wasn't done using color with its new M1 iMac series: the design aesthetic is coming to the next MacBook Air as well.

Famed Apple leaker Jon Prosser, who has a pretty decent track record, has released a set of new renders that he says is indicative of MacBook Air designs he was shown from his own source at the company.

As reported by Digital Trends, the renders feature several notable changes to the current MacBook Air design. The most obvious change is that the computer will supposedly be available in one of seven colors: Silver, Blue. Yellow, Orange. Pink, Purple, and Green. Not coincidently, those are the same colors that Apple's newly-announced M1 iMacs are available in.

New Release: Capture One Pro 21 Essential Training

Capture One Pro is a complete digital photo management and editing application for professional photographers and serious enthusiasts. Photographers who appreciate outstanding RAW processing, expert color control, and logical organization should consider Capture One Pro for its comprehensive feature set. In this course, professional photographer and instructor Derrick Story helps you learn the basics quickly, then takes you deeper into the application to master its finer points. For seasoned users, Derrick also covers all the new features in version 21, including Speed Edit, the Dehaze slider, and Style Brushes that allow you to enhance specific areas of a photo. To wrap up, he shares tips and techniques that can help you ensure your workflow is as efficient as possible.

You can check it out now by visiting LinkedIn Learning.

The New Donation Kit for Carefree Shipping of Found Film Cameras

We have more time around the house than ever. And you finally dove into that bedroom closet that's been begging for some organization.

If you found a film camera that you're no longer using, our new Donation Kit makes it easy to pack and ship. Just visit the Contact Form on thenimblephotographer.com, click the box next to Donating a Film Camera, and let me know what you have. In your note, be sure to include your shipping address.

If it's a camera we can use for the shop, I'll send you a Donation Kit that includes a USPS Priority Mail shipping box and prepaid label. All you have to do is tape it up, insert the camera, and add the label. USPS will pick up your shipment from the front door of your house during their regular mail delivery. It's that simple!

Your donation help get analog gear in the hands of aspiring fine art photographers, and the proceeds help support this podcast.

Virtual Camera Club News

Photos for macOS Big Sur and iPhone Essential Training

This course was just released on LinkedIn Learning and lynda.com. It shows you how to leverage both the latest iPhone technology with Photos software, on both your Mac and mobile devices.

"With the free Photos for macOS software from Apple, you can manage, enhance, and share photos in a variety of ways. In this course, photographer, author, and educator Derrick Story takes you on a detailed exploration of Photos for macOS. Derrick starts with a quick-start introduction to taking pictures on your phone, then editing them with Photos and sharing them. He walks you through how to use the options available to you when you're recording video. Derrick also covers several advanced iPhone camera techniques, such as switching among cameras, controlling the flash, working with ProRAW, and more. He covers each step of the process to edit pictures in Photos for macOS, then does the same for editing videos. Derrick offers some useful tips to enhance your experience using Photos, then concludes with resources to help you learn more."

Inner Circle Members: A big thanks to those who support our podcast and our efforts! (And welcome to our new members.)

My Writing on Medium.com: I now have more than 25 published articles on Medium.com. And if you haven't visited the site, and enjoy good writing on a variety of topics, I suggest that you may want to take a look. You can just go to the home page and enter "Derrick Story" in the search field. And if you like what you read, then follow me!

EV Explorers for Those Who Are Interested in Electric Cars: I've created a new group on DerrickStoryOnline titled EV Explorers. The tagline for this group is: "Bringing Curiosity and Nimbleosity to the World of Electric Vehicle Transportation." Here we can share information, tips, discoveries and more about using electric vehicles for our photography adventures. If you want to join this group, click on this link for an invite. We're going to keep this as a private group for now, but you are invited to join us.

Affiliate Links - The links to some products in this podcast contain an affiliate code that credits The Digital Story for any purchases made from B&H Photo and Amazon via that click-through. Depending on the purchase, we may receive some financial compensation.

And finally, be sure to visit our friends at Red River Paper for all of your inkjet supply needs.

See you next week!

Product Links and Comments

There are product links in this article that contain affiliate tags. In some cases, depending on the product, The Digital Story may receive compensation if you purchase a product via one of those links. There is no additional cost to you.

You can share your thoughts at the TDS Facebook page, where I'll post this story for discussion.
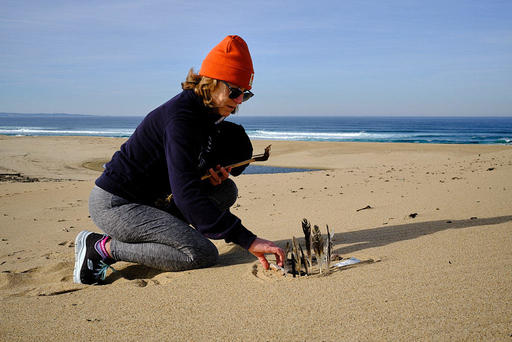
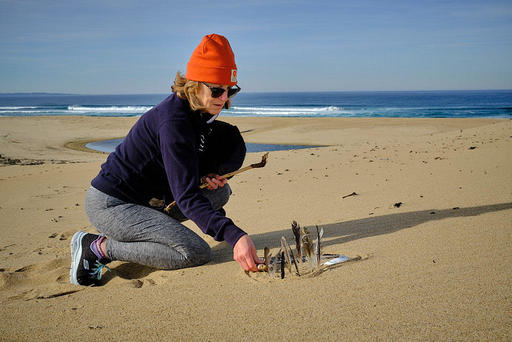
I truly enjoy using the iPhone 12 Pro Max with the HEIC file format for my everyday pictures. The results are terrific, and the file sizes are compact.

But when I want to have a little extra fun with those images, I've been firing up ON1 Effects 2021 that works as both a standalone app and as an Editing Extension for Photos for macOS. Effects has a wide variety of adjustments that work great with HEIC files (Jpegs and RAWs as well), and the workflow couldn't be easier.

Effects is also an excellent plugin for Photoshop, Lightroom, and Capture One Pro. The steps are similar as these.

Basic Steps to Using Effects as a Photos Editing Extension

Here are the basic steps that I use to add a little punch to my everyday pictures.

001-ON1-for-HEIC.jpg Step 1 - Go to Edit mode in Photos for macOS and choose ON1 Effects from the Extensions dropdown menu.

002-Apply-Filter.jpg Step 2 - Once you're in Effects, experiment with the Presets on the left side of the interface.

003-Add-Filters.jpg Step 3 - Further enhance your image by tapping a variety of adjustments. ON1 calls them Filters.

004-Enhanced.jpg Step 4 - Collapse the pallet on the left side to get a better look at your image before sending back to Photos. Click the Done button when satisfied with your work.

006-Back-to-Photos.jpg Step 5 - Back in Photos. Exit the editing interface by clicking on the yellow Done button.

More You Can Do with Effects

There are many different ways to approach ON1 Effects. It works as a standalone app. You can use it as an editing extension for Photos, as shown here. And it's a very nice plugin for Photoshop, Lightroom, and Capture One Pro 21.

I usually start with browsing presets to get a feel for where I might want to go with an image. For my infrared photography, I create my own presets as starting points. These include the red/blue channel swaps and other adjustments that I commonly use.

Beyond that, local adjustments are available, as are gradient masks and more. There's really no limit to what you can do with your pictures in this app.

Creating a Totally Non-Destructive Workflow with Effects and Photos

When you send an image from Apple Photos to Effects, any settings you apply will be saved with the image, so that you can send the image back to Effects with your edits intact, as long as you do not subsequently edit that image inside Photos.

To re-edit an image processed inside Effects, click on the image in Photos and follow the same steps above. When your image is opened inside Effects, you will see all of the changes you made in your previous session.

Keep in mind however, once you make any editing changes to your image inside Photos, your Effects edits will be "baked in" to the image. You can send the image again to Effects, but your original settings won't be visible.

If you wish to keep your original Effects edits, duplicate the image inside Photos (Image > Duplicate), which will create a new virtual copy of the file. You can then edit one of the versions in Photos, using the other one to preserve your Effects edits.

Downloading a Free Trial or Purchasing ON1 Effects 2021

You can try ON1 Effects 2021 free for 14 days. If you decide to purchase, you can buy for $69.95. Save 15% off that price by using coupon code: THEDIGITALSTORY.

Bottom Line

I started using ON1 Effects for my infrared photography because of its excellent Channel Mixer, LUTs, and presets. But I've discovered that it's useful for all of my photography. It's a robust tool for both my Photos and Capture One Pro workflows. And it's a great way to get the most out of my iPhone shots as well.

Product Links and Comments

There are product links in this article that contain affiliate tags. The Digital Story may receive compensation if you purchase a product via one of those links. There is no additional cost to you.

You can share your thoughts at the TDS Facebook page, where I'll post this story for discussion.
When you visit our Workshops Signup Page, you'll see a variety of options. We feature physical events, such as the Oregon Coast Photography Workshop this coming November.

Scott-Davenport-US-Oregon-2018-11-09-0022-Along+Sweet+Creek+In+Oregon.jpg Photo by Scott Davenport

But we also offer Online Workshops and Video Trainings. The beauty of these is that you can enjoy them and learn from the comfort of your home. They're affordable and wildly popular.

So your photography experience doesn't require a plane ticket. Check out all of our Photography Events today. And when you see something you like, sign up.

We're looking forward to working with you.

This is The Digital Story Podcast #789, May 4, 2021. Today's theme is "The Workshop Plan." I'm Derrick Story.

Opening Monologue

Going into the second half of 2021 and planning the entire 2022 season, I want to share our TDS Workshop Plan with you. Many of us are already considering travel plans and thinking about the things that we want to do. I'm hoping to be very much part of those plans. Here's what I'm working on.

Tune-In Via Your Favorite Podcast App!


podcast-icon.jpeg

Apple Podcasts -- Spotify Podcasts -- Stitcher

Podbean Podcasts -- Podbay FM -- Tune In

The Workshop Plan

Scott-Davenport-US-Oregon-2018-11-09-0022-Along+Sweet+Creek+In+Oregon.jpg Along Sweet Creek, Oregon. Photo by Scott Davenport.

Our workshops moving forward are going to be better than ever. We have events on the books right now, and there are others in the works. So I'm going to give you a preview today of how things are going to play out moving forward.

Two Types - Physical and Online

The online events are definitely here to stay. They have so many positives. They are affordable, convenient, and still provide some excellent interaction.

But now that physical events are coming back to the calendar, they are going to be enhanced as well through our online site and Zoom meetings leading up to the actual event.

The 2022 season will probably feature 3 physical events and a half dozen online workshops. This means that regardless what time of year it is, or where you live, you should be able to join your fellow photographers for one of these events.

But First, The Second Half of 2021

The next thing we have planned is the The Ultimate B&W Photography Workshop that begins on June 30, 2021. If you love Black and White photography and want to explore the creation of stunning monochrome, duotone, and infrared images, then this event is for you.

In November, we have our first physical event scheduled in more than a year: The Oregon Coast Photography Workshop that runs the week of November 8, 2021.

I'm teaming up with photographer Scott Davenport for this exciting exploration of the stunning Oregon landscape. We will headquarter in Florence, OR. It's a direct line west from the Eugene Airport. So if you're flying in, you'll be able to rent a car and easily drive to our headquarters.

This workshop features two instructors, four full days, pre-workshop meetings online, lifetime membership to our virtual workshop site, and plenty more. This will be our first physical event where we incorporate our online tools as well.

Registration for the Oregon Coast Photography Workshop is limited to 10 photographers. Tuition is $1,295. You can secure your spot now with a $295 deposit.

If you have a balance from the 2020 workshop season, it can be applied in full for this event. Plus, our Inner Circle Members will receive a $100 discount for the second payment.

I'm going to be driving our new TDS Workshop Transport, the all electric Volkswagen ID.4 for this event. If you're curious about EVs, I'll have a birds of a feather session about them one of the evenings during our event.

This is going to be a amazing week. Scott and I are already counting the days until we gather together.

More on the 2022 Season

Coming this summer, I'll release the 2022 workshop season. Potential locations include the Humboldt Redwoods, Eastern Sierra, Lassen Volcanic Park, Costa Rica, and others.

If one of these sound particularly tantalizing to you, please drop me a note via the Contact Form on TheNimblePhotographer.com

I can't wait to hit the road and get back to work with all of you!

Xencelabs Pen Tablet Review: Already Better than Wacom

You can read the entire article on Petapixel.

What do you get when you take a bunch of former Wacom employees, start a new company, and give them carte blanche to develop a brand new pen tablet? What you get is Xencelabs, a new player in graphics that is bringing some much-needed innovation to a stale market. This is no cheap knock-off we're talking about, Xencelabs' new Pen Tablet Medium just put Wacom on notice.

For those of you who haven't been following this space, it's not that Wacom has been short of competition lately. XP-PEN and Huion in particular have been releasing high-quality pen tablets and pen displays at an alarming clip, while also charging a fraction of Wacom prices for a similar combination of core specs. We've reviewed a few of these products and have been duly impressed by what we found.

But both XP-PEN and Huion are very clearly Wacom knock-offs. They are high-quality knock-offs that offer similar performance for a lot less money, but knock-offs all the same. You can't shake the feeling that you're using a product designed to undercut Wacom, which usually means cutting a few corners when it comes to build quality, software, customer support, and extraneous features like wireless connectivity.

That's where the Xencelabs Pen Tablet sets itself apart. It's a true-blue competitor that meets or exceeds the most stringent build standards, adds some refreshing design elements, and checks all the professional-grade boxes.

The New Donation Kit for Carefree Shipping of Found Film Cameras

We have more time around the house than ever. And you finally dove into that bedroom closet that's been begging for some organization.

If you found a film camera that you're no longer using, our new Donation Kit makes it easy to pack and ship. Just visit the Contact Form on thenimblephotographer.com, click the box next to Donating a Film Camera, and let me know what you have. In your note, be sure to include your shipping address.

If it's a camera we can use for the shop, I'll send you a Donation Kit that includes a USPS Priority Mail shipping box and prepaid label. All you have to do is tape it up, insert the camera, and add the label. USPS will pick up your shipment from the front door of your house during their regular mail delivery. It's that simple!

Your donation help get analog gear in the hands of aspiring fine art photographers, and the proceeds help support this podcast.

DPReview TV: Olympus OM-D E-M10 IV review

You can read the entire video on DP Review.

The Olympus OM-D E-M10 IV is a compact, stylish and low-priced Micro Four Thirds camera with a 20MP sensor and in-body stabilization. Chris and Jordan put it through its paces in the latest episode of DPReview TV.

Virtual Camera Club News

Photos for macOS Big Sur and iPhone Essential Training

This course was just released on LinkedIn Learning. It shows you how to leverage both the latest iPhone technology with Photos software, on both your Mac and mobile devices.

"With the free Photos for macOS software from Apple, you can manage, enhance, and share photos in a variety of ways. In this course, photographer, author, and educator Derrick Story takes you on a detailed exploration of Photos for macOS. Derrick starts with a quick-start introduction to taking pictures on your phone, then editing them with Photos and sharing them. He walks you through how to use the options available to you when you're recording video. Derrick also covers several advanced iPhone camera techniques, such as switching among cameras, controlling the flash, working with ProRAW, and more. He covers each step of the process to edit pictures in Photos for macOS, then does the same for editing videos. Derrick offers some useful tips to enhance your experience using Photos, then concludes with resources to help you learn more."

Inner Circle Members: A big thanks to those who support our podcast and our efforts! (And welcome to our new members.)

My Writing on Medium.com: I now have more than 25 published articles on Medium.com. And if you haven't visited the site, and enjoy good writing on a variety of topics, I suggest that you may want to take a look. You can just go to the home page and enter "Derrick Story" in the search field. And if you like what you read, then follow me!

EV Explorers for Those Who Are Interested in Electric Cars: I've created a new group on DerrickStoryOnline titled EV Explorers. The tagline for this group is: "Bringing Curiosity and Nimbleosity to the World of Electric Vehicle Transportation." Here we can share information, tips, discoveries and more about using electric vehicles for our photography adventures. If you want to join this group, click on this link for an invite. We're going to keep this as a private group for now, but you are invited to join us.

Affiliate Links - The links to some products in this podcast contain an affiliate code that credits The Digital Story for any purchases made from B&H Photo and Amazon via that click-through. Depending on the purchase, we may receive some financial compensation.

And finally, be sure to visit our friends at Red River Paper for all of your inkjet supply needs.

See you next week!

Product Links and Comments

There are product links in this article that contain affiliate tags. In some cases, depending on the product, The Digital Story may receive compensation if you purchase a product via one of those links. There is no additional cost to you.

You can share your thoughts at the TDS Facebook page, where I'll post this story for discussion.
I've had macOS Big Sur on my test machine since its first availability. There are many things that I enjoy with this latest operating system from Apple, but I was hesitant to install it on my production Macs until all of the kinks were worked out.

new-portrait-controls.jpg

When version 11.3 came out, I felt confident enough to load it on to my everyday MacBook Pro 2020, and boy am I glad the wait is over.

This is a lovely piece of software on a newish Mac. It's fast and visually attractive. The reworked icons, menus, and dialog boxes feel like a new coat of paint. And for those of us who use Photos as well, the cool features such as Depth Control and Filters Fading are a welcome addition.

I tested all of my imaging apps on Big Sur: Lightroom, Capture One Pro 21, ON1 Photo RAW 2021, Luminar 4, and RAW Power. All good. My podcast and writing apps seem fine as well. Print jobs to the Canon TR85000 transferred smoothly. Performance in general was outstanding.

I think the Mac App Store really helps in this area. I try to get as much of my software as I can from there, and let the updates quietly roll in. For other software, I did have a new version here and there to install. It all went well.

big-sur.jpg

If you've been holding off on upgrading to Big Sur, I think it's safe to go into the water. (The exception being is that if you run specialized software for your company that might not be compatible yet. But I'm sure your IT person has already warned you about that!) I backed up all of my important files (that weren't already covered by iCloud), cleaned out the cruft, then installed the new OS.

The entire house cleaning project took the better part of a day to complete. But the result is that my 1-year-old MacBook Pro feels brand new. And you can't beat the price.

You can share your thoughts at the TDS Facebook page, where I'll post this story for discussion.

Is a New DSLR Totally Out of the Question? (Pentax K-3 III) - TDS Podcast

This is The Digital Story Podcast #788, April 27, 2021. Today's theme is "Is a New DSLR Totally Out of the Question? (Pentax K-3 III)." I'm Derrick Story.

Opening Monologue

With all the mirrorless announcements from Sony, Canon, Nikon, and others, it seems as though the DSLR is going the way of the film camera. But there's one holdout against this trend, Pentax, and the just-announced Pentax K-3 Mark III has some truly interesting features, including outstanding high ISO performance. So, are the reports of DSLR death are greatly exaggerated? We'll explore this idea on today's TDS Photography Podcast.

Tune-In Via Your Favorite Podcast App!


podcast-icon.jpeg

Apple Podcasts -- Spotify Podcasts -- Stitcher

Podbean Podcasts -- Podbay FM -- Tune In

Is a New DSLR Totally Out of the Question? (Pentax K-3 III)

Pentax-K3-III.jpg

I must admit, I'm a bit fascinated by this camera. Let's start by taking a look at some of its highlight features.

  • High ISO Performance - Specs say 100 to 1,600,000. More on this in a few minutes.
  • 1.05x-Mag. Pentaprism Optical Viewfinder The pentaprism's design has also been updated to use high-refraction glass, optimized coatings, and a distortion-correcting element to reduce aberrations and promote high clarity and color fidelity.
  • 25.7MP APS-C BSI CMOS Sensor - Sports a BSI design that promotes low noise, smooth tones, and accurate color rendering throughout the sensitivity range, from ISO 100-1600000, to suit working in a variety of lighting conditions.
  • Up to 12 fps Continuous Shooting
  • Real-Time Scene Analysis System - Using the high-density RGBIr sensor and the PRIME V image processor, the K-3 Mark III can use the Real-time Scene Analysis System to optimize exposure and AF accuracy by detecting subjects' faces and eyes with image recognition technology. This system relies on Deep Learning, an AI-based technology, for more accurate subject detection and scene judgement.
  • 5-axis SR II Shake Reduction system provides 5.5 stop-effective image stabilization - Beyond controlling camera shake, the SR II mechanism also benefits stills applications by enabling a Pixel Shift Resolution feature and an AA Filter Simulator function. Pixel Shift Resolution shifts the sensor in small increments in sequential shots in order to capture full color information at each pixel site, then composites these sequential frames to produce a single image with richer detail and resolution. The AA Filter Simulator, on the other hand, utilizes microscopic vibrations during the capture process to help mitigate moirĂ© in order to produce clean renderings of fabrics and other high-frequency materials. This system works in conjunction with the sensor that lacks an AA filter, so you have the choice between gaining the most resolution or reducing moirĂ© under specific scenarios.
  • SAFOX 13 Phase-Detection AF - Updated with more points and improved coverage, the SAFOX 13 autofocus sensor is a phase-detection focusing system that uses 101 individual points, including 25 cross-type sensors in the middle of the image frame. This array benefits focusing speed and accuracy in a variety of lighting conditions, down to -4 EV. Additionally, a new 307000-pixel RGBIr sensor and new tracking algorithm also promote more accurate tracking of subjects, even when moving at varying speeds or in irregular directions.

So I was studying this article on Petapixel titled, A High ISO Shootout: Pentax K-3 III vs. Sony a7 III, and was amazed at the ISO performance of the Pentax.

"Image quality is outstanding up to ISO 6400 and still looks clean at ISO 12800 in my opinion. Even ISO 25600 looks good enough to print up to A3 if like me you don't mind some grain. Heck, if all you need is a small postcard print and the noise is not a bother, you can go as high as ISO 204,800 in some cases and still get an acceptable image."

"For this comparison, I decided to go with the highly regarded Sony a7 III. Please note that is nothing more than a look at how far APS-C technology has come in that it can compete with a larger sensor. This is not a brand comparison. Looking at ISO 100-1600, there is no visible difference between both cameras.
"Even going up to ISO 6400 and ISO 12800, I can't see any advantage on either side. ISO 25600 is where I am really surprised. The APS-C PENTAX looks slightly cleaner to me than the full-frame camera. Looking at the maximum ISO of the Sony at 204800, they are both pretty much the same. Neither is usable for this shot, but one is not worse than the other though the PENTAX does better on the color."

Interesting Notes

I think for some folks, the feeling is that they will have outdated technology if they purchase a DSLR in 2021. But after reviewing the features in the Pentax K-3 Mark III , that doesn't seem to be the case.

So then it really comes down to form factor, EVF, and what feels better in the hands. A compact DSLR isn't very much bigger than most full frame mirrorless cameras. You can use Live View on the 3.2" LCD for a preview of the image, and the optical viewfinder the rest of the time.

I'm not saying that the K-3 Mark III is going to spark a DSLR comeback. But it's nice to see a competent camera for those who still enjoy a quality optical viewfinder and the feel of a DSLR.

The New Donation Kit for Carefree Shipping of Found Film Cameras

We have more time around the house than ever. And you finally dove into that bedroom closet that's been begging for some organization.

If you found a film camera that you're no longer using, our new Donation Kit makes it easy to pack and ship. Just visit the Contact Form on thenimblephotographer.com, click the box next to Donating a Film Camera, and let me know what you have. In your note, be sure to include your shipping address.

If it's a camera we can use for the shop, I'll send you a Donation Kit that includes a USPS Priority Mail shipping box and prepaid label. All you have to do is tape it up, insert the camera, and add the label. USPS will pick up your shipment from the front door of your house during their regular mail delivery. It's that simple!

Your donation help get analog gear in the hands of aspiring fine art photographers, and the proceeds help support this podcast.

Love Crop Sensors? Exciting Possibilities for the Future

You can read the entire article on The Phoblographer.

The internet loves to predict doom and gloom for cameras with crop sensors. How many years have we heard that Micro Four-Thirds is dead? Current offerings remain quite capable cameras. However, camera technology has been advancing rapidly. Brands like Fuji and OM-Digital Solutions (referred to as OMDS from here on) heavily rely on these cameras to survive. What do they need to do to remain relevant?

It seems that AI and deep-learning tech are here to stay. Interviews with people at Fuji and OMDS seem to confirm this. Fuji has mentioned to Imaging-Resource that they are looking at AI for more than just autofocus. OMDS told DPReview that they plan to take advantage of the fast readout of their smaller sensors. What does this mean for us? New technology could help to negate the downsides of crop sensors. Denoise technology has also jumped leaps and bounds. DxO Lab and Topaz have really begun to show us what AI Denoise is capable of.

What if we could see Full Frame level low-light performance from Micro Four-Thirds? If processing power and new sensor tech can deliver better signal-to-noise ratios, the possibility is there. We saw a great example of this with the Nikon Z50. However, I hope they don't go overboard here. There's definitely something about the organic feel of an image that isn't clinically clean. And of course, AI will continue to play a large part in new autofocus technology.

Some of the points include: Olympus Had Great Ideas, More Please; Could Modular Cameras Be the Future?; Crop Sensors Are Still Great for Video; and Will New Tech Be Enough To Save Crop Sensors? Only time will tell what the industry's brilliant engineers will do next. However, what if these technologies are implemented in larger sensor cameras too?

Virtual Camera Club News

Photos for macOS Big Sur and iPhone Essential Training

This course was just released on LinkedIn Learning and lynda.com. It shows you how to leverage both the latest iPhone technology with Photos software, on both your Mac and mobile devices.

"With the free Photos for macOS software from Apple, you can manage, enhance, and share photos in a variety of ways. In this course, photographer, author, and educator Derrick Story takes you on a detailed exploration of Photos for macOS. Derrick starts with a quick-start introduction to taking pictures on your phone, then editing them with Photos and sharing them. He walks you through how to use the options available to you when you're recording video. Derrick also covers several advanced iPhone camera techniques, such as switching among cameras, controlling the flash, working with ProRAW, and more. He covers each step of the process to edit pictures in Photos for macOS, then does the same for editing videos. Derrick offers some useful tips to enhance your experience using Photos, then concludes with resources to help you learn more."

You can Photos for macOS Big Sur and iPhone Essential Training here.

Inner Circle Members: A big thanks to those who support our podcast and our efforts! (And welcome to our new members.)

My Writing on Medium.com: I now have more than 25 published articles on Medium.com. And if you haven't visited the site, and enjoy good writing on a variety of topics, I suggest that you may want to take a look. You can just go to the home page and enter "Derrick Story" in the search field. And if you like what you read, then follow me!

EV Explorers for Those Who Are Interested in Electric Cars: I've created a new group on DerrickStoryOnline titled EV Explorers. The tagline for this group is: "Bringing Curiosity and Nimbleosity to the World of Electric Vehicle Transportation." Here we can share information, tips, discoveries and more about using electric vehicles for our photography adventures. If you want to join this group, click on this link for an invite. We're going to keep this as a private group for now, but you are invited to join us.

Affiliate Links - The links to some products in this podcast contain an affiliate code that credits The Digital Story for any purchases made from B&H Photo and Amazon via that click-through. Depending on the purchase, we may receive some financial compensation.

And finally, be sure to visit our friends at Red River Paper for all of your inkjet supply needs.

See you next week!

Product Links and Comments

There are product links in this article that contain affiliate tags. In some cases, depending on the product, The Digital Story may receive compensation if you purchase a product via one of those links. There is no additional cost to you.

You can share your thoughts at the TDS Facebook page, where I'll post this story for discussion.
Documenting Mom's House

For those of us who appreciate history, especially within our own family, it's worth remembering that much of it is contained within their homes.

1600-DSCF0181-Moms-House.jpg The Dining Room - Fujifilm X100V, ISO 1600, 1/15th, f/4. Handheld. Photo by Derrick Story.

This dawned on me during a recent visit to my Mom's house. I'm an early riser and was up sipping coffee on an overcast morning. I had the whole place to myself.

I began to notice how she had designed her living environment. It had been more or less the same for decades. Many of the items in the top photo are part of my childhood memories. (I once broke one of those cups while horsing around with my sister. We tried to glue it back together.)

I took out my iPhone and captured a few images. As I looked at them, I thought, "This is important. I don't know how much longer I'll have the opportunity to enjoy this space." None of us do, right?

I decided to get a bit more serious about the photography, so I pulled out my Fujifilm X100V and documented a few of my favorite scenes.

1600-DSCF0193-Moms-House.jpg Ceramic Bunny with Norman Rockwell Plates - Fujifilm X100V, ISO 640, 1/15th, f/2.8. Handheld. Photo by Derrick Story.

Photographing my Mom's house helped me appreciate it even more. Her life is here. This is where she raised her children. My father passed away in this home. She is the caretaker of our family history.

I'm sharing this because there have been moments when I didn't fully appreciate what she is doing at this stage of her life. It would be far more practical (and safer) for her to sell this home and move somewhere that's easier to maintain. But she has resisted. And walking around her home on that overcast morning, with camera in hand, I began to understand why.

There are no easy answers to these situations. So for now, I am going to enjoy spending time with her and capturing images of her home, our family's home, and hope for the best.

1600-DSCF0199-Moms-House.jpg Plastic Bonsai with Glass Fish - Fujifilm X100V, ISO 1250, 1/15th, f/4, Canon 0.8 Wide Angle Adapter for 28mm equivalent. Handheld. Photo by Derrick Story.

You can share your thoughts at the TDS Facebook page, where I'll post this story for discussion.

This is The Digital Story Podcast #787, April 20, 2021. Today's theme is "5 Useful Accessories for DIY Photo Projects" I'm Derrick Story.

Opening Monologue

When inspiration strikes for a "do it yourself" solution to a gear-related idea that comes to mind, I've found that certain items in my photo accessory drawer are helpful time after time. This week, I'll share five of my favorite DIY accessories, and a case study of putting some of them to use. I hope you enjoy the show.

Tune-In Via Your Favorite Podcast App!


podcast-icon.jpeg

Apple Podcasts -- Spotify Podcasts -- Stitcher

Podbean Podcasts -- Podbay FM -- Tune In

5 Useful Accessories for DIY Photo Projects

In a recent Medium.com article, I wrote about the handiness of my photo accessory drawer. Some folks might call it a junk drawer, but nothing could be further from the truth.

Accessory-Drawer-1024.jpeg

I have a number of items in there that have become essential components when I trying to come up with a DIY solution. Here are some of my favorites that I've reached for many times.

  • Step-Up and Step-Down Rings - This is one of the items I reach for regularly. Not only do they help me adapt off-sized filters to lenses, they can connect just about anything that has threads.
  • Lens Mount Adapters Over the years I've collected a set of affordable adapters that will mount practically any vintage lens to my MFT cameras, including Nikon, Canon, Pentax, Contax, and Minolta.
  • Cold Shoe Adapters There are tons of accessories that can be mounted in a cold shoe, from bubble levels, to microphone, to LED lights, and of course, flashes themselves. And the list goes on from there.
  • Old Filters - Way back when, I did a show discussing how I never throw a filter away, because some day it will have use. That includes practically every type in every diameter.
  • Translucent Plastic Film Canisters - I've used these for everything from LED light diffusers to small parts containers. They're also handy for carrying around a set of coins that can serve as both super compact slotted screw drivers and emergency change, with room left over for tripod thread adapters and bolts.

I have other things as well, such as a variety of brackets, gaffers tape, and oddball lenses. What are your favorite items in the photo accessory drawer? Stop by our Facebook page and share them.

How to Adapt a 20-Year-Old Lens to an X100 (and save $300)

As much as I love the 35mm lens on my Fujifilm X100V, sometimes I need a bit more elbow room. I looked at the WCL-X100 II Wide Conversion Lens, wanted it, but was reluctant to spend the $350 it costs. So I came up with another angle.

I found a Canon Wide Converter WC-DC58 0.8X lens in my photo accessory drawer, and decided to try it on the X100V. I mean, why not! I already had the filter adapter for the X100V that used 49mm threads. The WC-DC58 had 58mm threads on its backside. I kept digging, found a couple step-up rings that I could cobble together, and made the connection.

Peering through the electronic viewfinder, the world looked pretty good... and wider too. This had potential. I went to the menu on the Fujifilm and found the Conversion Lens option and set it to wide.

This does two things. First, it correctly adjust the metadata to read at the wider focal length, and it removes the frame lines in the optical viewfinder presenting you with a more accurate view of the world. Very cool.

After a bit of testing and reviewing the images at 100 percent on the laptop, I can confidently say that the lovely Canon Wide Converter works beautifully on the X100V. Sharpness was good at f/2.8 and great beyond f/5.6. Colors were deliciously Fuji, and it looks cool on the camera as well.

Photos for macOS Big Sur and iPhone Essential Training

This course was just released on LinkedIn Learning and lynda.com. It shows you how to leverage both the latest iPhone technology with Photos software, on both your Mac and mobile devices.

"With the free Photos for macOS software from Apple, you can manage, enhance, and share photos in a variety of ways. In this course, photographer, author, and educator Derrick Story takes you on a detailed exploration of Photos for macOS. Derrick starts with a quick-start introduction to taking pictures on your phone, then editing them with Photos and sharing them. He walks you through how to use the options available to you when you're recording video. Derrick also covers several advanced iPhone camera techniques, such as switching among cameras, controlling the flash, working with ProRAW, and more. He covers each step of the process to edit pictures in Photos for macOS, then does the same for editing videos. Derrick offers some useful tips to enhance your experience using Photos, then concludes with resources to help you learn more."

You can check out both the free movies and the entire course here.

Did You Know You Can Archive Your Digital Photos on Analog Film?

You can read the entire article on FStoppers.

Bit rot, or the slow deterioration in the performance and integrity of data stored on various forms of digital storage media, is a real concern for photographers. Over time, digital photos degrade and some even become totally defective. The best insurance against this problem may actually be analog film.

Digital photography offers a lot of advantages over the analog process. Namely, it's a lot cheaper and it allows a greater degree of freedom when shooting. Images are also more easily manipulated and with greater sophistication. But digital photography also has its disadvantages, too. One big one is bit rot. I have been shooting digital for about 15 years and, already, I have degraded or defective images. Now, this is certainly by no means a huge percentage of my files but imagine if one of those images was one of my "greatest shots." In some cases, the degradation is only slight, but it is still perceptible. I have some files that are totally gone, that is they won't open at all.

Bit rot is not the only thing I have struggled with in the digital realm, though. I have also just plain lost images. This has happened when I have switched recording formats, computers, etc. Some photos I only had stored in clouds and then lost when I closed accounts (Facebook, for example). The point is many digital photographs I have made in my lifetime are simply gone in one way or another, from one thing or another. Others are degraded or defective. Yet, I have every single image I have ever shot on 35mm film. My negatives have followed me halfway around the world on every move and are still as good as the day they were developed. Now, to be clear, I am not saying that negatives cannot be damaged or lost, they can. I'm simply saying, in my experience, I have all of my analog images and I do not have all of my digital ones. So it goes. Your experience may be different.

Virtual Camera Club News

Inner Circle Members: A big thanks to those who support our podcast and our efforts! (And welcome to our new members.)

My Writing on Medium.com: I now have more than 25 published articles on Medium.com. And if you haven't visited the site, and enjoy good writing on a variety of topics, I suggest that you may want to take a look. You can just go to the home page and enter "Derrick Story" in the search field. And if you like what you read, then follow me!

EV Explorers for Those Who Are Interested in Electric Cars: I've created a new group on DerrickStoryOnline titled EV Explorers. The tagline for this group is: "Bringing Curiosity and Nimbleosity to the World of Electric Vehicle Transportation." Here we can share information, tips, discoveries and more about using electric vehicles for our photography adventures. If you want to join this group, click on this link for an invite. We're going to keep this as a private group for now, but you are invited to join us.

Affiliate Links - The links to some products in this podcast contain an affiliate code that credits The Digital Story for any purchases made from B&H Photo and Amazon via that click-through. Depending on the purchase, we may receive some financial compensation.

And finally, be sure to visit our friends at Red River Paper for all of your inkjet supply needs.

See you next week!

Product Links and Comments

There are product links in this article that contain affiliate tags. In some cases, depending on the product, The Digital Story may receive compensation if you purchase a product via one of those links. There is no additional cost to you.

You can share your thoughts at the TDS Facebook page, where I'll post this story for discussion.
As much as I love the 35mm lens on my Fujifilm X100V, sometimes I need a bit more elbow room. I looked at the WCL-X100 II Wide Conversion Lens, wanted it, but was reluctant to spend the $350 it costs. So I came up with another angle.

Canon-Aux-Lens-P4165404-1024.jpg A Canon Wide Converter WC-DC58 0.8X lens mounted to a Fujifilm X100V. Photos by Derrick Story.

I found a Canon Wide Converter WC-DC58 0.8X lens in my photo accessory drawer, and decided to try it on the X100V. I mean, why not! I already had the filter adapter for the X100V that used 49mm threads. The WC-DC58 had 58mm threads on its backside. I kept digging, found a couple step-up rings that I could cobble together, and made the connection.

Canon-Aux-Lens-P4165414-1024.jpg

Peering through the electronic viewfinder, the world looked pretty good... and wider too. This had potential. I went to the menu on the Fujifilm and found the Conversion Lens option and set it to wide.

This does two things. First, it correctly adjust the metadata to read at the wider focal length, and it removes the frame lines in the optical viewfinder presenting you with a more accurate view of the world. Very cool.

Canon-Aux-Lens-P4165405-1024.jpg

After a bit of testing and reviewing the images at 100 percent on the laptop, I can confidently say that the lovely Canon Wide Converter works beautifully on the X100V. Sharpness was good at f/2.8 and great beyond f/5.6. Colors were deliciously Fuji, and it looks cool on the camera as well.

X100V-DSCF0146-Canon-Conversion-Lens-1024.jpg Photo captured with the Fujifilm X100V and Canon Wide Converter. Processed in Capture One Pro 21.

An interesting note about this experiment. At first I was bummed that I didn't have a straight 49mm-58mm step-up ring, and had to use two rings to make the connection. I later bought a single ring and tested it. Interestingly, the pictures weren't quite as good. Seems that the slightly extra distance using the two rings is the proper calibration. I'll keep testing this, but the results are impressive with the two step-up ring configuration. I'm sticking with it for now.

In case you have a Fujifilm X100 and want to play with this, I did find the Canon WC-DC58 on eBay, usually for around $30. I'm using 49mm-55mm and 55mm to 58mm step-up rings to make the connection. And of course, you will need the Fujifilm filter adapter, which you should have anyway. In case you don't, I like the Vello LHF-X100 Dedicated Lens Hood with Adapter Ring for Fujifilm X100 for $19.95. It works great!

Oh, and guess what else I had in my photo accessory drawer? The Canon Tele-Converter TC-DC58 that provides 1.5X magnification. My oh my.

Canon-Aux-Lens-P4165398-1024.jpg

Product Links and Comments

There are product links in this article that contain affiliate tags. In some cases, depending on the product, The Digital Story may receive compensation if you purchase a product via one of those links. There is no additional cost to you.

You can share your thoughts at the TDS Facebook page, where I'll post this story for discussion.