Recently in Photography

  Page 36 of 386 in Photography  

Catalog or Session in Capture One Pro?

As new users come to Capture One Pro, I'm hearing a familiar question from them: Should I use a catalog or a session when I start a new library? My answer is: "Well, that depends." Click on the link below to watch a 2-minute video that explains the differences.

session-vs-catalog.jpg

Catalog vs. session: How are they different? from Capture One Pro 9 Essential Training by Derrick Story

If you do decide to use a session for a temporary work area, such as sorting out a wedding or taking your laptop on vacation, remember you can use the Import Session command to incorporate the session into your catalog, if you need to.

Even though I use catalogs the majority of the time, I do use sessions for my tethered shooting for product shots. If I want to add those images to my catalog, I can. But generally speaking, I don't.

Hope this helps clear the muddies waters a bit.

Learn Capture One Pro 20 Quickly

If you're new to Capture One Pro, you may want to check out my latest online class, Capture One Pro 20 Essential Training on LinkedIn Learning, or, if you're a lynda.com subscriber, you can watch it there as well. It will get you up and running in no time at all.

If you don't have Capture One Pro yet, you can download the 30-day free trial (Mac/Win). No credit card is required, and it's a fully functioning version.

You can share your thoughts at the TDS Facebook page, where I'll post this story for discussion.

This is The Digital Story Podcast #753, August 25, 2020. Today's theme is "A RAW Look at Image Differences Between Smartphones and Cameras." I'm Derrick Story.

Opening Monologue

As a guy who loves to shoot with both his iPhone and digital cameras, I wondered how much of a difference there is between the two when I shoot in RAW. The smartphone certainly holds its own when it comes to Jpegs. Is it equally competitive with RAW files? So I conducted a test and compared an iPhone X with an Fujifilm X100V. And I share my findings in today's TDS photography podcast.

A RAW Look at Image Differences Between Smartphones and Cameras

RAW File Comparison Left: Fujifilm X100V - Right: iPhone X - Rendered in Capture One Pro 20

I'm a bit surprised that I never set aside the time to do this test before. I enjoy photography with both my iPhone and my Olympus, Fujifilm Nikon, and Pentax cameras. I rarely shoot in RAW on the iPhone, but did so for this test since I capture in RAW on my other cameras. So I wanted a pears to pears comparison.

My subject was a bowl of pears from my yard photographed in natural light. As best I could, I maintained similar angles and avoided exposure compensation. I let the cameras do the work, using the RAW files from each.

To decode and view the images, I used Capture One Pro 20 and Lightroom CC. My cameras were an iPhone X and Fujifilm X100V. I did use camera and lens profiles when they were available, and I did add some warmth to these through white balance. But I let the apps do the rest of the processing using their respective auto enhancements.

BTW: As a point of reference, the DNGs from the iPhone were 12.1 MBs for a 12MP file vs the RAF files from the X100V that are 56.8 MBs for a 26MP image. That is a substantial difference.

After comparing the output, here's what I noticed.

Pears-Side-by-Side-LR.jpg Left: Fujifilm X100V - Right: iPhone X - Rendered in Adobe Lightroom

  • Smartphones continue to impress - There are differences between the two files, which I will note, but overall I wanted to state that the DNGs from the iPhone are quite respectable, especially in terms of detail. Can I tell the difference? Yes I can. But it's much closer than one might initially think.
  • Depth of Field - This isn't a RAW thing so much, but boy is it noticeable. Even when I stopped down to f/5.6 on the X100V, the falloff is so much more pleasing that shooting at f/2.4 on the iPhone, which renders everything sharp.
  • Color Science - The color difference was very noticeable to me. The iPhone had a much harder time rendering subtle hue difference. This was particularly noticeable on the backside of the pear in the upper left corner. There is this wonderful peachy coloring in the Fuji shot, but in all of the iPhone images that area went brown, as if the gamut was narrower for the iPhone. Also, and this will sound funny, the fruit looked much more edible with the Fuji shots compared to the iPhone rendering.
  • Sharpness: Both images are sharp, but the characteristics are much different. The textures on the iPhone pears are more pronounced, almost exaggerated, compared to the more delicate rendering from the X100V. Again, I'm not sure that I would want to eat the fruit in the iPhone shot.
  • Shadows and Highlights: Again, an admirable rendering by the iPhone. The shadows were good with decent gradation. But the shadows from the X100V were more pleasing, and the highlights were brighter, but still retained detail. The iPhone highlights were more controlled with less contrast. I feel the X100V shot has more life.

If I didn't have the X100V RAW files in the same album as the iPhone images, I would say that the iPhone RAWs were very good. And to be honest, they are. But when you compare the two side by side, little differences become quite noticeable.

And I think that is how I would sum up the comparison. If little differences in color science, tonality, and texture are important to you, it's still very worth it to carry a digital camera for the images that you want to draw the most out of in post.

The gulf becomes even wider when it comes to background control. And for a lot of photographers, the conversation would end right there.

Panasonic will announce, via livestream, its new Lumix S5 full-frame camera on September 2

You can read the entire article on DP Review.

Panasonic has announced it will hold an online launch event for its new full-frame mirrorless camera, the Lumix S5, on Wednesday, September 2, 2020, at 10 AM EDT.

Aside from the date and time, no further information was shared about the camera or launch event. Panasonic suggests keeping an eye on its Lumix S5 webpage and Instagram account, but we will also update this article with a link to the event when it goes live.

Rumor has it, however, that the S5 will be more compact and affordable than existing options from Panasonic. According to Digital Camera World, "the Panasonic S5 will be one-third smaller and lighter than the S1, has a 24.2MP sensor, 4K, Dual Native ISO, and will cost $1,998. Those specs are pretty compelling. We'll find out for sure soon enough.

The New Donation Kit for Carefree Shipping of Found Film Cameras

We have more time around the house than ever. And you finally dove into that bedroom closet that's been begging for some organization.

If you found a film camera that you're no longer using, our new Donation Kit makes it easy to pack and ship. Just visit the Contact Form on thenimblephotographer.com, click the box next to Donating a Film Camera, and let me know what you have. In your note, be sure to include your shipping address.

If it's a camera we can use for the shop, I'll send you a Donation Kit that includes a USPS Priority Mail shipping box and prepaid label. All you have to do is tape it up, insert the camera, and add the label. USPS will pick up your shipment from the front door of your house during their regular mail delivery. It's that simple!

Your donation help get analog gear in the hands of aspiring fine art photographers, and the proceeds help support this podcast.

My Expansion into Music and Audio

With two new music titles about to release: "Ripping and Cataloging Audio CDs" and "Enjoying and Digitizing Vinyl Records," you may be wondering how these topics fit with the traditional content on TheDigitalStory that is primarily image based.

The answer is: Quite Well!

Audio has always been a part of our world here. This is a podcast for heaven's sakes! And as I look at our changing world and how we might be adapting to it, I see music being a big part of the formula that helps us stay happy and creative.

Plus, one of the side effects to the popularity of digital music is that we're listening more and more on small devices with earbuds and bluetooth speakers. There's no denying that this is highly convenient, but if you play the same music on via a CD or record album on a HiFi stereo, it will sound different. And at times, very different.

From my perspective, this is no more a campaign against digital downloads for music than it is for smartphone photography. They are both here to stay, and I like 'em! But, if we're limited to smartphones for photography and audio, then we are missing a lot. And I want to advocate for richer experiences on both fronts to augment the digital convenience we tend to rely on.

If this resonates with you at all, then please take a look at these two titles that will appear on TheNimblePhotographer site later this week. I'm loving rediscovering music on this level, and I'm hoping that you may as well.

The Essential Steps to Impressive Video Conferencing

If you want to learn more about looking and sounding great for your next online interaction, then I think you'll very much enjoy my latest online workshop, The Essential Steps to Impressive Video Conferencing.

This 1-hour deep dive focuses on the 3 major areas of successful online interaction: Audio, Video, and Environment. During the course, I walk you through a variety of techniques that range from simple using gear that you already have, to improving your chops through a few inexpensive purchases.

The course is currently available for free to our Inner Circle Members on Patreon. Members, just go to our Patreon site, and all the information will be there. If you're not already an Inner Circle Member, you can join us for $5 a month.

The course is also available on our Nimble Photographer Workshop Page for $14.95.

I have tons of great tips and techniques waiting for you there. If you want to get serious about how you come across during online meetings, classes, interviews, and family interactions, then you definitely will want to watch this course.

Digitizing Family Memories Course Now Available Online

Each of the four classes will outline a specific set of steps for you to accomplish. By the end of the course, you will have an organized digital archive of your most valuable family images.

You can sign up for the course by visiting the Workshops page on The Nimble Photographer. The course fee is a reasonable $39 (on sale right now). It includes the 4 class videos, class notes, and access to the class forums that are a part of each movie.

Updates and Such

Inner Circle Members: A big thanks to those who support our podcast and our efforts!

How to Watch Photos for macOS Catalina and iPadOS - Learn everything you need to know about Photos for the Mac and iPad by checking out my latest course on LinkedIn Learning and on lynda.com. This course is perfect for Mac and iPad based photographers who shoot with iPhone, Mirrorless, and DSLR cameras. It covers both photography and movies. And if I say so myself, it's a lot of fun.

B&H and Amazon tiles on www.thedigitalstory. If you click on them first, you're helping to support this podcast. (The Digital Story is supported by its audience. When you purchase through links on our site, we may earn an affiliate commission.) And speaking of supporting this show, and big thanks to our Patreon Inner Circle members:

Affiliate Links - The links to some products in this podcast contain an affiliate code that credits The Digital Story for any purchases made from B&H Photo and Amazon via that click-through. Depending on the purchase, we may receive some financial compensation.

And finally, be sure to visit our friends at Red River Paper for all of your inkjet supply needs.

See you next week!

Product Links and Comments

There are product links in this article that contain affiliate tags. In some cases, depending on the product, The Digital Story may receive compensation if you purchase a product via one of those links. There is no additional cost to you.

You can share your thoughts at the TDS Facebook page, where I'll post this story for discussion.
I still have Photoshop, but I'm so happy that I don't need it often thanks to layers in Capture One Pro 20. And I was reminded of that joy again today while editing this grape image.

Sonoma County Grapes Sonoma County Grapes - Fujifilm X100V, f/8, 1/30th, ISO 160, processed in Capture One Pro 20. Photo by Derrick Story.

I really like the unique variety in this bunch, something that I don't see often. But there were also a few distracting elements that I knew I would have to address in post. I captured the image in RAW with the Fujifilm X100V, then loaded the files into Capture One Pro 20 when I returned home. Here's what it looked like before I started working on it.

C1P-Not-Edited.jpg Not edited version of grape shot.

One of the biggest distractions for be was the ugly leaf just to the right of the grapes. In the old days, that would have guaranteed a trip to Photoshop. But the cloning and healing tools have improved a lot in Capture One. So I stayed home and addressed the issue there.

I actually started with the healing brush first, then touched up with the clone tool. Each on separate layers. I still have a bit more fine tuning to do, but it's coming along nicely. Here's a look at where I am now with the picture. You can see the layers listed on the left of the screen.

C1P-Edited-With-Layers.jpg Editing in progress with the grapes.

Another adjustment that I made was tandem radial screens for the grape bunch. The first radial screen excluded the grapes and worked like a sophisticated vignette. Then I copied the mask, inverted it, and brightened up the fruit a bit. This is one of my favorite techniques.

All in all, I have seven layers plus the background. They are very easy to manage, and quite powerful.

I'm sure I'll have to fire up Photoshop in the future for an image. Just not sure when.

Learn Capture One Pro 20 Quickly

If you're new to Capture One Pro, you may want to check out my latest online class, Capture One Pro 20 Essential Training on LinkedIn Learning, or, if you're a lynda.com subscriber, you can watch it there as well. It will get you up and running in no time at all.

If you don't have Capture One Pro yet, you can download the 30-day free trial (Mac/Win). No credit card is required, and it's a fully functioning version.

There are product links in this article that contain affiliate tags. In some cases, depending on the product, The Digital Story may receive compensation if you purchase a product via one of those links. There is no additional cost to you.

You can share your thoughts at the TDS Facebook page, where I'll post this story for discussion.
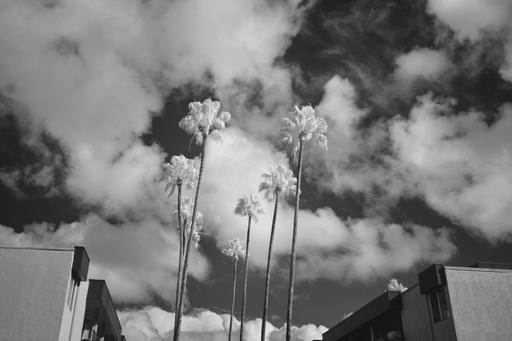
Have Your Camera, Find Your Spot

Every day seems like a new adventure in 2020. A short list of recent events in Northern CA include: pandemic, Black Lives Matter protests, lightning strikes, heat wave, and fires. When I get in the car to drive home each evening, I have no idea what I will encounter.

Sonoma-County-DSCF1950-fire.jpg "Fire in the West" - Captured for a safe spot on a freeway overpass in Sonoma County with a Fujifilm X100V. Photo by Derrick Story.

So I make sure that I have my Fujifilm X100V by my side and the iPhone X in a bracket. Between the two of them, I can record this crazy world when it presents its madness.

The other thing to keep in mind is finding my spot. My approach when I see something going down is to capture it immediately, even if the photographic circumstances aren't ideal. Just get the shot.

Then, if I have the ability to find a better vantage point for a refined version, I do that next. Our current fire in the West County that flared up yesterday evening is a good example.

IMG_6662.jpeg "Fire in the West" - Captured with an iPhone X using a bracket and self-timer. Photo by Derrick Story.

This shot above, captured with an iPhone X, was recorded from the car when I had the first good look at it. It is not an ideal image by any stretch of the imagination. But who knows what's going to happen next, so I wanted to have it for documentation.

The top image was photographed minutes later from a freeway overpass where I had a much better vantage point. Fortunately we have places to park around here, and that makes it much easier to get out of the car with camera in hand and compose the shot that I want.

As always, I try to be safe when taking pictures, and be aware of the safety for those around me as well. Yes, I want to do my job, but not at the expense or inconvenience of others. And sometimes I lose shots as a result.

The bottom line is, that there are many photo opportunities that we can't anticipate. But if you're prepared and willing to make the extra effort to detour for a few minutes, you can capture many of these unexpected moments.

Be prepared, be safe, and be an artist.

Product Links and Comments

There are product links in this article that contain affiliate tags. In some cases, depending on the product, The Digital Story may receive compensation if you purchase a product via one of those links. There is no additional cost to you.

You can share your thoughts at the TDS Facebook page, where I'll post this story for discussion.
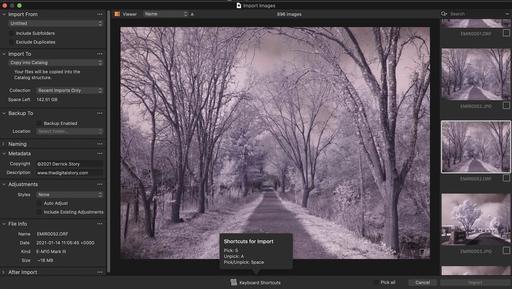
This is The Digital Story Podcast #752, August 18, 2020. Today's theme is "5 Ways to Spice Up Your Pix Life." I'm Derrick Story.

Opening Monologue

Much is written about the evils of gear acquisition syndrome, often referred to as GAS. And yes, it is a real thing for many photographers. But my personal view of this affliction is isolated more to spending big bucks on cameras and glass. What about those smaller purchases that bring us true joy and energize our enthusiasm for photography? I'll make my anti-GAS case on today's TDS podcast.

5 Ways to Spice Up Your Pix Life

I don't know if you've ever done this, but I'm going to admit to you that I have. Have you ever set a new camera, or an accessory for it, on the table in front of you while you worked?

PEN-F-1024.jpeg

It wasn't in use. There was no particular reason to do this other than you just wanted to look at it and admire its beauty. I've done that. I did it with the Olympus PEN-F in its handsome leather half case. I also perched the Fujifilm X100V with its aluminum grip in front of me. It's such a great feeling. I can't wait to go out and take pictures with these beauties.

So when we're feeling a bit stale, how can we spark that joy without dinging our credit cards with a $1,500 charge? My trick has been through new accessories and techniques. And I have five to share with you this week.

  • A New Lens, but Vintage - Yes, you could spend $1,200 on a new state of the art optic. But scoring a vintage beauty for $100 can be just as satisfying and evokes far less guilt. And the images that this glass produces can be truly inspiring.
  • An ND Filter - Unless you're a seasoned landscape photographer, you probably haven't invested in an ND filter yet. Get one and find some water and amaze yourself with the images you can produce. I also recommend a smartphone app that will help you calculate exposure. There are many of them. This will increase your success rate as well as your enjoyment quotient. You can check a a variety of ND filters here.
  • A Pack of Black 5x7 Frames - There's something about a museum-styled black frame that makes your images look just a bit better. 5x7 prints are easy to make. Put the two together and you will be truly pleased with the results. Try it. I'm beggin' ya! Here's a a set of frames that I bought and have been pleased with
  • Half Case or Aluminum Grip, You Choose: I've gone both routes and can't decide which one I like better. On the PEN-F I went with a leather half case with matching wrist strap. For the X100V I chose the aircraft aluminum grip with Arca Swiss adapter on the bottom. I can't stop looking at either one of them. Here is a selection of half cases to browse.
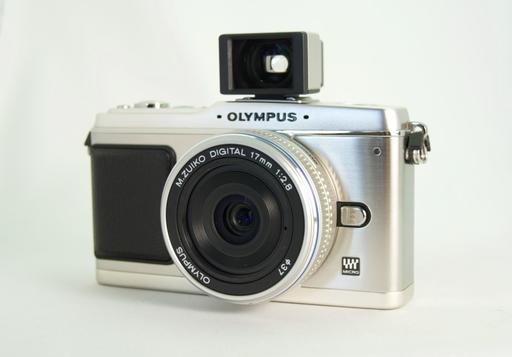
  • Custom Lens Hood: I've gone this route three times and have not regretted my decision once. I first bought the Olympus metal hood for my 75mm f/1.8 optic. What a beautiful, artfully designed metal accessory. I did it again with the Voigtlander 40mm f/2.0 optic for my Nikons. It included a fitted lens cap that is gorgeous. And finally, my silver Olympus 17mm f/1.8 lens has a limited edition metal lens hood with custom fitted cap. Oh my. All three are so irresistible.

I realize that when it comes to photography, I am easily entertained. And these minor indulgences really keep my enthusiasm waxing. Pick one or two and try them yourself. And if you have a favorite that isn't on this list, please list it on our TDS Facebook pages so others may consider it for their kits.

Adobe opens up free registration for its all-digital Adobe MAX 2020 conference?

You can read the entire article on DP Review.

Registration for the all-digital Adobe MAX 2020 event is now open and free for all.

Back in May, Adobe announced both of its annual conferences, 99U and Adobe MAX, would be going all-digital amidst the ongoing COVID-19 pandemic. Now, Adobe has opened up registration for its Adobe MAX 2020 conference, making it free for all who want to join the virtual version of 'The Creativity Conference.'

The online event will feature more than 250 speakers and take place from October 19-21. Both the main keynote and the breakout sessions will be available for all registrants. The headlining speakers include photographer Annie Leibovitz; recording artist, producer and director Tyler, the Creator; writer, director and producer Ava DuVernay; and actor and director Keanu Reeves. Dozens of other artists across all disciplines will have keynotes and breakout sessions as well.

I'm Now Writing on Medium

I've started publishing articles on Medium.com as @derrickstory. Posts that aren't anywhere else include: "The Body Is Willing Long After the Mind is Gone," "How IBIS Saved the Day, er, The Night," "From LA to San Francisco, 61 Days in a Different World," and "My 10 Years with Olympus Cameras." If you're interested in these topics, I'm posting an article a week. You might want to stop by and follow.

After mentioning this last week, I was thrilled so see that many of you from our TDS audience were hanging out on Medium last week. Thank you so much for chiming in. I think this is going to be an excellent complement to the work we're doing on TDS.

Those Darn Meteors!

Actually, the meteors weren't the problem. But those clouds certainly were. I wandered out two nights last week with camera on tripod and ended going home with my tail between my legs. I explain what happened in this segment of the show.

The New Donation Kit for Carefree Shipping of Found Film Cameras

We have more time around the house than ever. And you finally dove into that bedroom closet that's been begging for some organization.

If you found a film camera that you're no longer using, our new Donation Kit makes it easy to pack and ship. Just visit the Contact Form on thenimblephotographer.com, click the box next to Donating a Film Camera, and let me know what you have. In your note, be sure to include your shipping address.

If it's a camera we can use for the shop, I'll send you a Donation Kit that includes a USPS Priority Mail shipping box and prepaid label. All you have to do is tape it up, insert the camera, and add the label. USPS will pick up your shipment from the front door of your house during their regular mail delivery. It's that simple!

Your donation help get analog gear in the hands of aspiring fine art photographers, and the proceeds help support this podcast.

The Essential Steps to Impressive Video Conferencing

If you want to learn more about looking and sounding great for your next online interaction, then I think you'll very much enjoy my latest online workshop, The Essential Steps to Impressive Video Conferencing.

This 1-hour deep dive focuses on the 3 major areas of successful online interaction: Audio, Video, and Environment. During the course, I walk you through a variety of techniques that range from simple using gear that you already have, to improving your chops through a few inexpensive purchases.

The course is currently available for free to our Inner Circle Members on Patreon. Members, just go to our Patreon site, and all the information will be there. If you're not already an Inner Circle Member, you can join us for $5 a month.

The course is also available on our Nimble Photographer Workshop Page for $14.95.

I have tons of great tips and techniques waiting for you there. If you want to get serious about how you come across during online meetings, classes, interviews, and family interactions, then you definitely will want to watch this course.

Digitizing Family Memories Course Now Available Online

Each of the four classes will outline a specific set of steps for you to accomplish. By the end of the course, you will have an organized digital archive of your most valuable family images.

You can sign up for the course by visiting the Workshops page on The Nimble Photographer. The course fee is a reasonable $39 (on sale right now). It includes the 4 class videos, class notes, and access to the class forums that are a part of each movie.

Updates and Such

Inner Circle Members: A big thanks to those who support our podcast and our efforts!

How to Watch Photos for macOS Catalina and iPadOS - Learn everything you need to know about Photos for the Mac and iPad by checking out my latest course on LinkedIn Learning and on lynda.com. This course is perfect for Mac and iPad based photographers who shoot with iPhone, Mirrorless, and DSLR cameras. It covers both photography and movies. And if I say so myself, it's a lot of fun.

B&H and Amazon tiles on www.thedigitalstory. If you click on them first, you're helping to support this podcast. (The Digital Story is supported by its audience. When you purchase through links on our site, we may earn an affiliate commission.) And speaking of supporting this show, and big thanks to our Patreon Inner Circle members:

Affiliate Links - The links to some products in this podcast contain an affiliate code that credits The Digital Story for any purchases made from B&H Photo and Amazon via that click-through. Depending on the purchase, we may receive some financial compensation.

And finally, be sure to visit our friends at Red River Paper for all of your inkjet supply needs.

See you next week!

Product Links and Comments

There are product links in this article that contain affiliate tags. In some cases, depending on the product, The Digital Story may receive compensation if you purchase a product via one of those links. There is no additional cost to you.

You can share your thoughts at the TDS Facebook page, where I'll post this story for discussion.
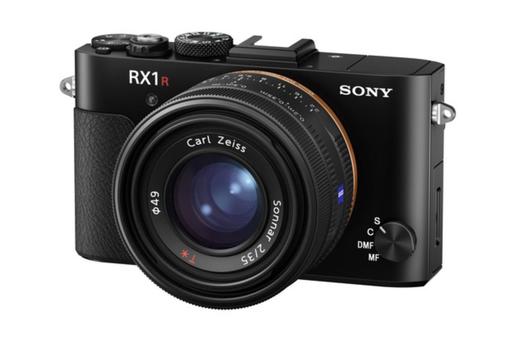
There are those situations when we find ourselves without an easy-to-use light meter - most commonly when using older film cameras that either didn't have one to begin with, or the internal electronics have faded over the years.

meter-1024.jpeg Readouts for the Reveni Labs Light Meter.

Thanks to a clever solution by Reveni Labs, you can easily add a silicone eye with digital readouts to any photography situation.

I've been testing their hot shoe light meter ($95 USD/$125 CAD) and have been able to use cameras once again that had been on the shelf due to their lack of electronics. The Reveni Meter provides a digital readout of the light in front of the camera (or where ever you point the eye). You can use its controls on top to "shift" the readout to a pairing that best suits your needs at the time. So if 1/125th at f/4 is stopped down too much, shift to 1/250th at f/2.8.

meter-top-1024.jpeg Top panel of the meter with the controls.

One thing to keep in mind with the device is that it's good-old-fashioned single-segment metering. So if you point it at a subject that has a bright background, such as a white fence, the fence will influence the readout accordingly. Once you get used to that, you should be in business.

The Reveni Meter is powered by a button cell (provided) and resides comfortably in the camera's hot shoe. But if you want to use it differently, there are lots of accessories on the site that provide flexibility.

I published an article on Medium.com titled, The Body Is Willing Long After the Mind Is Gone that tells the story of how the Reveni Meter gave a second life to my Nikon FA that could no longer read exposures, but all the shutter speeds still worked. It's a good story and a true real life experience.

I highly recommend this photo accessory.

You can share your thoughts at the TDS Facebook page, where I'll post this story for discussion.
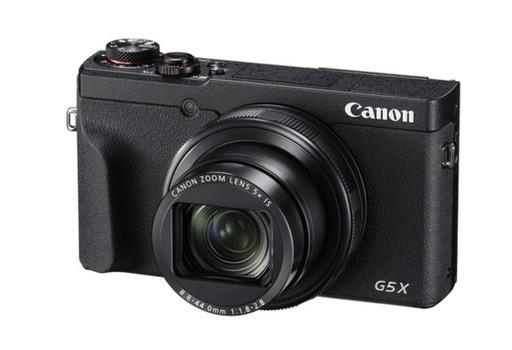
This is The Digital Story Podcast #751, August 11, 2020. Today's theme is "Has the Pandemic Killed Your Creative Mojo?." I'm Derrick Story.

Opening Monologue

In the last two months, I've shot 2 rolls of film. And if it wasn't for Comet Neowise, the same would apply to my digital production as well. It's not that I don't want to take pictures. It's that all of my normal prompts have been put on ice. And now I'm searching for new inspiration to increase my production. I talk about this ongoing challenge, and the realization I had about it, in this week's TDS podcast.

Has the Pandemic Killed Your Creative Mojo?

Derrick-1024.jpeg

When I was 15 years old, I had a job at a gas station in my home town. I learned a lot about myself during that time. For example, there would be stretches of time with no customers. The slower traffic was, the slower I became to the point where I didn't feel like doing anything.

Then I would get a rush of cars, and I would work like crazy and feel totally energized. Time would pass quickly, and I really enjoyed my work.

The thing I've noticed about all versions of shelter in place, including those that have cancelled all of my photo jobs and workshops, is that it's a momentum killer. I become focused on making ends meet, trying to cut costs, stay in contact with friends, and in all honesty, just get through the day as safely as possible.

None of this seems good for creativity. And the more that I'm stuck inside my studio, the less motivated I am to venture out to take pictures of the world coping with a pandemic. Maybe that's it. We're just so single topic these days, the topic itself feels old and tired.

So I devised a plan to battle back and to combat the gas station blues. Here's what this week's strategy looks like.

  • Monday: Ride my bike to Jeremiah's to pick up some processed film and look for pictures along the way. Write and record the podcast. I didn't get any pictures, but I did have an epiphany.
  • Tuesday: Start recording my new training title on "How to Play, Digitize, and Enjoy Vinyl Records". Prepare for and watch the Perseid (Per - See - id) meteor shower that night.
  • Wednesday: Continue recording my new training title How to Play, Digitize, and Enjoy Vinyl Records. Process the images that I captured the night before. Make sure one walk or bike ride.
  • Thursday: Another day of recording my new training title on Enjoying and Digitizing Vinyl Records. Be sure to get in a long walk or a bike ride.
  • Friday: Mini road trip for a meeting, but pack camera and spend a little extra time taking pictures before returning home. Try to find a photo subject that isn't COVID.

What I've discovered is that these activities do help me feel better. And that's definitely half the battle. But I'm still not feeling as creatively powerful as I would like. I think part of that is because I'm using a lot of my creative juices to problem solve the challenges in business and life. I should give myself credit for that. (And you should as well.)

And that's when the lightbulb finally went on for me. It's not that we've lost our creativity. It's that we're having to use it for other things, namely problem solving during a pandemic. The pandemic didn't kill our mojo. It redirected it. And it will be stronger than ever when we get to tap it again for our photography, writing, painting, and music.

So for right now, just do the best you can every day. Meet those challenges head on. Give yourself credit for using your problem solving capabilities to help your friends, family, community, and country.

And continue to check in here. Because if anyone knows what you're going through, it's us.

Can You Tell the Difference Between Digital B&W and Film?

A common remark I hear from photographers is that there's no need to shoot B&W film because it's so easy to convert digital files to monochrome. Why take on the extra work?

Generally speaking, I think that's a fair comment. We can make very, very nice B&W images on our computers choosing from a variety of tools and film simulations. And yet, film is still a bit different. Maybe it's the randomness of the silver crystals compared to organized patten of pixels, maybe it's something else.

So I thought we'd have a little fun with this. Here are two images. Both shot with a Nikon and a 50mm f/1.8 lens. One is digital, and the other is Tri-X film that I processed at the studio and scanned on a $160 Kodak Scanza. Which one is the digital, and which one is from Tri-X?

And the answer is: Photo A is digital captured with a Nikon D700 and Nikon 50mm f/1.8 lens. Photo B is analog, recorded with a Nikon FA with a 50mm lens and Tri-X film.

As of this morning, the correct answer was leading 3:1 on our Inner Circle site and Facebook page combined.

Using the NPF Rule for Photographing Night Skies

You can read the entire article here on F-Stoppers.

Because we know the amount of rotation in 24 hours, we can easily calculate the distance a star will move each second. This leads to the Rule of 600. By dividing the number 600 by the focal length of the lens you are using, you will end up with the maximum amount of seconds an exposure may last. That's easy to remember, and easy to use.

The Rule of 600 originates from the days of analogue photography. That is why the focal length has to be a 35mm equivalent. If you are using a crop sensor, just multiply the focal length by the crop factor. Still, not every image with a shutter speed that is calculated by the Rule of 600, will produce real stars. There is something not right with this rule.

Nowadays, our digital sensors have more resolution than analogue film. It means, motion blur will be visible much sooner compared to analogue film. That is why the Rule of 600 is often changed into the Rule of 500, or even the Rule of 400. It compensates the increased resolution up to a certain point. Still, it is not easy to get the exact maximum shutter speed. Especially because the resolution of digital sensors is getting larger with almost every new camera. That is why you have to take resolution into account, and for that you can use the NPF rule.

The NPF rule originates from Fr�d�ric Michaud from the Soci�t� Astron�mique du Havre. It is a complex rule that takes sensor resolution into account. The NPF stands for

N = aperture (it's the official notification of aperture in optics),
P = pixel density, the distance between the pixels on the sensor, also called pixel pitch,
F = focal length.

The app PhotoPills will calculate the NPF rule for you.

I'm Now Writing on Medium

I've started publishing articles on Medium.com as @derrickstory. Posts that aren't anywhere else include: "How IBIS Saved the Day, er, The Night," "From LA to San Francisco, 61 Days in a Different World," and "My 10 Years with Olympus Cameras." If you're interested in these topics, I'm posting an article a week. You might want to stop by and follow.

After mentioning this last week, I was thrilled so see that many of you from our TDS audience were hanging out on Medium last week. Thank you so much for chiming in. I think this is going to be an excellent complement to the work we're doing on TDS.

The New Donation Kit for Carefree Shipping of Found Film Cameras

We have more time around the house than ever. And you finally dove into that bedroom closet that's been begging for some organization.

If you found a film camera that you're no longer using, our new Donation Kit makes it easy to pack and ship. Just visit the Contact Form on thenimblephotographer.com, click the box next to Donating a Film Camera, and let me know what you have. In your note, be sure to include your shipping address.

If it's a camera we can use for the shop, I'll send you a Donation Kit that includes a USPS Priority Mail shipping box and prepaid label. All you have to do is tape it up, insert the camera, and add the label. USPS will pick up your shipment from the front door of your house during their regular mail delivery. It's that simple!

Your donation help get analog gear in the hands of aspiring fine art photographers, and the proceeds help support this podcast.

The Essential Steps to Impressive Video Conferencing

If you want to learn more about looking and sounding great for your next online interaction, then I think you'll very much enjoy my latest online workshop, The Essential Steps to Impressive Video Conferencing.

This 1-hour deep dive focuses on the 3 major areas of successful online interaction: Audio, Video, and Environment. During the course, I walk you through a variety of techniques that range from simple using gear that you already have, to improving your chops through a few inexpensive purchases.

The course is currently available for free to our Inner Circle Members on Patreon. Members, just go to our Patreon site, and all the information will be there. If you're not already an Inner Circle Member, you can join us for $5 a month.

The course is also available on our Nimble Photographer Workshop Page for $14.95.

I have tons of great tips and techniques waiting for you there. If you want to get serious about how you come across during online meetings, classes, interviews, and family interactions, then you definitely will want to watch this course.

Digitizing Family Memories Course Now Available Online

Each of the four classes will outline a specific set of steps for you to accomplish. By the end of the course, you will have an organized digital archive of your most valuable family images.

You can sign up for the course by visiting the Workshops page on The Nimble Photographer. The course fee is a reasonable $39 (on sale right now). It includes the 4 class videos, class notes, and access to the class forums that are a part of each movie.

Updates and Such

Inner Circle Members: A big thanks to those who support our podcast and our efforts!

How to Watch Photos for macOS Catalina and iPadOS - Learn everything you need to know about Photos for the Mac and iPad by checking out my latest course on LinkedIn Learning and on lynda.com. This course is perfect for Mac and iPad based photographers who shoot with iPhone, Mirrorless, and DSLR cameras. It covers both photography and movies. And if I say so myself, it's a lot of fun.

B&H and Amazon tiles on www.thedigitalstory. If you click on them first, you're helping to support this podcast. (The Digital Story is supported by its audience. When you purchase through links on our site, we may earn an affiliate commission.) And speaking of supporting this show, and big thanks to our Patreon Inner Circle members:

Affiliate Links - The links to some products in this podcast contain an affiliate code that credits The Digital Story for any purchases made from B&H Photo and Amazon via that click-through. Depending on the purchase, we may receive some financial compensation.

And finally, be sure to visit our friends at Red River Paper for all of your inkjet supply needs.

See you next week!

Product Links and Comments

There are product links in this article that contain affiliate tags. In some cases, depending on the product, The Digital Story may receive compensation if you purchase a product via one of those links. There is no additional cost to you.

You can share your thoughts at the TDS Facebook page, where I'll post this story for discussion.
A common remark I hear from photographers is that there's no need to shoot B&W film because it's so easy to convert digital files to monochrome. Why take on the extra work?

Generally speaking, I think that's a fair comment. We can make very, very nice B&W images on our computers choosing from a variety of tools and film simulations. And yet, film is still a bit different. Maybe it's the randomness of the silver crystals compared to organized patten of pixels, maybe it's something else.

So I thought we'd have a little fun with this. Here are two images. Both shot with a Nikon and a 50mm f/1.8 lens. One is digital, and the other is Tri-X film that I processed at the studio and scanned on a $160 Kodak Scanza. Which one is the digital, and which one is from Tri-X?

Dibs-Photo-1.jpeg Photo A - Dibs the Cat.

Dibs-Photo-2.jpeg Photo B - Dibs the Cat.

There are two ways you can vote. Inner Circle Members can cast their vote on our Patreon page. Members of our Facebook community can let their voice be heard on the TheDigitalStory FB Home Page.

And for a little extra fun, let us know which one you like better!

Even though there isn't a dedicated headphone port on the Fujifilm X100V, you can use its USB-C... that is, if you get the correct connector (more on that in a moment). Once you do so, the audio sounds great, and you have controls for the output volume.

headphones-1024.jpeg Sony headphones connected to the X100V via the USB-C port. Photos by Derrick Story.

The biggest challenge is finding an adapter that will work. I finally succeeded on the third try. And I learned a few things along the way. Take a look at the illustration below. Even though everything looks relatively similar, only one of those connectors will work with the camera.

P8054224.jpeg Three attempts at finding an adapter that will work. Fortunately, the third time was a charm.

The adapter that worked, and the only one that I recommend right now, is the Nylon Braided 2 in 1 USB C Type C to 3.5mm Headphone Audio Aux Jack & Charge Adapter Cable Converter for Motorola Moto Z, Letv Le Pro 3 and Other Mobile Phone That Without 3.5mm Audio Jack for $8.88. A close up view is shown below.

P8054222.jpeg This headphone adapter works with the Fujifilm X100V.

One of the problems with the other connectors that did not work was that they were digital. So, for example, if they work with the Google Pixel, Samsung Note, and Apple iPad Pro, they are probably useless with the X100V. On the other hand, this analog model that works with Moto phones sounds great! Plus, it has a second USB-C female port, that in theory, would allow you to charge the camera at the same time. I have not tested that function yet.

Once you get everything connected, go to MENU > MOVIE SETTING > AUDIO SETTING > HEADPHONES VOLUME and start at Level 7. You can adjust for taste from there. Using headphones in the field is critical for reviewing the audio of your recorded movies. With this configuration, you can hear the sound both live and during playback. That way, when you call it a day, you know that your video is good.

Product Links and Comments

There are product links in this article that contain affiliate tags. In some cases, depending on the product, The Digital Story may receive compensation if you purchase a product via one of those links. There is no additional cost to you.

You can share your thoughts at the TDS Facebook page, where I'll post this story for discussion.
This is The Digital Story Podcast #750, August 4, 2020. Today's theme is "Just Announced: The Olympus OM-D E-M10 Mark IV." I'm Derrick Story.

Opening Monologue

For those who thought Olympus was done for the year after the JIP announcement, I have a surprise for you: New camera and new super telephoto lens. Today, we're going to take a close look at the OM-D E-M10 Mark IV and the Digital ED 100-400mm f5.0-6.3 IS lens. Plus, I'll give an update to the Eastern Sierra workshop in the Fall and Costa Rica in January. I hope you enjoy the show.

The Olympus OM-D E-M10 Mark IV

E-M10_top.jpg

The Olympus OM-D E-M10 Mark IV is lighter than any previous model, at approximately 0.85 pounds. Even when paired with the M.Zuiko Digital ED 14-42mm F3.5-5.6 EZ lens, the kit is just over a pound, making it incredibly portable. A deep grip provides an ergonomic, comfortable and secure feel. Easy USB charging enables in-camera charging. So you can use a power bank when on the go. This body is also wireless radio wave external flash compatible.

A first for the OM-D series, this model is equipped with a flip-down LCD monitor and dedicated selfie mode, making it easy and fun to take high-quality selfies using one hand. The camera supports high-angle and low-angle shooting, so photos and videos turn out exactly as imagined. Additionally, the OM-D E-M10 Mark IV features a high-definition electronic viewfinder, making it easier than ever to shoot in direct sunlight and in other situations where it might be difficult to view the LCD monitor.

E-M10-front.jpg

Feature Highlights

  • 20.3 million 4/3" Live MOS Sensor
  • 121-point contrast AF - All target, group target (9-area), single target
  • Built-in 5-axis sensor-shift image stabilization for video and still photos (compensates for yaw, pitch, roll, vertical shift, horizontal shift) - up to 4.5 stops
  • Sequential shooting up to 8.7 fps
  • Eye-level electronic viewfinder, approx. 2.36M dots
  • 3.0-inch tilting monitor -Approx.1040k dots (3:2), electrostatic capacitance touch panel
  • Digital ESP metering (324-area multi pattern metering), center-weighted average metering, spot metering, spot metering with highlight control, spot metering with shadow control
  • AUTO ISO (default) : LOW (approx.100) ‐ 6400 Manual ISO : LOW (approx.100), 200 - 25600
  • Built-In Flash with wireless capability, Triggered and controlled by the built-in flash (Olympus Wireless RC Flash system compatible)
  • SD Card Slot - SD (SDHC, SDXC, UHS-I, UHS-II)
  • 4K Video - 3840 × 2160 (4K) / 30p, 25p, 24p / IPB (approx. 102 Mbps)
  • External mic can be attached, but not sure how (USB Micro-B?)
  • BLS-50 Li-ion battery (included)

E-M10-back.jpg

Pricing, Configurations, and Availability

Olympus OM-D E-M10 Mark IV Body (Silver/Black); $699 (U.S.)/$999.99 (CAD)

Olympus OM-D E-M10 Mark IV EZ Kit Body (Silver/Black) and M.Zuiko Digital ED 14-42mm F3.5- 5.6 EZiv lens; $799 (U.S.)/$1,049.99 (CAD)

The Olympus OM-D E-M10 Mark IV will be available for pre-order at participating local authorized retailers, or at www.getolympus.com, and will begin shipping on September 25, 2020. For detailed product specifications visit https://www.getolympus.com/digitalcameras/omd/e-m10-mark-iv.html.

Take advantage of a special launch offer by purchasing a new OM-D E-M10 Mark IV before November 1, 2020; receive an Olympus starter kit, including an Olympus camera bag, extra BLS- 50 battery and 32GB SD card (starter kit valued at $99.99).

October Eastern Sierra Physical Photography Workshop Postponed

Based on the progress of the pandemic and the need to keep our community members safe, I'm postponing the Eastern Sierra Photography Workshop to 2021.

I do have an event, however, that I'm hoping you'll be interested in: The Nimble Landscape Virtual Workshop Experience. Derrick then explains how this new event will work.

The Olympus 100-400mm F5.0-6.3 IS Lens

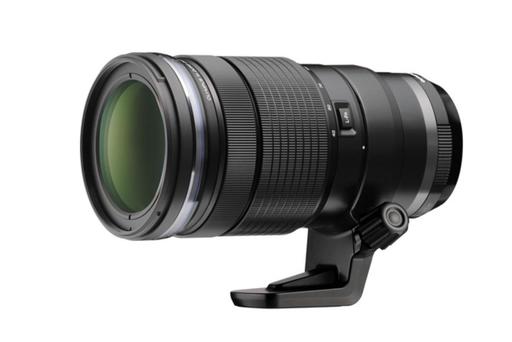
The 100-400mm f5.0-6.3 IS is an ultra-compact, lightweight super-telephoto zoom lens that covers a broad telephoto focal length of 200-800mm equivalent1 and is compliant with the Micro Four Thirds System standard.

100-400mm.jpg

The optic features the same dustproof and splashproof performance as the M.Zuiko PRO lens series, and when paired with the M.Zuiko Digital 2x Teleconverter MC-20, delivers up to 1600mm equivalent1 super telephoto shooting. This lens offers superior autofocus performance, even handheld, and in-lens image stabilization for the optimal shooting experience.

Despite being a 200-800mm equivalent super telephoto zoom lens, the Olympus M.Zuiko Digital ED 100-400mm f5.0-6.3 IS lens is compact and lightweight, with a length of 205.7 mm, a weight of 1,120 g6 and a filter diameter of 72 mm.

The M.Zuiko Digital ED 100-400mm f5.0-6.3 IS lens is capable of 200-800mm equivalent1 telephoto shooting on its own, which can be further extended when paired with the optional (sold separately) M.Zuiko Digital 1.4x Teleconverter MC-14 or the M.Zuiko Digital 2x Teleconverter MC-20, for up to 1600mm equivalent , making it possible to zoom in close on subjects that are difficult to approach, such as birds and wildlife, and delivering flattening effects for shooting that is unique to a super telephoto lens.

A rear focus system is employed to drive this lightweight focusing lens, for fast, high-precision autofocus performance. This lens is also equipped with four functional switches, designed to support handheld shooting, including a Focus Limiter switch for AF operation selection, ranging between three levels, according to the focusing distance, allowing for quick focusing and comfortable shooting, even in the super telephoto range. In-lens image stabilization on/off delivers stable handheld super telephoto shooting, an AF/MF switch and a zoom locking switch.

Pricing and Availability

The Olympus M.Zuiko Digital ED 100-400 f5.0-6.3 IS lens will be available for $1,499 (U.S.)/$2,199.99 (CAD). To pre-order, visit a participating local authorized retailer, or www.getolympus.com. Shipping will begin September 8, 2020. Please visit the website for detailed product specifications: https://www.getolympus.com/lenses/m-zuiko-digital-ed-100- 400mm-f5-0-6-3-is.html.

bonus-kit.jpg

I'm Now Writing on Medium

I've started publishing articles on Medium.com as @derrickstory. Posts that aren't anywhere else include: "How IBIS Saved the Day, er, The Night," "From LA to San Francisco, 61 Days in a Different World," and "My 10 Years with Olympus Cameras." If you're interested in these topics, I'm posting an article a week. You might want to stop by and follow.

After mentioning this last week, I was thrilled so see that many of you from our TDS audience were hanging out on Medium last week. Thank you so much for chiming in. I think this is going to be an excellent complement to the work we're doing on TDS.

The New Donation Kit for Carefree Shipping of Found Film Cameras

We have more time around the house than ever. And you finally dove into that bedroom closet that's been begging for some organization.

If you found a film camera that you're no longer using, our new Donation Kit makes it easy to pack and ship. Just visit the Contact Form on thenimblephotographer.com, click the box next to Donating a Film Camera, and let me know what you have. In your note, be sure to include your shipping address.

If it's a camera we can use for the shop, I'll send you a Donation Kit that includes a USPS Priority Mail shipping box and prepaid label. All you have to do is tape it up, insert the camera, and add the label. USPS will pick up your shipment from the front door of your house during their regular mail delivery. It's that simple!

Your donation help get analog gear in the hands of aspiring fine art photographers, and the proceeds help support this podcast.

The Essential Steps to Impressive Video Conferencing

If you want to learn more about looking and sounding great for your next online interaction, then I think you'll very much enjoy my latest online workshop, The Essential Steps to Impressive Video Conferencing.

This 1-hour deep dive focuses on the 3 major areas of successful online interaction: Audio, Video, and Environment. During the course, I walk you through a variety of techniques that range from simple using gear that you already have, to improving your chops through a few inexpensive purchases.

The course is currently available for free to our Inner Circle Members on Patreon. Members, just go to our Patreon site, and all the information will be there. If you're not already an Inner Circle Member, you can join us for $5 a month.

The course is also available on our Nimble Photographer Workshop Page for $14.95.

I have tons of great tips and techniques waiting for you there. If you want to get serious about how you come across during online meetings, classes, interviews, and family interactions, then you definitely will want to watch this course.

Digitizing Family Memories Course Now Available Online

Each of the four classes will outline a specific set of steps for you to accomplish. By the end of the course, you will have an organized digital archive of your most valuable family images.

You can sign up for the course by visiting the Workshops page on The Nimble Photographer. The course fee is a reasonable $39 (on sale right now). It includes the 4 class videos, class notes, and access to the class forums that are a part of each movie.

Updates and Such

Inner Circle Members: A big thanks to those who support our podcast and our efforts!

How to Watch Photos for macOS Catalina and iPadOS - Learn everything you need to know about Photos for the Mac and iPad by checking out my latest course on LinkedIn Learning and on lynda.com. This course is perfect for Mac and iPad based photographers who shoot with iPhone, Mirrorless, and DSLR cameras. It covers both photography and movies. And if I say so myself, it's a lot of fun.

B&H and Amazon tiles on www.thedigitalstory. If you click on them first, you're helping to support this podcast. (The Digital Story is supported by its audience. When you purchase through links on our site, we may earn an affiliate commission.) And speaking of supporting this show, and big thanks to our Patreon Inner Circle members:

Affiliate Links - The links to some products in this podcast contain an affiliate code that credits The Digital Story for any purchases made from B&H Photo and Amazon via that click-through. Depending on the purchase, we may receive some financial compensation.

And finally, be sure to visit our friends at Red River Paper for all of your inkjet supply needs.

See you next week!

Product Links and Comments

There are product links in this article that contain affiliate tags. In some cases, depending on the product, The Digital Story may receive compensation if you purchase a product via one of those links. There is no additional cost to you.

You can share your thoughts at the TDS Facebook page, where I'll post this story for discussion.