Recently in Photography

  Page 16 of 385 in Photography  

This is The Digital Story Podcast #852, July 19, 2022. Today's theme is "Finally! Your Entire Digital Catalog in One Place with Peakto." I'm Derrick Story.

Opening Monologue

Photography cataloging software has evolved a lot over the years. And as we move from software to software we often have to leave our older images behind. No more! Thanks to a breakthrough app called Peakto (for Mac), you can browse pictures from Aperture to Capture One, all in one interface, plus leverage the power of AI to search and sort. It's nothing short of amazing, and you'll learn all about it on today's TDS Photography Podcast. I hope you enjoy the show.

Digital Photography Podcast 852

Tune-In Via Your Favorite Podcast App!


podcast-icon.jpeg

Apple Podcasts -- Spotify Podcasts -- Stitcher

Podbean Podcasts -- Podbay FM -- Tune In

Finally! Your Entire Digital Catalog in One Place with Peakto

Peakto-Full-Interface-1024.jpg

I've been testing Peakto 1.0 and currently have it cataloging my Aperture and Capture One catalogs side by side, plus watching a few folders. And I have to say that I'm amazed. Let's start with its basic specs.

Peakto requires macOS 11 (Big Sur) or later and runs well on Apple M1 chips.
Peakto is compatible with:

  • Aperture catalogs from version 3.6
  • Lightroom Classic catalogs from version 5
  • Luminar catalogs from version 4.2
  • Luminar AI catalogs from version 1.0
  • Capture One catalogs from version 20
  • Apple Photos catalogs from version 6 (Big Sur)
  • iView Media Pro catalogs from version 3

A working copy of the supported apps (Apple Aperture, Lightroom, CaptureOne, iView Media Pro...) is not required when using Peakto, as Peakto opens those libraries natively.

Peakto gathers tons of existing data from your catalogs, such as EXIF, IPTC, keywords, ratings, geotags, and faces. The faces recognition is particularly impressive. All the faces data from my Aperture libraries were recognized in Peakto.

Working with Peakto

Peakto can pull from a variety of hard drives and keeps track of where everything is. If you edit a photo in one of your apps on one of your drives, Peakto will recognize the change and update the image in its browser.

If you unplug a drive that Peakto is following, you can still browse the images, even when the drive is detached. I've tested Peakto with external SSD, external HDD, and Drobos. Worked equally well with all.

If you have an older version of a catalog, let's say Capture One, Peakto will notify you to update it (by simply opening it in a current version of the app) before it can be cataloged. I'm going through that process now with some of my older stuff.

If you find an image that you want to do more with, Peakto will let you open it for editing in the native app, or it will point you to the location of the originating library in the Finder.

Impressive Use of AI and Organization

Obviously, we don't want to flat browse thousands of images to find what we're looking for. Peakto helps us with this process in two basic ways.

First, it shows us our original catalog organization. You can reveal a second column that shows you the organization from the original catalog, even if it's Lightroom, Aperture, or Capture One. It's amazing.

Next, you have your keywords, star ratings, labels, and faces info that you can use as search criteria as well.

And finally, Peakto uses AI that gathers images in intelligent ways such as by color or visual subject. This part is fun too.

Impact on Computer and Performance

Peakto stores everything in the Application Support folder. Currently it's occupying 10.14 GB for 226,329 items. I'm projecting that I will easily reach 500,000 items soon, guessing that I'll need 20 GBs of storage to manage that. A good deal indeed!

It does take time to register catalogs. This is a multi-phase process that can operate in the background once it gets to a certain stage.

I set up five catalogs last night and went to bed. Everything was completed this morning, probably a good way to go in the beginning.

Clever Trick for Exporting Pictures Out of Peakto

Even if you don't have the host app available, you can export high quality Jpegs out of Peakto. Here's how I did it for images in an Aperture catalog.

  • Create an album or reuse an existing album. Note that you can create an album from the current selection easily.
  • Put all images to export in the album.
  • Choose "Export Album" from the Contextual menu.
  • You will be presented with the Export dialog. It is a fairly sophisticated export dialog because we need to handle the presence/absence of large resolution 'previews' for all the images selected.
    Peakto will carefully analyze what is available. Take Aperture for example: Aperture usually stores 1:1 image previews for all images. Exporting from Peakto will give you the ability to export those high resolution images.
    Lightroom has several options when it comes to preview sizes and quality, and we will analyse what is available and export it.

Peakto Pricing

Peakto is available three ways:

  • $9.99 Monthly with Zero Risk 7 day free trial.
  • $99 Yearly per seat with 15 day free trial.
  • $189 One time per seat with 30 day Money back guarantee.

Final Thoughts

I am wildly impressed with Peakto, and it is going to change my archiving and retrieval forever, and for the best.

Become a Medium Member and Support Independent Writers

The articles that I publish on Medium.com are an important part of our overall ecosystem. That work introduces new members to our community and what we're doing here.

If you enjoy the vast array of great writing on Medium, including the photography articles, consider becoming a member to support me and the other writers there.

Please use this link to do so.

Uh-oh: Cash-strapped storage company Drobo files for Chapter 11 bankruptcy

You can read the entire article on PopPhotography.com.

The data storage company, Drobo is facing an uncertain future. Late last month, the brand and its parent company, StorCentric, both simultaneously filed for Chapter 11 bankruptcy protection in California's Northern Bankruptcy Court (San Jose).

It's sad news for one of the earliest names in both direct- and network-attached storage, but it's not necessarily the end quite yet, as one or both companies could emerge rejuvenated. Should that happen, hopefully, the brand's products will have been reworked to reflect the needs and realities of the current storage market.

In the final weeks of 2018, the new company released its first--and to date, only--new Drobo product, the Drobo 8D. Initially, things seemed to be on the right path, with early reviews proving quite positive. But then in the second half of 2018, the stock suddenly disappeared from shelves right as StorCentric seemed ready to spread its wings. Over the next six months, availability fluctuated before the 8D suddenly disappeared altogether in March 2020.

The newest storage device wasn't alone in vanishing from the company's product listings, as the 5D, 5Dt, and B1200i models were also discontinued around the same time the 8D went AWOL. Five other Drobo models remain listed on the company's website, but all were geriatric, having launched anywhere from five to seven years earlier. By early 2020, only two of these five were still available at retail. (As of today, not a single one remains available to purchase.) Yet Drobo remained silent as to the reasons for its supply issues.

The process both Drobo and StorCentric have entered is for a Chapter 11 bankruptcy. This indicates an intention to reorganize the companies while under the control of a trustee, with the goal being to resolve debts and return the company to solvency, possibly under the control of the debtors should insufficient funds be available to cover their debts.

At the same time, though, there's no guarantee that Chapter 11 proceedings will reach a successful conclusion.

Tell a Friend

I was thinking the other day about how people love to tell me about their favorite podcasts, which I appreciate!

Then, I started thinking, we should be telling our friends about The Digital Story podcast. It's available on every service that's commonly used: Apple Podcasts, Google Play, Amazon, Spotify, and on and on.

If each or our regular listeners told just one friend about this podcast and encouraged them to listen, those should be substantial numbers.

So let's try it! Tell a friend about the TDS Photography Podcast.

How to Go from Garden to Greeting Card in 3 Easy Steps

You can read the entire article on TheDigitalStory.com.

Whether you have a window box over the kitchen sink, clay pots on the patio, or a raised bed in the backyard, the flowers you cultivate can live far beyond their vase-life expectancy with the help of your camera and inkjet printer.

Fine art greeting cards are one of the most satisfying print projects, and they are very easy to create. All you have to do is photograph a few of your favorite blossoms, then follow these simple steps.

1 - Prepare the Image

The finish size for our greeting card will be 5" tall and 7" wide. So you'll want to crop your image to 5"x7" so it looks exactly as you want on the front of the card. This is especially important if you're going to print a "full bleed" edge-to-edge picture.

Also, if you're printing on a matte surface paper, I would add a little extra sharpening to compensate for dot spread.

2 - Choose Your Paper

I recommend Red River Paper pre-scored 7x10 60lb. paper for this project. It has a lovely weight, folds easily along the score, and is available in a variety of surfaces.

For this project, I used Item #1058, 60lb. Red River Paper Canvas. Images look terrific on this matte surface, and the card feels absolutely lovely in the hands. There are many other stocks that work wonderfully as well, so have a few on hand. And don't forget to add a box of 5.25"x7.25" envelopes to your order.

3 - Print the Card

You can use any app that supports inkjet printing. I'm currently using Photos for macOS because it's easy and provides good results.

Prefold your card so that it's 5"x7" in dimension and insert it into the printer intake tray. Fold the card as flat as possible to ensure that it feeds smoothly. I print just one card at a time to prevent paper jams. (I know you're thinking that this won't work, but it does on both of my inkjet printers.)

In the print dialog box, set up your job. If you want to float the image on the front of the card, use the settings in the illustration below. (I think this is a handsome pro touch!)

Now all you have to do is enable Print, and within a few minutes your finished card will emerge from the printer. Finish it off by writing a note on the inside and put it in the envelope. You're ready to go!

Virtual Camera Club News

Have you been unsubscribed? A number of listeners have let me know that they were unceremoniously unsubscribed from the show. If that happens to you, just go back to the app and click on subscribe.

Inner Circle Members: A big thanks to those who support our podcast and our efforts! We are having a blast at our new Inner Circle hangout, the private group I've set up at DerrickStoryOnline. We'd love it if you join us. You can become an Inner Circle Member by signing up at our Patreon site. You will automatically be added to the new hangout.

My Writing on Medium.com: I now have 51 published articles on Medium.com. And if you haven't visited the site, and enjoy good writing on a variety of topics, I suggest that you may want to take a look. You can just go to the home page and enter "Derrick Story" in the search field. And if you like what you read, then follow me!

The New Donation Kit for Carefree Shipping of Found Film Cameras - If you've discovered a film camera that's no longer being used, our new Donation Kit makes it easy to pack and ship. Just visit the Contact Form on thenimblephotographer.com, click the box next to Donating a Film Camera, and let me know what you have. In your note, be sure to include your shipping address.

Affiliate Links - The links to some products in this podcast contain an affiliate code that credits The Digital Story for any purchases made from B&H Photo and Amazon via that click-through. Depending on the purchase, we may receive some financial compensation.

Red River Paper - And finally, be sure to visit our friends at Red River Paper for all of your inkjet supply needs.

See you next week!

You can share your thoughts at the TDS Facebook page, where I'll post this story for discussion.
Whether you have a window box over the kitchen sink, clay pots on the patio, or a raised bed in the backyard, the flowers you cultivate can live far beyond their vase-life expectancy with the help of your camera and inkjet printer.

DSCF2172.jpeg

Fine art greeting cards are one of the most satisfying print projects, and they are very easy to create. All you have to do is photograph a few of your favorite blossoms, then follow these simple steps.

1 - Prepare the Image

The finish size for our greeting card will be 5" tall and 7" wide. So you'll want to crop your image to 5"x7" so it looks exactly as you want on the front of the card. This is especially important if you're going to print a "full bleed" edge-to-edge picture.

P7121865-1024.jpeg Image cropped to fit properly on card.

Also, if you're printing on a matte surface paper, I would add a little extra sharpening to compensate for dot spread.

2 - Choose Your Paper

I recommend Red River Paper pre-scored 7x10 60lb. paper for this project. It has a lovely weight, folds easily along the score, and is available in a variety of surfaces.

For this project, I used Item #1058, 60lb. Red River Paper Canvas. Images look terrific on this matte surface, and the card feels absolutely lovely in the hands. There are many other stocks that work wonderfully as well, so have a few on hand. And don't forget to add a box of 5.25"x7.25" envelopes to your order.

3 - Print the Card

You can use any app that supports inkjet printing. I'm currently using Photos for macOS because it's easy and provides good results.

Prefold your card so that it's 5"x7" in dimension and insert it into the printer intake tray. Fold the card as flat as possible to ensure that it feeds smoothly. I print just one card at a time to prevent paper jams. (I know you're thinking that this won't work, but it does on both of my inkjet printers.)

In the print dialog box, set up your job. If you want to float the image on the front of the card, use the settings in the illustration below. (I think this is a handsome pro touch!)

Step-1-Print-Job-1024-v2.jpg

Now all you have to do is enable Print, and within a few minutes your finished card will emerge from the printer. Finish it off by writing a note on the inside and put it in the envelope. You're ready to go!

Final Thoughts

What I love about this project is that it combines the beauty of gardening with the joy of sharing handmade greeting cards with those you care about.

You don't need a professional photo printer - just about any all-purpose inkjet device will work. And trust me, you will truly impress the recipients with your "garden to fine art" skills.

Make someone happy today!

IMG_1664.jpeg Printing days are fun! All images by Derrick Story.

You can share your thoughts at the TDS Facebook page, where I'll post this story for discussion.

This is The Digital Story Podcast #851, July 12, 2022. Today's theme is "5 Great Vintage Lenses for Your Digital Camera." I'm Derrick Story.

Opening Monologue

Creative photography is often about character. How can we create looks that are unique and convey the intended emotion. One of my favorite starting points for this is to adapt a vintage lens to my Olympus PEN-F. Everything changes, from process to outcome. And the images are truly different. In today's podcast, I share 5 of my favorite vintage optics for digital photography. I hope you enjoy the show.

Digital Photography Podcast 851

Tune-In Via Your Favorite Podcast App!


podcast-icon.jpeg

Apple Podcasts -- Spotify Podcasts -- Stitcher

Podbean Podcasts -- Podbay FM -- Tune In

5 Great Vintage Lenses for Your Digital Camera

P7072498-vintage-lenses-1024.jpg

If you're interested in this technique, there are a few things you will need. First, a mirrorless camera that you like to experiment with, not so much your workhorse. You want to be able to leave the optic on the camera to grab when inspiration strikes.

You'll need an adapter. These are reasonably priced and are specific to the lens mount and camera. I have a small collection of these so I can adapt a variety of optics to my PEN-F and Fuji X100S. And finally, you'll need the lens itself, preferably a prime that is f/2.8 or faster.

As a bonus, I do like to have a film body to go with the lens. Every now and then it's fun to load up a roll of 35mm and experiment further.

OK, so all of that being said, here are five vintage optics that I've really enjoyed using.

Minolta MD Rokkor-x 45mm f/2.0

This is a relatively easy to find optic that is very compact, fast, and produces great images. It's a terrific portrait optic on Micro Four Thirds cameras because the equivalent focal length is 90mms.

I do like the compact primes for this work because even with the adapter, they still look good on the camera and are easy to handle and shoot with.

flowers-1024.jpeg Backyard flowers captured with the Zeiss 45mm f/2.8 on a PEN-F. Photo by Derrick Story.

Carl Zeiss Tessar T* 45mm f/2.8

This is my favorite vintage optic on the PEN-F. It costs a bit more than the Minolta 45mm, but it is even more compact, and truly looks like it was designed for the camera.

The Tessar is sharp, contrasty, and produces great color or B&W images. I particularly like it with the Mono setting on the PEN-F for contrasty, artistic B&W work.

This lens is an absolute beauty.

SMC Pentax-A 50mm f/1.4

Surprisingly compact for such a fast optic with a beautiful front objective lens. The Pentax is a bit heftier than the Minolta or Zeiss 45s, but you get crazy-fast wide aperture with impressive falloff and creamy backgrounds.

The Pentax 50mm is also relatively easy to find, and also is available and f/1.7 and f/2.0 versions. You won't be disappointed with either color or B&W output.

Nikon Series E 100mm f/2.8

I first fell in love with the Series E 100mm for film work, but then was enchanted all over again when adapted to the Fujifilm X100s medium format camera.

With a crop factor of 0.79, the Nikon becomes a cool 79mm portrait lens on the GFX. And just as a point of interest, the Fujifilm does have a 35mm setting on the camera for this application.

Nikon Series E 35mm f/2.5

This is such a handy lens that works well on a variety of digital cameras. If you mount on a Nikon full frame DSLR, it's a versatile 35mm lens, put it on a MFT body, and it becomes a lovely 70mm portrait optic, and on the GFX medium format camera, it goes wide at 28mm.

The Series E lenses are affordable, but not always easy to come by, so you need to keep your eyes open for when one pops up on the used market.

And then if you want to go for the grand slam, score a Nikon film body too and head out for a little analog street photography.

Final Thoughts

All of these lenses give you a different look from their modern counterparts. But there are other factors involved that contribute to the unique outcome. Manual focus slows you down and often makes for more interesting compositions, and motivation to experiment with other settings on the camera such as Art Filters and monochrome further pushes the creative envelope.

P7072470-vintage-lenses-1024.jpg Olympus PEN-F with adapter and Zeiss 45mm f/2.8 vintage lens.

If you're photography is feeling a bit in the rut, a vintage lens might just get you rolling again in the creative fast lane.

Become a Medium Member and Support Independent Writers

The articles that I publish on Medium.com are an important part of our overall ecosystem. That work introduces new members to our community and what we're doing here.

If you enjoy the vast array of great writing on Medium, including the photography articles, consider becoming a member to support me and the other writers there.

Please use this link to do so.

2021 Was Leica's Best Financial Year Ever

You can read the entire article on PetaPixel.com.

Leica has announced that 2021/22 was its best financial year in its more than 100-year history. It increased revenue by 16% to 450 million euros.

The financial year was between April 1, 2021, and March 31, 2022 which resulted in the best business result in the company's history of more than 100 years.

Leica CEO Matthias Harsch says that in addition to these numbers, sales of cameras and sports optics were also up and allowed the company to accelerate international growth despite the COVID-19 pandemic and its effect on supply chains and retail stores.

"We are convinced that our products 'made in Germany' fulfill the strongly growing consumer demand for high-quality sustainable brands and that our new product categories will generate increasing enthusiasm for the world of Leica photography in younger target groups," Harsch says.

The company says that a significant factor in its growth was the expansion of its global sales and retail network as well as the online business sector.

"With the realignment of US business activities and the founding of regional organizations in the Middle East and Scandinavia, the company further consolidated its activities in strategically important premium markets," Leica reports.ctions in camera design.'

Tell a Friend

I was thinking the other day about how people love to tell me about their favorite podcasts, which I appreciate!

Then, I started thinking, we should be telling our friends about The Digital Story podcast. It's available on every service that's commonly used: Apple Podcasts, Google Play, Amazon, Spotify, and on and on.

If each or our regular listeners told just one friend about this podcast and encouraged them to listen, those should be substantial numbers.

So let's try it! Tell a friend about the TDS Photography Podcast.

How to Create a Photography Website and Print Store

You can read the entire article on thewanderinglens.com.

Good article that covers the basic considerations for creating a photography website.

Virtual Camera Club News

Have you been unsubscribed? A number of listeners have let me know that they were unceremoniously unsubscribed from the show. If that happens to you, just go back to the app and click on subscribe.

Inner Circle Members: A big thanks to those who support our podcast and our efforts! We are having a blast at our new Inner Circle hangout, the private group I've set up at DerrickStoryOnline. We'd love it if you join us. You can become an Inner Circle Member by signing up at our Patreon site. You will automatically be added to the new hangout.

My Writing on Medium.com: I now have 51 published articles on Medium.com. And if you haven't visited the site, and enjoy good writing on a variety of topics, I suggest that you may want to take a look. You can just go to the home page and enter "Derrick Story" in the search field. And if you like what you read, then follow me!

The New Donation Kit for Carefree Shipping of Found Film Cameras - If you've discovered a film camera that's no longer being used, our new Donation Kit makes it easy to pack and ship. Just visit the Contact Form on thenimblephotographer.com, click the box next to Donating a Film Camera, and let me know what you have. In your note, be sure to include your shipping address.

Affiliate Links - The links to some products in this podcast contain an affiliate code that credits The Digital Story for any purchases made from B&H Photo and Amazon via that click-through. Depending on the purchase, we may receive some financial compensation.

Red River Paper - And finally, be sure to visit our friends at Red River Paper for all of your inkjet supply needs.

See you next week!

You can share your thoughts at the TDS Facebook page, where I'll post this story for discussion.

This is The Digital Story Podcast #850, July 5, 2022. Today's theme is "The Photography Endgame." I'm Derrick Story.

Opening Monologue

When you sit back and analyze the world of photography today, it's not unusual to wonder where you fit in. There was a time when making a pretty picture separated us from the snapshooters. But technology has dethroned that king. So why do we keep buying cameras, attending classes, reading articles, and yes, laboring over our images? I will share my theory in today's TDS Photography Podcast. I hope you enjoy the show.

Digital Photography Podcast 850

Tune-In Via Your Favorite Podcast App!


podcast-icon.jpeg

Apple Podcasts -- Spotify Podcasts -- Stitcher

Podbean Podcasts -- Podbay FM -- Tune In

The Photography Endgame

IR-Palms-1024.jpeg

I've been thinking about this for a while, but a few insights came to light during our recent Infrared Photography Workshop. We had a group of seasoned photographers spending time learning new techniques that at times were frustrating and that also involved purchasing new equipment.

The kicker was, ironically, that very few people outside of the group would appreciate the images that we produced. We shared stories of entering IR shots in camera club competitions, showing our work to loved ones, and posting these images on social - all with predictable outcomes: hardly anyone preferred them to our postcard shots of a sunset with an iPhone.

And yet, we kept working. Not because we had to, but because we really wanted to. Each of us wanted to find our own voice in this Stranger Things upside down world of photography. And we loved it.

After our wonderful final presentations, I was fascinated by the entire experience. And it dawned on me that this was an analogy for all of enthusiast photography today.

As I continued thinking about this, I came up with 5 reasons why many of us keep investing time, money, and energy into the pursuit of creative photography, and what our possible endgame is.

Making a Pretty Picture No Longer Matters

I know that I've mentioned in passing that I'm cleaning out and redesigning my studio. A big part of that process is recycling, repurposing, and sometimes throwing away things that I've held on to.

I'm amazed at how many pretty pictures I've taken over the past 5 decades. And for the most part, they bore the hell out of me. What I used to spend hours on I can now accomplish in seconds with my iPhone - and so can everyone else.

Pretty pictures tied to good memories are valuable. But beyond that, they are not a meaningful part of serious artistic photography.

We Now Judged Against a Global Community

When I was a photographer for a local newspaper in my 20s, my world was family, friends, school, and town. In those days, Chino had a population of 10,000. A fraction of those people owned interchangeable lens cameras. I was a big fish in a small pond.

Today, when I post a picture on Instagram, it has the ability to reach practically every corner of the world, and I am compared to millions of photographers.

None of us are going to be the big fish in the vast churning worldwide ocean.

Why We Buy Interchangeable Lens Cameras and Rangefinders

Because pretty pictures no longer matter, and smartphones take pretty pictures. We need tools that allow us to make unusual images that look different than sunsets over the ocean.

In the hands of a creative, a $2,000 kit can bend to our wills of creating something different, imperfect, and yes, at times unattractive. But we made it, not the technology.

As a bonus, we get to use tools that feel good, appeal to our sense of mechanical appreciation, and have an iconic look.

Photography Is Our Creative Voice

The bulk of our life is spent sleeping, eating, doing chores, going to work, and interacting with friends and family.

For most folks, none of that is particularly creative. But for us, photography is our expression. And the possibilities are unlimited.

We can be expressing our creative voice with these tools through every phase of our life to the very end when a nurse tilts our wheelchair on its back to allow us to take pictures of a beautiful cloudy sky.

There are few pursuits in life that offer the creative flexibility or longevity that photography does.

In the End, the Final Picture Doesn't Matter

Yes, every now and then it's nice to turn the laptop to a friend sitting next to us and ask, "So what do you think of this shot?" But their response has absolutely nothing to do with our motivation to continue.

We make pictures because we love the journey. The destination does not matter.

There is no photography endgame. These is pursuit, evolution, pleasure, wonder, surprise, and a love of hardware and software.

Very few things in life deliver the thrill of a decisive moment caught through our lens and nurtured with software on our laptop screen.

Let's face it: much of life is disappointing. But photography is the silver thread that runs through it, that magical path that travels from our heart and mind to the outside world.

No one is going to care about our pictures as much as we do. And that's just fine.

Film Friday: A tribute to the Olympus OM-1 on its 50th anniversary

You can read the entire article on DPReview.com.

In honor of the 50-year anniversary of the Olympus OM-1, Kosmo Foto founder Stephen Dowling has written up a comprehensive tribute to the camera that redefined what an SLR camera could be by keeping the design simple and compact without sacrificing too much functionality.

As we've covered before, the Olympus OM-1 wasn't the original plan. Olympus designer Yoshihisa Maitani had originally conceptualized and eventually developed a prototype for a camera that we now know was called the Olympus OM-X. This camera was similar in style to Hasselblad cameras, but used 35mm film instead of the 120 rolls its medium format counterpart used.

Unfortunately, that design proved too complicated to produce at scale, so it stopped at the prototype stage. Eventually, Maitani settled on making the OM-1, a camera he had envisioned as an incredibly compact 35mm camera from the get-go. So small, in fact, that he used the Nikon F as the measuring stick and told his engineers that he wanted the OM-1 to be 20-percent smaller in all dimensions and weigh just half of what the Nikon F did.

Although not easy, the Olympus team eventually pulled through with Maitani at the helm, delivering a camera that measured only marginally larger than his original concept. To achieve this, Maitani and his team used new technologies and materials to make the most of every component. While the camera was originally named the M-1, Leica took issue with that due to its own M1 camera, so it was eventually named the OM-1 to minimize confusion.

Eventually, the camera was revealed at the Photokina photographic fair in Cologne, West Germany, in May 1972. The first units started arriving at stores just under a year later in February 1973 and started what Dowling refers to as an 'arms race' amongst the other major camera manufacturers, paving the way for the likes of the Canon A-1 and others.

Dowling concludes the article saying the OM-1 is 'a testament to Maitani's skill at finding new directions in camera design.'

Tell a Friend

I was thinking the other day about how people love to tell me about their favorite podcasts, which I appreciate!

Then, I started thinking, we should be telling our friends about The Digital Story podcast. It's available on every service that's commonly used: Apple Podcasts, Google Play, Amazon, Spotify, and on and on.

If each or our regular listeners told just one friend about this podcast and encouraged them to listen, those should be substantial numbers.

So let's try it! Tell a friend about the TDS Photography Podcast.

How Much Does Image Quality Really Matter?

You can read the entire article on FStoppers.com.

Modern cameras and lenses offer remarkably good image quality -- levels that were only dreamed of even just a decade ago. And with those increased capabilities have come increased standards and expectations. But at this point, how much image quality do we really need? This interesting video poses the question and examines a scenario where getting the shot might take precedence.

Coming to you from Jiggie Alejandrino, this thought-provoking video examines the question of how much image quality we really need.

I'm reminded of one of my first headshot sessions. At that time, I would automatically remove any image where I didn't absolutely nail the focus. The client was not especially satisfied with what that left and asked me where many of the photos in which he knew he was smiling had gone to. I explained my reasoning, but he asked to see them anyway, and he was immediately far more pleased. He ended up selecting one where I had barely missed focus; a little extra sharpening got it plenty close enough. It was then that I realized there is a way a photographer sees images and a way a client sees them, and it is important that we understand both, because technical perfection is far from everything.

Check out the video above for the full rundown from Alejandrino.

Virtual Camera Club News

Have you been unsubscribed? A number of listeners have let me know that they were unceremoniously unsubscribed from the show. If that happens to you, just go back to the app and click on subscribe.

Inner Circle Members: A big thanks to those who support our podcast and our efforts! We are having a blast at our new Inner Circle hangout, the private group I've set up at DerrickStoryOnline. We'd love it if you join us. You can become an Inner Circle Member by signing up at our Patreon site. You will automatically be added to the new hangout.

My Writing on Medium.com: I now have 51 published articles on Medium.com. And if you haven't visited the site, and enjoy good writing on a variety of topics, I suggest that you may want to take a look. You can just go to the home page and enter "Derrick Story" in the search field. And if you like what you read, then follow me!

The New Donation Kit for Carefree Shipping of Found Film Cameras - If you've discovered a film camera that's no longer being used, our new Donation Kit makes it easy to pack and ship. Just visit the Contact Form on thenimblephotographer.com, click the box next to Donating a Film Camera, and let me know what you have. In your note, be sure to include your shipping address.

Affiliate Links - The links to some products in this podcast contain an affiliate code that credits The Digital Story for any purchases made from B&H Photo and Amazon via that click-through. Depending on the purchase, we may receive some financial compensation.

Red River Paper - And finally, be sure to visit our friends at Red River Paper for all of your inkjet supply needs.

See you next week!

You can share your thoughts at the TDS Facebook page, where I'll post this story for discussion.
You're going to hear a lot of pros and cons about the just-released iPad version of Capture One, just like you would with any V1 software. But the fact of the matter is that this is a great start for mobile photographers who like to shoot RAW.

capture-one-ipad-1024.jpeg

And to make it an even better start for you, here are 5 tips to get you headed in the right direction.

Its Minimum Specs are Conservative

Technically, according to the FAQs, Capture One only runs on newer iPads. For example, my iPad mini 5 is not officially supported, but I've been using the software on that device without any problems since the official release.

There is a 7 day free trial period if you want to test your iPad. If you're only a generation off, I would definitely try it out.

Dig Out Your iPad SD Card Reader

The joy of Capture One on the iPad is its beautiful RAW processing. And unlike tossing around Jpegs wirelessly from device to device, a SD card reader is the best way to go for RAW files.

So, it's time to dig around in the bottom of your gadget bag to retrieve that iPad card reader. You'll be glad you did.

Load All of the Styles You Own on to the iPad

The user interface for the adjustment tools on the iPad are good, but your existing Styles for the desktop version of the app work on the iPad as well, and they are easy to use.

You'll always know which Style you applied, which is really helpful if you want to use it again on another image. And it's easy to stack Styles too.

Here are the instructions for adding Styles to the iPad. I really like using them with this workflow.

Add Cloud Transfer

At the moment, Cloud Transfer isn't anything to get really excited about. But it is the easiest way to move an album of freshly edited iPad images to your desktop application.

cloud-transfer.jpg Add Cloud Transfer to your desktop app toolbar.

The first thing you'll want to do is add Cloud Transfer to your top toolbar in Capture One Pro on the computer. Here are the instructions for setting up Cloud Transfer.

IMG_0255.jpeg An album of iPad images being uploaded from the iPad to the cloud.

This is one area that we will see workflow improvements in the coming versions.

Remove from Cloud after Transfer

Since you're driving on a one way street here (iPad to desktop), you should remove transfers from the cloud server after completion.

"Once you have transferred your photos, you can go back to your iPad and in the three-dot menu for an album you will find an option to "remove from cloud". This will free up space for your next uploads. If you also want to remove the photos from the iPad, you can delete them by selecting them and pressing the delete button. They will be moved to the trash if you want to restore them; if you remove them from the trash too, they will be completely gone from your iPad."

How you manage the RAW files you've uploaded to the iPad will depend on your particular workflow. Some folks will want to keep some of the images on the mobile device to play with while on the go. For others, once the files have been moved to the desktop application, they will want to free up space on their device and in the cloud.

Final Thoughts

Once I dug into Capture One on the iPad, I enjoyed editing my images there. You can bring in content from Files, Photos for iOS, and of course camera memory cards.

It's too early to tell how my workflow will shake out with this new option. But the journey looks like a lot of fun.

You can share your thoughts at the TDS Facebook page, where I'll post this story for discussion.
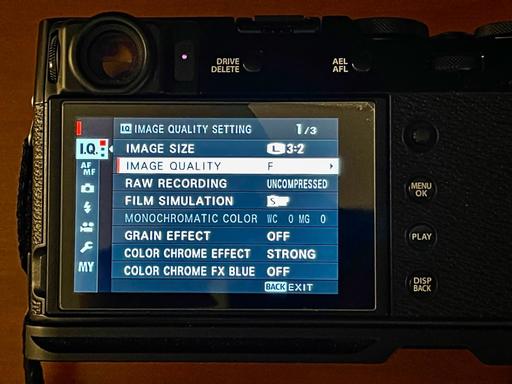
This is The Digital Story Podcast #849, June 28, 2022. Today's theme is "And Yet, Things Still Go Wrong." I'm Derrick Story.

Opening Monologue

As I see it, a major difference between the analog age and modern digital times, is there are more ways to screw up today than ever. Whether it's a flagship mirrorless camera, state of the art Apple watch, or an all electric SUV, their amazing powers at times seem to hang in a delicate balance. On today's TDS Podcast, I share a few recent examples. I hope you enjoy the show.

Digital Photography Podcast 849

Tune-In Via Your Favorite Podcast App!


podcast-icon.jpeg

Apple Podcasts -- Spotify Podcasts -- Stitcher

Podbean Podcasts -- Podbay FM -- Tune In

And Yet, Things Still Go Wrong

DSCF0694.jpeg

No RAWs in Slot #1

I'm still not sure how this happened, but I came away from an important shoot with only Jpegs.

Snap Out of Focus

I pulled the camera out of my bag to grab a quick shot of a decisive moment only to have 5 frames of fuzz.

Power Misalignment

On the same day, I misaligned my Apple Watch on its recharging stand and my iPhone on its wireless pad.

All Systems Not Go

I get into my EV and it promptly tells me that the system isn't working properly and that I should contact the dealer. I turn off the car, count to 10, and power up again. Everything is fine. Sound familiar?

The Internet is Broken!

So often when I'm in public spaces, my iPhone tells me that it can't connect to the Internet, even though I have 4 bars on my cellular. But instead of using that, it decides to connect to some bogus WiFi network that is a bridge to nowhere.

So, while all of this is going on, back at the house my Timex quartz is ticking away, my Pentax LX still has a half a roll of film and is patiently waiting for me to finish it off, and the Audi A3 has 8 gallons of premium petro ready to blast off.

I'm beginning to think that to survive in today's world, enjoy the convenience of digital when it's working, but it doesn't hurt to have an analog backup -- just in case.

Free, Open-Source Photo Manager DigiKam Gets a Big Update

You can read the entire article on PetaPixel.com.

DigiKam, the free open-source multi-platform digital photo management application, has released version 7.7 for Windows, macOS, and Linux that adds new features, support for more cameras, and fixes a bunch of bugs.

The update to the free professional photo management software comes just a few months after the last major feature release that brought support for the AOM AV1 image file format as well as adding and updating the read/write support for the JPEG-XL image format in all supported bundles.

The 7.7 update brings support for the Olympus OM-1 mirrorless micro four-third system allowing the new camera and lens combinations to be recognized by the application, bringing the number of supported RAW cameras up to more than 1180.

Version 7.7 also includes 84 crash, bug, and maintenance fixes to improve the overall experience and performance, including better support of the HEIF images from the various iPhone cameras, updated operating system support (Windows/Mac/Linux), and adds features like Pinterest exporting, Picasa 3 migration, and the ability to export PSD files to Google Photos.

Apple explains how it's making your iPhone a full-fledged webcam for your Mac

You can read the entire article on The Verge.

Apple software engineer Karen Xing spent some time explaining how the new Continuity Camera feature for macOS Ventura will actually work at WWDC 2022 -- and it sounds seriously impressive. It could make your iPhone a full-fledged camera for Mac, one that does most everything you'd expect and more.

macOS will detect your iPhone as a camera and microphone, period, so every camera app should work. While Apple only showed off FaceTime and mentioned Zoom, Teams, and Webex during the big WWDC 2022 keynote, developers shouldn't need to do anything to their apps for them to work.

You get Portrait Mode, "Studio Light," and Center Stage options regardless of the app, too. They're in a Control Center dropdown menu, alongside your iPhone's battery.

FaceTime isn't the only app that'll "magically" switch to your iPhone when you plop it down. Xing demoed that with Zoom, and Apple's offering up an automatic camera selection API that other apps can use, too. macOS Ventura will automatically switch to your iPhone if it's mounted on a stand and either plugged in via USB or detected as "nearby" using Bluetooth and Wi-Fi.

There's an API for Apple's nifty Desk View mode, too. Apple figured out a way to bend and crop images from the iPhone's super-ultrawide lens to let you show off things on the surface of your desk without moving your phone. That's available for app devs, too, and Xing showed it off as a way to present in Zoom.

Unfortunately, none of this works with those old iPhones you've got sitting in a drawer. Continuity Camera requires iOS 16 in addition to macOS 13, Xing revealed -- and unfortunately, the iPhone 6S, 7, and first-gen iPhone SE and earlier won't be getting the iOS 16 software update. That's a shame because it feels like it could be a great way to make use of an older phone that doesn't have resale value. Still, there are other ways to turn an old spare phone into a webcam.

DPI vs PPI

You can read the entire article on theWanderlingLens.com site.

There's a lot of good info in this article about printing. And one gem deals with DPI, which stands for Dots per Inch regarding ink droplets on paper, and PPI, which stands for Pixels per Inch and refers to resolution of digital images on screens.

When printing, the standard is 300 dpi.

Virtual Camera Club News

Have you been unsubscribed? A number of listeners have let me know that they were unceremoniously unsubscribed from the show. If that happens to you, just go back to the app and click on subscribe.

Inner Circle Members: A big thanks to those who support our podcast and our efforts! We are having a blast at our new Inner Circle hangout, the private group I've set up at DerrickStoryOnline. We'd love it if you join us. You can become an Inner Circle Member by signing up at our Patreon site. You will automatically be added to the new hangout.

My Writing on Medium.com: I now have 51 published articles on Medium.com. And if you haven't visited the site, and enjoy good writing on a variety of topics, I suggest that you may want to take a look. You can just go to the home page and enter "Derrick Story" in the search field. And if you like what you read, then follow me!

The New Donation Kit for Carefree Shipping of Found Film Cameras - If you've discovered a film camera that's no longer being used, our new Donation Kit makes it easy to pack and ship. Just visit the Contact Form on thenimblephotographer.com, click the box next to Donating a Film Camera, and let me know what you have. In your note, be sure to include your shipping address.

Affiliate Links - The links to some products in this podcast contain an affiliate code that credits The Digital Story for any purchases made from B&H Photo and Amazon via that click-through. Depending on the purchase, we may receive some financial compensation.

Red River Paper - And finally, be sure to visit our friends at Red River Paper for all of your inkjet supply needs.

See you next week!

You can share your thoughts at the TDS Facebook page, where I'll post this story for discussion.

This is The Digital Story Podcast #848, June 21, 2022. Today's theme is "5 Tips for Photographers Who Shoot with iPhones." I'm Derrick Story.

Opening Monologue

I think it's safe to say that photographers approach their iPhone cameras just a little bit different than everyone else. And they are more likely to tap the software's advanced features. In that spirit, I have a show just for you, nimble photographer, who realizes the value of photography with any device, even the one in your pocket. I hope you enjoy the show.

Digital Photography Podcast 848

Tune-In Via Your Favorite Podcast App!


podcast-icon.jpeg

Apple Podcasts -- Spotify Podcasts -- Stitcher

Podbean Podcasts -- Podbay FM -- Tune In

5 Tips for Photographers Who Shoot with iPhones

Derrick-1024.jpeg A One-Handed Selfie Shot captured with the front camera of an iPhone 12 Pro Max using Portrait Mode with a depth of f/2.8. Photo of Derrick Story by Derrick Story.

In my latest Medium article titled, My Favorite iPhone Portrait Tricks, I tell the story of me showing up at a family gathering without any of my mirrorless cameras. So I felt a little sheepish when asked to make a couples portrait.

Fortunately, I've had plenty of practice with my iPhone 12 Pro Max. And thanks to that knowledge, I pulled it off.

That got me thinking that this might be a good time to share some of my favorite techniques with you. So let's get right to it.

  • The Back Tap Camera Wake - A photographer's eye often detects decisive moments before others. To ensure that your camera reacts as quickly as you need, set up the Back Tap Camera Wake. Settings > Accessibility > Touch > Back Tap. There are lots of options here. I use the Double Tap for the Camera, and the Triple Tap for the Flashlight.
  • Angle Bracket Pointing Down - There's an angle bracket at the top of the camera interface, and it is usually point upward. Tap on it to angle it downward, and it will reveal an entire row of camera settings right above the shutter button, including proportions, flash controls, exposure compensation, self timer, and filters. If you're in Portrait mode, you can set the Depth f/stop here. In Time-Lapse, you can adjust the exposure there.
  • One-Handed Selfie Shot - Use the Volume Down button on the side of the phone to take a one-handed selfie shot. Start by switching to the front camera, then grip the phone in one hand with your thumb on the volume down button. Direct your eyes to the glowing green dot (that's where the camera is), then squeeze your thumb to take the picture.
    You can use this technique in Portrait Mode, which is really cool, especially around f/2 for the Depth. Also, this is much easier with the case removed providing easier response from the volume button.
  • Lens Correction - The Ultra Wide Lens gets even better when you enable Lens Correction in the Camera Settings. You also have many other useful option here sun as View Outside of the Frame and Preserve Settings.
  • Long Exposure Trick - My all time favorite. Enable Live Photo, hold the camera steady right before, during, and after exposure. Then open the image in Photos, and choose Long Exposure fro the "Live" menu. You can also use this technique creatively by moving the camera before and during exposure.

I also recommend that you read my My Favorite iPhone Portrait Tricks on Medium.com. There's a really nice portrait workflow in that article that can serve you well in a pinch.

Tell a Friend

I was thinking the other day about how people love to tell me about their favorite podcasts, which I appreciate!

Then, I started thinking, we should be telling our friends about The Digital Story podcast. It's available on every service that's commonly used: Apple Podcasts, Google Play, Amazon, Spotify, and on and on.

If each or our regular listeners told just one friend about this podcast and encouraged them to listen, those should be substantial numbers.

So let's try it! Tell a friend about the TDS Photography Podcast.

Senators Want US to Follow EU and Adopt a Common Charging Cable

You can read the entire article on ThPetaPixel.com.

A group of United States senators has written a letter to the U.S. Commerce Department advocating that the country should follow the European Union's decision to force all electronics manufacturers to adopt a common charging cable.

Senators Ed Markey (D-MA), Elizabeth Warren (D-MA), and Bernie Sanders (I-VT) authored the letter to Commerce Secretary Gina Raimondo to argue for a standardized charging system. The three Senators say that the consumer electronics industry's largest players have hurt consumers by failing to establish a uniform charging accessory standard and forcing them to frequently change their charging accessories instead.

"This planned obsolescence is expensive and frustrating for consumers, and drives the proliferation of electronic waste," the senators write.

"The lack of interoperability standards for charging and other device accessories also results in e-waste and environmental damage. As specialized chargers become obsolete with the introduction of new products, or as consumers change the brand of phone or device that they use, their outdated chargers are usually just thrown away," the senators continue.

"When electronics are not disposed of properly, e-waste can spread toxins in water, pollute soil, and degrade the air we breathe. In 2019, humans generated a staggering 53.6 million metric tons of e-waste, and only 17 percent of this waste was recycled. Chargers that are discarded or never used create more than 11,000 tons of e-waste annually. This is a global issue, with a lasting impact on our environment and public health.7 The U.S. government must respond."

The three argue that the European Union (EU) has recognized this in the passing of legislation that requires manufacturers to adopt a common charger for electronic devices.

Tool Panel Redesign in Capture One Pro 15.3

You can read the entire article on TheDigitalStory.com.

One of my favorite aspects of the new 15.3 update to Capture One Pro 22 is the Tool Panel Design. I used this fresh look as motivation to clean up my entire Tools area.

Start by Removing Tool Tabs You Don' Need

First you want to clear up a little space at the top of the Tool Tab by removing any Tool Tabs that aren't part of your daily workflow. In my case, the Tether Tab is the first to go. I rarely use is, and I don't need it taking up valuable real estate.

Go to View > Customize Tools > Remove Tool Tab and select from the list the one you want to take off the top of the column. Keep in mind that this Tool Tab isn't deleted, just repositioned.

Also note that you can customize the tools within any tab. So if you want to remove the Refine Tab, but want Sharpening easily available, you could add that tool to another tab such as the new Quick Tab.

Customize Within the Tool Tabs

Once you get your basic categories set at the top of the Tools column, you will probably want to customize a few of the Tools within each tab. Open the Tab you want to modify, then go to View > Customize Tools > Add Tool to [selected] Tab. You can also remove tools as well to tailor each Tab exactly to your liking.

If you want to reorder the Tab icons at the top of the Tools column, hold down the Command key and drag the icon to its new location.

Save Your Workspace

It's a great feeling to get your Capture One Pro house in order. Now is the time to save your Workspace so you can return to it at any time. This is particularly handy if you have different workspaces for different workflows, or if you have multiple photographers using the same computer.

Click on the three vertical dots at the top of the Tool Tab column. Save the Workspace, and you're set. This is also where you can move the Tool Tabs column from one side of the interface to the other.

Top 10 E-M1X & E-M1 Mark III Menu Secrets

You can read the entire article on the GetOlympus site.

Here's one in particular that I liked, and it works with the OM-1 as well!

Low ISO Processing - On Custom Menu E1. Exp/ISO/BULB (E-M1 III and E-MX) you will find a feature called Low ISO Processing (on OM-1 it's Camera Menu 1, Low ISO Processing) with two options called Detail Priority and Drive Priority. A quick explanation is that when shooting at low ISO's, if we set this option to Detail Priority, the camera will prioritize image resolution and reducing noise, and in Drive Priority it will focus on frame rate (the number of images per second). So, for my camera bodies and/or custom modes that are set for landscape and macro photography, I choose Detail Priority since frame rate is generally not critical. For wildlife photography, I choose Drive Priority since frame rate is more critical and I am not always shooting at a low ISO.

Virtual Camera Club News

Have you been unsubscribed? A number of listeners have let me know that they were unceremoniously unsubscribed from the show. If that happens to you, just go back to the app and click on subscribe.

Inner Circle Members: A big thanks to those who support our podcast and our efforts! We are having a blast at our new Inner Circle hangout, the private group I've set up at DerrickStoryOnline. We'd love it if you join us. You can become an Inner Circle Member by signing up at our Patreon site. You will automatically be added to the new hangout.

My Writing on Medium.com: I now have 51 published articles on Medium.com. And if you haven't visited the site, and enjoy good writing on a variety of topics, I suggest that you may want to take a look. You can just go to the home page and enter "Derrick Story" in the search field. And if you like what you read, then follow me!

The New Donation Kit for Carefree Shipping of Found Film Cameras - If you've discovered a film camera that's no longer being used, our new Donation Kit makes it easy to pack and ship. Just visit the Contact Form on thenimblephotographer.com, click the box next to Donating a Film Camera, and let me know what you have. In your note, be sure to include your shipping address.

Affiliate Links - The links to some products in this podcast contain an affiliate code that credits The Digital Story for any purchases made from B&H Photo and Amazon via that click-through. Depending on the purchase, we may receive some financial compensation.

Red River Paper - And finally, be sure to visit our friends at Red River Paper for all of your inkjet supply needs.

See you next week!

You can share your thoughts at the TDS Facebook page, where I'll post this story for discussion.
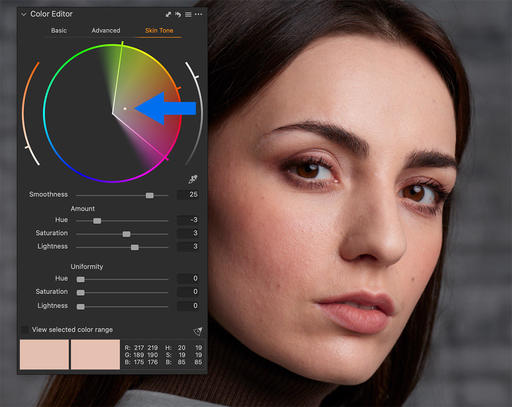
One of the new features in the Capture One Pro 15.3 update is a redesigned tools panel. This is where you access everything from Exposure to Spot Removal. And if you haven't customized your Tools panel in a while, the timing couldn't be better to do so.

Start by Removing Tool Tabs You Don' Need

Remove-Tool-Tab-1024.jpg Removing tools you don't need.

First you want to clear up a little space at the top of the Tool Tab by removing any Tool Tabs that aren't part of your daily workflow. In my case, the Tether Tab is the first to go. I rarely use is, and I don't need it taking up valuable real estate.

Go to View > Customize Tools > Remove Tool Tab and select from the list the one you want to take off the top of the column. Keep in mind that this Tool Tab isn't deleted, just repositioned.

Also note that you can customize the tools within any tab. So if you want to remove the Refine Tab, but want Sharpening easily available, you could add that tool to another tab such as the new Quick Tab.

Customize Within the Tool Tabs

Add-Tool-1024.jpg Adding a Tool to a Tool Tab

Once you get your basic categories set at the top of the Tools column, you will probably want to customize a few of the Tools within each tab. Open the Tab you want to modify, then go to View > Customize Tools > Add Tool to [selected] Tab. You can also remove tools as well to tailor each Tab exactly to your liking.

If you want to reorder the Tab icons at the top of the Tools column, hold down the Command key and drag the icon to its new location.

Save Your Workspace

save-workspace.jpg

It's a great feeling to get your Capture One Pro house in order. Now is the time to save your Workspace so you can return to it at any time. This is particularly handy if you have different workspaces for different workflows, or if you have multiple photographers using the same computer.

Click on the three vertical dots at the top of the Tool Tab column. Save the Workspace, and you're set. This is also where you can move the Tool Tabs column from one side of the interface to the other.

Final Thoughts

Customizing your Tools workspace feels good and improves efficiency. And now that we have new tabs with a fresh design, this is the perfect time to tidy up your Capture One Pro interface.

You can share your thoughts at the TDS Facebook page, where I'll post this story for discussion.
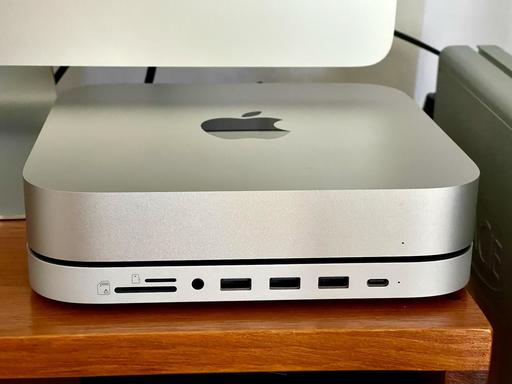
This is The Digital Story Podcast #847, June 14, 2022. Today's theme is "Cropped Sensors Aren't Going Anywhere, Nor Should They" I'm Derrick Story.

Opening Monologue

"Mine is bigger than yours" seems to permeate every crevice of the male psyche. We compare the size of our trucks, houses, paychecks and practically anything else that can be measured, quantified, or weighed. We even do it with the girth of our lenses and size of our sensors. And yet, after multiple predictions of their demise, APS-C and MFTs are not only still here, but thriving. A closer look on today's TDS Photography Podcast. I hope you enjoy the show.

Digital Photography Podcast 847

Tune-In Via Your Favorite Podcast App!


podcast-icon.jpeg

Apple Podcasts -- Spotify Podcasts -- Stitcher

Podbean Podcasts -- Podbay FM -- Tune In

Cropped Sensors Aren't Going Anywhere, Nor Should They

canon-r7-web.jpg

What do the Canon EOS R7, Fujifilm X-H2S, Canon EOS R10, Nikon Z fc, Sony a6400, OM System OM-1, and Panasonic GH6 all have in common? None of them have a full frame sensor.

The Canon R7, R10, and Fujifilm X-H2s are new releases that we're waiting for to land on store shelves, the a6400 is just now going back into production. Nikon Z fc is suddenly a golden child. And it isn't very easy to get your hands on the new OM-1, which seems to be always out of stock.

If the smaller cropped sensor camera is so inferior to their larger siblings, why is Canon, Sony, Nikon, Fujifilm, OM System, and Panasonic investing so much in them?

The short answer is (get it?) that people like 'em. And here are five reasons why.

  • They tend to be smaller and easier to carry around.
  • Thanks to today's technology, the image quality is fantastic.
  • You can get smaller, lighter lenses that still have amazing optical quality.
  • They generally cost less.
  • And yes, sometimes you want a little extra depth of field.

On pro photo assignments, I stand shoulder to shoulder with my full frame brothers and sisters. My shoulders are less tired. And I get hired just as often as they do. (And I'm spending far less on my gear.)

Believe me, cropped sensor cameras aren't going anywhere.

Tell a Friend

I was thinking the other day about how people love to tell me about their favorite podcasts, which I appreciate!

Then, I started thinking, we should be telling our friends about The Digital Story podcast. It's available on every service that's commonly used: Apple Podcasts, Google Play, Amazon, Spotify, and on and on.

If each or our regular listeners told just one friend about this podcast and encouraged them to listen, those should be substantial numbers.

So let's try it! Tell a friend about the TDS Photography Podcast.

TikTok is Convincing People to Scratch Their Camera Lenses with Rocks

You can read the entire article on Petapixel.com.

Some photographers on TikTok are trying an unconventional technique for unusual results: taking a rock to the front of their lenses, scratching the glass, and destroying them in the process.

Photographer Illumitati posted a video of her using a rock to mortally wound her Canon 50mm f/1.8 in response to a viral video made by Andres Videography where he appeared to do the same to his lens.

However, Andres didn't actually scratch his lens; eagle-eyed viewers will notice that he was actually scratching a lens filter placed on his Sony 85mm.

But in Illumitati's case, she actually takes a rock to the front element of her 50mm. Speaking to PetaPixel she explains what happened.

"I saw another person do it with a filter, and my intrusive thoughts told me to try it on the lens for real," she says.

"This came up on my 'for your page' and as a photographer, I'd never cringed harder in my life," Illumitati says in her TikTok video.

"But then I was so curious to see what a photo from that camera would look like I actually destroyed one of my lenses," she continues. "Then I set it down and got ready to take a couple of portraits and to my surprise, it actually gave it this glow. I don't recommend doing this to your lenses but hey, it's kind of cool."

When asked by PetaPixel, the portrait and fashion photographer seemed to have no regrets over the video.

"I really did scratch it, and the photos were actually not bad at all. The lens is really not great in the first place so I don't think I'd use it," she says.

Leica announces $20,000 M-A' Titan' set featuring titanium film camera and lens

You can read the entire article on DPReview.com.

Leica has announced a new limited-edition film camera and matching APO-Summicron-M 50 F2 ASPH lens. The Leica M-A 'Titan' set is Leica's sixth limited-edition camera with a titanium exterior. The first titanium exterior Leica was the Leica M6 TTL' Titanium,' released in 2001. The high-end, limited M-A 'Titan' camera and lens are milled from solid titanium, a material known for its durability. The titanium also gives the M-A 'Titan' set a distinct, striking look.

The Leica M-A is a purely mechanical camera, relying on no power or data connections. Leica writes that the M-A is 'the epitome of Leica's philosophy to concentrate on the essential: a return to photography in its purest form.' The Leica M-A doesn't even include a light meter, unlike the Leica MP. The special edition version includes the classic 'Ernst Leitz Wetzlar' script on the top plate.

The matching APO-Summicron-M 50mm F2 ASPH lens, whose external components are built using titanium for the 'Titan' set, is modeled after the first 50mm Summicron-M lens, introduced in 1956. To maintain the special aesthetic, the lens' included round lens hood is made of solid titanium.

The Leica M-A 'Titan' set doesn't come cheap. The set is limited to just 250 units worldwide and will set you back $19,995. The camera and lens are engraved with special-edition serial numbers, and the set comes in a special presentation box lined with black silk.

If the idea of a purely mechanical Leica film camera is up your alley, but the M-A' Titan' is too expensive, you can purchase the Leica M-A in black chrome or silver chrome for $5,965. The Leica M-A works with a wide of Leica M lenses, ranging from 16mm to 135mm.

Virtual Camera Club News

Have you been unsubscribed? A number of listeners have let me know that they were unceremoniously unsubscribed from the show. If that happens to you, just go back to the app and click on subscribe.

Inner Circle Members: A big thanks to those who support our podcast and our efforts! We are having a blast at our new Inner Circle hangout, the private group I've set up at DerrickStoryOnline. We'd love it if you join us. You can become an Inner Circle Member by signing up at our Patreon site. You will automatically be added to the new hangout.

My Writing on Medium.com: I now have 51 published articles on Medium.com. And if you haven't visited the site, and enjoy good writing on a variety of topics, I suggest that you may want to take a look. You can just go to the home page and enter "Derrick Story" in the search field. And if you like what you read, then follow me!

The New Donation Kit for Carefree Shipping of Found Film Cameras - If you've discovered a film camera that's no longer being used, our new Donation Kit makes it easy to pack and ship. Just visit the Contact Form on thenimblephotographer.com, click the box next to Donating a Film Camera, and let me know what you have. In your note, be sure to include your shipping address.

Affiliate Links - The links to some products in this podcast contain an affiliate code that credits The Digital Story for any purchases made from B&H Photo and Amazon via that click-through. Depending on the purchase, we may receive some financial compensation.

Red River Paper - And finally, be sure to visit our friends at Red River Paper for all of your inkjet supply needs.

See you next week!

You can share your thoughts at the TDS Facebook page, where I'll post this story for discussion.
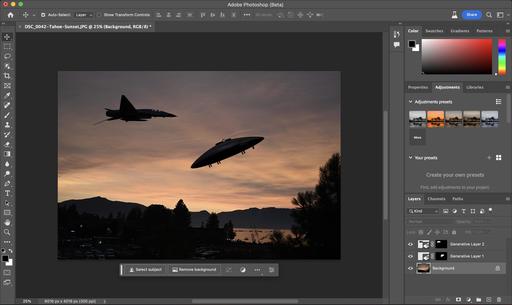
This is The Digital Story Podcast #846, June 7, 2022. Today's theme is "It's Official: Capture One for the iPad in June" I'm Derrick Story.

Opening Monologue

Capture One users and those thinking about migrating to the robust photo management app finally get the news they have been waiting for: the iPad version will be released this month! Our lead story will look at what's included and what isn't. Plus a few top of mind thoughts on the new MacBook Pro 13" M2, and more. I hope you enjoy the show.

Digital Photography Podcast 846

Tune-In Via Your Favorite Podcast App!


podcast-icon.jpeg

Apple Podcasts -- Spotify Podcasts -- Stitcher

Podbean Podcasts -- Podbay FM -- Tune In

It's Official: Capture One for the iPad in June

Capture-One-iPad.jpg

"No wine will be released before its time," and such is the case with Capture One software as well. But finally they are confident enough in the iPad version to share it with the world.

Cost and Availability

The software will be available on June 28 at 1 PM CEST, will cost $4.99 a month, and will be available through the App Store.

Version 1 Features

More will be added to C1P iPad in the future, but for starters users can expect:

  • Import from camera roll, files, a plugged-in camera or an SD card - Create albums - Sort and filter.
  • Culling with Star rate and Color tag.
  • Quick Editing with styles and presets - Create styles and presets - Import styles and presets.
  • Crop and Rotate.
  • Editing: White balance (wb & tint) - Exposure (exposure, contrast, brightness, saturation) - Dynamic Range (highlights, shadows, whites, blacks) - Clarity and structure - Dehaze (auto and manual) - Basic color editor, with color picker - HSL - B&W conversion - Vignetting - Sharpening (amount, radius, threshold, halo) - Noise reduction (luminance, details, color, single pixel) - Film grain (modes, impact, granularity) - Moiré - Histogram.
  • Before/After - Undo/Redo/Reset - Display basic metadata - Copy and apply (selective adjustments).
  • Add album to the cloud, to be imported into CO Pro desktop - Export jpgs (predefined recipes) - Export EIPs - Watermark (text-only) - Share to any relevant app, including cloud storage ones, or save to files - Airdrop.

Upcoming Features

Tethering, Masks and Layers, Cloud improvements for file transfer and ultimately, synchronization.

Understanding Their Approach

Capture One iPad app is not intended to be a replacement for the desktop app, but instead its best companion. Even though the iPad app works perfectly well on its own, it is built to be a part of an ecosystem where you can work smoothly across devices to get the most out of your time, money, and images.

With the Capture One iPad app you can plug your camera directly into your iPad, import hundreds of photos, organize them and get to culling. See your images in all their glory on the iPad screen, quickly swipe through them, and rate or color tag them. Filter your best ones and start editing using either Styles or manual adjustments.

Once you are done editing, you can show your images directly on the screen to team members and clients when together on location or by exporting them as JPEGs. If you would like to refine your images even further when you get home, upload your album to the cloud, import it into Capture One Pro on desktop, and continue working exactly from where you left off.

The 2022 TDS Workshops Update

We have great events lined up for this year, and there are a few more coming. Here's a recap of what we have so far:

  • May 2022 - Infrared Photography Workshop (online event) - Sold Out
  • August 2022 - Ultimate B&W Photography Workshop (online) - Sold Out
  • Sept. 2022 - Eastern Sierra Photo Workshop (physical) - Sold Out
  • Nov. 2022 - Oregon Coast Photography Workshop (physical) - 3 Seats Available

You can learn more about all of these events and register by visiting TheNimblePhotographer.com.

What the Heck Was Apple Thinking with the New 13" MacBook Pro?

Since I'm still working with all Intel processor Macs, I was hoping that the M2 MBP 13" would be the computer that I could upgrade to. I guess I'll have to keep waiting.

First, let's start with the basic specs:

  • 13.3-inch Retina display
  • Apple M2 chip
  • Up to 24GB memory
  • Up to 2TB storage
  • Up to 20 hours battery life
  • Touch Bar and Touch ID
  • Two Thunderbolt/USB 4 Ports
  • One Headphone/Mic jack
  • Starting price: $1,299 - Available in July.

Those are nearly the exact same specs as the new MacBook Air that starts at $1,199, but includes a slightly bigger screen and a MagSafe power port. The new Air doesn't include the TouchBar (that practically nobody cares about) and gets 18 hours of battery life compared to 20.

So tell me, what is Pro about the 13" MacBook Pro? Only 2 Thunderbolt ports (one of which has to be used for charging since there is not a MagSafe port), no SD card slot, and no other ports period.

I guess we'll see what happens next time.

Fujifilm announces X-H2S high-end APS-C stills/video hybrid

You can read the entire article on DP Review.com.

Fujifilm has announced the X-H2S, a high-end stills/video APS-C mirrorless camera. It's built around a stabilized 26MP Stacked CMOS sensor that lets it shoot at up to 40 frames per second with full AF. It can also shoot 4K video at up to 120p in a wide range of codecs.

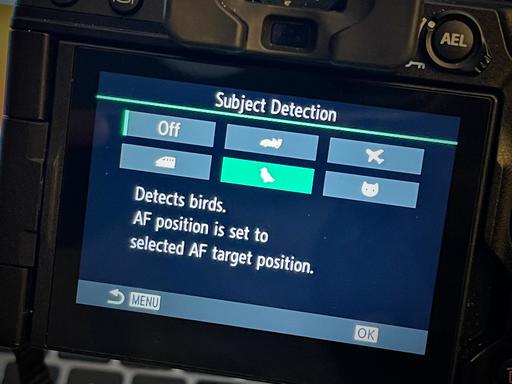
The X-H2S uses its fast-readout sensor and new X-Processor 5 chip to add subject recognition AF (Humans, Animals, Trains, Planes, Motorbikes, Cars and Birds), and more sophisticated AF tracking even with subject-detection disengaged. This combines with the ability to shoot at up to 40fps and a buffer that allows up to 184 JPEG or 175 Raw files at this fastest rate, and over 1000 JPEGs or 400 Raw images at 15fps using its mechanical shutter.

On the video side of things the X-H2S can capture DCI or UHD 4K at up to 60p using the full width of its sensor to give footage sampled from 6.2K width. It can also shoot 3:2 6.2K footage using its entire sensor area or 4K at up to 120p from a 1.29x cropped area. Footage can be recorded in a choice of 8-bit H.264, 10-bit H.625 or ProRes 422HQ, 422 or 422 LT with the option of ProRes Proxy capture in parallel. 4K at up to 120p can be output over HDMI or a Raw stream for encoding as ProRes RAW or BRaw using external recorders.

The Fujifilm X-H2S will be available from early July at a recommended price of $2499.

Virtual Camera Club News

Have you been unsubscribed? A number of listeners have let me know that they were unceremoniously unsubscribed from the show. If that happens to you, just go back to the app and click on subscribe.

Inner Circle Members: A big thanks to those who support our podcast and our efforts! We are having a blast at our new Inner Circle hangout, the private group I've set up at DerrickStoryOnline. We'd love it if you join us. You can become an Inner Circle Member by signing up at our Patreon site. You will automatically be added to the new hangout.

My Writing on Medium.com: I now have 51 published articles on Medium.com. And if you haven't visited the site, and enjoy good writing on a variety of topics, I suggest that you may want to take a look. You can just go to the home page and enter "Derrick Story" in the search field. And if you like what you read, then follow me!

The New Donation Kit for Carefree Shipping of Found Film Cameras - If you've discovered a film camera that's no longer being used, our new Donation Kit makes it easy to pack and ship. Just visit the Contact Form on thenimblephotographer.com, click the box next to Donating a Film Camera, and let me know what you have. In your note, be sure to include your shipping address.

Affiliate Links - The links to some products in this podcast contain an affiliate code that credits The Digital Story for any purchases made from B&H Photo and Amazon via that click-through. Depending on the purchase, we may receive some financial compensation.

Red River Paper - And finally, be sure to visit our friends at Red River Paper for all of your inkjet supply needs.

See you next week!

You can share your thoughts at the TDS Facebook page, where I'll post this story for discussion.