Recently in Photography

  Page 86 of 385 in Photography  

This is The Digital Story Podcast #597, August 15, 2017. Today's theme is "I've Got Shotgun!" I'm Derrick Story.

Opening Monologue

In my mind, road trips are a two-person activity. One needs to focus on driving, while the other serves as navigator. And with the current mapping technology, sudden route changes to avoid traffic jams are a great benefit if you have someone to monitor the situation. These days, that person would be me. And the side benefit to acting as navigator is that you also enjoy tremendous photography opportunities. And we're going to explore those on today's show.

I've Got Shotgun!

For those of you unfamiliar with "riding shotgun," the term was coined durning stagecoach days when the person seated to the right of the driver was assigned the task of protecting the entire crew, with shotgun in hand, as they traversed the trails of the west.

When I was a teenager, we didn't have to worry much about bandits pulling us over in Southern California, but riding shotgun was definitely the preferred seat because you weren't stuck in the back of the car.

I-5-Twilight-2048-web.jpg

Today, I'm still seated on the right side, but now with an iPhone in hand navigating the complicated California freeway system as we travel up and down the state. My skills as a navigator have earned me that position. And the side benefits of the job are unlimited photo opportunities. If you too can take advantage of this situation, here are a few things to help you maximize your opportunity.

  • Prepare your camera kit for front seat travel. Keep the bag small and gear accessible. Remove any protection filters from lenses that you might use. Be sure that the flash is off.
  • Keep the windows clean. If shooting through the windshield, then position the camera as close to the glass as possible, and be aware of possible reflections in the scene. Roll down the side window when possible (but this depends greatly on the views of others along for the ride.) Your polarizer can come in handy as well.
  • Experiment with techniques that you normally don't have time for. Test art filters, monochrome, film emulations, and more.
  • Be ready for sunrise and twilight.
  • Use motion to your advantage. Practice the "near and far" rule for shooting out the side window.

My last tip is not to judge while you're shooting. You'll have plenty of time later to evaluate what works, and what doesn't. The magic of shotgun photography is to let go so you can capture that wildly unique shot that you never anticipated, but dearly love.

How to Test Your Solar Eclipse Glasses

Time Magazine published a helpful article about fake solar eclipse glasses with some advice that I want to pass along to you.

It's not enough today to just look for the ISO certification, as many vendors have started printing glasses with ISO certifications -- even if the glasses do not meet industry standards, experts warned, so your best bet is to only buy from trusted vendors.

If eclipse glasses were purchased from an unauthorized dealer online, experts suggest conducting an at-home test. When you look through the lenses, the AAS said, you should not be able to see anything except for the sun or anything else significantly bright, like a halogen light bulb or a bright-white LED flashlight. All such sources of light should look dim through real eclipse glasses. The glasses also should not have any tears or scratches on them.

You need to wear the glasses during the partial solar eclipse, when the sun is partly blocked by the moon, but can take them off for the brief totality phase, in which the sun's light is entirely blocked for up to 2 minutes and 40 seconds.

The solar eclipse is coming to North America on Monday, August 21, 2017.

Using Cascable 3 "kas-ka-ball" as a Remote Control for Your Camera

This week I want to cover how I set up my Olympus PEN-F for remote control with my iPhone. Here are the steps.

  • Turn on your camera and enable WiFi Then launch the Cascable app on your iPhone. It will automatically find your camera's WiFi connection.
  • In Cascable, turn on the Histogram, Zebra Stripes (Pro), and Grid. Tap on the green Histogram icon on the bottom toolbar. (When you're in live view mode the histogram appears on the screen above the image.
  • Go to Camera Settings (green camera back icon) and set the Exposure Mode to P, White Balance to Auto, and Drive Mode to Single.
  • View the scene on the iPhone. Check the image, look for zebra stripes, and most importantly, study the live histogram.
  • Tap on the Exposure Compensation icon and adjust the exposure using the histogram and the live view of the scene. The live histogram makes this process very easy.
  • When everything looks good, take the picture.

If you haven't used Zebra Stripes before, keep in mind that many scenes have some spectral highlights. So you're not necessarily trying to eliminate the stripes all together.

The Olympus O.I. app doesn't have the live histogram (free) nor the zebra stripes (Pro) capability.

Cascable is available to get started with for free from the iOS App Store. Cascable's Pro features come with a free trial when subscribing from $2 per month, or can also be unlocked with a one-time $29.99 purchase.

We have a tile on all the pages of The Digital Story that takes you directly to the TDS landing page on the Cascable site.

New Subjects Added to The Nimble Classroom

I've trying to figure out a way to bring more personalized training to photographer without them having to travel. It's one thing to get on a plane to photograph wine country or the French Quarter, but not quite as alluring to sit in a classroom for two days.

As a result, I've designed a new approach called, The Nimble Classroom. And now there are four courses for the Summer Session of The Nimble Classroom.

  • August 19, Catalog Management, Capture One Pro
  • September 9, Expert Editing, Capture One Pro
  • September 23, Luminar Pro Techniques
  • October 7, Photos 3 for macOS

You can learn more about them and sign up for your favorites by visiting The Nimble Classroom online.

Updates and Such

Big thanks to all of our Patreon members!

We still have one spot open for the Autumn in Wine Country Photography Workshop this coming Oct. 26, 27, and 28.

B&H and Amazon tiles on www.thedigitalstory. If you click on them first, you're helping to support this podcast. And speaking of supporting this show, and big thanks to our Patreon Inner Circle members.

And finally, be sure to visit our friends at Red River Paper for all of your inkjet supply needs.

Texas-based Red River Paper recently announced a new fine art paper, Palo Duro Etching. The new paper is a 100 percent cotton rag paper and is free of optical brightener additives. The paper is designed to offer warm white tones, deep blacks and a subtle texture to accurately recreate traditional darkroom fine art prints.

See you next week!

More Ways to Participate

Want to share photos and talk with other members in our virtual camera club? Check out our Flickr Public Group. And from those images, I choose the TDS Member Photo of the Day.

Podcast Sponsors

Cascable - Cascable is the best tool available for working with your camera in the field.

Red River Paper - Keep up with the world of inkjet printing, and win free paper, by liking Red River Paper on Facebook.

The Nimbleosity Report

Do you want to keep up with the best content from The Digital Story and The Nimble Photographer? Sign up for The Nimbleosity Report, and receive highlights twice-a-month in a single page newsletter. Be a part of our community!

Want to Comment on this Post?

You can share your thoughts at the TDS Facebook page, where I'll post this story for discussion.
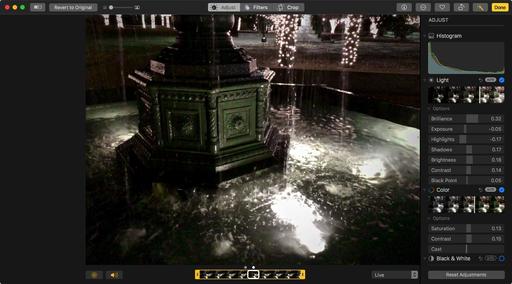
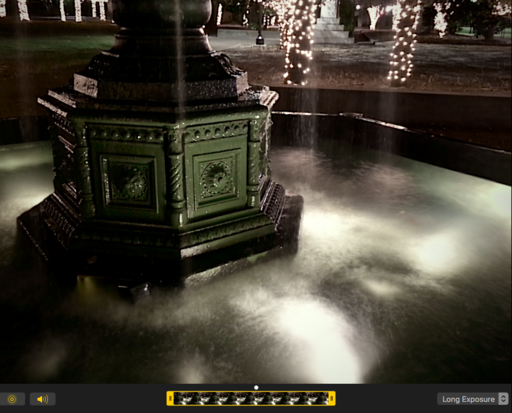
Much of the video I capture these days is either from the iPhone or my DJI Spark. In both cases, the content is managed in Photos for macOS. To be honest, it's just more convenient than the other options.

One of the wonderful aspects of HD and 4K movies is the ability to pull a single frame from the footage and use it as a standalone photograph. The quality is quite good, especially for web publishing. And it's easy to do in Photos. Here's a short video on the technique.

Essentially, all you have to do is scrub to the frame you want, then click on the gear icon in the controller. Choose "Export Frame to Pictures" from the popup menu. Photos will send a high quality Tiff file to your Pictures folder.

export-single-frame.png Exporting a single frame from video captured with the DJI Spark. Photo by Derrick Story.

At that point, you can bring the image back into Photos, convert it to a Jpeg with Preview, or make a print. Its file name will be the actual frame number from the video, so you might want to change that. And I recommend bringing the image back into Photos where you can add some metadata and keep it with the original movie.

Exporting a single frame from video is a great option to have as we continue to capture movies with our portable devices. And it's really easy to do in Photos for macOS.

Mastering Photos for macOS

I added a new Nimble Class on Mastering Photos for macOS to my ongoing Nimble Classroom Series. The first session sold out, but seats are available for the November 4th class.

You can also explore the world of modern photography with my The Apple Photos Book for Photographers that features insightful text and beautiful illustrations.

And if you'd like to cozy up to a training video at the same time, watch my latest lynda title, Photos for macOS Essential Training

You can share your thoughts at the TDS Facebook page, where I'll post this story for discussion.

This is The Digital Story Podcast #596, August 8, 2017. Today's theme is "It All Starts with the Bag." I'm Derrick Story.

Opening Monologue

When we're in the great outdoors, open space is a thing of beauty. But in our daily lives, it's a rare commodity. Counter tops, desks, closets, and garages tend to be filled to the brim. This tends to hold true for our suitcases, and yes, our camera bags as well. And before you know it, we're lugging around extra pounds that we just don't need. But there is a simple solution, and that's the topic for today's show.

It All Starts with the Bag

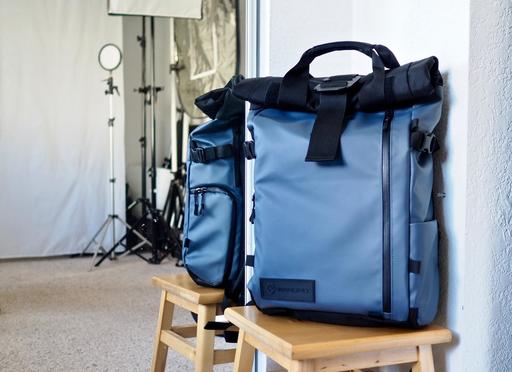
A few months ago, I grabbed my work bag on the way out the door and thought to myself, "Man, that's pretty heavy." When I got to work, I emptied its entire contents on my work table and stood there in disbelief. "I'm carrying all of that around with me?" I thought.

retrospective-7-on-car.jpg

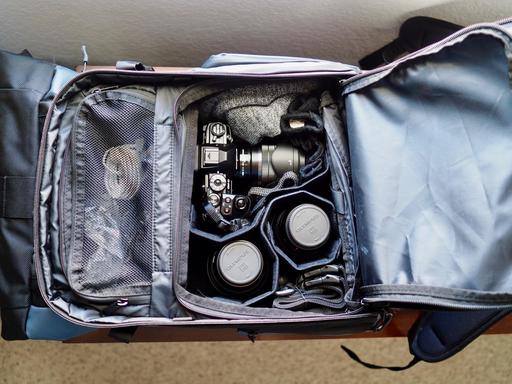
There were too many cameras, too many lenses, extra cables, batteries, card readers, chargers, and more. Looking inside my bag, you would think that I was heading off across the Atlantic, not cross town to my office.

Why was I carrying all of that? Was it left over from my days as a wedding photographer where we needed to have backups for our backups? Maybe. But it was time to slim down. So here's what I did.

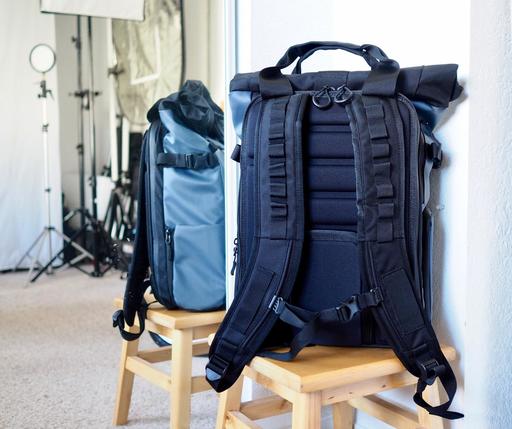
  • It all starts with a smaller bag.
  • You only need one of each, except batteries.
  • Tablets and small laptops are just fine for home.
  • Leave room for temporary items, such as lunch, paperwork, etc. so you don't end up carrying two bags.
  • Create an organized storage system so you can quickly interchange bag items for different situations.

Innovations such as the Olympus PEN-F and DJI Spark have made all of this much easier. Try your own gear diet and see how you feel.

Advice for Eclipse Newbies

The Atlantic published a helpful article titled, Advice for Eclipse Newbies where they provide some helpful tips for the August 21 event.

"Be sure to bring the appropriate viewing glasses, a pair of glasses for each member of the group. They are pretty cheap and sharing can be problematic in the moment. Just as totality nears, it gets very exciting. Bring additional batteries and cards for the cameras, and a tripod really helps a lot."

Also, B&H Photo has put together an Solar Eclipse Resources Page with links to gear and articles for the big event.

Introducing Cascable 3 "kas-ka-ball" - The Professional WiFi Camera Remote

Unlock the potential of your compatible Canon, Fujifilm, Nikon, Olympus, Panasonic, or Sony WiFi-enabled camera with Cascable. Built for professional and amateur photographers alike, Cascable is the best tool available for working with your camera in the field.

  • Full control of your camera's exposure settings right at your fingertips. (Free)
  • Shutter Robot automation tool for Self Timer (Free), Bulb Timer, Intervalometer, and Exposure Bracketing (Upgrade).
  • Work smart in low-light conditions with an app-wide night theme. (Upgrade)
  • Put your shutter right on your wrist with the included Apple Watch app. Makes group shots a breeze! (Free)
  • Download full-resolution images to your iOS device straight from your camera one at a time or in batches. You can download RAW, Jpeg, or RAW+Jpeg. (Upgrade)
  • Using an neutral density filter? the built-in calculator performs exposure calculations in a snap. Start with initial shutter speed, then set the filter density, and Cascable will then display the recommended shutter speed to those variables. (Free)
  • Want Sharp Stars (instead of trails)? The Sharp Stars calculator determines the longest shutter speed you can use at night. Set the focal length and sensor size, then read the maximum shutter speed you can use for sharp stars. (Free)

Cascable is available to get started with for free from the iOS App Store. Cascable's Pro features come with a free trial when subscribing from $2 per month, or can also be unlocked with a one-time $29.99 purchase.

We have a tile on all the pages of The Digital Story that takes you directly to the TDS landing page on the Cascable site.

New Subjects Added to The Nimble Classroom

I've trying to figure out a way to bring more personalized training to photographer without them having to travel. It's one thing to get on a plane to photograph wine country or the French Quarter, but not quite as alluring to sit in a classroom for two days.

As a result, I've designed a new approach called, The Nimble Classroom. And now there are four courses for the Summer Session of The Nimble Classroom.

  • August 19, Catalog Management, Capture One Pro
  • September 9, Expert Editing, Capture One Pro
  • September 23, Luminar Pro Techniques
  • October 7, Photos 3 for macOS

You can learn more about them and sign up for your favorites by visiting The Nimble Classroom online.

Updates and Such

Big thanks to all of our Patreon members!

We still have one spot open for the Autumn in Wine Country Photography Workshop this coming Oct. 26, 27, and 28.

B&H and Amazon tiles on www.thedigitalstory. If you click on them first, you're helping to support this podcast. And speaking of supporting this show, and big thanks to our Patreon Inner Circle members.

And finally, be sure to visit our friends at Red River Paper for all of your inkjet supply needs.

Texas-based Red River Paper recently announced a new fine art paper, Palo Duro Etching. The new paper is a 100 percent cotton rag paper and is free of optical brightener additives. The paper is designed to offer warm white tones, deep blacks and a subtle texture to accurately recreate traditional darkroom fine art prints.

See you next week!

More Ways to Participate

Want to share photos and talk with other members in our virtual camera club? Check out our Flickr Public Group. And from those images, I choose the TDS Member Photo of the Day.

Podcast Sponsors

Cascable - Cascable is the best tool available for working with your camera in the field.

Red River Paper - Keep up with the world of inkjet printing, and win free paper, by liking Red River Paper on Facebook.

The Nimbleosity Report

Do you want to keep up with the best content from The Digital Story and The Nimble Photographer? Sign up for The Nimbleosity Report, and receive highlights twice-a-month in a single page newsletter. Be a part of our community!

Want to Comment on this Post?

You can share your thoughts at the TDS Facebook page, where I'll post this story for discussion.

During our 2016 SF Street Photography Workshop, I brought a roller bag full of analog cameras for participants to experiment with during the event. I had all different types, and I remember one photographer remarking as he picked up an 80s SLR, "I love the feel of a mechanical film advance. It makes me smile."

When people ask me why I shoot film as well as digital, I think that's the best answer: It makes me smile. And that's a frame of mind that often leads to good photographs.

Contax-13mm.jpg

I dropped off three lenses for repair yesterday at Seawood Photo in San Rafael. I could have chucked them instead of restoring, but they seemed to valuable to just let go of. I asked the lady writing up my order how film sales were going. She said quite well. "It's funny, everyone left analog for a while except for a few of us. Now we're quite popular again."

I had a Contax 139Q with a Zeiss 28-70mm zoom in my camera bag while I was talking to her. "How would you characterize these film photographers?" I asked her while subconsciously patting my bag. "They seem happy," she replied.

Softar-1-2.jpg

Digital cameras are technological marvels. But analog cameras are mechanical wonders. The way they feel and the sounds they make while producing imagery is unlike our iPhones, computers, TVs, and other modern devices we use daily. With analog cameras, the tool itself pulls me into a zone of creativity.

Many, many cameras pass through my hands as part of the restoration that I do for TheFilmCameraShop. Each one is a little different. All of them have their own stories and journeys.

My workbench is their next stop. Then I think about what happens from there. Who's next? What will they create with this camera?

Those of you who have a 1980s Canon, Pentax, Yashica, Minolta, Nikon, Contax know what I'm saying here. You probably have a roll of film in there that you've been working on for a few weeks. There's no hurry. It's a feeling that you want to last.

Derrick returned to analog photography in late 2015 and has shot over 100 rolls of film since then. He currently runs TheFilmCameraShop on Etsy, when he restores 80s and 90s SLRs, specializing in Pentax, Contax, and Yashica.

You can share your thoughts at the TDS Facebook page, where I'll post this story for discussion.

Selective Color Editing in Photos 3

In addition to the new Curves Adjustment coming to Photos 3 for macOS, we also get selective color. This is a nicely implemented tool that I think you're going to enjoy. Here's a preliminary peek at how it works.

VW-Before-Edit.jpg Classic VW Bug. Photo by Derrick Story.

Let's say that we wanted to change the red VW above to something a bit wilder. Maybe lavender? It's easy enough to do.

First, open Selective Color in the Adjust tab of Photos 3. Then click on the dropper and select the red color of the car. Now, play with the Hue, Saturation, Luminance, and Range sliders until you get the look you want.

VW-After-Edit.jpgVW Bug after Selective Color edit.

You can hold down the M key to see the before and after. And you can uncheck the blue circle in the Selective Color box to turn on and off the adjustment.

Photos 3 will ship with macOS High Sierra this coming Fall. The application is evolving nicely as we work with in through the beta builds. And I think Mac users are really going to enjoy this latest version of the software.

IMG_4225.jpg Here's the final version of the image.

New Nimble Classroom for Photos 3 Added!

My first Nimble Classroom for Photos 3 sold out. So, I've added another session for Nov. 4. If you want to learn this app inside and out, plus its wonderful editing extensions, you may want to sign up for the November class. We're going to have a blast!

Book or Videos: Photos for macOS

Explore the world of modern photography with my The Apple Photos Book for Photographers that features insightful text and beautiful illustrations.

And if you'd like to cozy up to a video at the same time, watch my latest lynda title, Photos for macOS Essential Training

You can share your thoughts at the TDS Facebook page, where I'll post this story for discussion.

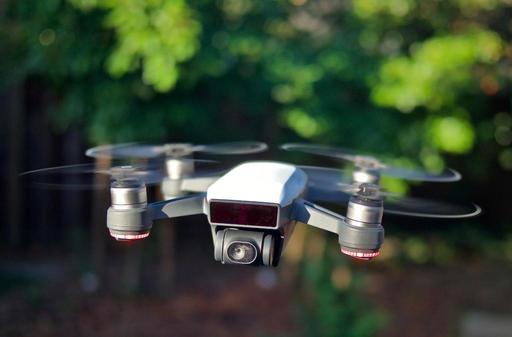
Spark owners will definitely want to apply the new firmware update (V01.00.0500) that fixes some aggravating bugs and brings about a few much-desired features.

spark-in-flight.jpg

Highlights from the Spark firmware include:

  • Gesture recognition improved.
  • Photo resolution improved to 4K in gesture mode.
  • Video recording now available in gesture mode.
  • Fixed the problem that caused photos not to save with no shutter sound in gesture mode.
  • Optimized battery's gas gauge.
  • New option to adjust gimbal tilt sensitivity.
  • Added a 180 degree Pano shooting mode.
  • And more (really!)

The firmware update is a biggie, over 90 MBs, so set aside a little time to execute it. I applied the update using the DJI GO 4 app on an iPhone, and everything ran smoothly. Just follow the prompts.

I'm going to test the new gesture capability this week. I'll follow up if there's anything noteworthy to report.

Drone World Expo Coming to San Jose

For those who want to hear from industry experts, mark Oct. 3 and 4 on your calendar now for Drone World Expo.

Thought leaders, industry experts and end-users will gather at Drone World Expo in the heart of Silicon Valley to present real-world solutions to your business and environmental challenges.

I'll be in San Jose covering the Expo in October. If you want to attend, early bird pricing is available until Sept. 22. That includes a $200 discount on the conference program. And the Expo pass (with keynotes) is free during this period. After early bird, the Expo pass is $50.

Want to learn more about the DJI Spark?

Listen to my podcast, DJI Spark - The Nimble Drone.

You can share your thoughts at the TDS Facebook page, where I'll post this story for discussion.

This is The Digital Story Podcast #595, August 1, 2017. Today's theme is "The Unfriendly Skies for Photographers." I'm Derrick Story.

Opening Monologue

Travel is as important to many photographers as the cameras they carry. Because let's face it: you can have the coolest mirrorless in the world, but if you don't have anything interesting to shoot, it's not worth much. But unfortunately air travel has become increasingly unfriendly for us. So this week's show is dedicated to making our trips as painless as possible.

The Unfriendly Skies for Photographers

On July 26, 2017, TSA announced new security measures for domestic travelers.

a-clear-path.jpg

As new procedures are phased in, TSA officers will begin to ask travelers to remove electronics larger than a cell phone from their carry-on bags and place them in a bin with nothing on top or below, similar to how laptops have been screened for years. This simple step helps TSA officers obtain a clearer X-ray image.

It is possible that passengers may experience more bag checks, however, through extensive testing, TSA identified ways to improve screening procedures with quicker and more targeted measures to clear the bags. The new screening procedures in standard lanes are already in place at the following 10 U.S. airports with plans to expand to all airports during the weeks and months ahead:

  • Boise Airport (BOI)
  • Colorado Springs Airport (COS)
  • Detroit Metropolitan Airport (DTW)
  • Fort Lauderdale-Hollywood International Airport (FLL)
  • Logan International Airport (BOS)
  • Los Angeles International Airport (LAX)
  • Lubbock Preston Smith International Airport (LBB)
  • Luis Muñoz Marín International Airport (SJU)
  • McCarran International Airport (LAS)
  • Phoenix Sky Harbor International Airport (PHX)

In standard screening lanes, TSA officers will be stationed in front of the checkpoint X-ray machines to guide passengers through the screening process and recommend how best to arrange their carry-on items for X-ray screening. Travelers are encouraged to organize their carry-on bags and keep them uncluttered to ease the screening process and keep the lines moving. There are no changes to what travelers can bring through the checkpoint; food and liquid items that comply with the 3-1-1 liquids rule, electronics, and books continue to be allowed in carry-on bags.

For photographers, this new screening approach will be a supreme hassle. So what are some of the things that we can do to mitigate our discomfort?

  • Signup for TSA Pre - By enrolling in the TSA Pre program, you can avoid taking electronics out of your carryon when going through security. You enroll online, then schedule a 10-minute appointment for background screening and fingerprinting. The service fee is $85.
  • Simplify the boarding process - The earlier you can get on the plane, the more options you have for stowing your gear. Fewer devices, camera bodies, and lenses simplify this process. If you're flying for a job, you have to bring what you have to bring. Otherwise, pare down. Airline programs that provide early access, combined with traveling as light as possible, will get you in your seat faster.
  • Avoid red flags - Don't attract attention to yourself by forgetting about liquids, knives, flammables, and other prohibited items. Once you're on the radar, they're going to become very curious about all of that gear.
  • Get to the airport early - Nothing makes me more uneasy than traveling with someone who likes to arrive at the last minute. That might be fine for a friend's birthday party, but no good for a traveling photographer with lots of gear. Even with TSA Pre, I've seen the line back up to the door.
  • Consider adding Clear Pass - CLEAR speeds you through the long line for ID check, and guides you to the screening line. Just find a Clear lane, verify that you are you with a tap of the finger or blink of an eye, and you speed right through. Enrolled in PreCheck? We'll provide you with fast access to PreCheck screening for eligible flights. You can start the enrollment process here. Currently Clear is in over 20 airports and growing. It costs $179 a year.

Even if you do all of these things, they is still no protection against delay flights, obnoxious travelers, and rude airline staff. So pack plenty of patience and as much humor as you can muster. May the skies be friendly for you.

11 Free Apps I Couldn't Live Without as a Photographer

Photographer Paul Adshead posted this article on F-Stoppers. There are some terrific suggestions here.

New Subjects Added to The Nimble Classroom

I've trying to figure out a way to bring more personalized training to photographer without them having to travel. It's one thing to get on a plane to photograph wine country or the French Quarter, but not quite as alluring to sit in a classroom for two days.

As a result, I've designed a new approach called, The Nimble Classroom. And now there are four courses for the Summer Session of The Nimble Classroom.

  • August 19, Catalog Management, Capture One Pro
  • September 9, Expert Editing, Capture One Pro
  • September 23, Luminar Pro Techniques
  • October 7, Photos 3 for macOS

You can learn more about them and sign up for your favorites by visiting The Nimble Classroom online.

Updates and Such

Big thanks to all of our Patreon members!

B&H and Amazon tiles on www.thedigitalstory. If you click on them first, you're helping to support this podcast. And speaking of supporting this show, and big thanks to our Patreon Inner Circle members.

And finally, be sure to visit our friends at Red River Paper for all of your inkjet supply needs.

Texas-based Red River Paper recently announced a new fine art paper, Palo Duro Etching. The new paper is a 100 percent cotton rag paper and is free of optical brightener additives. The paper is designed to offer warm white tones, deep blacks and a subtle texture to accurately recreate traditional darkroom fine art prints.

See you next week!

More Ways to Participate

Want to share photos and talk with other members in our virtual camera club? Check out our Flickr Public Group. And from those images, I choose the TDS Member Photo of the Day.

Podcast Sponsors

ImageFramer 4 - ImageFramer is used by artists, professional and amateur photographers, scrapbookers, framers, and people who simply want their family photos to look better.

Red River Paper - Keep up with the world of inkjet printing, and win free paper, by liking Red River Paper on Facebook.

The Nimbleosity Report

Do you want to keep up with the best content from The Digital Story and The Nimble Photographer? Sign up for The Nimbleosity Report, and receive highlights twice-a-month in a single page newsletter. Be a part of our community!

Want to Comment on this Post?

You can share your thoughts at the TDS Facebook page, where I'll post this story for discussion.

The Capture One Pro 10.1 update was a substantial, much bigger dot release than what we typically see.

New goodies include master reset, tokenized watermarking (really slick), Photoshop round tripping, styles packs, and more. I've added movies to these features in my Capture One Pro 10 Essential training on lynda.com, which is also available on LinkedIn Learning. Here's a 10.1 overview movie that I think you'll enjoy.

I think the 10.1 update is icing on an already delicious cake. Capture One Pro 10 provides an excellent workflow to manage, edit, and output your RAW and Jpeg images.

Master Capture One Pro

Start with Capture One Pro 10 Essential Training that will quickly get you up to speed with this pro level imaging application.

capture-one-pro-10.jpg

Then drill down into mastering the editing tools with Capture One Pro 10: Retouching and get supremely organized with Advanced Capture One Pro: Catalog Management.

Personalized Instruction Too!

If you want to have your questions incorporated into the curriculum, plus have live Q&A interactions, then take a look at my Nimble Classroom Series. I have personalized online sessions scheduled for Capture One Pro, Photos for macOS, and Luminar. Sign up today!

You can share your thoughts at the TDS Facebook page, where I'll post this story for discussion.

The news just keeps getting better for Capture One photographers. Today's happiness is brought to us by RNI, who just released RNI All Films 4 Lite for C1 users on both Mac and PC platforms. These styles are absolutely beautiful.

RNI-Kodak_E100GX.jpg "Street Musician, New Orleans" - Olympus PEN-F with Panasonic 20mm, RAW file processed in Capture One Pro using the Kodak E100GX Style in RNI All Films 4. Image by Derrick Story.

Here's what RNI has to say about them: "RNI All Films for Capture One is designed to bring the magic touch of film into your digital workflow. This package features 39 beautifully crafted film styles made after real analog film stocks. Rediscover film aesthetics. Create an emotional essence in your photography with RNI All Films.

And that's no exaggeration. Seems to me like the marriage of C1 RAW processing and RNI's film emulation science is ideal. As folks would say, "They are going to have some beautiful kids."

Once your purchase the Styles ($59), install them by opening Styles and Presets in the Adjustments panel, then clicking on Import Styles in the ... menu. All 39 film emulation profiles will be added to your User Presets.

Following that, simply open an an image and mouse over the different film types, you'll instantly see a preview of each effect. The workflow couldn't be easier.

Here's the processed version of the above image, using only C1's RAW processing and the RNI style.

Street Musician, New Orleans "Street Musician, New Orleans" - Photo by Derrick Story.

Master Capture One Pro

Start with Capture One Pro 10 Essential Training that will quickly get you up to speed with this pro level imaging application.

Then drill down into mastering the editing tools with Capture One Pro 10: Retouching and get supremely organized with Advanced Capture One Pro: Catalog Management.

Personalized Instruction Too!

If you want to have your questions incorporated into the curriculum, plus have live Q&A interactions, then take a look at my Nimble Classroom Series. I have personalized online sessions scheduled for Capture One Pro, Photos for macOS, and Luminar. Sign up today!

You can share your thoughts at the TDS Facebook page, where I'll post this story for discussion.

Luminar 3-Day Sale - $49

For the next 3 days you can purchase Luminar Neptune for $49. Considering that this app was a steal at $69, this is one terrific offer.

luminar-sale.png

Luminar Neptune includes the impressive Accent AI Filter, adaptive workspace, non-destructive RAW workflow, layers, filters, noise reduction, intelligent erase tool, and tons and tons of presets.

Luminar is also a plugin for Lightroom and my favorite editing extension for Photos for macOS. All of that is included in this $49 sale that's only available until July 27.

Photos for macOS as Your Digital Darkroom

I'll be showing you all the cool Luminar pro techniques in my upcoming Nimble Classroom on Luminar on Sept. 23. Interact with me and others from the comfort of your home.

You can learn more about using Luminar as an editing extension in my lynda.com training, Photos for macOS: Advanced Editing Extensions.

And if you'd prefer to cozy up with a book, check out The Apple Photos Book for Photographers that features chapters on basic editing, advanced post processing, and editing extensions.

You can share your thoughts at the TDS Facebook page, where I'll post this story for discussion.