Recently in Show Notes

  Page 39 of 99 in Show Notes  

This is The Digital Story Podcast #599, August 29, 2017. Today's theme is "5 Scenarios When Analog Makes More Sense." I'm Derrick Story.

Opening Monologue

I've been reading a lot about the Nikon D850 and what an impressive 45MP, $3,300 machine it is. I've also been following the Fuji GFX story and how the market is responding to the 51MP, $6,500 digital medium format body. The numbers made me a little dizzy. And it got me thinking about more affordable alternatives for creative photography. And that's the subject for today's show.

5 Scenarios When Analog Makes More Sense

7350_32A-TFP091.jpg

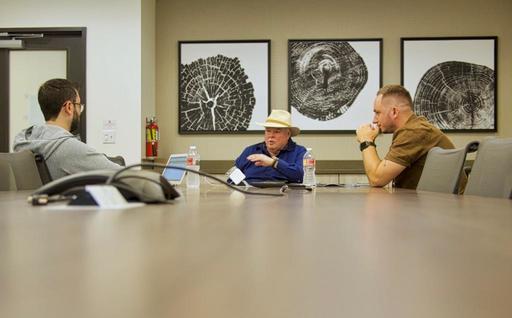
I had coffee the other day with a customer who had purchase a Contax RTS from TheFilmCameraShop. He was in town via a road trip, and it was easier to hand over the camera rather than ship it. Kyle is a professional travel and landscape photographer. And it was fascinating to listen to the direction he's taking today.

He shoots Sony mirrorless most of the time. But he has collection of Zeiss lenses with the Contax mount that he's adapted to his digital body. "I can't describe how good these lenses are and how utterly affordable."

He was preaching to the choir. And his story is my first example of when analog makes more sense.

  • Great Glass, Affordably - One of the best zoom lenses ever made is the Zeiss 35-70mm f/3.4 in the Contax mount. Pop Photo commented in their testing of it that every focal length performed like a prime lens. I bought one in pristine condition for $289. I can mount it on any mirrorless camera.
  • Medium Format at a Fraction of the Price - You can buy a Hasselblad 500C with Zeiss 80mm lens and back for about $900. That's about 1/10 the cost of a digital medium format kit. Since most of us only need medium format for special assignments, this is a wonderful alternative.
  • Archive for the Ages - Properly handled film has a very long life expectancy and is device independent.
  • Improving Your Skill as a Photographer - It's amazing the motivation that sets in the moment you get your processed images back from the lab, and they are all over the map exposure wise. Shooting digital RAWs has made most of us lazy at capture. There is no better (and unforgiving) way to sharpen up our skills than by shooting a monthly roll of film.
  • The Cameras Themselves - Many of the analog cameras I shoot with are my favorites. And because of this, I want to shoot more often with them. And as a result, I have more images at my disposal than ever before. I shoot digital at work. But analog gets me off the couch in my free time.
  • Using the Intervalometer for Cascable 3 "kas-ka-ball"

    One of my favorite features in Cascable's Shutter Robot is the Intervalometer Module. It's both powerful and flexible, and perfect for taking full control of your time-lapse sequences. The Intervalometer is a PRO feature.

    Start by setting the Interval, which can be as short as 1 second or as long as 59 minutes, 59 seconds. Then set the Stop parameter. You have three options: manually, after a fixed number of shots, or after a fixed amount to time. Once those are set, tap the Engage button, then the shutter release to begin the sequence.

    Cascable is available to get started with for free from the iOS App Store. Cascable's Pro features come with a free trial when subscribing from $2 per month, or can also be unlocked with a one-time $29.99 purchase.

    We have a tile on all the pages of The Digital Story that takes you directly to the TDS landing page on the Cascable site.

    You Don't Always Have to Take the Shot

    The story about my younger brother getting to steer the ship during an important family event.

    A Look at Our First The Nimble Classroom

    It was all systems go last Saturday for our first The Nimble Classroom focusing on Capture One Pro Catalog Management. Here's how it went.

    Here are the upcoming sessions.

    • September 9, Expert Editing, Capture One Pro
    • September 23, Luminar Pro Techniques
    • October 7, Photos 3 for macOS SOLD OUT
    • November 4, Photos 3 for macOS

    You can learn more about them and sign up for your favorites by visiting The Nimble Classroom online.

    Updates and Such

    Big thanks to all of our Patreon members!

    B&H and Amazon tiles on www.thedigitalstory. If you click on them first, you're helping to support this podcast. And speaking of supporting this show, and big thanks to our Patreon Inner Circle members.

    And finally, be sure to visit our friends at Red River Paper for all of your inkjet supply needs.

    Texas-based Red River Paper recently announced a new fine art paper, Palo Duro Etching. The new paper is a 100 percent cotton rag paper and is free of optical brightener additives. The paper is designed to offer warm white tones, deep blacks and a subtle texture to accurately recreate traditional darkroom fine art prints.

    See you next week!

    More Ways to Participate

    Want to share photos and talk with other members in our virtual camera club? Check out our Flickr Public Group. And from those images, I choose the TDS Member Photo of the Day.

    Podcast Sponsors

    Cascable - Cascable is the best tool available for working with your camera in the field.

    Red River Paper - Keep up with the world of inkjet printing, and win free paper, by liking Red River Paper on Facebook.

    The Nimbleosity Report

    Do you want to keep up with the best content from The Digital Story and The Nimble Photographer? Sign up for The Nimbleosity Report, and receive highlights twice-a-month in a single page newsletter. Be a part of our community!

    Want to Comment on this Post?

    You can share your thoughts at the TDS Facebook page, where I'll post this story for discussion.
This is The Digital Story Podcast #598, August 22, 2017. Today's theme is "Tales from the Solar Eclipse" I'm Derrick Story.

Opening Monologue

Like so many photographers in the U.S., I had been preparing for weeks to ensure my readiness for the August 21 Solar Eclipse of 2017. And judging by the images I saw on Instagram and throughout social media, many were happy with their results. So I thought that I'd dedicate this show to my preparations, and the event itself. After all, we get to do it all again in 7 years!

Tales from the Solar Eclipse

IMG_4430-Solar-Eclipse.jpg

Here's how I prepared for the big event, the equipment I used, and how it all turned out.

Using Cascable 3 "kas-ka-ball" to Photograph the Solar Eclipse

I connected my Olympus OM-D E-M10 Mark II to my iPhone and used Cascable to control the camera during the eclipse. This was the safest way to view the event.

  • Turn on your camera and enable WiFi Then launch the Cascable app on your iPhone. It will automatically find your camera's WiFi connection.
  • In Cascable, turn on the Histogram, Zebra Stripes (Pro), and Grid. Tap on the green Histogram icon on the bottom toolbar. (When you're in live view mode the histogram appears on the screen above the image.
  • Go to Camera Settings (green camera back icon) and set the Exposure Mode to P, White Balance to Auto, and Drive Mode to Single.
  • View the scene on the iPhone. Check the image, look for zebra stripes, and most importantly, study the live histogram.
  • Tap on the Exposure Compensation icon and adjust the exposure using the histogram and the live view of the scene. The live histogram makes this process very easy.
  • When everything looks good, take the picture.

If you haven't used Zebra Stripes before, keep in mind that many scenes have some spectral highlights. So you're not necessarily trying to eliminate the stripes all together.

The Olympus O.I. app doesn't have the live histogram (free) nor the zebra stripes (Pro) capability.

Cascable is available to get started with for free from the iOS App Store. Cascable's Pro features come with a free trial when subscribing from $2 per month, or can also be unlocked with a one-time $29.99 purchase.

We have a tile on all the pages of The Digital Story that takes you directly to the TDS landing page on the Cascable site.

A Look at Our First The Nimble Classroom

It was all systems go last Saturday for our first The Nimble Classroom focusing on Capture One Pro Catalog Management. Here's how it went.

Here are the upcoming sessions.

  • September 9, Expert Editing, Capture One Pro
  • September 23, Luminar Pro Techniques
  • October 7, Photos 3 for macOS SOLD OUT
  • November 4, Photos 3 for macOS

You can learn more about them and sign up for your favorites by visiting The Nimble Classroom online.

Updates and Such

Big thanks to all of our Patreon members!

We still have one spot open for the Autumn in Wine Country Photography Workshop this coming Oct. 26, 27, and 28.

B&H and Amazon tiles on www.thedigitalstory. If you click on them first, you're helping to support this podcast. And speaking of supporting this show, and big thanks to our Patreon Inner Circle members.

And finally, be sure to visit our friends at Red River Paper for all of your inkjet supply needs.

Texas-based Red River Paper recently announced a new fine art paper, Palo Duro Etching. The new paper is a 100 percent cotton rag paper and is free of optical brightener additives. The paper is designed to offer warm white tones, deep blacks and a subtle texture to accurately recreate traditional darkroom fine art prints.

See you next week!

More Ways to Participate

Want to share photos and talk with other members in our virtual camera club? Check out our Flickr Public Group. And from those images, I choose the TDS Member Photo of the Day.

Podcast Sponsors

Cascable - Cascable is the best tool available for working with your camera in the field.

Red River Paper - Keep up with the world of inkjet printing, and win free paper, by liking Red River Paper on Facebook.

The Nimbleosity Report

Do you want to keep up with the best content from The Digital Story and The Nimble Photographer? Sign up for The Nimbleosity Report, and receive highlights twice-a-month in a single page newsletter. Be a part of our community!

Want to Comment on this Post?

You can share your thoughts at the TDS Facebook page, where I'll post this story for discussion.
This is The Digital Story Podcast #597, August 15, 2017. Today's theme is "I've Got Shotgun!" I'm Derrick Story.

Opening Monologue

In my mind, road trips are a two-person activity. One needs to focus on driving, while the other serves as navigator. And with the current mapping technology, sudden route changes to avoid traffic jams are a great benefit if you have someone to monitor the situation. These days, that person would be me. And the side benefit to acting as navigator is that you also enjoy tremendous photography opportunities. And we're going to explore those on today's show.

I've Got Shotgun!

For those of you unfamiliar with "riding shotgun," the term was coined durning stagecoach days when the person seated to the right of the driver was assigned the task of protecting the entire crew, with shotgun in hand, as they traversed the trails of the west.

When I was a teenager, we didn't have to worry much about bandits pulling us over in Southern California, but riding shotgun was definitely the preferred seat because you weren't stuck in the back of the car.

I-5-Twilight-2048-web.jpg

Today, I'm still seated on the right side, but now with an iPhone in hand navigating the complicated California freeway system as we travel up and down the state. My skills as a navigator have earned me that position. And the side benefits of the job are unlimited photo opportunities. If you too can take advantage of this situation, here are a few things to help you maximize your opportunity.

  • Prepare your camera kit for front seat travel. Keep the bag small and gear accessible. Remove any protection filters from lenses that you might use. Be sure that the flash is off.
  • Keep the windows clean. If shooting through the windshield, then position the camera as close to the glass as possible, and be aware of possible reflections in the scene. Roll down the side window when possible (but this depends greatly on the views of others along for the ride.) Your polarizer can come in handy as well.
  • Experiment with techniques that you normally don't have time for. Test art filters, monochrome, film emulations, and more.
  • Be ready for sunrise and twilight.
  • Use motion to your advantage. Practice the "near and far" rule for shooting out the side window.

My last tip is not to judge while you're shooting. You'll have plenty of time later to evaluate what works, and what doesn't. The magic of shotgun photography is to let go so you can capture that wildly unique shot that you never anticipated, but dearly love.

How to Test Your Solar Eclipse Glasses

Time Magazine published a helpful article about fake solar eclipse glasses with some advice that I want to pass along to you.

It's not enough today to just look for the ISO certification, as many vendors have started printing glasses with ISO certifications -- even if the glasses do not meet industry standards, experts warned, so your best bet is to only buy from trusted vendors.

If eclipse glasses were purchased from an unauthorized dealer online, experts suggest conducting an at-home test. When you look through the lenses, the AAS said, you should not be able to see anything except for the sun or anything else significantly bright, like a halogen light bulb or a bright-white LED flashlight. All such sources of light should look dim through real eclipse glasses. The glasses also should not have any tears or scratches on them.

You need to wear the glasses during the partial solar eclipse, when the sun is partly blocked by the moon, but can take them off for the brief totality phase, in which the sun's light is entirely blocked for up to 2 minutes and 40 seconds.

The solar eclipse is coming to North America on Monday, August 21, 2017.

Using Cascable 3 "kas-ka-ball" as a Remote Control for Your Camera

This week I want to cover how I set up my Olympus PEN-F for remote control with my iPhone. Here are the steps.

  • Turn on your camera and enable WiFi Then launch the Cascable app on your iPhone. It will automatically find your camera's WiFi connection.
  • In Cascable, turn on the Histogram, Zebra Stripes (Pro), and Grid. Tap on the green Histogram icon on the bottom toolbar. (When you're in live view mode the histogram appears on the screen above the image.
  • Go to Camera Settings (green camera back icon) and set the Exposure Mode to P, White Balance to Auto, and Drive Mode to Single.
  • View the scene on the iPhone. Check the image, look for zebra stripes, and most importantly, study the live histogram.
  • Tap on the Exposure Compensation icon and adjust the exposure using the histogram and the live view of the scene. The live histogram makes this process very easy.
  • When everything looks good, take the picture.

If you haven't used Zebra Stripes before, keep in mind that many scenes have some spectral highlights. So you're not necessarily trying to eliminate the stripes all together.

The Olympus O.I. app doesn't have the live histogram (free) nor the zebra stripes (Pro) capability.

Cascable is available to get started with for free from the iOS App Store. Cascable's Pro features come with a free trial when subscribing from $2 per month, or can also be unlocked with a one-time $29.99 purchase.

We have a tile on all the pages of The Digital Story that takes you directly to the TDS landing page on the Cascable site.

New Subjects Added to The Nimble Classroom

I've trying to figure out a way to bring more personalized training to photographer without them having to travel. It's one thing to get on a plane to photograph wine country or the French Quarter, but not quite as alluring to sit in a classroom for two days.

As a result, I've designed a new approach called, The Nimble Classroom. And now there are four courses for the Summer Session of The Nimble Classroom.

  • August 19, Catalog Management, Capture One Pro
  • September 9, Expert Editing, Capture One Pro
  • September 23, Luminar Pro Techniques
  • October 7, Photos 3 for macOS

You can learn more about them and sign up for your favorites by visiting The Nimble Classroom online.

Updates and Such

Big thanks to all of our Patreon members!

We still have one spot open for the Autumn in Wine Country Photography Workshop this coming Oct. 26, 27, and 28.

B&H and Amazon tiles on www.thedigitalstory. If you click on them first, you're helping to support this podcast. And speaking of supporting this show, and big thanks to our Patreon Inner Circle members.

And finally, be sure to visit our friends at Red River Paper for all of your inkjet supply needs.

Texas-based Red River Paper recently announced a new fine art paper, Palo Duro Etching. The new paper is a 100 percent cotton rag paper and is free of optical brightener additives. The paper is designed to offer warm white tones, deep blacks and a subtle texture to accurately recreate traditional darkroom fine art prints.

See you next week!

More Ways to Participate

Want to share photos and talk with other members in our virtual camera club? Check out our Flickr Public Group. And from those images, I choose the TDS Member Photo of the Day.

Podcast Sponsors

Cascable - Cascable is the best tool available for working with your camera in the field.

Red River Paper - Keep up with the world of inkjet printing, and win free paper, by liking Red River Paper on Facebook.

The Nimbleosity Report

Do you want to keep up with the best content from The Digital Story and The Nimble Photographer? Sign up for The Nimbleosity Report, and receive highlights twice-a-month in a single page newsletter. Be a part of our community!

Want to Comment on this Post?

You can share your thoughts at the TDS Facebook page, where I'll post this story for discussion.
This is The Digital Story Podcast #596, August 8, 2017. Today's theme is "It All Starts with the Bag." I'm Derrick Story.

Opening Monologue

When we're in the great outdoors, open space is a thing of beauty. But in our daily lives, it's a rare commodity. Counter tops, desks, closets, and garages tend to be filled to the brim. This tends to hold true for our suitcases, and yes, our camera bags as well. And before you know it, we're lugging around extra pounds that we just don't need. But there is a simple solution, and that's the topic for today's show.

It All Starts with the Bag

A few months ago, I grabbed my work bag on the way out the door and thought to myself, "Man, that's pretty heavy." When I got to work, I emptied its entire contents on my work table and stood there in disbelief. "I'm carrying all of that around with me?" I thought.

retrospective-7-on-car.jpg

There were too many cameras, too many lenses, extra cables, batteries, card readers, chargers, and more. Looking inside my bag, you would think that I was heading off across the Atlantic, not cross town to my office.

Why was I carrying all of that? Was it left over from my days as a wedding photographer where we needed to have backups for our backups? Maybe. But it was time to slim down. So here's what I did.

  • It all starts with a smaller bag.
  • You only need one of each, except batteries.
  • Tablets and small laptops are just fine for home.
  • Leave room for temporary items, such as lunch, paperwork, etc. so you don't end up carrying two bags.
  • Create an organized storage system so you can quickly interchange bag items for different situations.

Innovations such as the Olympus PEN-F and DJI Spark have made all of this much easier. Try your own gear diet and see how you feel.

Advice for Eclipse Newbies

The Atlantic published a helpful article titled, Advice for Eclipse Newbies where they provide some helpful tips for the August 21 event.

"Be sure to bring the appropriate viewing glasses, a pair of glasses for each member of the group. They are pretty cheap and sharing can be problematic in the moment. Just as totality nears, it gets very exciting. Bring additional batteries and cards for the cameras, and a tripod really helps a lot."

Also, B&H Photo has put together an Solar Eclipse Resources Page with links to gear and articles for the big event.

Introducing Cascable 3 "kas-ka-ball" - The Professional WiFi Camera Remote

Unlock the potential of your compatible Canon, Fujifilm, Nikon, Olympus, Panasonic, or Sony WiFi-enabled camera with Cascable. Built for professional and amateur photographers alike, Cascable is the best tool available for working with your camera in the field.

  • Full control of your camera's exposure settings right at your fingertips. (Free)
  • Shutter Robot automation tool for Self Timer (Free), Bulb Timer, Intervalometer, and Exposure Bracketing (Upgrade).
  • Work smart in low-light conditions with an app-wide night theme. (Upgrade)
  • Put your shutter right on your wrist with the included Apple Watch app. Makes group shots a breeze! (Free)
  • Download full-resolution images to your iOS device straight from your camera one at a time or in batches. You can download RAW, Jpeg, or RAW+Jpeg. (Upgrade)
  • Using an neutral density filter? the built-in calculator performs exposure calculations in a snap. Start with initial shutter speed, then set the filter density, and Cascable will then display the recommended shutter speed to those variables. (Free)
  • Want Sharp Stars (instead of trails)? The Sharp Stars calculator determines the longest shutter speed you can use at night. Set the focal length and sensor size, then read the maximum shutter speed you can use for sharp stars. (Free)

Cascable is available to get started with for free from the iOS App Store. Cascable's Pro features come with a free trial when subscribing from $2 per month, or can also be unlocked with a one-time $29.99 purchase.

We have a tile on all the pages of The Digital Story that takes you directly to the TDS landing page on the Cascable site.

New Subjects Added to The Nimble Classroom

I've trying to figure out a way to bring more personalized training to photographer without them having to travel. It's one thing to get on a plane to photograph wine country or the French Quarter, but not quite as alluring to sit in a classroom for two days.

As a result, I've designed a new approach called, The Nimble Classroom. And now there are four courses for the Summer Session of The Nimble Classroom.

  • August 19, Catalog Management, Capture One Pro
  • September 9, Expert Editing, Capture One Pro
  • September 23, Luminar Pro Techniques
  • October 7, Photos 3 for macOS

You can learn more about them and sign up for your favorites by visiting The Nimble Classroom online.

Updates and Such

Big thanks to all of our Patreon members!

We still have one spot open for the Autumn in Wine Country Photography Workshop this coming Oct. 26, 27, and 28.

B&H and Amazon tiles on www.thedigitalstory. If you click on them first, you're helping to support this podcast. And speaking of supporting this show, and big thanks to our Patreon Inner Circle members.

And finally, be sure to visit our friends at Red River Paper for all of your inkjet supply needs.

Texas-based Red River Paper recently announced a new fine art paper, Palo Duro Etching. The new paper is a 100 percent cotton rag paper and is free of optical brightener additives. The paper is designed to offer warm white tones, deep blacks and a subtle texture to accurately recreate traditional darkroom fine art prints.

See you next week!

More Ways to Participate

Want to share photos and talk with other members in our virtual camera club? Check out our Flickr Public Group. And from those images, I choose the TDS Member Photo of the Day.

Podcast Sponsors

Cascable - Cascable is the best tool available for working with your camera in the field.

Red River Paper - Keep up with the world of inkjet printing, and win free paper, by liking Red River Paper on Facebook.

The Nimbleosity Report

Do you want to keep up with the best content from The Digital Story and The Nimble Photographer? Sign up for The Nimbleosity Report, and receive highlights twice-a-month in a single page newsletter. Be a part of our community!

Want to Comment on this Post?

You can share your thoughts at the TDS Facebook page, where I'll post this story for discussion.

This is The Digital Story Podcast #595, August 1, 2017. Today's theme is "The Unfriendly Skies for Photographers." I'm Derrick Story.

Opening Monologue

Travel is as important to many photographers as the cameras they carry. Because let's face it: you can have the coolest mirrorless in the world, but if you don't have anything interesting to shoot, it's not worth much. But unfortunately air travel has become increasingly unfriendly for us. So this week's show is dedicated to making our trips as painless as possible.

The Unfriendly Skies for Photographers

On July 26, 2017, TSA announced new security measures for domestic travelers.

a-clear-path.jpg

As new procedures are phased in, TSA officers will begin to ask travelers to remove electronics larger than a cell phone from their carry-on bags and place them in a bin with nothing on top or below, similar to how laptops have been screened for years. This simple step helps TSA officers obtain a clearer X-ray image.

It is possible that passengers may experience more bag checks, however, through extensive testing, TSA identified ways to improve screening procedures with quicker and more targeted measures to clear the bags. The new screening procedures in standard lanes are already in place at the following 10 U.S. airports with plans to expand to all airports during the weeks and months ahead:

  • Boise Airport (BOI)
  • Colorado Springs Airport (COS)
  • Detroit Metropolitan Airport (DTW)
  • Fort Lauderdale-Hollywood International Airport (FLL)
  • Logan International Airport (BOS)
  • Los Angeles International Airport (LAX)
  • Lubbock Preston Smith International Airport (LBB)
  • Luis Muñoz Marín International Airport (SJU)
  • McCarran International Airport (LAS)
  • Phoenix Sky Harbor International Airport (PHX)

In standard screening lanes, TSA officers will be stationed in front of the checkpoint X-ray machines to guide passengers through the screening process and recommend how best to arrange their carry-on items for X-ray screening. Travelers are encouraged to organize their carry-on bags and keep them uncluttered to ease the screening process and keep the lines moving. There are no changes to what travelers can bring through the checkpoint; food and liquid items that comply with the 3-1-1 liquids rule, electronics, and books continue to be allowed in carry-on bags.

For photographers, this new screening approach will be a supreme hassle. So what are some of the things that we can do to mitigate our discomfort?

  • Signup for TSA Pre - By enrolling in the TSA Pre program, you can avoid taking electronics out of your carryon when going through security. You enroll online, then schedule a 10-minute appointment for background screening and fingerprinting. The service fee is $85.
  • Simplify the boarding process - The earlier you can get on the plane, the more options you have for stowing your gear. Fewer devices, camera bodies, and lenses simplify this process. If you're flying for a job, you have to bring what you have to bring. Otherwise, pare down. Airline programs that provide early access, combined with traveling as light as possible, will get you in your seat faster.
  • Avoid red flags - Don't attract attention to yourself by forgetting about liquids, knives, flammables, and other prohibited items. Once you're on the radar, they're going to become very curious about all of that gear.
  • Get to the airport early - Nothing makes me more uneasy than traveling with someone who likes to arrive at the last minute. That might be fine for a friend's birthday party, but no good for a traveling photographer with lots of gear. Even with TSA Pre, I've seen the line back up to the door.
  • Consider adding Clear Pass - CLEAR speeds you through the long line for ID check, and guides you to the screening line. Just find a Clear lane, verify that you are you with a tap of the finger or blink of an eye, and you speed right through. Enrolled in PreCheck? We'll provide you with fast access to PreCheck screening for eligible flights. You can start the enrollment process here. Currently Clear is in over 20 airports and growing. It costs $179 a year.

Even if you do all of these things, they is still no protection against delay flights, obnoxious travelers, and rude airline staff. So pack plenty of patience and as much humor as you can muster. May the skies be friendly for you.

11 Free Apps I Couldn't Live Without as a Photographer

Photographer Paul Adshead posted this article on F-Stoppers. There are some terrific suggestions here.

New Subjects Added to The Nimble Classroom

I've trying to figure out a way to bring more personalized training to photographer without them having to travel. It's one thing to get on a plane to photograph wine country or the French Quarter, but not quite as alluring to sit in a classroom for two days.

As a result, I've designed a new approach called, The Nimble Classroom. And now there are four courses for the Summer Session of The Nimble Classroom.

  • August 19, Catalog Management, Capture One Pro
  • September 9, Expert Editing, Capture One Pro
  • September 23, Luminar Pro Techniques
  • October 7, Photos 3 for macOS

You can learn more about them and sign up for your favorites by visiting The Nimble Classroom online.

Updates and Such

Big thanks to all of our Patreon members!

B&H and Amazon tiles on www.thedigitalstory. If you click on them first, you're helping to support this podcast. And speaking of supporting this show, and big thanks to our Patreon Inner Circle members.

And finally, be sure to visit our friends at Red River Paper for all of your inkjet supply needs.

Texas-based Red River Paper recently announced a new fine art paper, Palo Duro Etching. The new paper is a 100 percent cotton rag paper and is free of optical brightener additives. The paper is designed to offer warm white tones, deep blacks and a subtle texture to accurately recreate traditional darkroom fine art prints.

See you next week!

More Ways to Participate

Want to share photos and talk with other members in our virtual camera club? Check out our Flickr Public Group. And from those images, I choose the TDS Member Photo of the Day.

Podcast Sponsors

ImageFramer 4 - ImageFramer is used by artists, professional and amateur photographers, scrapbookers, framers, and people who simply want their family photos to look better.

Red River Paper - Keep up with the world of inkjet printing, and win free paper, by liking Red River Paper on Facebook.

The Nimbleosity Report

Do you want to keep up with the best content from The Digital Story and The Nimble Photographer? Sign up for The Nimbleosity Report, and receive highlights twice-a-month in a single page newsletter. Be a part of our community!

Want to Comment on this Post?

You can share your thoughts at the TDS Facebook page, where I'll post this story for discussion.
This is The Digital Story Podcast #594, July 25, 2017. Today's theme is "No Such Thing as Free Time." I'm Derrick Story.

Opening Monologue

Time is like horizontal space in an office. If there's an opening, it becomes occupied. Seems to be a law of human nature that free time belongs to the young and the old. For everyone else, time must be planned. And if your photography isn't on the agenda, it won't make the cut. Ensuring that doesn't happen is the first topic of today's show.

No Such Thing as Free Time

free-time.jpg

It was a little after 7pm when I had finished watering the garden. The plants were thirsty after another 90 degree day in Sonoma County. But things were changing as the day began to wind down. There was a light ocean breeze in the air, and the temperature slipped back to the low 70s.

My chores were done, and I had a decision to make. Should I head inside, make a drink, and park it on couch? Tempting, and certainly justified after a weekend of work. But I hadn't shot since Thursday. And the light was absolutely beautiful right now.

Instead, I grabbed my camera bag and the keys to the Vanagon (that's right, the Vanagon!). Shilo Park was only a mile and a half from my house. I'm going to spend this last hour of light outside.

My first choice was to fly the DJI Spark. I waited about 10 minutes until everyone had cleared out of the parking area. I didn't want to end their day of nature with the sound of my drone. Once everything was clear, I lifted off and shot video for the next 15 minutes. The shadows were long and the colors were warm. It was a beautiful time for aerial photography.

Later that night as I was editing the footage in Final Cut, I thought about that last hour of the day. It made my whole weekend. And I almost let it slip away.

If you've let opportunities slip by you, here are five suggestions to help keep photography on your priority list.

  • Manage Your Energy - At first this might sound like an odd addition, but it's been my long standing opinion and fatigue is the enemy of creativity. The three most important facets of energy management is sleep, exercise, and diet. Keep enough gas in your tank so you can seize the moment when it presents itself.
  • Sell Yourself on the Value of Your Photography Work - If you don't believe that shooting is of vital importance, no one else is going to take your seriously. And you need them to do so if you're going to carve out time for your creative endeavors.
  • Explore New Techniques and Gear - Many photographers feel a little guilty about acquiring new gear. But if a camera, lens, housing, drone, tripod, reflector, or bag excites you to the point of motivation, I think that's a good thing.
  • Create Projects and See Them Through - Projects are vital to creative longevity. Last week I talked about seeing an image all the way through printing to framing. Photo essays, finished movies, printed books are other great examples of completed projects.
  • Get Better - Few things are more motivating than mastery. The first thing that I thought when I reviewed my final movie from Shilo Park is that I can't wait to get out there again and make a better movie. What I did last night was better than any aerial work I had done before, and now I have the confidence to do even better.

If you make time for your photography, it will reward you beyond any reasonable exception. It is one of the best investments in you that you can make.

More On Being a Good UAS Citizen

After my podcast about the DJI Spark (Unmanned Aircraft System), I received quite a bit of mail, some of it kindly chiding me for not being more clear about certification. So, here's a bit more info about flying your UAS, including a link to the getting started page on the FAA site.

If you're flying only for fun, there are no pilot requirements. If you plan to use your drone commercially, however, you must have Remote Pilot Airman Certificate that involves a written test. The big question in my mind is how do you define commercial? Education, BTW, seems to fall into the non-commercial category.

Need to be aware of restricted airspace. Maintain line of sight with your drone, and always yield to manned aircraft. Don't fly over people unless you have their explicit permission. Do not fly from a moving car. UAS flight is for daylight hours only.

And just as important as all of that, be courteous to others and use common sense. If you follow these guidelines, you should have a rewarding experience, and it won't be at the expense of others.

ImageFramer 4.1 Available

ImageFramer 4.1 is available, which includes hiding layers (including image layer) and a drop-down list of templates in Lightroom plugin (needs an update of the plugin).

More information can be found at right here.

ImageFramer on Facebook

For more tips like these, and lots more, visit ImageFramer on Facebook. And give your images the ImageFramer look they deserve.

We want everyone to enjoy the benefits of the new ImageFramer. ImageFramer 4.0 is a free upgrade for ImageFramer 3 customers. Note that it requires macOS 10.11 (El Capitan) or later. TDS listeners can receive a 20 percent discount by visiting: our ImageFramer landing page.

New Subjects Added to The Nimble Classroom

I've trying to figure out a way to bring more personalized training to photographer without them having to travel. It's one thing to get on a plane to photograph wine country or the French Quarter, but not quite as alluring to sit in a classroom for two days.

As a result, I've designed a new approach called, The Nimble Classroom. And now there are four courses for the Summer Session of The Nimble Classroom.

  • August 19, Catalog Management, Capture One Pro
  • September 9, Expert Editing, Capture One Pro
  • September 23, Luminar Pro Techniques
  • October 7, Photos 3 for macOS

You can learn more about them and sign up for your favorites by visiting The Nimble Classroom online.

Updates and Such

Big thanks to all of our Patreon members!

B&H and Amazon tiles on www.thedigitalstory. If you click on them first, you're helping to support this podcast. And speaking of supporting this show, and big thanks to our Patreon Inner Circle members.

And finally, be sure to visit our friends at Red River Paper for all of your inkjet supply needs.

Texas-based Red River Paper recently announced a new fine art paper, Palo Duro Etching. The new paper is a 100 percent cotton rag paper and is free of optical brightener additives. The paper is designed to offer warm white tones, deep blacks and a subtle texture to accurately recreate traditional darkroom fine art prints.

See you next week!

More Ways to Participate

Want to share photos and talk with other members in our virtual camera club? Check out our Flickr Public Group. And from those images, I choose the TDS Member Photo of the Day.

Podcast Sponsors

ImageFramer 4 - ImageFramer is used by artists, professional and amateur photographers, scrapbookers, framers, and people who simply want their family photos to look better.

Red River Paper - Keep up with the world of inkjet printing, and win free paper, by liking Red River Paper on Facebook.

The Nimbleosity Report

Do you want to keep up with the best content from The Digital Story and The Nimble Photographer? Sign up for The Nimbleosity Report, and receive highlights twice-a-month in a single page newsletter. Be a part of our community!

Want to Comment on this Post?

You can share your thoughts at the TDS Facebook page, where I'll post this story for discussion.
This is The Digital Story Podcast #593, July 18, 2017. Today's theme is "Just One Print." I'm Derrick Story.

Opening Monologue

Sometimes we make things too big. And as such, we shy away from them. I was actually thinking about this as it relates to making prints from our digital images. The idea of printing and all that goes with it seems like so much work. But what if you said to yourself, "I'm going to make just one print." That doesn't seem so bad, does it? We explore this approach on today's TDS Podcast.

Just One Print

print-1024.jpg Work in Progress - A 13" x 19" print with an ImageFramer matte on my worktable getting ready to be framed.

You probably didn't know that for a while, I smoked cigarettes. I was in a rock n roll band called Section 8. I was in my 20s, and it was the golden era of small night clubs in Southern California. After our sound check, but before the gig actually started, we had a lot of time on our hands. And that's when I learned to smoke.

As you may have guessed, after a while the charm wore off. And when it was time to quit cigarettes, I found that was much more difficult than starting. Fortunately, my paths crossed with someone who could help me. He was teach smoking cessation for the Public Health Dept.

One of the things that he used to say, is that when the urge would strike, just say that I'm not going to do anything for the moment. Not forever, or even tomorrow, Just right now. And soon the urge would pass.

I learned that this technique worked in the opposite direction as well. If I was facing a big task, I would say to myself, "I'm just going to do one thing right now." Then later on, I would do another. And I some point I would have completed the whole thing.

I bring this up, because I think people feel that printing their images is a big task. Not only the actual output, but the matting and framing and all of that. But what if you decided to make just one print? That's it. Just a print, then a matte, then a frame. How would you feel about printing after that?

Making Your Your Own Mattes with ImageFramer

So after I made my one print, I decided to make a matte for it. I had a particular color scheme in mind, so I opened ImageFramer and started playing. Once I created the design I wanted, I substituted the picture with a a blank white Jpeg. Why? Because my intention was to print out this design on Red River Paper, cut it, then use it as a matte. And it looks terrific!

ImageFramer on Facebook

For more tips like these, and lots more, visit ImageFramer on Facebook. And give your images the ImageFramer look they deserve.

We want everyone to enjoy the benefits of the new ImageFramer. ImageFramer 4.0 is a free upgrade for ImageFramer 3 customers. Note that it requires macOS 10.11 (El Capitan) or later. TDS listeners can receive a 20 percent discount by visiting: our ImageFramer landing page.

Vanagon Update

Here's the latest on the VW Vanagon...

New Subjects Added to The Nimble Classroom

I've trying to figure out a way to bring more personalized training to photographer without them having to travel. It's one thing to get on a plane to photograph wine country or the French Quarter, but not quite as alluring to sit in a classroom for two days.

As a result, I've designed a new approach called, The Nimble Classroom. And now there are four courses for the Summer Session of The Nimble Classroom.

  • August 19, Catalog Management, Capture One Pro
  • September 9, Expert Editing, Capture One Pro
  • September 23, Luminar Pro Techniques
  • October 7, Photos 3 for macOS

You can learn more about them and sign up for your favorites by visiting The Nimble Classroom online.

Updates and Such

Big thanks to all of our Patreon members!

B&H and Amazon tiles on www.thedigitalstory. If you click on them first, you're helping to support this podcast. And speaking of supporting this show, and big thanks to our Patreon Inner Circle members.

And finally, be sure to visit our friends at Red River Paper for all of your inkjet supply needs.

Texas-based Red River Paper recently announced a new fine art paper, Palo Duro Etching. The new paper is a 100 percent cotton rag paper and is free of optical brightener additives. The paper is designed to offer warm white tones, deep blacks and a subtle texture to accurately recreate traditional darkroom fine art prints.

See you next week!

More Ways to Participate

Want to share photos and talk with other members in our virtual camera club? Check out our Flickr Public Group. And from those images, I choose the TDS Member Photo of the Day.

Podcast Sponsors

ImageFramer 4 - ImageFramer is used by artists, professional and amateur photographers, scrapbookers, framers, and people who simply want their family photos to look better.

Red River Paper - Keep up with the world of inkjet printing, and win free paper, by liking Red River Paper on Facebook.

The Nimbleosity Report

Do you want to keep up with the best content from The Digital Story and The Nimble Photographer? Sign up for The Nimbleosity Report, and receive highlights twice-a-month in a single page newsletter. Be a part of our community!

Want to Comment on this Post?

You can share your thoughts at the TDS Facebook page, where I'll post this story for discussion.
This is The Digital Story Podcast #592, July 11, 2017. Today's theme is "DJI Spark - The Nimble Drone." I'm Derrick Story.

Opening Monologue

Quite frankly, drones were just too cumbersome to mess with. Since aerial photography was not essential to my business, I decided to bide my time until the right quadcopter was developed. Fortunately, I didn't have to wait too long. In June 2017, DJI released the Spark. It is truly the Nimble Photographer drone, and the top story for today's show.

DJI Spark - The Nimble Drone

dji-spark-1024.jpg

One of the things I really like about the Spark is that I can carry it with me all the time in my Think Tank Retrospective 7 shoulder bag. It fits nicely in the front pocket, and it's like carrying a second camera. Except this camera can fly.

I don't lug around extra batteries or a controller. I'm sticking with the basic $499 kit. I have an extra set of props and the charging cable. That's it.

All of my testing has been using the iPhone or iPad mini as the controller. My preference is the iPad because of its additional screen real estate, plus my phone is free for other tasks during flights. The DJI GO 4 app is quite good.

So really, the only think I've added to my everyday kit is the svelt quadcopter itself. But the payoff is tremendous. Here are five reasons why I recommend the Spark for Nimble Photography.

  • Built Like a Rock, but Much Lighter - You don't need to baby this device. It is solid. I carry it in a soft case in the front pocket of my Retrospective 7, and forget about it. When it's time to fly, the Spark is ready.
  • Amazing Technology - Incredible use of GPS satellites, infrared detection, WiFi connectivity, still photography, video recording, and aerodynamics. When combined with a state of the art smartphone, it's mind blowing what you have in the palm of your hand for $500.
  • Excellent for Still Photography - The 12 MP camera is quite good. Jpegs only. But on the fly you have options for single shot, burst mode, auto exposure bracketing, timed shot, shallow focus, and panorama photography. You can use full auto, or switch to manual exposure mode as needed. You can change both the ISO setting and white balance. All of this from your smartphone.
  • Intelligent Flight Modes - For HD video recording, you can take advantage of settings such as Active Track and Tripod mode. For Active Track, you ID a subject, and the Spark follows it while recording. For Tripod mode, it becomes super steady and moves slowly allowing for the sexy screen saver videos that we see on Apple TV.
  • Learn a New Skill - Just like I had to learn all about audio to become a photographer podcaster, I'm learning about aeronautics to become and aerial photographer. And it's fun. I'm using an app called Kittyhawk to review flight conditions such as wind and airspace clearance, I'm aware of obstructions and airport, and I'm learning how to take pictures from a completely new perspective.

I did register with the FAA because I may use some of my imagery commercially. Even though the Spark is super nimble, it's a serious aircraft. And I respect both its capabilities, and the responsibilities that come with its use.

Capture One Classroom

I've been trying to figure out a way to bring more personalized training to photographers without them having to travel. It's one thing to get on a plane to photograph wine country or the French Quarter, but not quite as alluring to travel far to sit in a classroom for two days.

As a result, I've designed a new approach called, The Nimble Classroom. And the first course series offered as part of this program will be for Capture One Pro. Here are the highlights.

Capture One Classroom - Session 1 - Catalog Management
Saturday, August 19, 8am PDT/11am EDT

Designing your Capture One Pro catalog to meet your needs as a photographer is an important first step toward creating a digital asset manager that is easy to use, effective, and enjoyable.

In this class, Derrick Story shows you best practices for creating a top notch catalog environment. Participants may submit their unique questions before class, allowing Derrick to incorporate that content into his teaching. And there will be live Q&A sessions throughout the course.

Class participation is limited to 6. The course may be viewed on a computer, tablet, or smartphone. Details will be sent to you prior to class.

Tuition for the one-day session is $129. No plane fares, hotel rooms, or rental cars. You can reserve your spot by visiting The Nimble Classroom on theNimblePhotographer.com

Framing Tip of the Month

One thing your professional framer will tell you is that some pieces of art «need» help. If a picture is a non-standard size, either too large or too long, or the focal point of the picture is very close to the lower edge of the image, then the mat can be "pulled down".

This means that the lower edge of the mat is wider compared to the upper and side edges, creating a feeling of proportionality. This same technique can be applied in cases where two pictures of different sizes are shown together. If the inner edges of both mats are made slightly narrower, the two pictures will look more balanced.

ImageFramer on Facebook

For more tips like these, and lots more, visit ImageFramer on Facebook. And give your images the ImageFramer look they deserve.

We want everyone to enjoy the benefits of the new ImageFramer. ImageFramer 4.0 is a free upgrade for ImageFramer 3 customers. Note that it requires macOS 10.11 (El Capitan) or later. TDS listeners can receive a 20 percent discount by visiting: our ImageFramer landing page.

Updates and Such

Big thanks to all of our Patreon members!

B&H and Amazon tiles on www.thedigitalstory. If you click on them first, you're helping to support this podcast. And speaking of supporting this show, and big thanks to our Patreon Inner Circle members.

And finally, be sure to visit our friends at Red River Paper for all of your inkjet supply needs.

Texas-based Red River Paper recently announced a new fine art paper, Palo Duro Etching. The new paper is a 100 percent cotton rag paper and is free of optical brightener additives. The paper is designed to offer warm white tones, deep blacks and a subtle texture to accurately recreate traditional darkroom fine art prints.

See you next week!

More Ways to Participate

Want to share photos and talk with other members in our virtual camera club? Check out our Flickr Public Group. And from those images, I choose the TDS Member Photo of the Day.

Podcast Sponsors

ImageFramer 4 - ImageFramer is used by artists, professional and amateur photographers, scrapbookers, framers, and people who simply want their family photos to look better.

Red River Paper - Keep up with the world of inkjet printing, and win free paper, by liking Red River Paper on Facebook.

The Nimbleosity Report

Do you want to keep up with the best content from The Digital Story and The Nimble Photographer? Sign up for The Nimbleosity Report, and receive highlights twice-a-month in a single page newsletter. Be a part of our community!

Want to Comment on this Post?

You can share your thoughts at the TDS Facebook page, where I'll post this story for discussion.
This is The Digital Story Podcast #591, July 4, 2017. Today's theme is "Frederic VJ Lives; New Orleans." I'm Derrick Story.

Opening Monologue

Some of my favorite moments during the Rail Adventure Workshop were our one-on-one meetings during the 19-hour train journey through the South to New Orleans. And one of the names that often came up during our discussions was my friend Frederick Van Johnson and his podcast, TWiP. Friends asking about friends, Southern hospitality, street photography, and so much more... all on today's TDS podcast.

Frederick Van Johnson Lives

Before we get to New Orleans itself, I want to address an issue that came up along the way: the well being of Frederick Van Johnson. As soon as I returned from my trip, I dropped him a note asking if he'd make an appearance on the show to discuss what he's been up to, and how he's been. Here's what he had to say.

To-Trains-1024.jpg

The City of New Orleans

It was supposed to rain every day we were in NOLA. And yet it stayed dry (relatively speaking) until 10 minutes after our workshop ended, when a downpour began. So other than the weather itself, here are my five favorite moments in New Orleans.

  • Shrimp Tacos in the French Market - I know that I shouldn't lead off with food, but how can you not when visiting Louisiana? In addition to the freshest shrimp taco I've ever had, I ate my way through the South trying a variety of local specialties, including my introduction to Tasso.
  • Wednesday Morning in the French Quarter - We were out the door early on Wednesday, lead by local photographer Tillie Van Etten. There's something special about photographing places like the Quarter as it slowly comes to life in the morning.
  • Breakfast in the Classroom - Each morning we dined together enjoying a full breakfast served by the staff at Hotel Provincial. In the evening, we also ate together in the restaurants, but these mornings were just us. And I loved being there with everyone.
  • Sergeant Mark Mumme - For our evening shoot in the Quarter, we hired Sergeant Mark of the New Orleans Police Dept. to watch our backs as we worked. I've never had security before during an urban shoot. But I loved it. And it was wonderful being able to just focus on our photography.
  • Class Presentation - After all the miles, photo shoots both in Chicago and New Orleans, everyone chose eight shots to share and discuss to close out the workshop. Reliving all of those moments with our crew was special indeed.

How to Choose a Color for Your Photo Mat

A mat can be described as a field of light or colour around a picture, in width usually 1/2 to 1/3 of the image's narrowest side. Mats can be of different shapes and kinds - rectangular, oval, multi-layered, with decorative insertions, etc. The mat creates a neutral zone between picture and its frame, helping the viewer to focus on the art work itself.

Here are five tips to keep in mind while designing a mat.

  • The color of a light mat should be a tone darker than the lightest color of the image. If using a dark mat, its color must be one tone lighter than the darkest color on the photo.
  • Using a colored mat is a good way to attract attention to important segments of a photograph. In this case, the surrounding color must be the same as the brightest segment of the image, but in more muted tones.
  • The simple trick of a double mat will give a personality to an artwork. Two or even three mats of different shades can be applied. The color of the inner mat is usually chosen from a particular tone in the image, which may be lighter or darker than the outside mat.
  • It is important to remember that colors and shades of a mat must be chosen to complement the color of the frame and the main color of the picture.

ImageFramer offers a huge selection of mats, as well as frames that play the role of a mat, which is especially good for oil paintings. Besides the usual colors, which accompany photographs and watercolors, you can select the color of your mat, using any color from your photo.

Read the complete article, How to Choose Mats for Photos for lots more information about framing your artwork.

Special Offer! ImageFramer celebrates Canada Day & July 4th with a 34% discount store-wide. No coupons necessary! (New Frames Too). You can learn all about it here.

We want everyone to enjoy the benefits of the new ImageFramer. ImageFramer 4.0 is a free upgrade for ImageFramer 3 customers. Note that it requires macOS 10.11 (El Capitan) or later. TDS listeners can receive a 20 percent discount by visiting: our ImageFramer landing page.

Updates and Such

Big thanks to all of our Patreon members!

Registration invitations have gone out to Reserve List members for the Autumn in Wine Country Photography Workshop. If you are on the Reserve List, but didn't get your invite, please contact me. You can learn more about the workshops by visiting the TDS Workshops Page.

B&H and Amazon tiles on www.thedigitalstory. If you click on them first, you're helping to support this podcast. And speaking of supporting this show, and big thanks to our Patreon Inner Circle members.

And finally, be sure to visit our friends at Red River Paper for all of your inkjet supply needs.

Texas-based Red River Paper recently announced a new fine art paper, Palo Duro Etching. The new paper is a 100 percent cotton rag paper and is free of optical brightener additives. The paper is designed to offer warm white tones, deep blacks and a subtle texture to accurately recreate traditional darkroom fine art prints.

See you next week!

More Ways to Participate

Want to share photos and talk with other members in our virtual camera club? Check out our Flickr Public Group. And from those images, I choose the TDS Member Photo of the Day.

Podcast Sponsors

ImageFramer 4 - ImageFramer is used by artists, professional and amateur photographers, scrapbookers, framers, and people who simply want their family photos to look better.

Red River Paper - Keep up with the world of inkjet printing, and win free paper, by liking Red River Paper on Facebook.

The Nimbleosity Report

Do you want to keep up with the best content from The Digital Story and The Nimble Photographer? Sign up for The Nimbleosity Report, and receive highlights twice-a-month in a single page newsletter. Be a part of our community!

Want to Comment on this Post?

You can share your thoughts at the TDS Facebook page, where I'll post this story for discussion.
This is The Digital Story Podcast #590, June 27, 2017. Today's theme is "Out of Chicago." I'm Derrick Story.

Opening Monologue

It was the day after Summer Solstice when we touched down at O'Hare Airport. You could feel the heat seeping through the cracks in the covered walkway that connected the plane to airport. There was no mistake. It was summer and I was in Chicago. And what transpired over the next few days is the top story for today's show.

Out of Chicago

Jackson-Station-1024.jpg

Later that night I was awakened from my sleep by the sound of rain blowing hard against my window. And there was thunder as well. I had a pre-conference workshop the next morning that included a photo walk.

"What is our Plan B?" I asked myself. "I don't know," I answered.

I picked up my phone and checked the weather. The rain was predicted to stop by 8 am. And what was predicted to follow was three days of glorious spring-like weather.

"If that's true," I thought, "then we're in for a great conference." I rolled over and fell asleep again.

It was true, and we had a fantastic event. Here are some of the highlights with a few embarrassing moments mixed in.

My Favorite and Slightly Embarrassing Moments in Chicago

  • A Favorite: Catching up with Valerie Jardine (Hit the Streets podcast) about her transition away from Street Focus on TWiP.
  • Embarrassing: When I accidentally called one of my favorite people on staff Michelle when her name is really Malinda.
  • A Favorite: Watching participants in my Analog workshop try to figure out what camera the wanted to choose while they were all hidden from sight in old Crown Royal cloth bags.
  • Embarrassing: Privately swearing to conference organizer Chris Smith when he was joking with me about my needing a meal break after a very long day. He later said he didn't even remember the incident. (Nice guy!)
  • A Favorite: Finding the best street taco joint on State Street for my first lunch in Chicago.
  • Embarrassing: Not realizing that I had met Scott Wyden Kivowitz years earlier at Photo Plus Expo.
  • A Favorite: Seeing a room full of people waiting for my printing talk to begin.
  • A Favorite: All of the TDS listeners who introduced themselves to me at the conference, in restaurants, and on the streets of Chicago.

Mirrorless Panel Discussion

On Sunday I moderated a panel discussion with a terrific slate of mirrorless photographers including Giulio Sciorio, Mike Boening, and Jamie MacDonald. I thought that you might want to hear part of the discussion, so here's an excerpt for your listening pleasure where I'm talking about sensor size, then turn it over to Guido for his thoughts. After that, Jamie and Mike chime in.

Using ImageFramer 4 with Lightroom

ImageFramer's Lightroom plugin is a Post-Processing Action plugin that will add itself to your Export flow. After the plugin is installed, it will be listed in the bottom-left panel of the Export dialog and a "Process with ImageFramer" section appears in the right panel, if the plugin is enabled.

To use the plugin, type the name of the template in ImageFramer that you want to use (case sensitive). During Export, after all the Lightroom adjustments are applied, ImageFramer will be launched, the image will be processed with the template and saved back into Lightroom's flow.

So, if you want to create your own greeting cards and original art from images stored in Lightroom, ImageFramer can be a terrific tool for you.

ImageFramer is used by artists, professional and amateur photographers, scrapbookers, framers, and simply people who simply want their family photos to look better.

ImageFramer helps you to:

  • Themed frames: Frames for holidays, seasonal frames, kid frames, romance (for weddings) and many more creative designs. Great for greeting card designs, scrapbooking, enriching family photos etc.
  • Overlays: Text or image overlays can be used for adding copyright notices, signatures, descriptions, and even automatic data, like file name, date (file or EXIF), location, caption and headline from IPTC metadata. New in version 4: Snapping overlays to center or edges and simplified interaction with text color and fonts.
  • Design Templates. ImageFramer comes with some preset templates. It's easy to add your own templates. These can be used in-app or through Lightroom or in built-in Batch Processor. New in version 4: Saving templates to files and importing them into a another ImageFramer installation.
  • Mats. ImageFramer has a special color mat frame types that can look beveled with control over bevel width, and the colors of both the mat and the bevel. Size of mat can be different in each direction (often useful to have a wider mat on the bottom). Multiple mat (and frame) layers allow limitless combinations.
  • Integration with Workflows: Adobe Lightroom Export plugin, Photos.app, Sharing extension. Useful for portfolios, web site exports, printing (even simple designs like overlays or a simple white border).

We want everyone to enjoy the benefits of the new ImageFramer. ImageFramer 4.0 is a free upgrade for ImageFramer 3 customers. Note that it requires macOS 10.11 (El Capitan) or later. TDS listeners can receive a 20 percent discount by visiting: our ImageFramer landing page.

Updates and Such

Big thanks to all of our Patreon members!

While you're listening to this, I'm most likely on a train heading south to New Orleans. The anticipated weather looks a lot more challenging than the first leg of the trip here in Chicago. I'll share the inside scoop in next week's podcast.

Registration invitations have gone out to Reserve List members for the Autumn in Wine Country Photography Workshop. If you are on the Reserve List, but didn't get your invite, please contact me. You can learn more about the workshops by visiting the TDS Workshops Page.

B&H and Amazon tiles on www.thedigitalstory. If you click on them first, you're helping to support this podcast. And speaking of supporting this show, and big thanks to our Patreon Inner Circle members.

And finally, be sure to visit our friends at Red River Paper for all of your inkjet supply needs.

Texas-based Red River Paper recently announced a new fine art paper, Palo Duro Etching. The new paper is a 100 percent cotton rag paper and is free of optical brightener additives. The paper is designed to offer warm white tones, deep blacks and a subtle texture to accurately recreate traditional darkroom fine art prints.

See you next week!

More Ways to Participate

Want to share photos and talk with other members in our virtual camera club? Check out our Flickr Public Group. And from those images, I choose the TDS Member Photo of the Day.

Podcast Sponsors

ImageFramer 4 - ImageFramer is used by artists, professional and amateur photographers, scrapbookers, framers, and people who simply want their family photos to look better.

Red River Paper - Keep up with the world of inkjet printing, and win free paper, by liking Red River Paper on Facebook.

The Nimbleosity Report

Do you want to keep up with the best content from The Digital Story and The Nimble Photographer? Sign up for The Nimbleosity Report, and receive highlights twice-a-month in a single page newsletter. Be a part of our community!

Want to Comment on this Post?

You can share your thoughts at the TDS Facebook page, where I'll post this story for discussion.