Recently in Photos for OS X

  Page 12 of 12 in Photos for OS X  

Photos for OS X now accepts Photo Extensions, and this changes everything. Out of the gate, there are four available with many more to come.
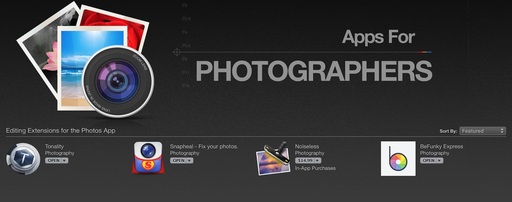
apps-for-photographers.jpg Look what's featured atop Apps for Photographers in the Mac App Store: Yes, the first wave of Photo Extensions.

The implementation is very smooth. Now, when you edit an image in Photos, there's an additional option in the right side toolbar called Extensions. Click on it, and you'll see a popup menu listing the Extensions you have loaded. Choose one, and your Photos interface transforms into that of the Extension.

Once you finish your work in the new environment, click on Save Changes, and you're returned to the Photos interface. What's really cool is that this is a totally nondestructive workflow. You can revert back to the original photo by returning to edit mode in Photos, then choosing Revert to Original. Want to see what the master looked like? Press the M key when in edit mode.
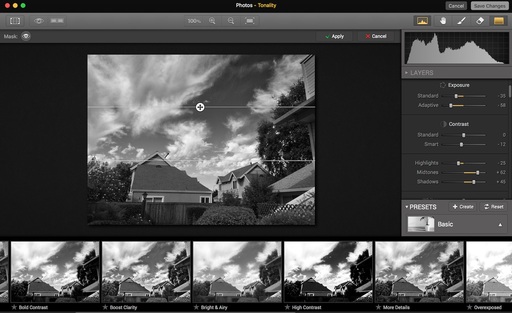
tonality-for-photos.jpg Tonality is a B&W Photo Extension that's available right now for El Capitan Photos.

Setting up an Extension is easy. First, purchase the software from the Mac App Store and install it. Then, go to your System Preferences, click on Extensions > Photos and enable your new app. Now it will appear in the Extensions popup menu in Photos for OS X.

I'll keep you posted about new Extensions as they are available. But already, Photos for OS X is far more powerful than it was a week ago.


Get Up and Running with Photos for OS X

Want to get up to speed with Apple's latest photo management application? Then take a look at my latest online video training, Up and Running with Photos for OS X. Soon, both you, and your pictures, will be comfortable in their new home.

And don't forget about the Photos for OS X Special Feature Section on The Digital Story. It's a roundup of tutorials, videos, and articles focused on helping you master Apple's latest photo management software. You can also find it under Photography in the top nav bar.

Want to Comment on this Post?

You can share your thoughts at the TDS Facebook page, where I'll post this story for discussion.
Even though one of the strengths of Photos for OS X is iCloud integration, that only works with Apple devices. If you want to share images outside of the Mac/iOS sphere, Dropbox makes more sense.

Dropbox runs on practically any device and operating system. So even if you manage your images in Photos for OS X, you can push copies through Dropbox quite easily. Plus you have additional backup. And when it comes to pictures, redundancy is a good thing.

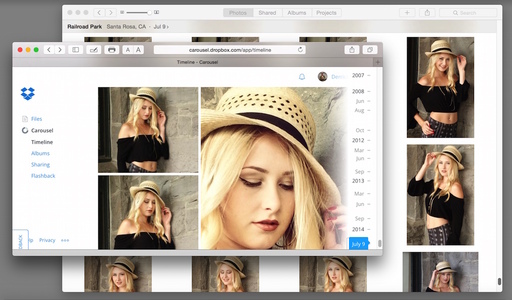
photos-and-carousel-1024.jpg Carousel on a Mac on top, with Photos for OS X in the background. These two apps can work together to expand your Cloud capability beyond Apple's ecosystem. Photos by Derrick Story.

The key to this system is installing the Dropbox app on your Mac that gives you Finder integration. By doing so, you can simply export images in bulk from Photos for OS X to a Backup/Sharing folder in Dropbox. It's easy and fast. Here's a movie on how this works.

A nice bonus to bringing Dropbox/Carousel into the mix, is that you get the Flashback feature that shows you images that you took on this day back in time. I really like it.

More Dropbox Tips and Techniques

If you want to dig into Dropbox, take a look at my lynda.com training, Dropbox for Photographers. For those who want to learn more about Photos for OS X, I also have the title, Up and Running with Photos for OS X.

Previous articles on The Digital Story about Dropbox include:

Want to Comment on this Post?

You can share your thoughts at the TDS Facebook page, where I'll post this story for discussion.
iCloud and Photos for OS X

A big advantage to Photos for OS X is its iCloud integration. This allows photographers to tie together their mobile devices with their computers. Regardless of where an image is captured or uploaded, it's immediately available on all the other devices, plus it's backed-up in the cloud too.

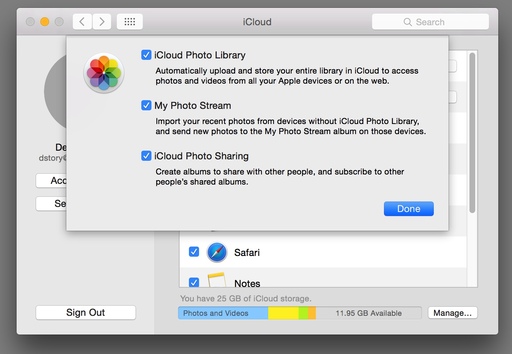
If you have a Mac and have not set this up yet, it's easy and only takes a minute. Here's a quick walk through to get you up to speed.

After you enable Photos integration on your Mac, check all of your iOS devices too. Just go to Settings > iCloud > Photos and turn on all the switches (except for Upload Burst Photos, which I leave off).

That's all there is to it. From that point forward, every picture you capture with an iPhone, or upload to Photos, will be shared across all of your devices.

icloud-settings.jpg It's easy to turn on iCloud for Photos on your Mac.

For more free movies, check out the links at the end of this post.


Get Up and Running with Photos for OS X

Want to learn the ins and outs of Apple's latest photo management application? Then take a look at my latest online video training, Up and Running with Photos for OS X. Soon, both you, and your pictures, will be comfortable in their new home.

Previous Articles on Photos for OS X

Basic Editing in Photos for OS X.

What Do Those Icons Mean in Photos for OS X?

How to Switch to RAW Files in Photos for OS X.

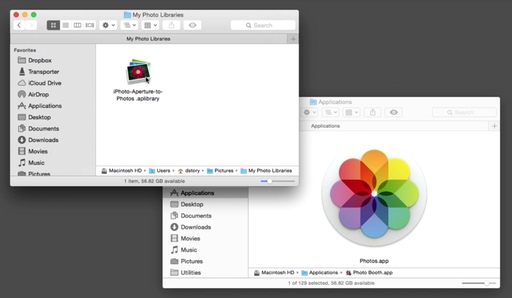
Converting an Aperture or iPhoto Library to Photos for OS X.

How to Open an Aperture or iPhoto Library in Photos for OS X.

How to Migrate from iPhoto or Aperture to Photos for OS X.

Basic Editing in Photos for OS X

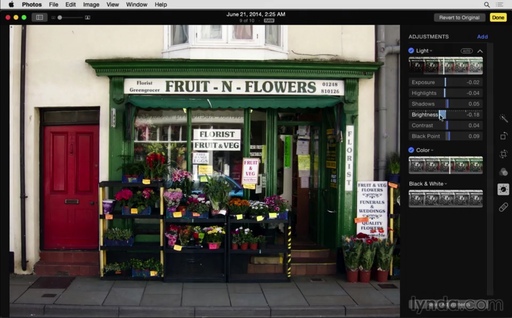
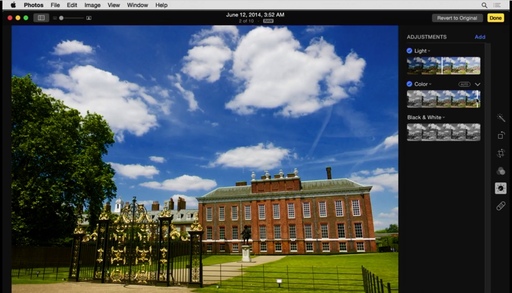
Image editing in Photos for OS X is quite intelligent. You can go as simple as one-click enhance, or drill down through the set of smart adjustment sliders. In this video, I show you the first two levels.

Most images can be spruced up in just a few seconds using this approach. In the following movies for this title, I drill down to more advanced adjustments, allowing you to get just the right look for your picture.

basic-editing-photos.jpg

For more free movies, check out the links at the end of this post.


Get Up and Running with Photos for OS X

Want to learn the ins and outs of Apple's latest photo management application? Then take a look at my latest online video training, Up and Running with Photos for OS X. Soon, both you, and your pictures, will be comfortable in their new home.

Previous Articles on Photos for OS X

How to Switch to RAW Files in Photos for OS X.

Converting an Aperture or iPhoto Library to Photos for OS X.

How to Open an Aperture or iPhoto Library in Photos for OS X.

How to Migrate from iPhoto or Aperture to Photos for OS X.

If you have an Aperture or iPhoto library that you would like to bring in to the Photos for OS X environment, then migration makes a lot of sense.

I recommend that your start with a smaller library to get a feel for the migration process. And there are a few gotchas you should be aware of.

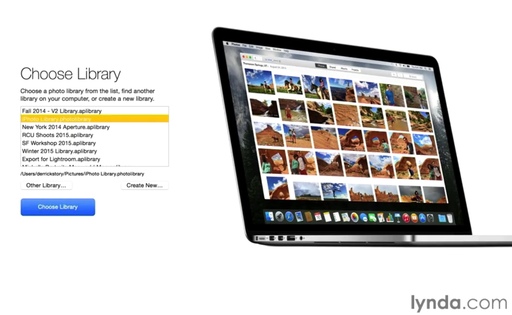
  • Unless you make the migrated library your "System Library," it won't be connected to iCloud and available across all devices. You can only have one System Library.
  • It isn't easy to merge libraries. There isn't really a process for this. So if you wanted to combine an existing System Library, with a newly converted library, you'll most likely be disappointed.
  • You can switch among libraries in Photos for OS X. So you can go back and forth between a System Library and one that has been migrated.

choose-library.jpg

Of course all of this could change in future updates. But if you want to know the best procedure for migration now, and what you can and cannot do once go through the process, watch my lynda movie on the subject. I'll walk you through the migration steps.


Get Up and Running with Photos for OS X

Want to learn the ins and outs of Apple's latest photo management application? Then take a look at my latest online video training, Up and Running with Photos for OS X. Soon, both you, and your pictures, will be comfortable in their new home.

Previous Articles on Photos for OS X

How to Switch to RAW Files in Photos for OS X.

Converting an Aperture or iPhoto Library to Photos for OS X.

How to Open an Aperture or iPhoto Library in Photos for OS X.

Apple has provided a migration path to Photos for OS X for Aperture and iPhoto users. The path does have a twist or two. In this movie from my lynda.com title, Up and Running with Photos for OS X, I show you a few of the options for making the move from your existing photo management app to the latest option for those running Yosemite on their Macs.


Get Up and Running with Photos for OS X

Want to learn the ins and outs of Apple's latest photo management application? Then take a look at my latest online video training, Up and Running with Photos for OS X. Soon, both you, and your pictures, will be comfortable in their new home.

convert-aperture.jpg

Previous Articles on Photos for OS X

How to Switch to RAW Files in Photos for OS X.

How to Open an Aperture or iPhoto Library in Photos for OS X.

Want to learn the ins and outs of Apple's latest photo management software, then take a look at my Up and Running with Photos for OS X title, just released by lynda.com.

I provide tips and techniques for image editing, exporting, sharing, cloud storage, and making the transition from Aperture or iPhoto. In just a short time, you (and your pictures) will be comfortable in their new home.

image-edit-photos.jpg Lean how to use all of the image editing tools in Photos for OS X.

Want to Comment on this Post?

You can share your thoughts at the TDS Facebook page, where I'll post this story for discussion.
If you're shooting RAW+Jpeg and upload those images to Photos for OS X, the application typically places the Jpeg forward. You can tell that this is the case via the badge in the lower left corner of the image with a "J" on top. (See second illustration.)

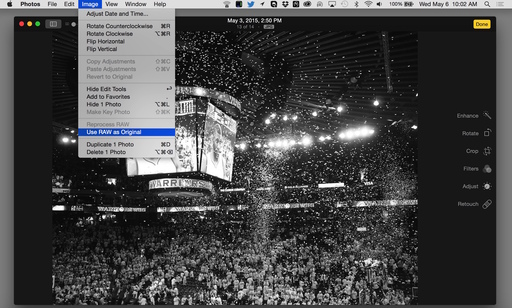
switch-to-raw.jpg In editing mode, you can tell Photos to switch to the RAW file.

Most photographers will want to edit the RAW file in post production. You can tell Photos that you want to work on the RAW by following these steps.

  • Double-click on the thumbnail to enlarge it, then click on the Edit button in the upper right corner.
  • Go to Image > Use RAW as Original.
  • Edit as normally, then click the Done button.

switched-to-raw.jpg

You'll notice that when you go back to thumbnails, the badge will now have an "R" on top instead of a "J", indicating that the RAW is the working image. You can control these badges by going to View > Metadata and turning on and off the ones you want.

Want to Comment on this Post?

You can share your thoughts at the TDS Facebook page, where I'll post this story for discussion.
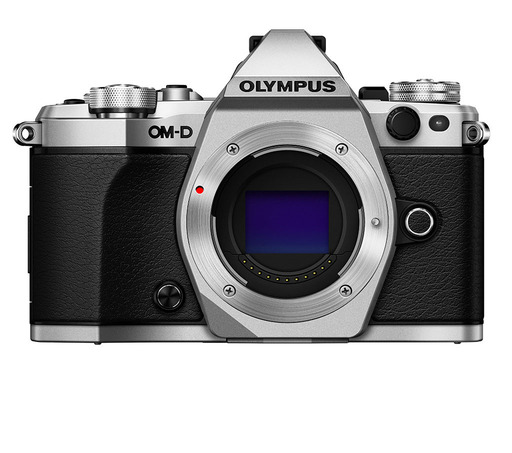
Apple has released Digital Camera RAW Compatibility Update 6.04 that supports 14 new cameras including the new Olympus OM-D E-M5 Mark II, but only for 16MP RAWs, not the 40MP High Resolution Shot files.

E-M5MarkII_SLV_TDS.jpg

The cameras on the following list will now have RAW support in Aperture, iPhoto, and Photos for OS X.

  • Canon EOS 5DS
  • Canon EOS 5DS R
  • Canon EOS Rebel T6i / 750D / Kiss X8i
  • Canon EOS Rebel T6s / 760D / Kiss 8000D
  • Fujifilm X-A2
  • Hasselblad CFV-50c
  • Hasselblad H5D-50c
  • Leica C (Typ 112)
  • Nikon 1 S2
  • Nikon D7200
  • Olympus OM-D E-M5 Mark II
  • Panasonic LUMIX CM1
  • Panasonic LUMIX DMC-GF7
  • Pentax MX-1

I tested the RAW files from the Olympus OM-D E-M5 Mark II in Aperture, and they look great.

For most Mac users, the update should have been automatically applied last night. But you can check for yourself by going to App Store > Updates.

Happy to see that Apple is keeping our photo software up to date.

Want to Comment on this Post?

You can share your thoughts at the TDS Facebook page, where I'll post this story for discussion.