Recently in Aperture 3

Turn Off Onscreen Proofing in Aperture on El Capitan

If you're see what looks like a white screen overlay on the images in your Viewer when running Aperture 3.6 in El Capitan, turn off Onscreen Proofing (View > Onscreen Proofing). This was the case for me after my initial testing on a mid-2012 MacBook Pro 15" running Mac OS X 10.11 and Aperture 3.6.

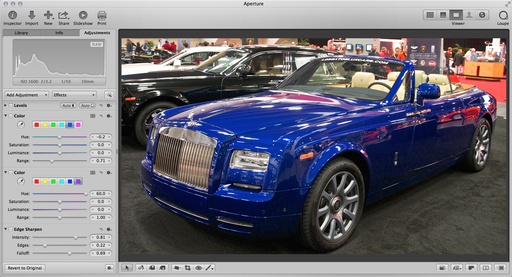
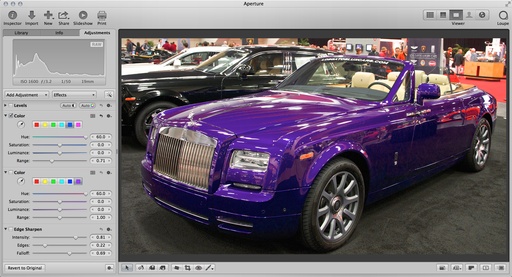
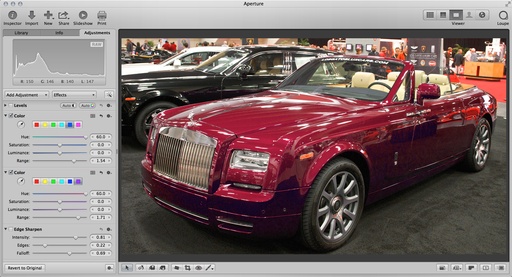
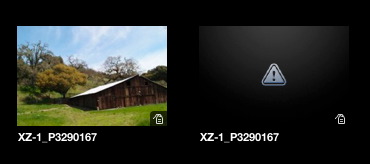
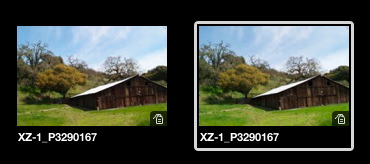
Here's what happens with Onscreen Proofing turned on (using any of the profiles):

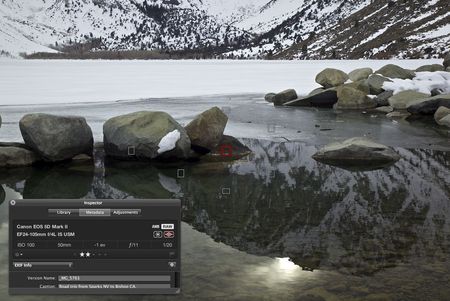
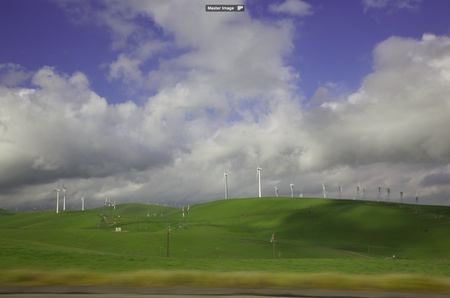
Screenshot 2015-09-30 13.58.37.png Thumbnail appears normal in Aperture 3.6

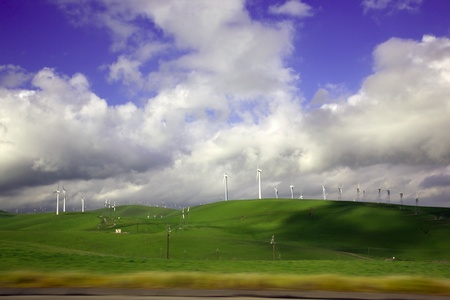
Screenshot 2015-09-30 13.59.17.png Viewer mode displays image with washed out appearance when Onscreen Proofing is turned on.

I'll continue to test Aperture 3.6 on El Capitan. So far, this is the first major bug I've found.

Want to Comment on this Post?

You can share your thoughts at the TDS Facebook page, where I'll post this story for discussion.

aperture-photos-libraries.jpg

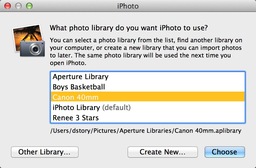
You can open your current Aperture or iPhoto libraries in Photos for OS X. The command to do so isn't part of the Photos for OS X menu system. Rather, you close the Photos app, then relaunch holding down the Option key. By doing so, you can switch to a new library or convert an existing iPhoto or Aperture library.

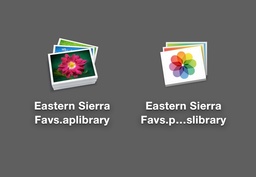
Photos will create its own version of the library, leaving the original Aperture or iPhoto library intact (as shown above). Keep in mind that the converted Photos library is different than your Photos System Library that's located in your Pictures folder. The System Library is the default Library that also communicates with iCloud services and allows you to share images across devices.

The Converted Library might be best considered a special project that's its own container. You can switch back and forth between the System Library and the Converted Library by relaunching Photos for OS X while holding down the Option key.

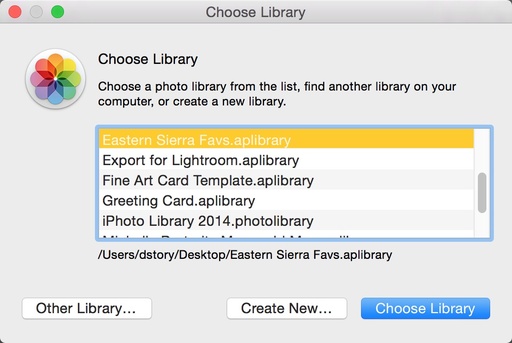
Option-Open.jpg Launching Photos with the Option key pressed presents you with a dialog box similar to this.

If you want to test this feature, I recommend that you use a small library that will allow you to practice the ins and outs of this procedure without processing gigabytes of information. There is no easy way to merge the Converted Library with the existing System Library. There's an advanced technique that's really a workaround, but I haven't tested it enough to write about at this time.

However, if you want to practice converting an iPhoto or Aperture Library, here are the steps.

  • Quit Photos for OS X and make sure Aperture and iPhoto are closed too.
  • Hold down the Option key and relaunch the Photos application.
  • Look for the Library you want to convert in the Choose Library dialog box.
  • Click on the Library you want to convert, then click on the Choose Library button.
  • Photos for OS X will prepare the converted library for you and place the container in the same directory as the original library.

Aperture Tips and Techniques

To learn more about Aperture, check out my Aperture 3.3 Essential Training (2012) on lynda.com. Also, take a look at our Aperture 3 Learning Center. Tons of free content about how to get the most out of Aperture.


Want to Comment on this Post?

You can share your thoughts at the TDS Facebook page, where I'll post this story for discussion.

Standing Out in a Crowd

I'm attracted to many pictures because something stands out in the composition. For example, with a crowd of people, there may be a face looking off in a different direction. When I snap the shutter, I know that I'm probably going to emphasize that person further in post production. And here's a bit more about that process.

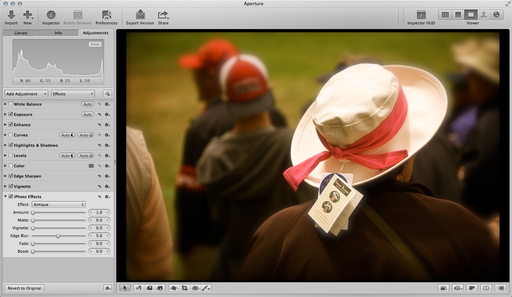
highlighted-school-child Highlighted Student - I took this photo because of the girl in the crowd looking off. So in post production I subtly enhanced the tones to help draw the viewer's eye to her.

original-school-kids Here's the original shot. The young female student still stands out, but the camera rendered all the tones more evenly than I wanted.

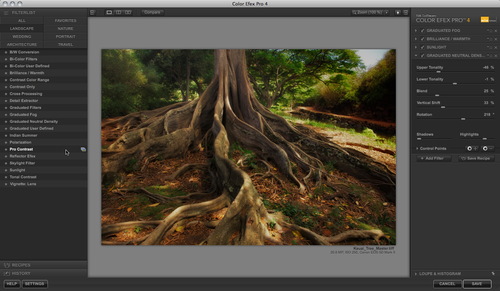
My favorite tool for this process is "Darken/Lighten Center" in Color Efex Pro 4. I like this plugin (with Aperture) because of it has a variety of helpful filters in addition to Darken/Lighten, such as Pro Contrast and Polarization.

When I'm in Lightroom, I'll tap the Radial Filter for this work. I can make a selection, then work outside it or on the interior. It also has a helpful feather slider for smooth transitions.

In some instances, a standard vignette tool will get the job done. Watch out for corners that get too dark, however. The goal is to lead the viewer down the path of discovery without overplaying your hand.

More Aperture Tips and Techniques

To learn more about portrait retouching in Aperture, take a look at Portrait Retouching with Aperture. You may want to check out my other Aperture titles, including Aperture 3.3 Essential Training (2012), Using iPhoto and Aperture Together, and the latest, Enhancing Product Photography with Aperture. Also, take a look at our Aperture 3 Learning Center. Tons of free content about how to get the most out of Aperture.


Want to Comment on this Post?

You can share your thoughts at the TDS Facebook page, where I'll post this story for discussion.

We knew there would be some compromise when Apple folded its high-end Aperture and consumer iPhoto applications in to one program. Now that we have an official preview of Photos for OS X, we can see the direction they're heading.

photos-for-mac-tools.jpg

The first thing to keep in mind is that this is the first beta for developer review. We'll see the gold master of Photos for OS X in the spring. So missing items such as star ratings, file names, etc. will probably appear in later releases. In other words, don't interpret what you see now as what you'll have later this year.

We do see some indicators, however, of the direction Apple is taking with Photos. And hardcore Aperture users will surely miss its advanced editing tools. In this area, I would say that early versions of Photos will feel more like iPhoto than Aperture.

My advice is for Aperture photographers to think about a 2-part strategy: what to do for 2015, then 2016 and beyond. For the remainder of this year, we have the luxury of sticking with Aperture on Yosemite and playing with Photos for OS X when it's released. By the end of 2015, we all should have a pretty good idea of how the new software is going to stack up against Aperture.

At the end of 2015, I believe it's decision time. In my case, I'll look at the following possibilities:

  • Continued support of Aperture with Mac OS X 10.11. If Apple continues to enable operating system compatibility, including systemwide RAW updates, then my job is easier. I can experiment with new workflows without having to overhaul my photo management system.
  • Evolution of Photos for OS X. With its open architecture, there are many possibilities for this application. In terms of features, what we see in 2016 could be very different than in the spring of 2015.
  • The competition. In addition to Adobe Lightroom, other applications such as DxO Optics Pro will continue to tempt Aperture users with their tool sets.

For the moment, I find this all very interesting. I'm looking forward to working with Photos for OS X and seeing how far I can push it. In the meantime, the current announcements (in terms of timing) are encouraging. We're going to see this application sooner than later.

Aperture Tips and Techniques

To learn more about Aperture, check out my Aperture 3.3 Essential Training (2012) on lynda.com. Also, take a look at our Aperture 3 Learning Center. Tons of free content about how to get the most out of Aperture.

Want to Comment on this Post?

You can share your thoughts at the TDS Facebook page, where I'll post this story for discussion.

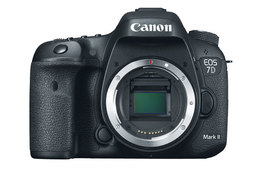
canon7d-Markii-front.jpg

RAW support for the Canon EOS 7D Mark II, Fujifilm X30, Nikon D750, and the Panasonic LUMIX DMC-LX100 were added to the Apple ecosystem that currently includes iPhoto, Aperture, and Preview.

Digital Camera RAW Compatibility Update 6.01 is currently available in the Mac App Store. This update requires Mac OS X Yosemite.

Aperture Tips and Techniques

To learn more about Aperture, check out my Aperture 3.3 Essential Training (2012) on lynda.com. Also, take a look at our Aperture 3 Learning Center. Tons of free content about how to get the most out of Aperture.

Want to Comment on this Post?

You can share your thoughts at the TDS Facebook page, where I'll post this story for discussion.

Adobe incorporated its Aperture/iPhoto Import Utility into Lightroom 5.7. And it works well. But a little preparation in Aperture will provide you with the best results possible.

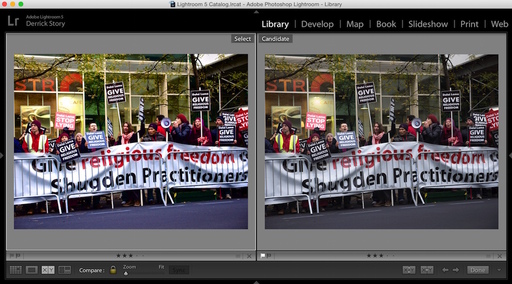
Edited-Jpeg-and-Raw.jpg Imported Aperture files in Lightroom 5.7 - The edited RAW file is now a Jpeg displayed on the left. The unedited RAW file is on the right. Both images were imported into Lightroom using the Adobe utility. The size and quality of the image on the left was determined by the Preview Settings in Aperture prior to import into Lightroom.

Since Lightroom can't imported the adjustments to RAW files (only the RAWs themselves), it provides you with the option to import Jpeg versions of your edited RAW files, along with the master RAWs themselves. I cover how to set this up in the article, How to Import Aperture Libraries into Lightroom 5.7 published on ct-digiphoto.com.

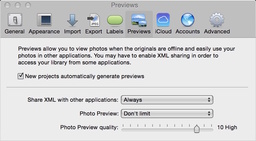
The real key for Aperture users is to regenerate their Jpegs that are being prepared for import into Lightroom. Most of us are using Aperture previews set to a constrained size, such as 1920x1920 or 1440x1440. This makes sense in terms of managing disk space on our computers.

The problem is, if we don't regenerate these Jpegs to "Don't Limit Size" and to a higher quality setting, such as "10," then the edited files that are imported into Lightroom won't be maximum quality or resolution.

preview-settings-in-aperture.jpg

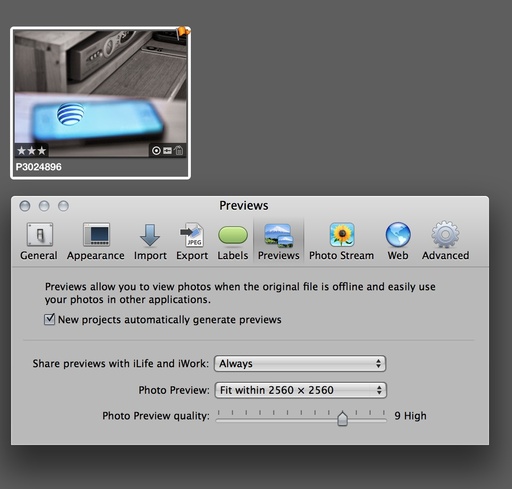
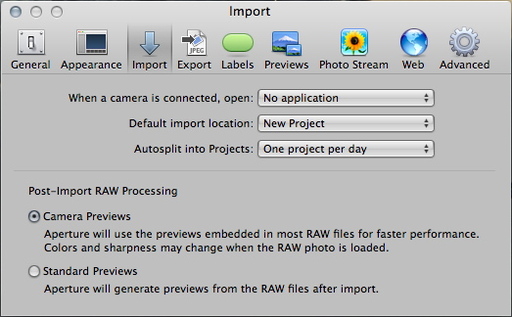
You can correct this by regenerating your previews using these settings in Aperture's Preferences (Aperture > Preferences), Photo Preview: Don't Limit, and Photo Preview Quality: 10 (High). Click on the image on the right to see how this looks.

To generate new previews using these parameters, hold down the Option key and go to Photos > Generate Previews. Depending on how many previews you're regenerating, this can take a while. Monitor your progress via the Activity window in Aperture (Window > Show Activity).

An easy test to make sure this worked is to drag a thumbnail out of Aperture to the Desktop. Open it in Preview, and use CMD-i to bring up the General Info box. There you can see the dimensions of the current preview in Aperture.

By regenerating full size previews, the pictures you so carefully edited in Aperture will be imported into Lightroom as Jpegs at their maximum dimensions with high quality. The edited preview receives an augmented file name, such as "PB020248_Aperture_preview.jpg" to help you identify it. Plus you'll get the original RAW, if there was one.

I highly recommend that you do a test run with a small Aperture library to ensure that you've prepared properly. Once everything passes muster, you're ready for the big import.

Keep in mind, that you only have to go through this laborious task if you were planning on moving to Lightroom anyway. A much easier transition to Apple's Photos app is on the horizon. And that move will keep all of our adjusted RAW files intact, plus library structure and metadata. Stay tuned for news about that right here on The Digital Story.

Aperture Tips and Techniques

To learn more about Aperture, check out my Aperture 3.3 Essential Training (2012) on lynda.com. Also, take a look at our Aperture 3 Learning Center. Tons of free content about how to get the most out of Aperture.

Want to Comment on this Post?

You can share your thoughts at the TDS Facebook page, where I'll post this story for discussion.

If you haven't updated your Google Nik Collection of plugins for a while, you might be greeted with an unhappy surprise after migration to Mac OS X Yosemite.

In my case, I was asked to reregister. And when I did, the software wouldn't accept my code. What caused this is incompatibility between the new operating system and an older version of the Nik suite.

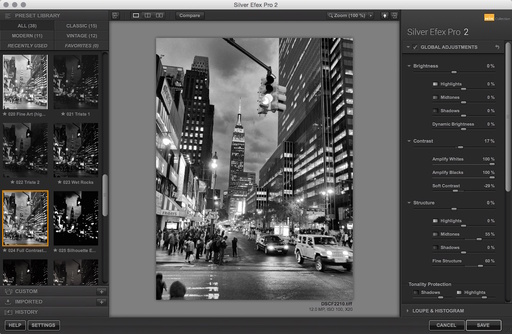
silver-efex-2pt2.jpg Everything is working fine again now that I have the latest version of Silver Efex Pro 2.

I contacted tech support and asked them to call me. Within a few minutes I learned that the most current version (2.2.x) of the Nik Collection seems to work well with Lightroom, Aperture, and Photoshop running on Yosemite. Google is working on an updated version of the suite that will ensure full compatibility. We should see that before too long.

If you haven't checked your Nik apps since upgrading to Yosemite, you might want to do so now. That way, you can get everything straightened out before you're in a time crunch.

Want to Comment on this Post?

You can share your thoughts at the TDS Facebook page, where I'll post this story for discussion.

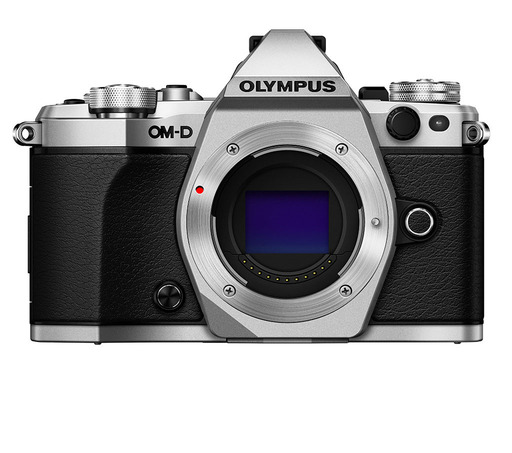
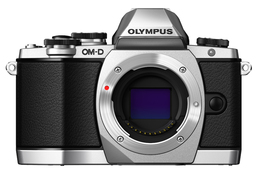
Olympus OM-D E-M10

Apple released Digital Camera RAW Compatibility Update 5.06 that adds Raw support for the following cameras.

  • Nikon COOLPIX P340
  • Nikon 1 V3
  • Olympus OM-D E-M10
  • Olympus STYLUS 1
  • Panasonic LUMIX DMC-GH4
  • Sony Alpha ILCE-7S
  • Sony Alpha ILCE-5000
  • Sony Alpha ILCE-6000
  • Sony Alpha SLT-A77 II
  • Sony Cyber-shot DSC-RX100 III

This is great news for Aperture (and iPhoto) users shooting with one of those cameras -- in my case the Olympus OM-D E-M10. After you install Update 5.06 via the App Store, relaunch Aperture and enable the Adjustments tab.

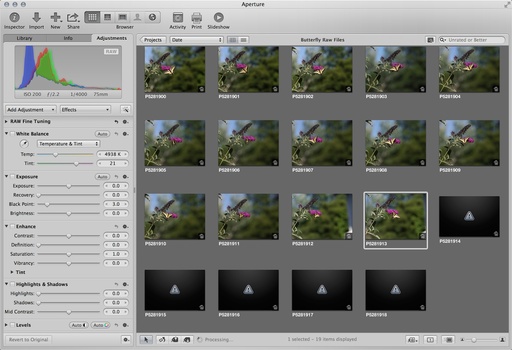
generating-thumbnails-raws.jpg

With the Adjustments tab enabled, you can click on each thumbnail to bring it to life. I use the arrow key to move from image to image.

Aperture Tips and Techniques

To learn more about Aperture, check out my Aperture 3.3 Essential Training (2012) on lynda.com. Also, take a look at our Aperture 3 Learning Center. Tons of free content about how to get the most out of Aperture.


The Digital Story on Facebook -- discussion, outstanding images from the TDS community, and inside information. Join our celebration of great photography!


exporter-for-aperture-logo.jpg

Those considering migrating from Aperture to Lightroom will be happy to hear that Adrian Grah's Exporter for Aperture is now available in the Mac App Store for $14.99. You can also download it from his site, ApertureExporter.com.

I first wrote about the beta version a couple weeks ago. Since that time, Adrian has received lots of feedback and has refined the utility. Highlights include.

  • Export your Aperture library to a set of folders.
  • Retain meticulously crafted project hierarchies.
  • Keep all your metadata including ratings and comments.
  • Original/Master images saved with XMP sidecar files for ultimate compatibility.
  • Aperture adjusted images saved as TIFF or JPEG depending on image rating. Adjustments are baked-in the image.
  • Exports images contained in your albums and smart albums.
  • Converts Aperture flags and colour labels to keywords.
  • Your Aperture libraries are unaltered and unaffected.

It's never easy moving your stuff, especially picture libraries. But Adrian can help make that job better.

Want to Comment on this Post?

You can share your thoughts at the TDS Facebook page, where I'll post this story for discussion.

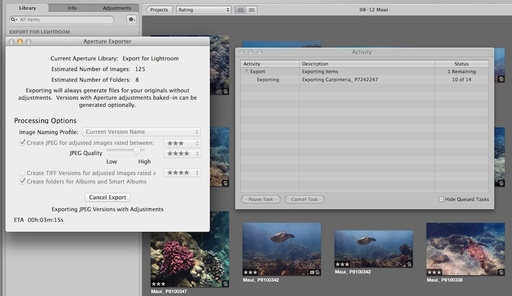
Aperture Exporter is a new app written by Adrian Grah designed to ease the pain of moving your library to Lightroom.

Using Aperture Exporter Aperture Exporter in action.

In my latest article for c't Digital Photography Magazine, Aperture Exporter - A Utility to Move Your Library to Lightroom, I share comments from Adrian and explain in detail how this application works. In essence, AE helps you extract content from your Aperture library and save it in a structure that's easily consumable by Lightroom.

After my first few rounds of testing, I estimate that this utility can easily cut your migration time in half, if not more. Aperture Exporter is still in beta, and Adrian is committed to improving it. So as user feedback rolls in, we'll see the app evolve even more.

If you're considering a move to Lightroom, be sure to take a look at this article first.

Aperture Tips and Techniques

To learn the finer points of Aperture to help you prepare your library for transition, check out my Aperture 3.3 Essential Training (2012) on lynda.com. Also, take a look at our Aperture 3 Learning Center. Tons of free content about how to get the most out of Aperture.


The Digital Story on Facebook -- discussion, outstanding images from the TDS community, and inside information. Join our celebration of great photography!


Many Aperture users are feeling like they don't belong to the cool club anymore. While Adobe Lightroom 5 users enjoy annual full release updates, a mobile app, and faster turnaround for new camera RAW support, Aperture is still chugging along at version 3.

So the temptation to switch is natural. If you're thinking of moving your photo library to where the party is happening, then here's a brief list of things to consider.

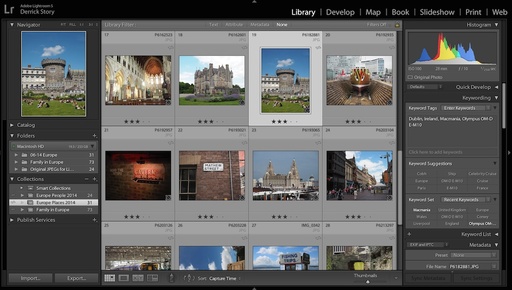
lightroom5-europe.jpg Lightroom 5.5 sports the latest image editing tools and is compatible with Mobile Lightroom for the iPad and iPhone.

Step 1 - Read my article Moving from Aperture to Lightroom on the lynda.com Article Center. I detail the various options available for moving content out of Aperture and in to Lightroom. All of the options involve a certain amount of work. Some are better than others.

Step 2 - If you're not pleased with the options for a complete relocation, take a look at the article, One Library Shared by Both Aperture and Lightroom that explains how to point both applications to the same set of master images.

With this approach, you still use Aperture as your main organizational tool (a function for which Aperture is superior), but still have access to Lightroom's Develop module and mobile app.

Step 3 - Evaluate the financial costs involved with a move. The best option for Lightroom is the $9.99 monthly Creative Cloud subscription that gets you Lightroom, Photoshop, and Mobile Lightroom. Currently, Aperture updates are free through the Mac App Store.

Step 4 - Identify the Lightroom tools that you want to use in Aperture. Then explore the plug-ins and presets available for Aperture. For example, I wish Aperture had gradient screens. But I have Color Efex and Perfect Effects plug-ins that give me that functionality while staying within the Aperture ecosystem.

Step 5 - Review your ties to the Apple ecosystem. If you're using the iPad, iPhone, Photo Stream, iPhoto, and looking forward to Mac OS X Yosemite, then you might want to evaluate Aperture's role in that ecosystem.

No move is easy, and switching to Lightroom definitely has its challenges. For some, the effort is well worth it. Just make sure you weigh the pros and cons before making the leap.

Aperture Tips and Techniques

To learn more about Aperture, check out my Aperture 3.3 Essential Training (2012) on lynda.com. Also, take a look at our Aperture 3 Learning Center. Tons of free content about how to get the most out of Aperture.


The Digital Story on Facebook -- discussion, outstanding images from the TDS community, and inside information. Join our celebration of great photography!


The software engineers at DxO Image Science have created a modern, powerful RAW processing app with DxO Optics Pro 9.5. The program includes an array of useful tools for Aperture users such as noise reduction, lens corrections, geometric straightening, intelligent presets, and more.

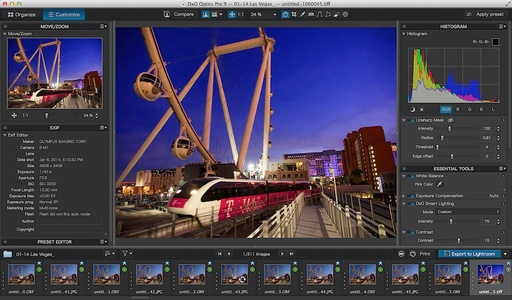
Monorail in DxO Optics Pro from Aperture Image from Aperture opened in DxO Optics Pro 9.5.

With the latest version, DxO can integrate smoothly into a Lightroom workflow. I explain how this works in the article, DxO Optics Pro 9.5 Intelligent Integration with Lightroom on c't Digital Photography Magazine. But what about Aperture? Can DxO Optics Pro work with it too?

The short answer is, "yes." The Aperture integration isn't as smooth as with Lightoom where DxO can read the original RAW file. With Aperture, you set up DxO as your external editor. Aperture sends out a TIFF file, and you can return a TIFF, JPG, or DNG to your Aperture library. Here's how it works.

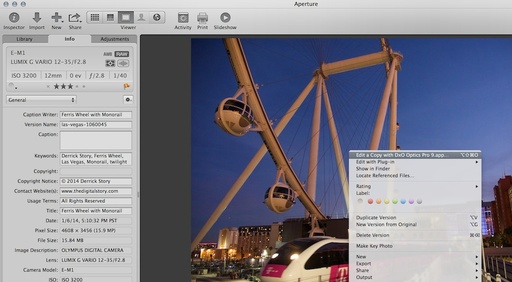
Export from Aperture to DxO Exporting from Aperture to DxO Optics Pro.

Step by Step Workflow for Using DxO Optics Pro with Aperture

  • Download the trial version of DxO and install on your Mac.
  • Open Aperture and go to Preferences > Export and select DxO Optics Pro as your external editor. Use TIFF (8-bit) as the file format and Adobe RGS as the color space. Close Preferences.
  • Open a RAW file in Aperture, right-click (or Control-click) on the image, and choose Edit with DxO Optics Pro from the top of the popup menu. (See figure above.)
  • Experiment with the different presets and editing tools in DxO.
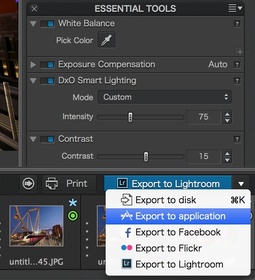
  • Export your finished image out of DxO by clicking on the Export Triangle icon in the lower right corner of the interface and choosing Export to Application. (See figure below.)
  • export-to-app-aperture

  • Choose Aperture from the dialog box, then set the parameters for your exported file.
  • Aperture will receive the file in a new Project. You can leave the image there, or move it to the project with the original RAW file. I recommend that you stack them.
  • At this point, there's no need to keep the TIFF file that Aperture used as the handoff. You can delete that from your Aperture library.

What this workflow lacks in smoothness, it more than makes up for in capability. Having access to top notch lens corrections, presets, and noise reduction fills major gaps with Aperture's editing tools.

And the price is reasonable right now. Until June 15, 2014, the Standard Edition is discounted to $99 and Elite is on sale for $199. The difference between the two are the number of cameras supported. They have a compatibility checker to help you make the right choice. In my case, the Standard Edition was sufficient.

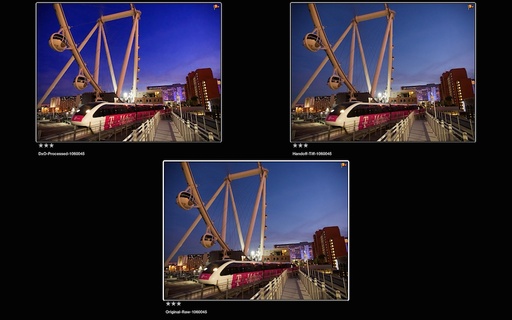
Comparing Files Comparing Files: Image on the bottom is the original RAW file. Upper right photo is the TIFF used for the handoff (you can delete this). Upper left corner is the Jpeg that was returned from DxO Optics Pro 9.5 to Aperture (it looks great!).

Bottom Line

DxO Optics Pro 9.5 is top drawer software that is a good fit for Aperture users. At this time, the workflow is a bit clumsy, but for your best images that you want to get the most out of, the effort is worth it.

Aperture Tips and Techniques

To learn more about Aperture, check out my Aperture 3.3 Essential Training (2012) on lynda.com. Also, take a look at our Aperture 3 Learning Center. Tons of free content about how to get the most out of Aperture.


The Digital Story on Facebook -- discussion, outstanding images from the TDS community, and inside information. Join our celebration of great photography!


Aperture is the great organizer. Lightroom's Develop module is terrific. Some photographers just can't decide which way to go.

aperture-lightroom-shared.jpg

Technically speaking, you don't have to choose. By setting up a referenced library in Aperture, you can point both applications to the same set of master files, then choose which one you want to use for image editing. Neither app will alter the original picture.

In my latest post for the lynda.com Article Center, One Library Shared by Both Aperture and Lightroom, I explain how to accomplish this. It's quite easy, and honestly, fun too.

Even though can jump back and forth for your image editing, I recommend that you choose just one app to organize you photo library. In my case, I prefer Aperture for that. But when it comes to post production, you have a lot of options between the two apps.

Aperture Tips and Techniques

To learn more about Aperture, check out my Aperture 3.3 Essential Training (2012) on lynda.com. Also, take a look at our Aperture 3 Learning Center. Tons of free content about how to get the most out of Aperture.


The Digital Story on Facebook -- discussion, outstanding images from the TDS community, and inside information. Join our celebration of great photography!


Much in the way that a new lens can invigorate your passion for taking pictures, presets and plugins can do the same for working in Aperture. If you haven't explored this brave new world, I have a treat for you.

presets-in-aperture.jpg

Presets are recipes that other photographers have created that use the existing tools in Aperture. Plugins are separate applications that work in concert with Aperture. I cover both in my latest article for lynda.com titled, Spicing Up Aperture with Plugins and Presets.

In terms of file management, presets are more friendly because you can try different looks for your pictures without adding megabytes to your library. Plugins, on the other hand, use largish Tiff files for the round trip from Aperture to the editing application. For that reason, I only use plugins for my favorite photos.

If you feel like your image editing life could use a pick-me-up, then read Spicing Up Aperture with Plugins and Presets and give a couple of these tools a try.

Personally, I love 'em. They've done a lot to keep me and Aperture together all these years.

Aperture Tips and Techniques

To learn more about Aperture, check out my Aperture 3.3 Essential Training (2012) on lynda.com. Also, take a look at our Aperture 3 Learning Center. Tons of free content about how to get the most out of Aperture.


The Digital Story on Facebook -- discussion, outstanding images from the TDS community, and inside information. Join our celebration of great photography!


Once you've enjoyed the speed of a solid state drive in your laptop, I doubt if you could ever return to spinning platters. So how do I manage my ginormous Aperture library with just 256 GBs on my laptop?

aperture_library_management.jpg

It's easier than you think. Thanks to the ability to merge and separate libraries with Aperture, I create a fresh library when I hit the road, then simply merge it into my master library on the Drobo when I return. I spell out the entire scenario in my latest lynda.com article, The Unlimited Laptop and Aperture.

If I want to bring a portion of the master library on the road with me, let's say all of my 2013 photos, I can use this technique to extract those images from the master collection and put it on a portable hard drive. I usually don't make changes to those past photos while traveling, but if I did, I could simply merge those files back into the master library when I'm back at the studio.

It's a great system that is easy to use and practically fool-proof. Check out The Unlimited Laptop and Aperture and see what you think.

Aperture Tips and Techniques

To learn more about Aperture, check out my Aperture 3.3 Essential Training (2012) on lynda.com. Also, take a look at our Aperture 3 Learning Center. Tons of free content about how to get the most out of Aperture.


The Digital Story on Facebook -- discussion, outstanding images from the TDS community, and inside information. Join our celebration of great photography!


hp5-film-1024.jpg

Even in the digital age, you can create B&W portraiture with a classic film grain and tonality. Thanks to inspiration by photographer Gary Tyson, I've added a new workflow for these types of images using Aperture 3 and Silver Efex Pro 2.

In the article, One Way to Convert Color Images to Black & White in Lightroom and Silver Efex Pro 2, Gary shows how to use Lightroom and Silver Efex to produce gritty B&W photos. The big take-away was flattening the contrast of the color photo in Lightroom before sending it to Silver Efex for processing.

To my thinking, this would be easy enough for Aperture users too. So I created this workflow.

Renee Reclining "Renee Reclining" originally captured in color and converted to B&W. All photos by Derrick Story.

To flatten the photo in Aperture, I moved the Contrast and Mid Contrast sliders to the left. (How far is a matter of personal taste. Take a look at the photo below for an example.) I then sent the image to Sliver Efex Pro 2 and applied the 011 Push Process (+1.5) or the 012 Push Process (+3) to the photo, depending on which one looked best. I then used the Film Simulation mode Ilford HP5 Plus 400. At this point I could return the picture to Aperture for finishing touches.

flat-contrast-color.jpg I created an Effect Preset for the flat contrast so it would be easy to apply in the future.

To close the loop, I output the image on fiber stock, such as Polar Matte 60lb.. Having the print for framing or just enjoying on the coffee table has certainly caught the eye of fellow photographers.

More Aperture Tips and Techniques

To learn more about portrait retouching in Aperture, take a look at Portrait Retouching with Aperture. You may want to check out my other Aperture titles, including Aperture 3.3 Essential Training (2012), Using iPhoto and Aperture Together, and the latest, Enhancing Product Photography with Aperture. Also, take a look at our Aperture 3 Learning Center. Tons of free content about how to get the most out of Aperture.

Want to Comment on this Post?

You can share your thoughts at the TDS Facebook page, where I'll post this story for discussion.

aperture_photo_management-500x323.jpg

It's that time of year when we look at our cluttered closets and think that it might be time to get our house in order. Well, the same could be said for our photo libraries.

With prime picture taking season right around the corner, wouldn't it be nice to have your Aperture library as tidy as your sock drawer? (This might be a bad comparison for some folks...)

My first post for the lynda.com blog is 5 tips for organizing your photos in Aperture. I cover the following topics to help keep your Aperture library spic and span.

  • Think in terms of projects
  • Use folders to reduce clutter
  • Build virtual collections with Albums
  • Be consistent with naming conventions
  • Use star ratings to identify your best work

And there's more to come. In the next post for lynda.com, I discuss how to set up your laptop for vacation travel photo management. Summer road warriors will definitely want to read that one.

Aperture Tips and Techniques

To learn more about Aperture, check out my Aperture 3.3 Essential Training (2012) on lynda.com. Also, take a look at our Aperture 3 Learning Center. Tons of free content about how to get the most out of Aperture.


The Digital Story on Facebook -- discussion, outstanding images from the TDS community, and inside information. Join our celebration of great photography!


fujifilm-x20-bw-mode.jpg

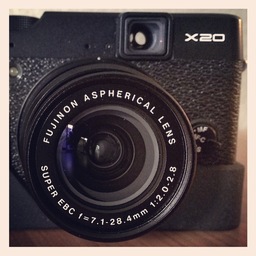
I carry the Fujifilm X-20 compact in my camera bag, set to RAW+Jpeg with the Film Simulation mode on B&W with yellow filter. Why?

By doing so, I'm always set to shoot B&W. The monochrome images look great on the LCD when I frame the shot, and while reviewing the images too. I use the X-20 for this because Fujifilm really has film simulation down to a science.

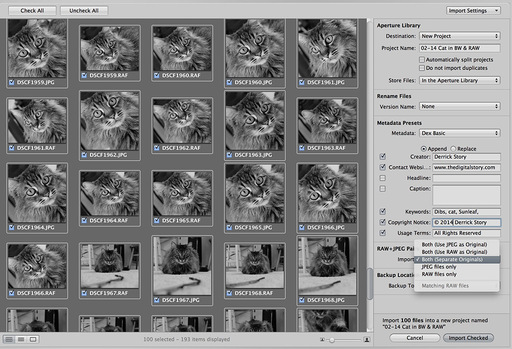
As a safety net, I'm capturing Raw too. When I import the images into Aperture, I enable Raw+Jpeg Pairs (in the import dialog box), then select: "Both (Separate Originals)." By doing so, I get all of those wonderful monochrome Jpegs plus the master Raw files. I tend to separate them into their respective albums.

I typically use the B&Ws going forward. But if I need those Raw files, it's good to have 'em.

Aperture Tips and Techniques

To learn more about Aperture, check out my Aperture 3.3 Essential Training (2012) on lynda.com. Also, take a look at our Aperture 3 Learning Center. Tons of free content about how to get the most out of Aperture.


The Digital Story on Facebook -- discussion, outstanding images from the TDS community, and inside information. Join our celebration of great photography!


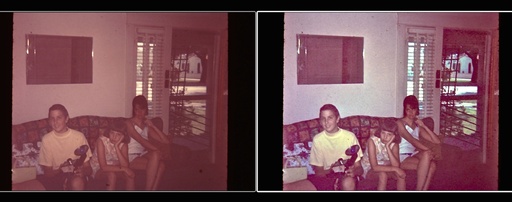
No photo library is complete without old, color-shifted family portraits. You can breath some life into these pictures by using the image editing tools in Aperture.

before-and-after-family.jpg That's me sitting on the couch with a camera. My sister looks pretty bored, and my Mom doesn't seem to be in a portrait mood.

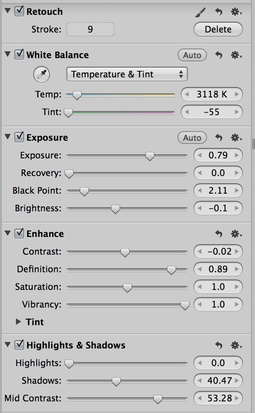
Here are the basic steps I follow to work on an old photo:

basic-restoration-adjustments.jpg

  • Remove Cast with Temperature and Tint - I use the eye dropper in the White Balance brick and click on a neutral area with Temperature and Tint selected. This helps remove some of the color cast.
  • Improve Contrast - using the Exposure brick along with the Highlights & Shadows brick, I work on the exposure. I find the Mid Contrast slider very helpful with old photos.
  • Add Vibrancy - Once you've pulled the colors and exposure into a better place, restore some of the life with the Vibrancy slider. It will protect skin tones much better than the Saturation control.
  • Attack Shadow Noise - These adjustments will almost always increase noise in the shadows. I use the Skin Smoothing brush on noisy areas. It works great.
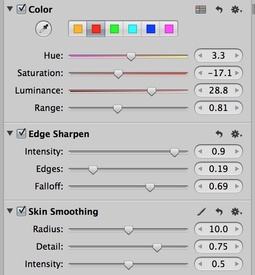
  • Tone Down Pesky Remaining Color Shifts - If you still have more color shift than you want, try using the Color brick and selecting an area with the eyedropper. Then you can adjust the hue and bump up the brightness. This is a nice finishing touch for color work.

fine-tuning-adjustments.jpg

  • Fix Blotches with the Retouch Brush - Weird spots seem to appear during this recovery process. Use the Retouch brush to knock down those imperfections.
  • Increase Definition and Sharpness - The Definition slider is an excellent helper with old photos. I usually move the slider pretty far to the right, then add some Edge Sharpening too.

Your old photo is still going to look its age. That's OK. But by experimenting with these tools, you can wash away some of the years, improving the appearance of your historical document.

Aperture Tips and Techniques

To learn more about using these tools in Aperture, check out my Aperture 3.3 Essential Training (2012) on lynda.com. Also, take a look at our Aperture 3 Learning Center. Tons of free content about how to get the most out of Aperture.


The Digital Story on Facebook -- discussion, outstanding images from the TDS community, and inside information. Join our celebration of great photography!


When you're out shooting with your interchangeable lens camera, remember to pull out your iPhone and snap a photo too. Why? Because your iPhone will log the location data that you can easily transfer to the corresponding images in Aperture.

import-from-iphone.jpg

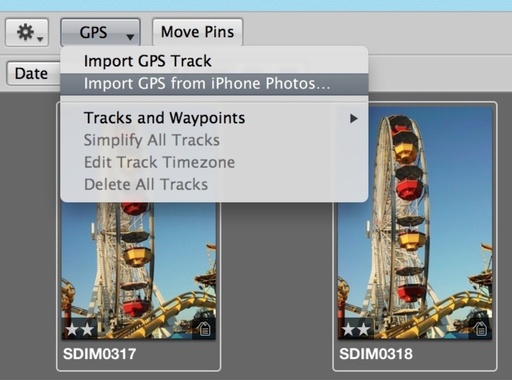
In my latest Macworld Magazine article, Geotagging the easy way with Aperture 3.5, I explain three ways to add location data to the images you already have in your Aperture library.

I love the iPhone method. It's so easy. But if you haven't captured location data with it, you can use the geotagging tools built in to Aperture to accomplish the same goal. It's particularly fun for vacation and business trips.

Aperture Tips and Techniques

To learn more about Aperture, check out my Aperture 3.3 Essential Training (2012) on lynda.com. Also, take a look at our Aperture 3 Learning Center. Tons of free content about how to get the most out of Aperture.


The Digital Story on Facebook -- discussion, outstanding images from the TDS community, and inside information. Join our celebration of great photography!


One of the reasons why I often shoot RAW+Jpeg is to take advantage of in-camera effects or film simulation modes. The images with effects are saved as Jpegs. The master files are in the RAW format. By capturing those RAW files too, I have fully editable images to further experiment with further if I wish, especially if I don't like the way the Jpegs turned out.

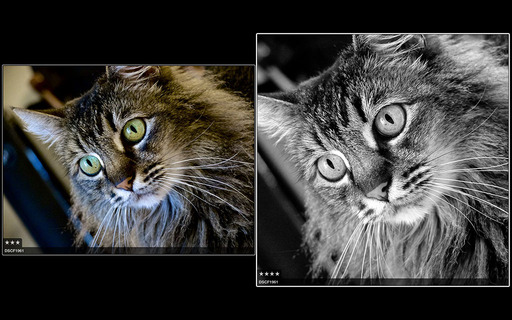
00-both-versions.jpg Both images captured at the same time with a Fujifilm X20 compact camera. Picture on the left is the RAW file, and on the right is a B&W recorded using Fujifilm's Film Simulation mode. By shooting RAW+Jpeg, I get both files. Photos by Derrick Story.

When it's time to upload these files to Aperture, I choose "Both - Separate Originals" for my RAW+Jpeg pairs. I *do not* recommend using the other Pairs settings because the files get linked together. This proves to be a problem up the road.

01-import-as-separates.jpg Import as "Both - Separate Originals". Don't be fooled that the RAW files are B&W at this point. Aperture is just reading the embedded Jpegs.

Once the files are in my Aperture library, I select Auto Stack (Stacks > Auto Stack) and set the timing to 0:01. This creates a pairing for each of my compositions - one Jpeg with one Raw.

If I want to tidy up the library, I can Close All Stacks (Stacks > Close All Stacks), and I only see one version of each pair. You even have control over which version by using the Pick command.

03-both-raws-and-jpegs.jpg Jpegs and RAWs now side by side in Stack mode.

By using this technique, I'm more willing to experiment with the interesting effects included in my camera because I will always have the RAW file too. Use this technique to explore the unique features of your camera.

Aperture Tips and Techniques

To learn more about Aperture, check out my Aperture 3.3 Essential Training (2012) on lynda.com. Also, take a look at our Aperture 3 Learning Center. Tons of free content about how to get the most out of Aperture.


The Digital Story on Facebook -- discussion, outstanding images from the TDS community, and inside information. Join our celebration of great photography!


How to Survive on Only 256 GBs a Year

The choice between speed and storage is a tough one for photographers. When I bought my stock MacBook Pro with Retina Display in mid-2012, I wanted speed. So I've had to learn to live with 256 GBs of built-in storage for my daily work.

backing-up-libraries.jpg Copying libraries from my MacBook Pro to the Drobo 5D.

How do I do it?

I rely on Aperture's excellent Project/Library management structure. I only store my current projects on the MacBook Pro at any given time. That initial phase is when I'm image editing, which is when I need the best performance.

Once the project has reached a mature state, I move it off the laptop and integrate it into the master library on the Drobo 5D. If I need to work on those images at a later time, I simply connect the Thunderbolt cable from the Drobo, and open the library enabling me to touch-up a photo then export it for publishing.

I keep a separate portable hard drive in my laptop bag. It contains a library of images from the last year, just in case I need to grab something while on the go.

Using this system, I have survived with my internal 256 GB Flash drive for almost 2 years. I couldn't have done it without Aperture's versatile library management system and a Thunderbolt external drive.

The good news is that I should be able to afford a bigger internal drive with my next MacBook Pro. But I'll continue to use the same system... just with a bit more breathing room.

Aperture Tips and Techniques

To learn more about how to manage your projects and libraries in Aperture, check out my Aperture 3.3 Essential Training (2012) on lynda.com. Also, take a look at our Aperture 3 Learning Center. Tons of free content about how to get the most out of Aperture.


The Digital Story on Facebook -- discussion, outstanding images from the TDS community, and inside information. Join our celebration of great photography!


Aperture for Portrait Retouching? Yes!

Not only can you retouch your people shots in Aperture... it's easy. In my latest article for Macworld Magazine titled, Portrait retouching in five easy steps, I explain how to not only work artistically, but quickly too.

Portrait Retouching in Aperture

If you like the techniques outlined in the article, then you may want to watch my lynda.com training video, Portrait Retouching with Aperture. It's a deeper dive into using these tools to make your subjects look like they had the best day ever when you photographed them.

Aperture Tips and Techniques

To learn more about Aperture, check out my Aperture 3.3 Essential Training (2012) on lynda.com. Also, take a look at our Aperture 3 Learning Center. Tons of free content about how to get the most out of Aperture.


The Digital Story on Facebook -- discussion, outstanding images from the TDS community, and inside information. Join our celebration of great photography!


Very few of my cameras have built-in geotagging. And the ones that do, are sometimes inconsistent in their application of the data.

The good news is that it's easy enough to apply location information in post production with Aperture. It's not a regular part of my workflow. But for certain shots, such as this image of the Transamerica Pyramid in San Francisco, I like to do it.

Since I've added the GPS data, file sharing apps like Flickr with display it. Photo by Derrick Story.

The steps in Aperture are easy.

  • After you've finished editing the image, go to View > Places.
  • In the "Search the Map" box in the upper right, begin typing the location. Aperture will provide you with location options based on what you enter.
  • Click on the best option to choose it, then click on the Assign Location button. A red pin will be added to your photo to indicate that it's been geotagged.
  • Go to Preferences > Export and make sure that the box next to "Include location info in exported photos" is checked.
  • Close Preferences and export your photo.

Assign GPS Data in Aperture Adding location data using Places in Aperture 3.

After you've exported your image from Aperture, you can check your work by opening it in Preview. Go to Tools > Show Inspector. Click on the "i" tab, and you should see a GPS option. Click on it. The location information will be displayed.

Checking Data in Preview

You have now successfully geotagged your image. When it's shared on Flickr and elsewhere, viewers can see exactly where the subject is located. They might want to go there themselves.

Aperture Tips and Techniques

To learn more about Aperture, check out my Aperture 3.3 Essential Training (2012) on lynda.com. Also, take a look at our Aperture 3 Learning Center. Tons of free content about how to get the most out of Aperture.


The Digital Story on Facebook -- discussion, outstanding images from the TDS community, and inside information. Join our celebration of great photography!


kathleen-raw-processing.jpg

We knew it was coming; just not sure when. Digital Camera RAW Compatibility Update 5.02 adds Raw processing for five cameras - all of them important: Nikon D5300, Nikon Df, Olympus OM-D E-M1, Sony Alpha 7, and Sony Alpha 7R.

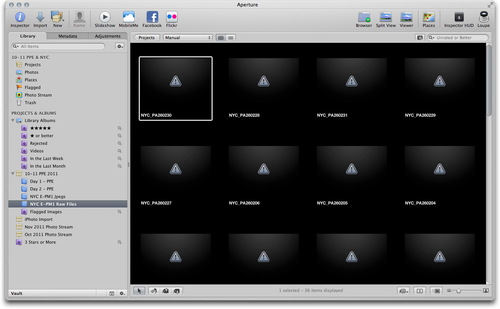
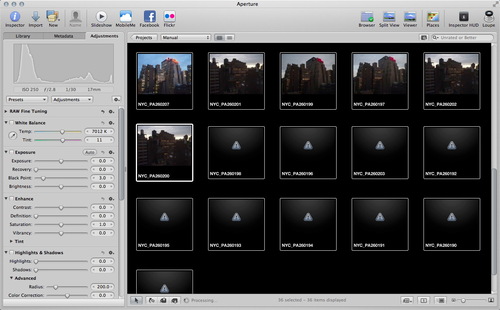
My approach while waiting for such updates is to shoot Raw+Jpeg with a new camera. I upload both to Aperture, and work with the Jpegs until the new Raw processing is available. I keep the two formats in separate albums. Until the Raw processing is available, my thumbnails for the unsupported files look like this.

raw-files-before-update.jpg

Once the update is applied, I go to the Adjustments tab in the Inspector, and click on any thumbnail. Aperture will process the file and present me with an image. I can use the right and left arrow keys to move through the images quickly and display the updates.

processed-raw-files.jpg

As for the Raw processing itself, it seemed very good for my OM-D E-M1 files. Initial previews looked spot on, highlight and shadow recovery was smooth, color was pleasing, and all controls behaved as I would anticipate.

If you're a Mac OS X Mavericks user, the update should be applied automatically. If not, you can download it here.

Aperture Tips and Techniques

To learn more about Aperture, check out my Aperture 3.3 Essential Training (2012) on lynda.com. Also, take a look at our Aperture 3 Learning Center. Tons of free content about how to get the most out of Aperture.


The Digital Story on Facebook -- discussion, outstanding images from the TDS community, and inside information. Join our celebration of great photography!


High school yearbook portraits are generally a mechanical process. With lots of students to photograph, and not much time to do it, it's understandable why the process can become a bit impersonal.

According to the students I've talked to, they get one shot in front of the photographer. There might be a second exposure if something went terribly wrong with the first. Otherwise, that's it. Next.

If your child decides that he or she doesn't like the image that was captured, offer to give them a second chance. After all, this is a photo they have to live with for a long time.

yearbook-head-shots.jpg

As photographers, we shoot portraits regularly. Yearbook shots are among the easiest to do. Simply look at the image that was supplied by the official photographer, find a comparable backdrop, and shoot a series of images.

That's right: a series.

Along the way, show the pictures you've already recorded to the subject. Ask which ones they like the best. Then shoot another series working that pose and expression. After just 15 or 20 minutes, you'll have a happy high school student, and you've put your skills to work for your family.

Aperture Tips and Techniques

If you have questions about portrait retouching in Aperture, or how to adjust the background color, take a look at Portrait Retouching with Aperture. You may want to check out my other Aperture titles, including Aperture 3.3 Essential Training (2012), Using iPhoto and Aperture Together, and the latest, Enhancing Product Photography with Aperture. Also, take a look at our Aperture 3 Learning Center. Tons of free content about how to get the most out of Aperture.

Want to Comment on this Post?

You can share your thoughts at the TDS Facebook page, where I'll post this story for discussion.

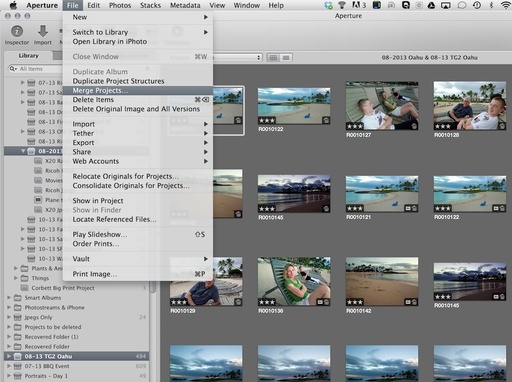
Over the course of the year, our photo libraries tend to become a bit disheveled. As I prepare for 2014, I like to have my 2013 images in shape. One technique that I use regularly is "Merge Projects" that allows me to combine multiple projects into one.

Merge Projects in Aperture Using the Merge Projects command in Aperture.

For example, I realized that I had created and backed up multiple projects for my trip to Oahu this summer. In part this was because I had shot with three different cameras.

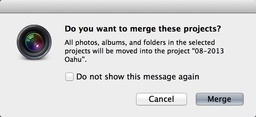
merge-message.jpg

I was able to combine them easily by selecting the two projects in the Library tab of the Inspector (by holding down the CMD key), then going to File > Merge Projects. Aperture presented me with this confirmation message.

Once I click on the Merge button, Aperture moves the images, albums, and any other parts I've created over to the other project. Typically, the application will move the lower project into the one that's positioned higher in the library. But I don't worry about it either way. Once I'm finished merging, I can rename the project by tapping on its name and typing.

Keep in mind that you can use Folders to organize your projects (File>New>Folder). Just drag the Projects into the new Folder, give it a name, and position it where you want it.

Those of us who are trapped inside by cold weather can put that confinement to good use by getting our photo libraries in order.

Aperture Tips and Techniques

To learn more about Aperture, check out my Aperture 3.3 Essential Training (2012) on lynda.com. Also, take a look at our Aperture 3 Learning Center. Tons of free content about how to get the most out of Aperture.


The Digital Story on Facebook -- discussion, outstanding images from the TDS community, and inside information. Join our celebration of great photography!


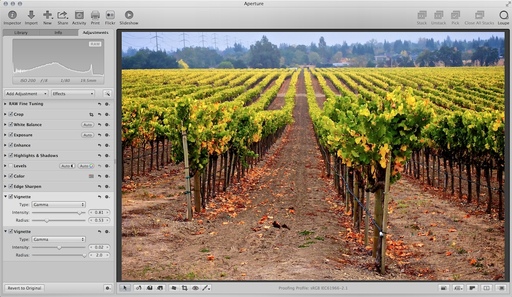
Adding a vignette to landscape and portrait images can help direct the viewer's eye to important areas. There are times, however, when you need more control than a single vignette can provide. That's when the double-vignette technique can prove helpful.

Double Vignette in Aperture 3 By using two vignette controls instead of one, you have more control over the gradation. Photo by Derrick Story.

Setting this up is easy. First make sure Vignette is active in your Adjustments pane. If not, go to the Add Adjustment popup menu and choose it. My first vignette usually has a radius just for the edges of the image. Adjust intensity to taste.

Then click on the gear icon in the Vignette brick, and choose Add New Vignette Adjustment. The radius for the second brick often covers more ground. By balancing the two Vignette adjustments, I have more control over the tones than with a single adjustment.

More Aperture Tips and Techniques

To learn about portrait retouching in Aperture, take a look at Portrait Retouching with Aperture. You may want to check out my other Aperture titles, including Aperture 3.3 Essential Training (2012), Using iPhoto and Aperture Together, and the latest, Enhancing Product Photography with Aperture. Also, take a look at our Aperture 3 Learning Center. Tons of free content about how to get the most out of Aperture.

Want to Comment on this Post?

You can share your thoughts at the TDS Facebook page, where I'll post this story for discussion.

Accurate color is particularly important in product photography. And it's easier to achieve spot-on hues than you may think. I show you how using Aperture 3.

This tutorial is from my Enhancing Product Photography with Aperture training on lynda.com. I provide tips on creating your own white balance target, then using that tool in post production.

More Aperture Tips and Techniques

To learn more about Aperture, take a look at Aperture 3.3 Essential Training (2012), Using iPhoto and Aperture Together, and the latest, Portrait Retouching with Aperture. Also, visit our Aperture 3 Learning Center. Tons of free content about how to get the most out of Aperture.

Want to Comment on this Post?

You can share your thoughts at the TDS Facebook page, where I'll post this story for discussion.

How many times have you said to yourself, "If I could just lighten that one spot in the photo, I would be so happy."? Aperture users don't have to roundtrip out of the application to accomplish that task. Using the brushing tools, you can work on "just that one spot." And in 5 minutes, I show you how.

This tutorial is from my Enhancing Product Photography with Aperture training on lynda.com. I walk you through localized editing techniques step by step, so you can apply this to your photos right now.

More Aperture Tips and Techniques

To learn more about Aperture, take a look at Aperture 3.3 Essential Training (2012), Using iPhoto and Aperture Together, and the latest, Portrait Retouching with Aperture. Also, visit our Aperture 3 Learning Center. Tons of free content about how to get the most out of Aperture.

Aperture Workshop Coming on Nov. 16 and 17, 2013

Want to learn Aperture in a hands on environment? My next Aperture workshop will be Nov. 16 and 17 in Santa Rosa, CA. We'll review all of the basics, plus work on portraiture (including a live model shoot), product photography, and more. Write me at derrick@thedigitalstory.com for more information and a reservation form.

Want to Comment on this Post?

You can share your thoughts at the TDS Facebook page, where I'll post this story for discussion.

Often when we shoot portraits, we find ourselves with a series of images that require minor adjustments. In Aperture, you can work on one of those photos, then apply those edits to remaining shots in the series. And you even have control over which edits are applied, and which are not.

This tutorial is from my Portrait Retouching with Aperture training on lynda.com. I walk you through the batch processing step by step, so you can apply this technique right now.

More Aperture Tips and Techniques

To learn more about Aperture, take a look at Aperture 3.3 Essential Training (2012), Using iPhoto and Aperture Together, and the latest, Enhancing Product Photography with Aperture. Also, visit our Aperture 3 Learning Center. Tons of free content about how to get the most out of Aperture.

Aperture Workshop Coming on Nov. 16 and 17, 2013

Want to learn Aperture in a hands on environment? My next Aperture workshop will be Nov. 16 and 17 in Santa Rosa, CA. We'll review all of the basics, plus work on portraiture (including a live model shoot), product photography, and more. Write me at derrick@thedigitalstory.com for more information and a reservation form.

Want to Comment on this Post?

You can share your thoughts at the TDS Facebook page, where I'll post this story for discussion.

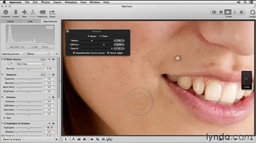
When you think about adding a little sparkle to a portrait subject's smile, think color. By using the color controls in Aperture with brushes, you can subtly brighten teeth for a pleasing, natural smile.

The following tutorial on how to do just that is from my Portrait Retouching with Aperture on lynda.com. You'll be surprised at how easy it is to artistically brighten a smile with Aperture's retouching tools.

This is just one of the many retouching techniques I cover in Portrait Retouching with Aperture.

More Aperture Tips and Techniques

You may want to check out my other Aperture titles, including Aperture 3.3 Essential Training (2012), Using iPhoto and Aperture Together, and the latest, Enhancing Product Photography with Aperture. Also, take a look at our Aperture 3 Learning Center. Tons of free content about how to get the most out of Aperture.

Aperture Workshop Coming on Nov. 16 and 17, 2013

Want to learn Aperture in a hands on environment? My next Aperture workshop will be Nov. 16 and 17 in Santa Rosa, CA. We'll review all of the basics, plus work on portraiture (including a live model shoot), product photography, and more. Write me at derrick@thedigitalstory.com for more information and a reservation form.

Want to Comment on this Post?

You can share your thoughts at the TDS Facebook page, where I'll post this story for discussion.

Those shiny bright areas in our product shots can cause real headaches. Fortunately, there are some excellent retouching tools in Aperture 3 to help us tame those highlights. Applied individually, or as a group, they will enable you to restore detail in areas where you thought all hope was lost.

In this 5-minute tutorial from my latest lynda.com training, Enhancing Product Photography with Aperture, you'll see how easy it is to make your product shots shine... with detail.

In this title, I also share tips on how to set up your shots (saving on post production time), plus wrangling with color, depth of field, and more.

Lots of Aperture Tips and Techniques

To learn more about Aperture in general, check out my Aperture 3.3 Essential Training (2012) on lynda.com. For people shots, try Portrait Retouching with Aperture. And for making the transition from iPhoto, I have Using iPhoto and Aperture Together.

Aperture Workshop Coming on Nov. 16 and 17, 2013

Want to learn Aperture in a hands on environment? My next Aperture workshop will be Nov. 16 and 17 in Santa Rosa, CA. We'll review all of the basics, plus work on portraiture (including a live model shoot), product photography, and more. Write me at derrick@thedigitalstory.com for more information and a reservation form.

Want to Comment on this Post?

You can share your thoughts at the TDS Facebook page, where I'll post this story for discussion.

The thing about colored backgrounds, sometimes they get a bit too intrusive. Fortunately, it's very easy to adjust not only the color, but the brightness and saturation of your backdrops... without affecting the subject itself.

In my lynda.com title, Portrait Retouching with Aperture, I have the following tutorial to help you get your backgrounds just the way you want them.

More Aperture Tips and Techniques

In addition to Portrait Retouching with Aperture, you may want to check out my other Aperture titles, including Aperture 3.3 Essential Training (2012), Using iPhoto and Aperture Together, and the latest, Enhancing Product Photography with Aperture. Also, take a look at our Aperture 3 Learning Center. Tons of free content about how to get the most out of Aperture.

Aperture Workshop Coming on Nov. 16 and 17, 2013

Want to learn Aperture in a hands on environment? My next Aperture workshop will be Nov. 16 and 17 in Santa Rosa, CA. We'll review all of the basics, plus work on portraiture (including a live model shoot), product photography, and more. Write me at derrick@thedigitalstory.com for more information and a reservation form.

One of the first steps for retouching a portrait is to clean up any distracting blemishes. There are a couple approaches to this technique, and I cover them all in this hands-on movie.

More Aperture Tips and Techniques

Blemish Retouching with Aperture

To learn more about portrait retouching in Aperture, take a look at Portrait Retouching with Aperture. You may want to check out my other Aperture titles, including Aperture 3.3 Essential Training (2012), Using iPhoto and Aperture Together, and the latest, Enhancing Product Photography with Aperture. Also, take a look at our Aperture 3 Learning Center. Tons of free content about how to get the most out of Aperture.

Aperture Workshop Coming on Nov. 16 and 17, 2013

Want to learn Aperture in a hands on environment? My next Aperture workshop will be Nov. 16 and 17 in Santa Rosa, CA. We'll review all of the basics, plus work on portraiture (including a live model shoot), product photography, and more. Write me at derrick@thedigitalstory.com for more information and a reservation form.

Producing compelling images of everyday objects isn't as easy as it looks. In my latest lynda.com training, Enhancing Product Photography with Aperture, I show you how to put the finishing touches on your photos to make them shine.

Enhancing Product Photography with Aperture

The training covers a variety of post production techniques including:

  • Evaluating the image quality before editing
  • Making sure the color is accurate
  • Determining the most effective color
  • Working with highlight recovery
  • Targeting areas for sharpening
  • Adjusting the background
  • Changing the color of objects
  • Vignetting
  • Round-tripping with Photoshop
  • Converting to black and white with Silver Efex Pro
  • Applying effects

Here's an Overview Moviie that gives you a taste of what this training is about. There are plenty of free movies for you to enjoy too. Visit Enhancing Product Photography with Aperture to see more.

Want to Comment on this Post?

You can share your thoughts at the TDS Facebook page, where I'll post this story for discussion.


twitter.jpg Follow me on Twitter


Portrait Retouching with Aperture

You can easily (and quickly!) improve your portraits by learning just a few basic techniques in Aperture 3.4. In this 2-hour training titled, Portrait Retouching with Aperture I apply a subtle hand to my people shots, and Aperture's toolset is just the ticket for performing natural-looking enhancements. People say to me after reviewing the images, "Wow, I really looked great that day!"

Derrick Story on Portrait Retouching with Aperture

In this course, I cover just about everything you need to know, including:

  • Assessing your image
  • Retouching blemishes
  • Enhancing skin texture
  • Adding highlights to the hair
  • Adjusting clothing and backdrop color
  • Brightening and sharpening eyes
  • Converting to black and white

This Welcome Movie (1 min) will provide you with a visual overview of what I'm covering.

I had a blast recording Portrait Retouching with Aperture. I hope you enjoy watching it just as much.


twitter.jpg Follow me on Twitter


When you first connect a Samsung Android device to your Mac for photo import, you might be disappointed to see that Aperture and iPhoto are not recognizing the device as a camera. I encountered this problem while working with a Samsung GC110 Galaxy digital camera that uses Android Jellybean for its operating system.

Samsung Galaxy Camera USB Connection Options

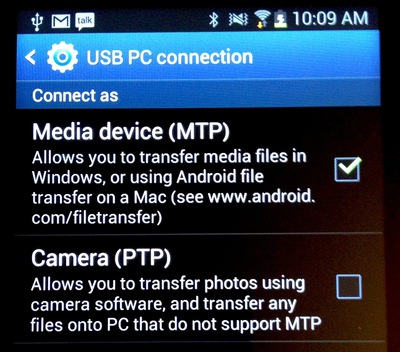
You can easily fix the problem by switching its USB protocol from a Media Device (MTP) to a Camera (PTP). Here are the steps.

  1. Connect the Samsung Android device to a Mac via its USB cable.
  2. Power up the camera and go to its Home screen.
  3. Swipe downward on the screen from top to bottom to reveal the Notifications display.
  4. Under "Ongoing" it will probably read "Connected as a Media Device." Tap on that to reveal an options screen.
  5. In the following screen, check the box next to "Camera (PTP).
  6. Tap the Home button.
  7. Open Aperture or iPhoto, and the Samsung should appear as a camera in the import window.

If you don't see the "Ongoing" screen in Step 3 when you swipe downward, don't despair. I didn't see it either at first. I downloaded the Samsung Kies software, installed it, then connected my camera with the Kies software running. Then the "Ongoing" option appeared in the Notifications screen on the camera.

As a side note, the Kies software is handy for managing your Samsung device on either a Mac or Windows computer.

Aperture Tips and Techniques

To learn more about Aperture, check out my Aperture 3.3 Essential Training (2012) on lynda.com. Also, take a look at our Aperture 3 Learning Center. Tons of free content about how to get the most out of Aperture.


PhotoHelpDesk.com is a down-to-earth resource for curious minded photographers. Submit your questions, and we'll post an answer.

Want to Comment on this Post?

You can share your thoughts at the TDS Facebook page, where I'll post this story for discussion.

Easy Photo Printing with Aperture

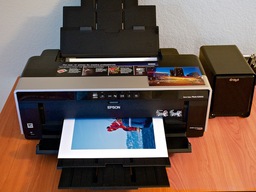
Epson R2000 Printing

Making beautiful prints at home might be easier than you think. If you haven't fired up the inkjet printer for a while, take a look at my latest Macworld article, How to print photos from Aperture the easy way.

The good news is, printer drivers have become much smarter over the last few years. So if you know what boxes to check, then you can produce lovely 13" x 19" prints on the first try.

I bet your walls at home could use a little freshening up. What do you think?

Aperture Tips and Techniques

To learn more about Aperture, check out my Aperture 3.3 Essential Training (2012) on lynda.com. Also, take a look at our Aperture 3 Learning Center. Tons of free content about how to get the most out of Aperture.


Want to Comment on this Post?

You can share your thoughts at the TDS Facebook page, where I'll post this story for discussion.

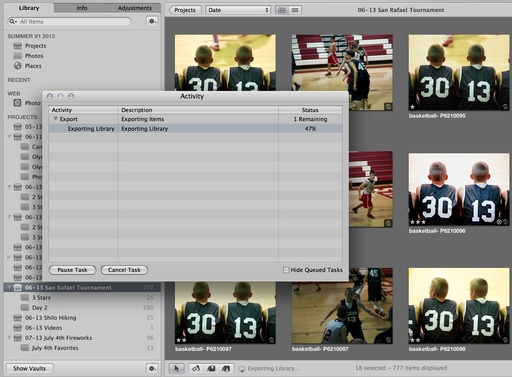
When you want to keep an eye on a big job is processing in Aperture, the Activity Monitor window is very helpful. I've been using it lately during an ambitious archiving project where I'm cleaning up old libraries and posting the content to my Everpix account.

Activity Monitor Enabled in Aperture

To view the Activity Monitor, go to Window > Show Activity. Since Aperture can run tasks in the background, you could have more than one process to view. If you decide that you want to terminate an activity, highlight it, then click on the Cancel Task button.

Currently I have an old MacBook connected to a Drobo and churning away on exporting libraries and generating full size previews for my online archiving project. That white MacBook isn't very fast, but it is steady, and I can leave it running over the weekend. When I want to know the status of a job, I check the Activity Monitor to see how long before I can set up the next task. It helps me manage my work without babysitting the computer. You might find it helpful for your big jobs too.

Aperture Tips and Techniques

To learn more about Aperture, check out my Aperture 3.3 Essential Training (2012) on lynda.com. Also, take a look at our Aperture 3 Learning Center. Tons of free content about how to get the most out of Aperture.

Want to Comment on this Post?

You can share your thoughts at the TDS Facebook page, where I'll post this story for discussion.

Aperture on an iPad - Anywhere

Aperture Access on an iPad Using Plex

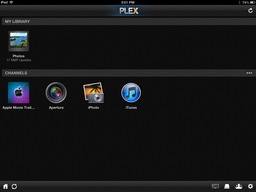
You can browse your entire Aperture library on an iPad, and even grab the photos you need, using the iOS app Plex ($4.99) and the free Plex Media Server for your Mac.

This clever software provides a variety of streaming options for photos, music, and movies. But it can also peer directly into your Aperture or iPhoto library, and serve up organized content on to your iOS device.

The setup for Plex is literally a short series of clicks. You install the iOS app on your iPad. Download and launch the server on your Internet-connected Mac. Then you create an account on myPlex that enables remote access.

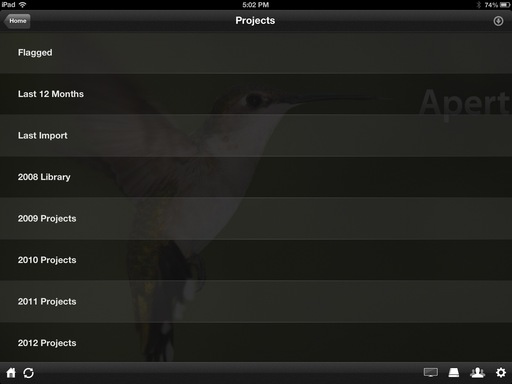
Aperture Projects Listed on an iPad Running Plex Aperture projects listed on an iPad

If you have Aperture or iPhoto loaded on the computer that's acting as the server, those channels are automatically added to your Plex library. Once enabled, you can browse your Aperture library on your local area network, or even remotely via the Internet.

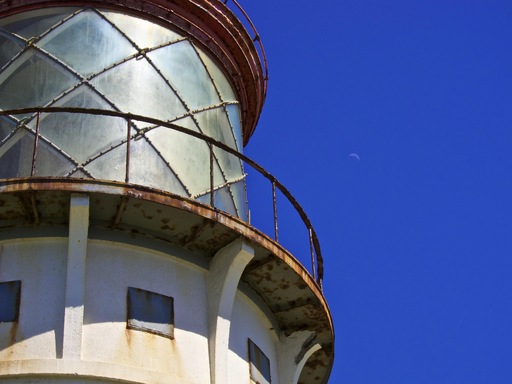
lighthouse_final.jpg Image captured off a Retina Display iPad via Plex using the system described in the article and applied here. (Click on photo to view full size.)

When you find a picture you want to save to your iPad, simply take a screenshot of it while in full screen mode (press the Home and Power buttons at the same time). Because of the high resolution of the Retina display on an iPad 3 or 4, the captured image will be 2048 x 1536 pixels - more than enough for sharing on Flickr, Facebook, Twitter, and blogs.

Plex is incredibly easy to use and performs quite well. It taps the preview files in your Aperture library. In my case, I have a older MacBook Pro laptop running at my studio with an archive Aperture library on it. If I need an image, let's say from 2010, I can browse the library on my iPad, capture the photo, and share as needed. Via this system, I have access to my Aperture library... anywhere.

Plex + Aperture is quite amazing.

Follow Up Note - Plex posted an update to the iOS app, v.3.2.1, that added a Save button in the upper right corner that allows you to save images from your Aperture library to your Camera Roll.


iPad for Digital Photographers

This is the kind of stuff I write about in iPad for Digital Photographers-- now available in print, Kindle, and iBooks format.

Aperture Tips and Techniques

To learn more about Aperture, check out my Aperture 3.3 Essential Training (2012) on lynda.com. Also, take a look at our Aperture 3 Learning Center. Tons of free content about how to get the most out of Aperture.

Want to Comment on this Post?

You can share your thoughts at the TDS Facebook page, where I'll post this story for discussion.

Wouldn't it be great to clean up your iPhoto library so that you have all the good stuff, but none of the cruft? Well, with the help of Aperture, you can. (This approach works for tidying an Aperture library too!)

In this 3-minute movie that I created for my latest lynda.com title, Using iPhoto and Aperture Together, I demonstrate how to use the organizational tools in Aperture to clean an iPhoto or Aperture library. And it's not difficult (the movie is only 3 minutes...)

Take a look, then tidy up your photo workspace.

More Aperture/iPhoto Tips and Techniques

To learn more about using Aperture and iPhoto together, visit my Using iPhoto and Aperture Together on lynda.com. Also, take a look at our Aperture 3 Learning Center. Tons of free content about how to get the most out of Aperture.

Want to Comment on this Post?

You can share your thoughts at the TDS Facebook page, where I'll post this story for discussion.

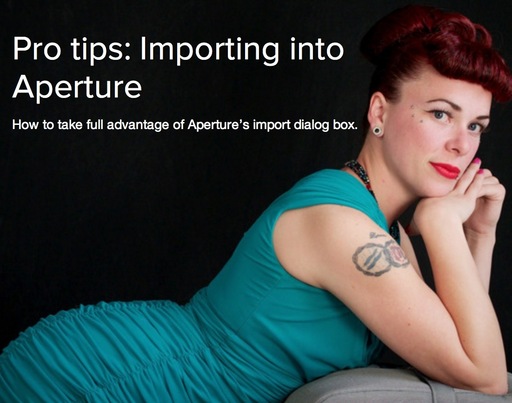
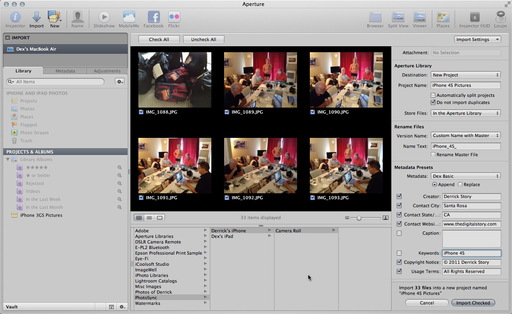
After uploading a fresh set of images, you probably want to start playing with them. Most photographers aren't interested (at that point anyway) in organizing, adding metadata, and other housekeeping tasks. Thanks to the tools available in Aperture's import dialog box, you can let the app do that heavy lifting during the actual transfer. Then you can enjoy the fruits of your efforts right away.

Aperture Import Pro Technique Digital Photographers Female Portrait Model

In my latest Macworld article, Import Like a Pro in Aperture, I explain how to separate Raw+Jpeg pairs so you can filter out one set or the other, add effects during import to improve the appearance of the photos, and take advantage of simple AppleScripts to automatically organize images within albums.

Then, once the import is finished, you can start enjoying your latest shoot instead of wrangling with it.

Aperture Tips and Techniques

To learn more about Aperture, check out my Aperture 3.3 Essential Training (2012) on lynda.com. Also, take a look at our Aperture 3 Learning Center. Tons of free content about how to get the most out of Aperture.

Want to Comment on this Post?

You can share your thoughts at the TDS Facebook page, where I'll post this story for discussion.

Adobe made a little noise with the release of Lightroom 4.4 and its working closely with Fufifilm to provide top notch decoding of .RAF files from Fujifilm X-Pro1, X-E1, X100S, and X-20 cameras. This lead to some speculation that Apple would be left out in the cold with Raw decoding for X-Trans sensors.

Well, apparently not. Apple today released Raw Compatibility Update v4.05 with support for these very same cameras. So how do these two applications stack up for Fujifilm camera owners?

Aperture 3.4 RAF Decoding for Fujifilm X-20 Camera

Aperture Display of X-20 Raw File Screenshot of unedited .RAF file in Aperture 3.4 with RAW Update 4.05

Aperture Full Rez Export A full resolution Jpeg export from a decoded RAF file in Aperture 3.4.

Lightroom 4.4 RAF Decoding for Fujifilm X-20 Camera

Lightroom Display of X-20 File Screenshot of unedited .RAF file in Lightroom 4.4.

Lightroom Full Rez Export A full resolution Jpeg export from a decoded RAF file in Lightroom 4.4.

No image editing was enabled in either application. Files were saved out at the highest export settings. So what you see here is essentially how each application decoded the .RAF files from a Fujifilm X-20 camera. (Imagine how the Raw files from the X100S look!)

In my opinion, both applications do an excellent job of handling .RAF files. And the fact that both Apple and Adobe had the RAW updates so quickly after the release of the new X-Trans cameras (X-20 & X100S), says that both are taking these cameras seriously. Well done.

Aperture Tips and Techniques

To learn more about Aperture, check out my Aperture 3.3 Essential Training (2012) on lynda.com. Also, take a look at our Aperture 3 Learning Center. Tons of free content about how to get the most out of Aperture.

Want to Comment on this Post?

You can share your thoughts at the TDS Facebook page, where I'll post this story for discussion.

Some pictures just look better in Black and White. And even though there are plug-ins and specialized programs to help you create B&W images, you can produce great stuff using the built-in tools in Aperture and iPhoto.

In this 3-minute movie that I created for my latest lynda.com title, Using iPhoto and Aperture Together, I compare the B&W conversion techniques in both iPhoto and Aperture, and add a few tips too.

Take a look, then make your B&W masterpiece tonight!

More Aperture/iPhoto Tips and Techniques

To learn more about using Aperture and iPhoto together, visit my Using iPhoto and Aperture Together on lynda.com. Also, take a look at our Aperture 3 Learning Center. Tons of free content about how to get the most out of Aperture.

Want to Comment on this Post?

You can share your thoughts at the TDS Facebook page, where I'll post this story for discussion.

You can control which application opens when you double-click a shared Aperture/iPhoto library. (All current Aperture and iPhoto libraries are "shared" by default.) This is a handy trick because many photographers open libraries from the Finder instead of from within the application. Here's how to control whether iPhoto or Aperture opens when you double-click on the shared library icon.

Specifying which application opens the library by default

More Aperture/iPhoto Tips and Techniques

To learn more about using Aperture and iPhoto together, visit my Using iPhoto and Aperture Together on lynda.com. Also, take a look at our Aperture 3 Learning Center. Tons of free content about how to get the most out of Aperture.

Want to Comment on this Post?

You can share your thoughts at the TDS Facebook page, where I'll post this story for discussion.

Photographer Gavin Seim did many things right when creating his ColorFlow presets for Aperture 3. I like them, not only because they help you produce better images, but also because they help you improve your editing skills in Aperture.

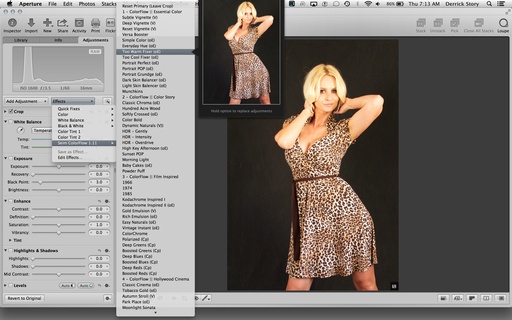
ColorFlow, Aperture 3, Image Editing, Model, Sexy, Portrait Applying the "Too Warm Fixer" preset to this portrait of Ewelina.

You can purchase the entire set, more than 60 presets in 5 categories, from Gavin's site for $39. It's a download, so within minutes you're using them in the app. (In the Adjustment tab, click on the Effects popup, choose Edit Effects, click on the gear menu and choose Import. Navigate to ColorFlow that you just downloaded. Aperture adds the presets to the app.)

The aspect of ColorFlow that I really like is that you stay in the Aperture environment the entire time you're working. There's no roundtripping to a separate window that adds big TIFF files to your library. You're working with your RAWs just like you would any other image.

The difference is, Gavin is giving you a head start on the editing. When I chose the "Too Warm Fixer" preset for the portrait of Ewelina, ColorFlow left my crop alone, but made changes to the White Balance and Enhance bricks. I can see exactly what it did. And if I want, tweak further using the sliders that I'm already familiar with.

Then, if I want, I might add a Hollywood Cinema effect, such as American Western, and ColorFlow makes adjustments to both Curves, and the Highlights & Shadows bricks. if the effect isn't exactly what I want, I can play from there.

There's nothing over the top here. Many of the effects are subtle, helping you craft your image rather than be hit over the head with it. And if you want more intensity, you can add it yourself.

I think ColorFlow is an excellent investment for your Aperture workflow. Because they are presets, they have low impact on the application itself. It's more like a guided tour for image editing. And I think using ColorFlow will inspire you to fine tune your pictures.

Watch the video that Gavin has embedded on the ColorFlow page, you'll learn a lot about these presets, and gain insights on his approach to photography.

Aperture Tips and Techniques

To learn more about Aperture, check out my Aperture 3.3 Essential Training (2012) on lynda.com. Also, take a look at our Aperture 3 Learning Center. Tons of free content about how to get the most out of Aperture.

Want to Comment on this Post?

You can share your thoughts at the TDS Facebook page, where I'll post this story for discussion.

Regardless if you're primarily an Aperture or iPhoto user, you can sweeten your workflow by using the two applications together. And in my latest lynda.com title, I show you how. Here's a quick overview.

Welcome Movie to Using Aperture and iPhoto Together

View this entire Using iPhoto and Aperture Together training and more in the lynda.com library.

In the coming weeks I'll be sharing some of my favorite techniques for using these two excellent apps together. In the meantime, you might want to check out the free movies on lynda.com.

Want to Comment on this Post?

You can share your thoughts at the TDS Facebook page, where I'll post this story for discussion.

I bet you rarely use Noise Reduction in Aperture. Probably because it doesn't work that well... at least not for its intended purpose. What it is good for, however, is rendering more pleasing skin tones for your portraits. Here's how.

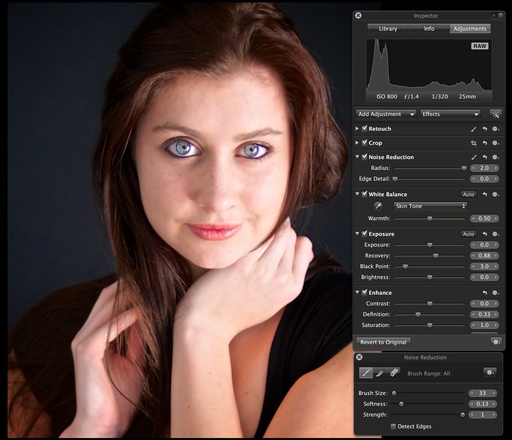
Noise Reduction for Portraits Model Francesca Parnigoni already has great skin. Using my noise reduction technique, I was able to soften it just a bit without losing its natural texture.

Noise reduction, when applied as illustrated here (2.0 Radius; 0 Edge Detail), creates a slight softening effect without losing the natural textures. So when you have a subject that has nice skin, you can retain its characteristics while creating a subtle, but appealing enhancement. In Francesca's case, I want to see those faint freckles. They're attractive. Most skin enhancing techniques would wipe them out. But not this one!

Basic Steps

  • Choose Noise Reduction from the Add Adjustment popup menu. Make sure the box is checked.
  • Set Radius to 2.0 and Edge Detail to 0. The effect is now applied to the entire image.
  • Click on Gear icon in the Noise Reduction brick and select "Brush Noise Reduction Away" from the popup menu.
  • Use the brush to paint over the eyes, eye brows, and selected hair to remove the noise reduction effect from those areas. (They will return to their original sharpness.)
  • To check your work, click on the Gear icon in the floating Noise Reduction palette, and select Color Overlay. You'll be able to see the areas where you removed the noise reduction effect.
  • Turn off color overlay, and enjoy.

Eyes will now be their original sharpness, but skin receives the subtle enhancing effect. If you need further work on the skin, you can always apply the skin softening brush. Just make sure you're not too heavy-handed.

More Aperture Tips and Techniques

To learn more about Aperture, check out my Aperture 3.3 Essential Training (2012) on lynda.com. Also, take a look at our Aperture 3 Learning Center. Tons of free content about how to get the most out of Aperture.


Want to Comment on this Post?

You can share your thoughts at the TDS Facebook page, where I'll post this story for discussion.

The easiest way to move a picture that you've just edited in your Aperture library to your iOS device is to drag and drop. That's right. It's that simple. And it works for iPhoto too.

AT&T Reflected in iPhone
Edited in Aperture, but want to use on my iPad. No problem! And it literally takes seconds to move.

Here's how to do it:

  • Purchase PhotoSync ($1.99) in the iTunes App Store and load on all of your iOS devices.
    • Download the free Mac version of PhotoSync from the Mac App Store and put it on your Dock.
    • Launch PhotoSync on your iOS device.
    • On your Mac, drag the thumbnail of the image you want to transfer (in either iPhoto or Aperture) on to the PhotoSync icon in the Dock.
    • Within seconds, the image will appear on your Camera Roll on your iPad or iPhone.

    Setting the Size for the File That's Transferred

    In Aperture, the Preview size of the file is what is moved from your Mac to iOS device. You can control that size by, in Aperture, going to Preferences > Previews, and setting the parameters you want. Here's what I use.

    aperture_preview_setting.jpg The size of your Preview in Aperture is the size of the file that's transferred.

    Once you have the image, or images on your iOS device, you can easily show them off, post to Instagram, or even add to your Flickr account. Actually, I prefer uploading to Flickr from my iPhone than on my computer. It's more fun, and I have all of those filters to play with.

    Aperture Tips and Techniques

    To learn more about Aperture, check out my Aperture 3.3 Essential Training (2012) on lynda.com. Also, take a look at our Aperture 3 Learning Center. Tons of free content about how to get the most out of Aperture.


    iPad for Digital Photographers

    This is the kind of stuff I write about in iPad for Digital Photographers-- now available at a special pre-order price of $13.70.


    Comments Are Off!

    Due to a wave of recent spam attacks, I've had to turn off the comments feature on The Digital Story. You can, however, add your thoughts at the TDS Facebook page, where I'll post these stories for discussion.

    Most photos can be improved with just a few adjustments... especially if you know which levers to pull. In my Macworld article, The 7-step edit in Aperture 3.4, I walk you through an easy image editing workflow that will improve 90 percent of your pictures.

    aperture_seven_step.jpg

    Aperture Tips and Techniques

    To learn more about Aperture, check out my Aperture 3.3 Essential Training (2012) on lynda.com. Also, take a look at our Aperture 3 Learning Center. Tons of free content about how to get the most out of Aperture.


    The Digital Story on Facebook -- discussion, outstanding images from the TDS community, and inside information. Join our celebration of great photography!


    You can create attractive portfolio pages and share them wirelessly with others around you -- all served securely from your digital camera. Sounds crazy, right? It isn't.

    Renee Light Table Portfolio page served from an Olympus OM-D to an iPad mini using the Toshiba FlashAir memory card.

    In short, what I do is create the portfolio pages using Light Table in Aperture 3.4, then write those files to a Toshiba FlashAir Wireless SD Card($55). After that, all I have to do is insert the card into my Olympus OM-D and turn on the camera.

    If I want to display this portfolio page on my iPad, or someone else's iPad, I have them log on to my FlashAir card and it will serve the page wirelessly to their device. If they want a copy of it, they can save the page to their Camera Roll.

    This is all made possible by the FlashAir card's ability to create its own secure web server. I talk about how this works on this week's podcast, Ingenious Toshiba FlashAir. Not only can this wireless-capable SD card share images from your camera to computers and mobile devices, it can actually serve web pages, PDFs, and other content.

    I created the portfolio page in Aperture 3.4 using the Light Table tool. Once the page was designed, I saved the Light Table as a PDF, then converted it to a JPEG to reduce file size.

    Print Light Table I created the Light Table in Aperture 3.4, then saved it as a PDF using the Print command.

    Once I have the JPEG version of the portfolio page, I copy it to the FlashAir SD card via drag and drop on my Mac. I then eject the card from the computer, insert it into my OM-D, and turn on the camera.

    As soon as the camera is powered up, it turns on the web server in the Toshiba FlashAir card. Now, all I have to do is open Settings on the iPad, choose the FlashAir WiFi Network, and direct my web browser to http://flashair/

    I can share pictures on the camera, plus any additional files that I've added to the card. It's secured by WPA2 Personal security. So only those I give a password to can access the content on the FlashAir card.

    It's the perfect combination of geeky technical plus design using the elegant Light Table tool in Aperture. And best of all... it' easy!

    Aperture Tips and Techniques

    To learn more about Aperture, including how to build Light Tables, check out my Aperture 3.3 Essential Training (2012) on lynda.com. Also, take a look at our Aperture 3 Learning Center. Tons of free content about how to get the most out of Aperture.

    Easy Photo Sequence Using Aperture 3

    I created this photo sequence of Blake Griffin shooting a free throw using the "Sequence" preset in the print dialog for Aperture 3.4. It's an easy way to create these types of images.

    Blake Griffin Freethrow Sequence Blake Griffin shooting a free throw. Image by Derrick Story

    To create a sequence, select three photos in Aperture, then go to File > Print Images. When the print dialog box opens, select the "Sequence" preset. Your three photos will be placed as slices on a single sheet. You can fine tune their individual positions by clicking and dragging on each slice.

    aperture_print_dialog.jpg

    Click the "More Options" button in the lower left corner to reveal controls to create borders, add slices, and more. Once you have the image to your liking, click the Print button. In the next dialog, click on the PDF button in the lower left corner. Choose "Open PDF in Preview." Here you can export the image as a Jpeg.

    The entire process just takes a minute or so, but the results are terrific!

    Aperture Tips and Techniques

    To learn more about Aperture, check out my Aperture 3.3 Essential Training (2012) on lynda.com. Also, take a look at our Aperture 3 Learning Center. Tons of free content about how to get the most out of Aperture.


    The Digital Story on Facebook -- discussion, outstanding images from the TDS community, and inside information. Join our celebration of great photography!


    I wanted to make a photo that captured the beauty and clean design of the Audi R8 sports car. The problem was, I didn't have access to one. So I tried this experiment instead.

    Audi R8 Front

    I photographed a 1/16 scale model of an R8 in my studio using the Lensbaby Composer Pro for Micro Four-Thirds camerasto create the shallow depth of field that's a challenge for smaller sensor cameras, then processed the image in Aperture 3.4 using Nik Silver Efex Pro 2 software.

    The combination of the Lens Baby with the Film Noir effect helped me fashion a stylized look that conveys the "feel" of the car without actually having access to one. The low camera angle contributes to the illusion also.

    Audi R8 Back

    What's interesting to me is that, the more I abstracted the rendering of the Audi, the closer it felt to being a real car. In the past, I haven't been a huge fan on the Lens Baby on my Canon DSLRs. I couldn't really get a feel for it. But I love using the Composer on my Olympus PENs and the OM-D. It's the first time I've been able to create that radical shallow depth of field on a micro four-thirds body.

    As a side note, I'm not sure about the fate of Nik's Silver Efex Pro since its acquisition by Google. I noticed that it isn't currently available at B&H Photo or Amazon. It's one of my favorite plug-ins for Aperture 3. And once again Silver Efex helped me create an image that I had visualized in my mind.

    With all of that being said... I have to close with: Is it real, or is it Silver Efex?.

    Aperture Tips and Techniques

    To learn more about Aperture, check out my Aperture 3.3 Essential Training (2012) on lynda.com. Also, take a look at our Aperture 3 Learning Center. Tons of free content about how to get the most out of Aperture.


    The Digital Story on Facebook -- discussion, outstanding images from the TDS community, and inside information. Join our celebration of great photography!


    It's easy to create your own image effects in Aperture, complete with previews. Think of them as recipes that you can replicate time and time again "This is delicious! Can you make this again?" "Indeed I can!" Here's a "vintage look" that I use to soften the color and create a more timeless rendering.

    save_as_effect.jpg

    The settings are easy: Set Vibrancy to -1, Saturation to 0.72, and Sepia Tone to .13 - plus I like to add a little Devignette too. Use the "Add Adjustment" popup menu to include any of these settings that might not already appear in your Adjustments Inspector.

    Then go to the Effects popup menu, to the right of Add Adjustment, and select Save as Effect from the menu. By doing so, you'll jump over to the Edit menu with an "Untitled Effect" added to the list (that is holding the image adjustments you've used for the photo). Give your new effect a name and hit Return. Then drag it to the group of effects where you'd like it to reside.

    previewing_preset.jpg

    In my case, I called this effect "Vintage 2" and added it to my Color set. I can now preview this effect on any image by simply mousing over its name to generate a smaller popup with the effect applied. If I like the way it looks on a different photo, I simply click on the effect name, and presto!

    You can create as many effects as you wish. So, if you stumble up a good look while image editing, save it as an effect. You can then apply it to other images up the road.

    Aperture Tips and Techniques

    To learn more about Aperture, check out my Aperture 3.3 Essential Training (2012) on lynda.com. Also, take a look at our Aperture 3 Learning Center. Tons of free content about how to get the most out of Aperture.

    The Color brick is one of the most powerful tools in Aperture 3. Not only can you adjust colors, you can change them all together. By way of example, I'm going to change this blue Rolls-Royce to a red model.

    blue_rolls_royce.jpg

    In the Adjustments inspector, add a Color brick by going to the Add Adjustment popup menu, then choosing Color. Once the Color brick is loaded, click on the eye dropper icon in the brick, then click on the color in the photograph you want to play with. Move the Hue slider back and forth to get as close to the new color as possible.

    purple_rolls_royce.jpg

    Since the Hue slider is constrained to neighboring colors, you sometimes can't get the exact color you want. In this case, I could go from blue to purple. But I want red.

    So here's the trick, you can add a second Color brick and continue adjusting. To do so, click on the gear icon in the Color brick, and choose "Add New Color adjustment" from the popup menu. You now have two Color bricks.

    red_rolls_royce.jpg

    Repeat the process you used before: click on the eye dropper, click on the color you want to change, then adjust the Hue slider. Once the color is close, you can fine tune it with the Saturation, Luminance, and Range sliders. You can turn off and on the adjustment via the checkbox in the upper left corner of the brick. (Notice how I don't have either Color bricks activated in the first illustration, then one Color brick in the second, and finally both bricks active in the third illustration.)

    I now have a red Rolls-Royce!

    The colors you want aren't always available using this simple technique. But it comes in very handy for adjusting clothing the clashes with the background, or an offending color in an otherwise good composition. You can also use this technique with the brushing tool to apply color changes to a specific area of the photograph.

    Aperture Tips and Techniques

    To learn more about Aperture, check out my Aperture 3.3 Essential Training (2012) on lynda.com. Also, take a look at our Aperture 3 Learning Center. Tons of free content about how to get the most out of Aperture.


    The Digital Story on Facebook -- discussion, outstanding images from the TDS community, and inside information. Join our celebration of great photography!


    Use Straighten Tool to Unstraighten

    angled_portrait_leah.jpg

    Aperture 3.4, and just about every other photo editing app, has a straighten tool to correct crooked horizons and leaning buildings. But the straighten tool can be used creatively also.

    In the top photo, I used the "straighten" adjustment to angle the photograph. By doing so, it feels more interesting, even a bit more artistic.

    To do this in Aperture, I clicked on the straighten icon on the bottom toolbar in application view (it's to the left of the cropping tool). In full screen mode, the toolbar is at the top of the interface. Just move your mouse pointer up there and it will appear. I then clicked and dragged on the image until I had a look I wanted.

    straight_portrait_leah.jpg

    See what you think. Compare the top photo to the original right here. (Click on them to see enlarged views.) You may even prefer the original composition. But this technique is something to keep in your back pocket when working on your images.

    Aperture Tips and Techniques

    To learn more about Aperture, check out my Aperture 3.3 Essential Training (2012) on lynda.com. Also, take a look at our Aperture 3 Learning Center. Tons of free content about how to get the most out of Aperture.


    The Digital Story on Facebook -- discussion, outstanding images from the TDS community, and inside information. Join our celebration of great photography!


    Aperture Exporting Tips

    Think of Aperture as a vault that, among other things, stores and protects your images. And you can export versions of those masters in a variety of formats and configurations. In my Macworld Magazine article, How to get your pictures out of Aperture, I show you how to set up a custom export preset to the exact specifications you want.

    aperture_export_zebras.jpg

    Aperture then makes a digital copy of your photograph, including any image edits, author's data, and format changes you've specified, and places it in the location where you've instructed. It's a great feeling knowing that your original image is safe, yet you have all of these options for copying it.

    This exporting article is the first in a series that will include image editing tips, organization, and more. If you have a specific request, let me know. I'll take a close look at it.

    More Aperture Tips and Techniques

    To learn even more about Aperture, check out my Aperture 3.3 Essential Training (2012) on lynda.com. Also, take a look at our Aperture 3 Learning Center. Tons of free content about how to get the most out of Aperture.


    The Digital Story on Facebook -- discussion, outstanding images from the TDS community, and inside information. Join our celebration of great photography!


    Aperture 3 supports tethered shooting with a host of Canon and Nikon DSLRs. But iOS devices work quite well too. Simply connect an iPhone or iPad via the USB cable to your Mac, then start a tether session in Aperture (File > Tether > Start Session).

    tethered_capture_aperture_mini.jpg A tether session in Aperture using the iPad mini as the camera.

    When you tap the shutter release button on the device to take a picture, Aperture grabs it and displays the image. This setup can be handy for all sorts of situations, such as product shoots and portraits where the large composing screen makes the job easier, or in the classroom with lots of kids. And since the built-in camera is actually quite good with the iPhone 4S and iPhone 5, plus the latest iPads, the main limitation is the software controlling the camera. The built-in Camera app is basic at best.

    procamera_settings.png

    But you're not limited to that software. An excellent app, ProCamera ($2.99, iPhone and iPad versions) provides much more sophisticated controls, and works in tethered mode with Aperture.

    ProCamera adds helpful features such as: anti-shake, self timer, virtual horizon, grids, white balance lock, separate exposure and focus controls, JPEG compression setting, sound trigger, and more. Plus it's easy to use.

    I'm not saying that your iPhone or iPad will always replace the DSLR for a tethered shoot. But the iOS setup is sure a lot easier. And there are many situations, especially in the classroom, where a tethered iPad or iPhone is a heck of a lot easier to manage.

    Aperture Tips and Techniques

    I have a training movie on tethering with an iPhone in my Aperture 3.3 Essential Training (2012) on lynda.com. It's just one of the tutorials in the 8+ hours of instruction. Also, take a look at our Aperture 3 Learning Center. Tons of free content about how to get the most out of Aperture.


    The Digital Story on Facebook -- discussion, outstanding images from the TDS community, and inside information. Join our celebration of great photography!


    Using Aperture on a Retina Display Mac

    When Phil Schiller announced the MacBook Pro 13" with Retina Display, he showed photographs on Aperture, which has been rewritten to take advantage of the increased pixel density. Now there are two laptops with Retina (MBP 13" and MBP 15"). So, how are they different than Macs with a traditional LED display? Take a look.

    Every icon, thumbnail, and letter in Aperture has been retooled to take advantage of the super high definition display. The details you can see in the thumbnails are stunning.

    When debating between the 13" and 15" MBP, be sure to take a look at the tech specs. The 15" model also includes the NVIDIA GeForce GT 650M with 1GB of GDDR5 memory and automatic graphics switching plus the Intel HD Graphics 4000, while the 13" only includes the Intel HD Graphics 4000 card.

    Either way, however, you'll see your images like never before with this hardware/software combination.

    Aperture Tips and Techniques

    To learn more about Aperture, check out my Aperture 3.3 Essential Training (2012) on lynda.com. Also, take a look at our Aperture 3 Learning Center. Tons of free content about how to get the most out of Aperture.


    The Digital Story on Facebook -- discussion, outstanding images from the TDS community, and inside information. Join our celebration of great photography!


    With Aperture 3.3 and iPhoto 9.3, Apple introduced the Unified Library that allows both applications to share a single library container. Not only does this allow you to switch back and forth between iPhoto and Aperture seamlessly, but it introduces new options for your photo workflow.

    How the Unified Library Works

    First, however, here's a brief look at the Unified Library in action.

    Since this movie was made, a new feature was introduced in Aperture 3.4 making this "switching back and forth" even easier. The command, File > Open in iPhoto streamlines the process of jumping over to iPhoto (and vice versa).

    Managing Photo Stream with the Unified Library

    Some people have asked me how the Unified Library affects my Controlling Photo Stream with iPhoto workflow. Well, it's actually made it easier.

    I still can have only one library designated to manage my Photo Stream. I've set up an iPhoto Library specifically for that task. My iPhoto Preferences are configured to automatically download images from Photo Stream into this container.

    photo_stream_preferences.jpg

    open_in_aperture.jpg

    So all of my pictures from the iPhone and iPad flow into this designated iPhoto library. Now, let's say, that I want to work on one of these shots in Aperture. I go to File > Open Library in Aperture, and the entire Photo Stream is there. I can edit anything that appeals to me with Aperture's extensive toolset, export finished pictures out to my Mac, or share them online. When I'm done, I switch back to my regular Aperture library and let iPhoto continue to manage the Photo Stream.

    Easy! Needless to say, I'm lovin' the Unified Library.

    Aperture Tips and Techniques

    To learn more about Aperture, check out my Aperture 3.3 Essential Training (2012) on lynda.com. Also, take a look at our Aperture 3 Learning Center. Tons of free content about how to get the most out of Aperture.


    The Digital Story on Facebook -- discussion, outstanding images from the TDS community, and inside information. Join our celebration of great photography!


    lynda.com has just released Aperture 3.3 Essential Training (2012), the updated, comprehensive video training for Apple's professional photo management application.

    Aperture 3-3 lynda

    This title includes more than 8 hours of tutorials, divided into short movies that focus on specific techniques. As you watch a movie, you can practice on your own computer, as many times as you want, until you've mastered each move.

    We've updated many of the previous tutorials from the original Aperture 3 Essential Training to reflect the changes in the application. Additionally, we've added an entirely new chapter titled, "What's New in Aperture 3.3," that features instruction on the functionality that's been incorporated since the app's initial release. Two of those movies, "Taking advantage of Retina display Macs," and "Understanding the unified library for iPhoto and Aperture," are available for free viewing.

    New Aperture Movies

    We will continue to publish new training for Aperture and iPhoto. In fact, we're already planning to record additional movies later this Fall.

    In the meantime, take a look at Aperture 3.3 Essential Training (2012). It will help you keep pace with the evolution of this excellent photo management and editing application.


    twitter.jpg Follow me on Twitter


    With the new Shared Photo Stream in Aperture 3.4.1 and iOS 6, you can set up mobile portfolios that can be viewed on your iPad, iPhone, Mac, or even Windows computer. You can limit accessibility to just your devices, or share individual streams (mobile portfolios) with friends. Here's how to set it up.

    Setting Up Photo Stream To get started, select your photos and then click on the Share button in Aperture.

    First, you have to designate one library as your Photo Stream environment. This library can be opened in either iPhoto 9.4 or Aperture 3.4.1. You can't maintain Photo Streams from multiple libraries with one iCloud sign-in. So I've established one library that is my "Photo Stream Mission Control" and maintain it with iPhoto or Aperture, depending on my needs at the moment. Remember, it's very easy to switch among libraries now with the Shared Library Container.

    Set Up a Shared Photo Stream

    Select a group of photos, then click on the Share button and choose Photo Stream. If this is your first, you'll be asked to give it a name. After that, you can add the selected images to an existing Photo Stream, or create a new one.

    I like creating unique Photo Streams for portfolio sharing. That way I can show a curated collection of photos instead of sifting through everything I've got. This helps with viewer attention span too.

    Photo Stream Dialog If you leave the "Share With" box blank, the Photo Stream will only be viewable on your devices.

    Now you can set some parameters. If you want to share this with someone else, enter their iCloud email into the dialog box. They will be able to view your images on any iCloud-enabled device.

    If the person doesn't have an iCloud account, you can still share with them, but then you have to check the box next to Public Website. The recipient will receive an email notification with a link they can view in any web browser. However this method puts your images on the Web, which is something you may not want. For tight control, it's best to stay within the iCloud ecosystem.

    For Photo Streams only to be viewed on your ecosystem of devices, leave the "Shared With" box blank.

    Photo Stream Portfolio Now I can show off my pictures on the iPad or iPhone, yet the portfolio is controlled via Aperture.

    Once you've published the Shared Photo Stream, you can add or subtract images from it, share with additional people, or unshare if needed.

    It's an easy way to create and maintain portfolios that you can show at anytime, anywhere, on your iPad or iPhone. And they look great!

    Aperture Tips and Techniques

    To learn more about Aperture 3, check out my Aperture 3.3 Essential Training (2012) on lynda.com. Also, take a look at our Aperture 3 Learning Center. Tons of free content about how to get the most out of Aperture.

    My next open Aperture Workshop is scheduled for Nov. 16 & 17 2012, in Santa Rosa, CA. You can get on the pre-registration list, plus learn about all the other photography workshops offered this season by visiting the TDS Workshops page.


    The Digital Story on Facebook -- discussion, outstanding images from the TDS community, and inside information. Join our celebration of great photography!


    You can save even more time in Aperture by apply basic image adjustments during the import process. This automation became particularly attractive in version 3.3 with the introduction of Auto Enhance, which never harms a photo, but does a great job of applying subtle adjustments to improve it.

    Here's how to set up your import to apply Auto Enhance, or any other effect.

    import_settings_aperture.jpg

    First, make sure that "Effect Presets" is selected from the "Import Settings" popup menu in the Import dialog box. If there's a checkmark next to the name, it's selected and should appear on the right side of the interface.

    apply_effect_import_web.jpg

    Next, go to the Effects Preset brick in the Import dialog box and choose Quick Fixes > Auto Enhance.

    Now, when you import your images, Auto Enhance will be applied to each shot. You can fine tune the settings for your favorite shots in the Adjustments tab.

    Aperture Tips and Techniques

    To learn more about Aperture 3, check out my Aperture 3 Essential Training on Lynda.com. Also, take a look at our Aperture 3 Learning Center. Tons of free content about how to get the most out of Aperture.

    My next open Aperture Workshop is scheduled for Nov. 16 & 17 2012, in Santa Rosa, CA. You can get on the pre-registration list, plus learn about all the other photography workshops offered this season by visiting the TDS Workshops page.


    The Digital Story on Facebook -- discussion, outstanding images from the TDS community, and inside information. Join our celebration of great photography!


    Half the fun of image editing in a non-destructive environment is playing with different techniques. If you stumble across a look that you want to repeat in the future, you can save those settings as an Effect in Aperture. Here's how.

    Mother and Child

    Click on the Effects popup menu (near the top of the Adjustments panel) and choose "Save as Effect." This brings up the Effects Presets dialog where you can name your new look. At the same time, decide which image edits you want saved as part of the Effect. Some of the adjustments you might have done, such as tweaking Curves, might be specific to the photograph, but not necessarily part of the preset you're creating.

    To eliminate an adjustment from the preset, just click on the "-" symbol next to its name. When you're done, click the OK button.

    edit_preset_aperture.jpg

    To apply the Effect to another image, go back to the Effects popup menu, and you should see your new preset in the list. Mouse over it to get a preview of how it will look. If you like it, just click and it will be applied to your image.

    apply_preset_aperture.jpg

    You can fine-tune the picture by using the other tools in the Adjustments panel.

    Aperture Tips and Techniques

    To learn more about Aperture 3, check out my Aperture 3 Essential Training on Lynda.com. Also, take a look at our Aperture 3 Learning Center. Tons of free content about how to get the most out of Aperture.

    My next open Aperture Workshop is scheduled for Nov. 2012, in Santa Rosa, CA. You can get on the pre-registration list, plus learn about all the other photography workshops offered this season by visiting the TDS Workshops page.


    The Digital Story on Facebook -- discussion, outstanding images from the TDS community, and inside information. Join our celebration of great photography!


    The Effects panel from iPhoto has found its way into Aperture's Adjustments tab. It's a bit like the new roommate who brings his HDTV along with the move in to the apartment. He'll also bring a few things that you're not crazy about too.

    iphoto_effects_in_aperture.jpg

    Edge Blur is one of new iPhoto tools that I like. Plus, in Aperture, it's easier to use. I like to apply Edge Blur to throw the background out of focus to direct the viewer's eye to the main subject. When used with restraint, it can be very effective.

    Other bonus effects that I like include the Antique filter and the Fade slider. For this image captured at the U.S. Open in San Francisco, I played with Antique and Edge Blur.

    I'm not as wild about some of the other iPhoto Effects, such as Matte and Vignette. We already have more elegant versions of them in Aperture. But like the roommate with the HDTV, you get the cool along with the unnecessary.

    You can enable iPhoto Effects via the Add Adjustment popup menu in Aperture's Adjustments tab. Once you do, they'll appear as a new adjustment brick, as in the screenshot above. Some of them are fun. Take a look!

    Aperture Tips and Techniques

    To learn more about Aperture 3, check out my Aperture 3 Essential Training on Lynda.com. Also, take a look at our Aperture 3 Learning Center. Tons of free content about how to get the most out of Aperture.

    My next open Aperture Workshop is scheduled for Nov. 2012, in Santa Rosa, CA. You can get on the pre-registration list, plus learn about all the other photography workshops offered this season by visiting the TDS Workshops page.


    The Digital Story on Facebook -- discussion, outstanding images from the TDS community, and inside information. Join our celebration of great photography!


    iphoto_open_aperture_lib.jpg

    A terrific workflow improvement with Aperture 3.3.1 and iPhoto 9.3 is the "unified library." This means that regardless of which application creates the library, it can be opened with either app.

    I decided to see how one of my Aperture libraries would look in iPhoto on a MacBook Pro 15" Retina Display. To test, I held down the Option key and launched iPhoto 9.3. I was greeted with a dialog box listing available iPhoto and Aperture libraries. I chose the "Canon 40mm" library, which I had created previously in Aperture.

    As you can see from the following screenshots, Apple has done a pretty good job of not only unifying the library structure, but also the user interfaces for both applications. So as you switch from one program to the other, the experience is relatively consistent.

    Aperture 3.3 user interface

    aperture_interface.jpg

    iPhoto 9.3 user interface

    iphoto_interface.jpg

    My star ratings, flags, keywords, and albums that were created in Aperture appeared in iPhoto. I then applied an image edit, added a keyword, and wrote a description in iPhoto. And yes, when I opened the library in Aperture, all of the changes from iPhoto appeared there.

    aperture_edit.jpg My info and image edit changes from iPhoto appeared in Aperture. All screen captures are from a MacBook Pro 15" Retina Display. Photos by Derrick Story.

    Overall, I had very few hiccups as I switched between the two apps. I did have one instance where my Aperture albums did not show up in iPhoto at first. So I created another album in iPhoto, then opened the library in Aperture. The new album was there, as it should. When I went back to iPhoto, now all the albums were then visible. I'm guessing this is a glitch that will be ironed out in an update.

    Keep in mind that you can only have a given library open in either in Aperture or iPhoto, but not both apps at the same time.

    A Few Feature Notes to Keep in Mind

    I much prefer Aperture's importing process to iPhoto's, especially for Raw files. Aperture is a magnitude faster. Also, you can switch between libraries on the fly in Aperture. With iPhoto, the app has to relaunch.

    Pictures marked as "Hidden" in iPhoto will not be visible in Aperture. In a similar vein, images marked as "Rejected" in Aperture can't be seen in iPhoto. So if you're sharing a library between apps with others, you do have some control over what appears in each.

    Smart Albums can only be modified in the app in which they were created, but they are visible in both Aperture and iPhoto.

    Just like in many marriages, a name change is involved as part of the union. A few terms have been modified in Aperture. "Masters" is now originals, "metadata" has become info, and "presets" are effects.

    And finally, if you have created a multitude of iPhoto libraries over the years, and you'd like to consolidate them, you can. First open the library in iPhoto to update it to 9.3. Then you can use Aperture's Import Library command to merge it with another updated library. You can do this as many times as you need until all of your iPhoto libraries are neatly organized in one unified library.

    Aperture Tips and Techniques

    To learn more about Aperture 3, check out my Aperture 3 Essential Training on Lynda.com. Also, take a look at our Aperture 3 Learning Center. Tons of free content about how to get the most out of Aperture.

    My next open Aperture Workshop is scheduled for Nov. 2012, in Santa Rosa, CA. You can get on the pre-registration list, plus learn about all the other photography workshops offered this season by visiting the TDS Workshops page.


    The Digital Story on Facebook -- discussion, outstanding images from the TDS community, and inside information. Join our celebration of great photography!


    One of the many feature improvements in Aperture 3.3 is the White Balance tool. Among its enhancements is an "uber auto" button and three "filters" for different types of photos. Here's an overview to get you up and running right away.

    renee_white_balance.jpg The new white balance tool in Aperture 3.3 includes a "skin tone" option for your portraits. Photo by Derrick Story. Click on image for larger size.

    White Balance Popup Menu

    Prior to Aperture 3.3 your white balance option was Temperature and Tint. Now there are two additional choices: Skin Tone and Natural Gray. Plus, there's an Auto button, but I'll get to that a bit later.

    • Skin Tone - a great choice for portraits. This new algorithm is designed for portraits. Simply place the eye dropper on a skin tone and click.
    • Natural Gray - designed to correct color cast, but to also leave some feel for the ambient color in your image. In other words, it won't over-correct your photo. An example could be an underwater scene where you want to temper the blue, but not eliminate it all together.
    • Temperature and Tint - this choice is best for color casts that are more extreme where you really need to get in there and move sliders around.

    Auto Button

    The White Balance brick also includes an Auto button. When you click on it, Aperture runs all three "filters" and you can choose your favorite version. Auto Skin Tone works best when Faces is enabled because Aperture will use face detection technology to fine tune the correction. I had good luck with it, however, even when Faces was not enabled.

    What's fun about Auto is that once you run it, you can cycle through the 3 filters to see the different types of corrections, then choose the one you want to use. On this portrait, for example, the Skin Tone version is beautiful, but the Natural Gray and Temperature and Tint versions were a bit too cool.

    Recommended Workflow

    Apple has made white balance so easy. I recommend that you begin by clicking the Auto button. Then cycle through the 3 filters and choose the look you like best. You can then fine tune the color by using the slider for that filter.

    Keep in mind that these corrections are brushable too. So you can further adjust the color in specific areas. I'll cover that in a future post.

    Aperture Tips and Techniques

    To learn more about Aperture 3, check out my Aperture 3 Essential Training on Lynda.com. Also, take a look at our Aperture 3 Learning Center. Tons of free content about how to get the most out of Aperture.

    My next open Aperture Workshop is scheduled for Nov. 2012, in Santa Rosa, CA. You can get on the pre-registration list, plus learn about all the other photography workshops offered this season by visiting the TDS Workshops page.


    The Digital Story on Facebook -- discussion, outstanding images from the TDS community, and inside information. Join our celebration of great photography!


    Aperture 3.3 provides much for us to talk about, and I'm going to start today with its improved rendering speed during import. Apple calls this "Fast Browsing."

    Aperture_import_prefs.jpg Noting the "Fast Browsing" preference in the Import tab (Camera Previews). It should be activated by default. But you might want to double-check it just to make sure.

    In the past, one of the annoyances for Raw shooters was the delay in building preview images during the import of files from a memory card. Now with Fast Browsing, Aperture takes better advantage of the Jpeg images embedded in those Raws. It shows you that image first, then will replace it with an Aperture preview (built to your specifications in the preferences menu) once the import has completed.

    fast_browsing_image.jpg New "Fast Browsing" image that's available immediately in Aperture 3.3. (Click on image for larger version.)

    I tested this feature on a 2010 MacBook Air using Raw files from an Olympus OM-D. As promised, large preview images were available right away during the importing process. And they looked good. I turned on Quick Preview to further speed things up while I worked.

    final_preview_image.jpg Aperture's generated preview that replaced the embedded Jpeg. Even better than the embedded file.

    Then I waited to see if I could detect Aperture replacing the embedded Jpeg with its own preview. And sure enough, a few seconds later it did. The color was a bit richer in the new preview, and it was a tad crisper too.

    But gone are the days of the pixelated image that finally snaps into focus. You can certainly start rating and sorting your images during the import process now. My guess is that the quality of the initial preview will vary depending on what your camera embeds in the Raw file.

    I still recommend turing Quick Preview on, because it seems to speed up the browsing process even further.

    Aperture Tips and Techniques

    To learn more about Aperture 3, check out my Aperture 3 Essential Training on Lynda.com. Also, take a look at our Aperture 3 Learning Center. Tons of free content about how to get the most out of Aperture.

    My next open Aperture Workshop is scheduled for Nov. 2012, in Santa Rosa, CA. You can get on the pre-registration list, plus learn about all the other photography workshops offered this season by visiting the TDS Workshops page.


    The Digital Story on Facebook -- discussion, outstanding images from the TDS community, and inside information. Join our celebration of great photography!


    When there's a dark area in your photograph that you want to lighten, the common inclination is to reach for the Dodge tool. I don't know about you, but I find the Dodge tool one of the most difficult to use for getting natural looking results. On my images, it always looks like someone spilled bleach on the photo.

    A more elegant approach to lightening a dark area is to use the brushing tool in the Shadows & Highlights brick. It's nearly foolproof in use, an the results are fantastic.

    highlights_shadows_aperture.jpg The Shadows & Highlights brick in Aperture's Adjustments panel.

    Here are the steps for using the Shadows & Highlights brush

    • Click on the gear icon in the Shadows & Highlights brick (as shown in the illustration).
    • Choose Brush Shadows & Highlights In
    • Don't click on the check box on the left side. That will happen automatically.
    • In the adjustment brick, move the Shadows slider to about 25 for a starting point.
    • In the floating palette (that will appear over your photo), move the Strength slider to 1.
    • Choose your brush size and softness (in the floating palette).
    • Start painting in the dark area you want to lighten.
    • Once you've painted an area, you can adjust the strength of its effect by moving the Shadows slider in the adjustment brick.
    • If you need to clean up an overpaint, click on the eraser icon in the floating palette.

    floating_palette.jpg The floating palette

    You can always reset the adjustment and start over by clicking on the gear icon in the floating palette and selecting "Clear from entire photo." But I don't think you'll have to do that often, because this is such a beautiful method for lightening dark areas.

    More Aperture Tips and Techniques

    To learn more about Aperture 3, (especially brushing techniques) check out my Aperture 3 Essential Training on Lynda.com. Also, take a look at our Aperture 3 Learning Center. Tons of free content about how to get the most out of Aperture.

    My next open Aperture Workshop is scheduled for Nov. 2012, in Santa Rosa, CA. You can get on the pre-registration list, plus learn about all the other photography workshops offered this season by visiting the TDS Workshops page.


    The Digital Story on Facebook -- discussion, outstanding images from the TDS community, and inside information. Join our celebration of great photography!


    I like my vintage 2008 17" MacBook Pro (MBP). But it had become too tired to run Aperture and manage my extensive photo library. Rather than give up on this otherwise beautiful machine, I decided to replace the traditional hard drive with a new Crucial Solid State Drive (SSD). Now that the project is completed, I have to say, the results have exceeded my expectations.

    prepare_hard_drive.jpg Preparing for the hard drive replacement.

    Basic Specs for the Mac

    Even by today's standards, the MBP 17" has decent specs. At its heart beats a 2.5 GHz Intel Core 2 Duo processor. I have 4 GBs of DDR2 SDRAM for memory, and a NIVIDIA GeForce 8600 GT graphics card with 512 MBs of memory onboard to process the images. Plus this MBP has a beautiful matte finish LCD display that was one of the first LED models that Apple shipped. I love editing photos on this screen. (It's worth keeping for the monitor alone.)

    Other goodies include a SuperDrive for both CD and DVDs, 3 USB ports, FireWire 800 and 400 ports, plus an excellent sound system. Like I said earlier, way too good of a machine to give up on quite yet.

    But its Achilles heel was the 200 GB Hitachi internal hard drive. It was slowing down my entire system. Aperture in particular was painful. I could barely perform the simplest image edit without a spinning beach ball.

    The Upgrade to Solid State

    Since Aperture is constantly hitting the hard drive, I thought moving to Solid State might help. In part, this belief stems from my excellent experience using the current MacBook Air. I thought that if I "air-i-fied" my MBP, I might be more satisfied with its performance.

    After I received the Crucial SSD, I watched "How to replace your 17" Mac Book Pro hard drive:"

    Then I retrieved my Newer Tech 11-Piece Computer Tool Kit and spread everything out on a covered table. Once all the screws were removed, I was careful when lifting the keyboard. There's a ribbon cable that connects it to the mother board that I didn't want to damage.

    I keep all the various sets of screws separate and labeled. This makes reassembly much easier (without any extra parts). The entire operation lasts about 30 minutes. I take my time when taking apart computers...

    new_hard_drive.jpg New SSD in place. Now all I have to do is put everything back together.

    Adding Software

    Fortunately I have a copy of Snow Leopard on DVD, so I held down the "C" key and booted the laptop from it. I used Disk Utility to format the Crucial SSD for Mac OS X Journaled. Then I installed the operating system itself.

    Once I had Snow Leopard on the SSD, it was just a matter of running updates so I could eventually access the Mac App Store to download Lion and install it. After that, I used the App Store to redownload Aperture, and the rest of my software. (I have a few hints about bringing Aperture up to speed that I will cover in another article later this week.)

    And That Old Toshiba Hard Drive I Removed...

    Even though I had backed up my files on an external hard drive before installing the SSD, I still wanted that old Toshiba available in case I had forgotten something. So I pried open an LaCie Rugged portable unit that had a failed hard drive in it, pulled out the bad hard drive, and replaced it with the unit I had removed from the laptop. I now have all of my previous files available.

    Beter Performance, Indeed

    The 2008 MacBook Pro is like a new computer. It's currently handling an Aperture library containing 50,000 referenced images with very little effort. I can now edit RAW files from my 5D Mark II without those long delays I was previously experiencing. I love working on this big boy again.

    The entire project cost me less than $275. (You can't get an iPad for that amount, let along a big 17" matte screen workhorse.) And performance is so much snappier than before. I'm definitely enjoying this ride.


    The Digital Story on Facebook -- discussion, outstanding images from the TDS community, and inside information. Join our celebration of great photography!


    Aperture Library First Aid

    Do you ever have the feeling that your Aperture library isn't feeling quite right? For those Alka Seltzer situations, try running the Aperture Library First Aid tool.

    aperture_first_aid.jpg

    Just 3 easy steps to potential relief:

    • Quit Aperture.
    • Hold down the Option and Command keys while relaunching the application.
    • Choose "Repair Database."

    This handy tool is built right in to the app. And it just might provide the relief you need for that upset database.

    More Aperture Tips and Techniques

    To learn more about Aperture 3, check out my Aperture 3 Essential Training on Lynda.com. Also, take a look at our Aperture 3 Learning Center. Tons of free content about how to get the most out of Aperture.

    My next open Aperture Workshop is scheduled for Nov. 2012, in Santa Rosa, CA. You can get on the pre-registration list, plus learn about all the other photography workshops offered this season by visiting the TDS Workshops page.


    The Digital Story on Facebook -- discussion, outstanding images from the TDS community, and inside information. Join our celebration of great photography!


    You can create inkjet contact sheets with Aperture by following four basic steps. These are useful as proof sheets for client review, or as a handy way to tell a story with multiple images. There are a variety of options for adding text to the pages too. Here's how.

    Step 1 - Select the Images

    Step 1 - Select Images

    In Aperture's thumbnail mode, select the images you want to add to the contact sheet. Just CMD-click on the shots to choose them. Then go to File > Print Images.

    Step 2 - Set Rows and Columns

    Step 2 - Set Rows and Columns

    In the following dialog box, select the number of rows and columns you want. The fewer you choose, the larger the images. Don't forget to choose your printer and paper size also! Then click on the "More Options" button in the lower left corner to reveal the Metadata panel.

    Step 3 - Choose Metadata

    Step 3 - Choose Metadata

    Here you can choose the type of information you want on your contact sheet, such as title, file name, etc. The text itself is pulled from the metadata associated with the picture.This includes EXIF, such as the file name and date of capture, and IPTC, such as the caption information and title you may have entered. Now, click Print.

    Step 4 - Print Dialog Box

    Step 4 - Print Dialog Box

    You'll be presented with one more dialog box, this one is part of the print driver software. Make your selections and click Print. In just a few minutes, your contact sheet will emerge from the printer.

    Advanced Tips

    If you want to make a preset of your contact sheet, click on the little gear menu at the bottom of the dialog box in Step 3. Choose "Duplicate Preset" from the popup menu. Give your preset a descriptive name by clicking on it. The next time you want to print this type of contact sheet, just choose your preset.

    If you'd rather generate a PDF instead of paper output, click on the PDF button in the lower left corner of the Print dialog box in Step 4. Choose "Save as PDF."

    More Aperture Tips and Techniques

    To learn more about Aperture 3, check out my Aperture 3 Essential Training on Lynda.com. Also, take a look at our Aperture 3 Learning Center. Tons of free content about how to get the most out of Aperture.

    My next open Aperture Workshop is scheduled for Nov. 2012, in Santa Rosa, CA. You can get on the pre-registration list, plus learn about all the other photography workshops offered this season by visiting the TDS Workshops page.


    The Digital Story on Facebook -- discussion, outstanding images from the TDS community, and inside information. Join our celebration of great photography!


    aperture_info_panel.jpg

    Both Aperture and Lightroom provide excellent tools for organizing images in your library. A common question I hear during workshops is about the difference between Flags, Stars, and Color Labels. Here's a quick overview on how I use them.

    Star Ratings

    I use stars to rate the quality of an image. A great picture will be 4 stars, good is 3, and acceptable is 2. I recommend making two passes to rate photos. First pass is just a "yay or nay" review. If it's an acceptable image, give it 2 stars (a yay). If not, no stars at all (nay).

    Then, on the second pass, only review the 2 star photos. I usually put them in an Album (or Collection in Lightroom). You've now had a chance to see the entire shoot and have better perspective on the relative quality of the images. Upgrade the best shots to 3 or 4 stars. These should be the only pictures you spend image editing time on.

    Color Labels

    aperture_color_labels.jpg

    Use the color dots for categories. You could assign one color, for example, to shots that you've uploaded to the web. Another color might be used for images that you've printed. If you have a frequent client, he or she might deserve their own color label. You can assign names to labels by going to Preferences > Labels.

    Flags

    Flags are useful for temporary collections. Let's say that you want to isolate and look at a handful of images. Mark them with a flag, then in thumbnail mode, go to the upper right corner of Aperture and click on the search icon. Choose Flagged from the popup menu. Only those images will be displayed on your screen. Click on the "X" in the search box when you're done to reveal all of the images in that project.

    aperture_flagged.jpg

    More Aperture Tips and Techniques

    To learn more about Aperture 3, check out my Aperture 3 Essential Training on Lynda.com. Also, take a look at our Aperture 3 Learning Center. Tons of free content about how to get the most out of Aperture.

    My next open Aperture Workshop is scheduled for Nov. 2012, in Santa Rosa, CA. You can get on the pre-registration list, plus learn about all the other photography workshops offered this season by visiting the TDS Workshops page.


    The Digital Story on Facebook -- discussion, outstanding images from the TDS community, and inside information. Join our celebration of great photography!


    Working efficiently in Aperture or Lightroom allows you to spend more time being creative and less fooling around with medicore shots. In this week's podcast, I cover the 5 basic workflow steps: Intelligent Import, 2-Pass Sort, Isolate Your Best, Edit to Perfection, and Share Your Work.

    This the same approach I teach in my Aperture 3 Essential Training on lynda.com and in the TDS Aperture Workshops.

    Listen to the Podcast

    You can also download the podcast here (31 minutes). Or better yet, subscribe to the podcast in iTunes. You can support this podcast by purchasing the TDS iPhone App for only $2.99 from the Apple App Store.

    Monthly Photo Assignment

    Eyes is the Mar. 2012 Photo Assignment. You can read more about how to submit on our Member Participation page. Deadline for entry is March 30, 2012.

    More Ways to Participate

    Want to share photos and talk with other members in our virtual camera club? Check out our Flickr Public Group. And from those images, I choose the TDS Member Photo of the Day.

    Podcast Sponsors

    Red River Paper -- The $7.99 Sample Kit is back! And with free shipping.

    Make Your Photos Sizzle with Color! -- SizzlPix is like High Definition TV for your photography.

    Need a New Photo Bag? Check out the Lowepro Specialty Store on The Digital Story and use discount code LP20 to saven 20% at check out.


    Technorati Tags:
    , , , , ,


    The Loupe tool in Aperture was one of the first "oh wow" features that caught photographers' attention. What's interesting, however, is that it's also quite useful, especially if you know the basic ins and outs.

    By spending just a few minutes with this video from my Aperture 3 Essential Training on Lynda.com, you just might fall in love with the Loupe tool all over again.


    More Aperture Tips and Techniques

    To learn more about Aperture 3, check out my Aperture 3 Essential Training on Lynda.com. Also, take a look at our Aperture 3 Learning Center. Tons of free content about how to get the most out of Aperture.

    My next open Aperture Workshop is scheduled for Nov. 2012, in Santa Rosa, CA. You can get on the pre-registration list, plus learn about all the other photography workshops offered this season by visiting the TDS Workshops page.


    The Digital Story on Facebook -- discussion, outstanding images from the TDS community, and inside information. Join our celebration of great photography!


    Apple released Digital Camera RAW Compatibility Update 3.9 that provides support for 11 new cameras, including the Canon S100, Nikon 1, Sony NEX 5N, and the new Olympus PENs. It's available via Software Update on your Mac.

    New Yorker with Olympus E-PM1 New Yorker hotel shot with an Olympus E-PM3 (Mini) in Raw and processed in Aperture 3. Click on image for larger size. Photo by Derrick Story.

    This means that Raw files from the following cameras can now be processed in Aperture 3, iPhoto 9, and Preview for Mac OS X Lion.

    • Canon PowerShot S100
    • Nikon 1 J1
    • Nikon 1 V1
    • Nikon COOLPIX P7100
    • Olympus PEN E-PL1s
    • Olympus PEN E-PL3
    • Olympus PEN E-PM1
    • Panasonic LUMIX DMC-FZ150
    • Sony Alpha NEX-5N
    • Sony Alpha SLT-A65
    • Sony Alpha SLT-A77

    I've been shooting Raw files with my Olympus PEN Mini, so I now can convert those images from this in Aperture:

    unprocessed_raw.jpg

    To fully processed images that look like this. All I have to do is open the Adjustments tab, and click on the thumbnail. Aperture will automatically process the Raw file for you, once you have the update installed.

    processed_raw.jpg

    The workflow that I recommend for photographers who buy new cameras that are not supported yet in Aperture, is to shoot Raw+Jpeg in the beginning. Upload the Raws and Jpegs separately in Aperture and keep the in separate Albums, as I've done here. (Check the Library pane in the middle illustration to see the set up.) You can use the Jpegs immediately. Once the Raw update is available, you can then process the Raw files and switch over to them.

    I've taken many good shots with the E-PM1 prior to the Raw update. If I didn't use this technique, I'd have only Jpegs from those weeks of shooting. Now I have both.

    More Aperture Tips and Techniques

    To learn more about Aperture 3, check out my Aperture 3 Essential Training on Lynda.com. Also, take a look at our Aperture 3 Learning Center. Tons of free content about how to get the most out of Aperture.


    The Digital Story on Facebook -- discussion, outstanding images from the TDS community, and inside information. Join our celebration of great photography!


    PhotoSync Import

    Now, more than ever, your iPhone photos need to be incorporated into your photography workflow. With the 8 MP camera in the iPhone 4S, you have print-worthy images of important events that should be properly cataloged.

    In iOS 5, Apple introduced Photo Stream to help with this situation. I'll cover the ins and outs of this technology in a future post. But for those who need a bit more control over sync between iPhone and computer, or for iOS 4 users, there's a terrific app $1.99 called PhotoSync that I have found invaluable for managing my iPhone photos.

    PhotoSync easily moves images from the iPhone to a dedicated folder on my Mac. I then import those pictures into an Aperture library. On import I can add more metadata to the images and organize them as well.

    Here are the steps.

    • Install PhotoSync on the iPhone and Mac.
    • Launch PhotoSync on the iPhone.
    • Choose images to sync. (First time sync all, then just new shots in the future.)
    • Select which device to sync to. You choose your computer, iPad, iPod Touch, or another iPhone.
    • If PhotoSync is active on the receiving device, it will show up in the list of destinations on your iPhone.
    • Upload the photos from the iPhone to the Mac.
    • Open Aperture and choose Import.
    • Ensure that the "Do not import duplicates" box is checked.
    • Click Import and enjoy working with your images.

    Aperture Import of PhotoSync Images The Aperture Import dialog for my iPhone images. Click on image for larger size.

    I don't maintain just one Aperture library. I have many that I use for different purposes. One of those libraries is dedicated to my mobile photography. This workflow, using PhotoSync, makes it easy to keep my iPhone pictures safe, and available for use.

    More Aperture Tips and Techniques

    My next Aperture Workshop is Nov, 12-13, 2011 in Santa Rosa, CA. Write me if you're interested in attending.

    To learn more about Aperture 3, check out my Aperture 3 Essential Training on Lynda.com. Also, take a look at our Aperture 3 Learning Center. Tons of free content about how to get the most out of Aperture.


    The Digital Story on Facebook -- discussion, outstanding images from the TDS community, and inside information. Join our celebration of great photography!


    I'm a big fan of what Nik Silver Efex Pro 2can do for my B&W photography, so when I heard that they've just released Color Efex Pro 4 for color work, I wanted to give it a try.

    Color Efex Pro 4 Project in Process Project in process with 4 filters active. Click on image for larger version. Photo by Derrick Story, shot in Kauai.

    Essentially, this software provides a set of 55 customizable photo filters that you can combine in just about any imaginable way. When you build a set of filters that results in a look you want to repeat, save them as a recipie to apply to other shots.

    As with Silver Efex Pro 2, there are plenty of sliders to tailor the intensity of highlights, shadows, contrast, color, etc. And, as you'd expect, control points are available to fine tune a specific area.

    I combined four filters on this shot from Kauai to create a look I had always had in my mind for this image, but hadn't been able to achieve. My workflow went like this.

    • Make basic image adjustments in Aperture 3 to the master Raw file.
    • Choose Color Efex Pro 4 from the Photos > Edit with Plug-in menu.
    • Click on the Landscape filter grouping in the left column.
    • Choose a filter that looks appropriate and preview its options by clicking on the variations icon to the right of the filter name (see illustration).
    • Pick a variation I want, then tweak to taste.
    • Click the Add Filter icon in the right column to add another effect to the image (if you don't use Add Filter, then the next effect you choose replaces the previous one).
    • Repeat process until I've added the right amount of filters and adjusted them for the look I want.
    • Click on Save Recipe in the right column to save my settings. Give the recipe a name.
    • Click the Save button in the lower right corner to process the image and send the Tiff file back to Aperture,

    Original Tree Image from Kauai Here's the original tree image in Aperture before working on it in Color Efex Pro. The shot is fine, but it doesn't have the Jurassic Park mood that I wanted.

    Just like with any Edit plug-in in Aperture, you're adding another image to your library. I like to stack them together to keep things organized. Color Efex Pro 4 works with Adobe Lightroom and Photoshop also. So, regardless of your preferecne for image editing software, you can use these filters.

    A few of the other features I like in Color Efex Pro 4 include a zooming tool, compare mode, choice of background shade, and history browser. There are two editions of the software available from the Nik site: Standard (26 filters) $99.95 or Complete (55 filters) for $199.95. Works great on both Macs and Windows machines. If you own a previous version, you can upgrade to the Compelte Edition for $99.95. And if you purchase Color Efex Pro 3.0 or the Complete Collection on or after August 7, 2011 you are eligible for a free upgrade to Color Efex Pro 4.

    Bottom line: I was able to learn the software quickly by watching a couple videos on Nik's On Demand Video Training page, then put these effects to work on my images. The visual nature of the interface makes it easy to create the look you want. It's not for every image, in part because I don't want to fill up my Aperture library with large Tiff files. But for that special shot you want to get just right, Color Efex Pro 4 can get you there quickly.

    More Aperture Tips and Techniques

    My next Aperture Workshop is Nov, 12-13, 2011 in Santa Rosa, CA. Write me if you're interested in attending.

    To learn more about Aperture 3, check out my Aperture 3 Essential Training on Lynda.com. Also, take a look at our Aperture 3 Learning Center. Tons of free content about how to get the most out of Aperture.


    The Digital Story on Facebook -- discussion, outstanding images from the TDS community, and inside information. Join our celebration of great photography!


    Ever since I can remember, Aperture has had the same five templates for creating web galleries. But thanks to Themes for Aperture by Graphic Node, we have 51 more visual possibilities to choose from when building online galleries.

    Themes for Aperture

    You download the program from the Mac App Store, then browse the various templates they've designed. You do the browsing in the Themes for Aperture application. Once you find something that catches your eye, mouse over it to reveal the "Save Theme" button. Click on it, and you get a dialog box asking if you want to save the template to the default location in the Aperture container. Click OK, and you're set.

    Now, when you choose Web Page from within Aperture, the new template is available right along side the standard offerings from Apple. I tested a handful of them, and they created fresh looking, workable galleries, just as promised. The only difference I noticed was that the Graphic Node themes took a bit longer to export than the standard Apple selections, sometimes up to twice as long. For example, a gallery that began with 37 Raw files took 5 minutes to export on my MacBook Air using the stock black Apple theme, but took 10 minutes when I selected the Precision Camouflage template from Graphic Node. But once the export was complete the theme worked flawlessly.

    I was able to remove a theme I didn't want by quitting Aperture, going into the Aperture application container, drilling down to Content > Resources > Web Themes, and dragging the particular web theme to the trash.

    Graphic Node is offering an introductory price of $19.99 for Themes for Aperture through August 15th. Some fun stuff in there!

    More Aperture Tips and Techniques

    My next Aperture Workshop is Nov, 12-13, 2011 in Santa Rosa, CA. Write me if you're interested in attending.

    To learn more about Aperture 3, check out my Aperture 3 Essential Training on Lynda.com. Also, take a look at our Aperture 3 Learning Center. Tons of free content about how to get the most out of Aperture.


    The Digital Story on Facebook -- discussion, outstanding images from the TDS community, and inside information. Join our celebration of great photography!


    aperture_network_vault.jpg

    I've always used external hard drives to store my Aperture 3 Vaults. And even though I work with a referenced library these days instead of a managed library, I still use the vault to back up my image adjustments, ratings, and metadata. If my computer ever fails, I want to be able to restore my work as well as my master files.

    But as I experimented more with personal cloud computing, I started thinking that it would be nice to have a copy of my vault on one of those network drives that has RAID1 mirroring. So I tried it.

    On my local area network, I selected the Iomega ix2 storage drive that contained two 2TB hard drives that were set up to mirror one another. I opened Aperture and selected "Add Vault" from the gear menu at the bottom of the Library pane. In the dialog box that followed, I was able to choose the Iomega ix2 from the "Shared" drives. I initiated the process for creating a new Vault... and Aperture began backing up to it.

    Even though my master Raw files are not contained in the Aperture library, the back up of my previews and work is still about 50 GBs. The building of the Vault for this went slowly, taking overnight to complete the job.

    Subsequent updates to the Vault have gone much faster since Aperture uses incremental archiving -- it only backs up new data or data that has changed. It's still not as fast as a connected hard drive. But, I usually just work on other things during the few minutes it takes to refresh the Vault.

    With this new set-up, I find that I'm running the Vault more often because it's more convenient. I doubt that I'll ever try this over the Cloud, but over my local area network, all seems well.

    More Aperture Tips and Techniques

    My next Aperture Workshop is Nov, 12-13, 2011 in Santa Rosa, CA. Write me if you're interested in attending.

    To learn more about Aperture 3, check out my Aperture 3 Essential Training on Lynda.com. Also, take a look at our Aperture 3 Learning Center. Tons of free content about how to get the most out of Aperture.


    The Digital Story on Facebook -- discussion, outstanding images from the TDS community, and inside information. Join our celebration of great photography!


    onOne Software announced today the availability of Perfect Layers for Aperture and Lightroom at a special intro price of $99.95. I loaded up this plug-in into Aperture 3 on my MacBook Air to take it for a quick test drive.

    Perfect Layers for Aperture

    After installation, Perfect Layers is available via Photos > Edit with Plug-in. It takes a few seconds to create the Photoshop file and present it to you in a new window. You can select one file, or multiple images to open in Perfect Layers.

    Once there, you have a streamlined, but very capable version of the layers functionality that was originally created by Adobe for Photoshop. If you're working with a single image, the first thing you'll want to do is copy it to create a new layer. Then you can play with blending modes and painting to create the effect you want.

    I wanted to add a little punch to this countryside shot from Virginia. So I used the Hard Light blending mode, then "painted out" the effect on the horse. That allowed me to pump up the landscape without overdoing it on the main subject.

    side-by-side-aperture.jpg Side by side comparison in my Aperture library. The Perfect Layers version is on the left.

    Working in Perfect Layers is fairly intuitive if you've worked in Photoshop. If not, you might want to spend some time in the How To section on the onOne site. That should get you up to speed quickly.

    Performance was OK, but the plug-in did seem to tax my MacBook Air, which usually handles my photography apps quite well. I also think onOne needs to add a "Save" and "Cancel" buttons to the interface. Once you're finished with the work, your only options are to go to the menu, or just close the window and wait for the dialog box that asks you if you want to save. Seems like an overlooked detail to me.

    Perfect Layers isn't for you're everyday photos. This plug-in is for those special shots that you want to get just right, or for building composite images. You pay the typical round tripping price when you use this app. My original horse shot is 27 MBs in the Aperture library. The Perfect Layers version is 411 MBs. As I always say in my workshops, you want to use the native Aperture tools as much as possible, and save plug-ins for only when you need them.

    For photographers who don't want to make the full investment for Photoshop CS5 but wants the ability to work with layers in Lightroom or Aperture, Perfect Layers represents an alternative. Keep in mind that Photoshop Elements also has layers capability, however. You can roundtrip from Aperture to CS5 or Elements, or use a plug-in. It really depends on which tool you like the best. And since there is a 30-day free trial of Perfect Layers, you might want to give it a look.

    For the time being, I'm going to continue to test Perfect Layers in Aperture. I like the interface and the convenience. And I'm curious to see how often I choose this tool over the other options. I'll keep you posted.


    The Digital Story on Facebook -- discussion, outstanding images from the TDS community, and inside information. Join our celebration of great photography!


    Unsupported Raw File

    When you have a new camera that produces Raw files not immediately supported in Aperture (and iPhoto), how should you approach the situation? Here's the process that I go through.First, I look at Apple's track record with the camera brand. If there's a history of support, then odds are good that an update will come. I shoot primarily Canon and Olympus. I know that the Canon updates will come pretty fast, and those from Olympus will lag behind. But I have confidence that both will be supported.

    Case in point: Apple just released Raw Compatibility Update 3.7 that adds support for my XZ-1 and for the E-PL2. The E-PL2 came out in January of this year, so the update didn't follow until 4 months later.

    both_as_masters.jpg

    While I wait for the update, I'll shoot Raw+Jpeg in the camera, then upload the files in Aperture choosing "Both (Separate Masters)" in the Raw+Jpeg Pairs popup menu (in the Import dialog box). Once imported, the Jpegs will show (as in the illustration above) and the Raws will not. If you find this distracting, you can always stack the pairs with the Jpeg as the select, then collapse the stacks. You can do this quickly with the Auto Stack command, then Close All Stacks.

    Once the update arrives, and you've installed it, the Raw file just has to be processed. Usually, you can simply click on the thumbnail with the Adjustments tab open, and Aperture will process it automatically. After that, you can either make the Raw file the "pick" for the stack, or delete the Jpegs from your library.

    supported_raw.jpg

    If Apple doesn't have a history supporting a particular line of cameras, then you're rolling the dice. You can always shoot Jpeg only. Or you can process the Raw files in Adobe Camera Raw when it's supported there.

    What's the biggest difference I notice between the Raw and Jpeg versions? I'm better able to display highlight and shadow detail in the images. And for me, that benefit is worth the trouble.

    More Aperture Tips and Techniques

    My next Aperture Workshop is May 21, 2011 in Santa Rosa, CA. We'll probably schedule the next for Nov. 2011. write me if you're interested in attending either.

    To learn more about Aperture 3, check out my Aperture 3 Essential Training on Lynda.com. Also, take a look at our Aperture 3 Learning Center. Tons of free content about how to get the most out of Aperture.


    The Digital Story on Facebook -- discussion, outstanding images from the TDS community, and inside information. Join our celebration of great photography!


    We've been able to apply watermarks in Aperture since the beginning, but the problem is they usually don't look the way we want. Unless you create your watermark with a transparent background, you'll get what looks like a rectangular label instead of the more elegant type without a box.

    Watermark Applied Watermark with transparent background created in Photoshop, then applied in Aperture 3.

    The procedure for a better watermark is relatively simple. Start in Photoshop. Go to File > New, then choose "Transparent" for the Background Contents popup menu in the dialog box. Click OK. Once you've created the file with a transparent background, use the text tool to type and style your watermark. You may want to shade the text light gray instead of black (even though you do have an opacity slider later on in Aperture for fine tuning). If you want a diagonal watermark, go to Image > Image Rotation > Arbitrary and set the angle you want. Once everything looks good, then Save As Copy in the PNG format. You'll also want to save your master as a PSD file for easy editing at a later date.

    transparent_background.jpg

    Now go to Aperture. Pick the image you want to apply the watermark to, then choose File > Export > Version. In the Export dialog box, choose "Edit" at the bottom of the Export Preset popup menu. Click the "+" icon in the lower left to create a new preset. Set your basic parameters, then check the "Show Watermark" box. Click the "Choose Image" button and navigate to the graphic you created in Photoshop. If you go diagonal, you'll probably want to position it in the center.

    Aperture Export Presets

    Once everything is set up to your liking, click OK, then click Export Versions. You may have to run a few tests to get everything the way you want. Once you do, you can watermark many images at once by batch exporting from Aperture. You can also set up different export presets for watermarks placed in different positions, such as lower left and lower right.

    I don't have to watermark often. But when I do, it's nice to have this set up ahead of time.

    More Aperture Tips and Techniques

    My next Aperture Workshop is May 23, 2011 in Santa Rosa, CA. write me if you're interested in attending.

    To learn more about Aperture 3, check out my Aperture 3 Essential Training on Lynda.com. Also, take a look at our Aperture 3 Learning Center. Tons of free content about how to get the most out of Aperture.


    twitter.jpg Follow me on Twitter

    There are very few plug-ins that I'd consider necessay. The editing tools in Aperture 3 and Lightroom 3 are so robust, that I can handle most of the things I need within those applications. But after working with Nik Software's Silver Efex Pro 2 for a few weeks, I've decided that this is my next "must have" enhancement.
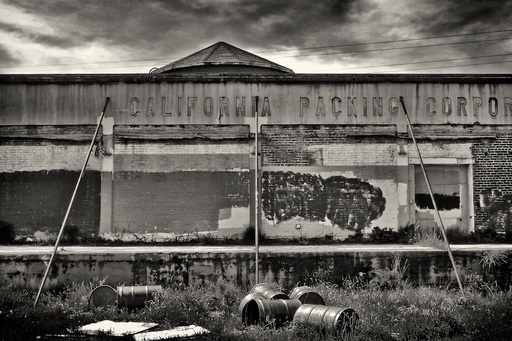
    Warehouse - Silver Efex Pro 2 Abandoned Warehouse: processed in Aperture 3 and finished with Silver Efex Pro 2 plug-in using global adjustments only. Photo by Derrick Story with an Olympus XZ-1. Click on image for larger version.

    Silver EFEX is a tool to convert your images to Black & White. Now you may be saying to yourself, "I know 10 ways to create a B&W photo." So do I. But none of them work as well at this plug-in. The whole reason I even paid attention to this app in the first place was because I saw images that looked great, and I wanted to know how they were created. Many of them with Silver Efex Pro 2.
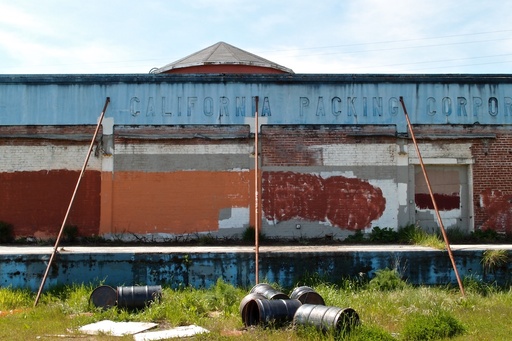
    Abandoned Warehouse - Original Image Original image captured in mid-day lighting. Click on image for larger version.

    New Features in Silver Efex 2

    This new version adds many important tools:

    • Refined and improved black and white conversion algorithms
    • Highlight, Midtone,and Shadow Brightness control
    • Dynamic Brightness control
    • Amplify Blacks and Amplify Whites controls
    • Soft Contrast control
    • Highlight, Midtone, and Shadow Structure control
    • Fine Structure control
    • Selective Colorization
    • Image Borders
    • History Browser
    • GPU Processing
    • Improved interface and interaction controls

    Most of the images I've worked on have only required the global controls. There are selective adjustments available, using control points, if you need them. I was surprised at how often I didn't. The basic workflow I use is relatively simple.
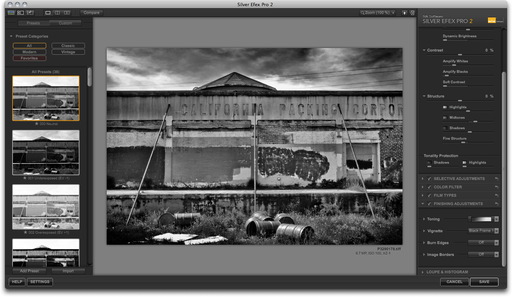
    Silver Efex Pro 2 Interface Silver Efex Pro 2 interface. Click on image for full size version.

    Basic Silver Efex 2 Workflow

    For this example, I'm using Aperture 3 as the host app. But the plug-in works with Aperture, Lightroom, and Photoshop. And you get compatibility for all three in the box.

    In Aperture, first I choose a color image, then I go to Photos > Edit with Plug-In > Silver Efex Pro 2. Aperture prepares the image for hand-off. Once the Silver Efex interface appears, make it full screen by pressing the "F" key.

    On the left side of the three-paned interface are the presets, with the "000 Neutral" selected at the top of the column. You can preview the other presets by clicking on them. This is helpful to get a feel for the possibilites of your photo. I usually return to Neutral, however, and start working the controls on the right side of the interface. This way, I get the exact look I want.

    Typically, the three basic global controls (Brightness, Contrast, and Structure) are collapsed. Click on the triangle next to their names to reveal more sliders. I also open the Loupe & Histogram window at the bottom of the right column, and click on Histogram. This graph is helpful when making tonal adjustments.

    Now begin working on the highlights, midtones, and shadows of your picture. Be sure to play with the new Dynamic Brightness slider. It brightens areas of the photo while protecting the darker tones.

    Next, I'll use the Amplify Whites and Amplify Blacks sliders to fine tune those areas. But the real killer slider here is the Soft Contrast control that adds mood by selectivly adding contrast in areas of the photo based on an intelligent alograithm.

    Then I move to Structure, which is similar to "Definition" in Aperture and "Clarity" in Lightroom. But with Silver Efex 2 you have four Structure sliders, one for each tonal area, plus Fine Structure. Fine Structure can increase detail, as in the building photo. Or, as in this portrait, I decreased Fine Structure to soften the skin tones.

    Now, I'll go back to the left column and click on the History Browser Icon. It's at the top of the column, third from the left. Then click on the Compare button. I generally use the Split Screen view to compare the work I've done with the original conversion. You can click anywhere in your "history" to compare that point in your work to the final product.

    Once I'm satisfied with my adjustments, I click the Save button, and Silver Efex 2 prepares a Tiff and returns it to Aperture. I "stack" the new Tiff and original image for convenience.

    The Bottom Line

    Nik Software's Silver Efex 2 runs smoothly on my MacBook Air and keeps me excited about Black & White photography. There are many more features than I've covered here, such as the image borders, film emulators, vignettes, and toners -- plenty to keep you occupied well into the wee hours of the night.

    You can see more images processed with this software on the TDS Flickr site.

    Update! Hunt's Photo and Video is offering Silver Efex Pro for $129, plus free shipping, and a free upgrade to Silver Efex Pro 2. While supplies last.


    twitter.jpg Follow me on Twitter


    By using B&W in a photo, you can help focus the viewer's eye to a particular area of the composition. In this shot for example, I like how the basketball player is flying above the rim. It's amazing really. But in the full color version, the colorful crowd was distracting, making it hard to isolate the player with the ball. I like the expressions in the crowd, but I want the viewer to look at those after focusing on the main subject.

    Flying Basketball Player After bouncing off a trampoline during the halftime show at Oracle Arena, this athlete soars high into the air then dunks the ball on his way down. Click on image for larger version.

    To help improve things, I converted the entire image to B&W in Aperture 3, then I used an adjustment brush to restore the color to just the player. To do this, go to the gear menu in the B&W brick, and choose, "Brush B&W away." It's very easy to do.

    You can also create this effect in Photoshop, but the thing I like about Aperture 3 is that I don't have to build a mask. The application does that for me. All I have to do is paint and I get the effect I want.

    More Aperture Tips and Techniques

    My next Aperture Workshop is May 23, 2011 in Santa Rosa, CA. write me if you're interested in attending.

    To learn more about Aperture 3, check out my Aperture 3 Essential Training on Lynda.com. Also, take a look at our Aperture 3 Learning Center. Tons of free content about how to get the most out of Aperture.


    twitter.jpg Follow me on Twitter

    default_title_slide.jpg

    Building movies in Aperture 3 that combine still images and video snippets is a great way to improve your presentations. There are two simple ways to add a title slide to the video.

    The first is the default method where you simply check the box next to "Show title" in the Default tab. Aperture will use the name you've given to the slideshow project and overlay it on the first image. If you want to adjust the font or color, click on the buttons to the right of the check box.

    insert_title_slide.jpg

    A second method, and the one I prefer, is to go to the gear menu and choose, "Insert Blank Slide With Text." Again you have font and color options, but now you're making your adjustments in the Selected Slides tab.

    You can create as many title slides as you want, and drag them to any point in the presentation. They're a handy tool for adding that professional touch to your work.

    More Aperture Tips and Techniques

    My next Aperture Workshop is May 23, 2011 in Santa Rosa, CA. write me if you're interested in attending.

    To learn more about Aperture 3, check out my Aperture 3 Essential Training on Lynda.com. Also, take a look at our Aperture 3 Learning Center. Tons of free content about how to get the most out of Aperture.


    twitter.jpg Follow me on Twitter

    One of the most creative tools I use in Aperture isn't in the Adjustments panel. It's Versions. I make virtual copies of a selected image, then I play with the different looks until I end up with something I like.

    Versions in Aperture Original image on far left, then using versions to work toward final image on far right. Click on image for larger view.

    The process is simple. Click on an image, then go to Photos > Duplicate Version. Even though the new image looks and behaves like a full copy of the original, it's only bits of metadata. You're adding virtually no file space to your hard drive.

    At this point, I like to put my versions in a Stack by selecting them and choosing Stack > Stacks or CMD-K. I think they are easier to manage this way. Then after some image play, I might create another version and do something else with it.

    Michaela B&W Final version of the photo using the Black and White adjustment brick in Aperture 3. Click on image for larger view.

    Once you have a version the way you like, you can move it to the top of the Stack (Stacks > Pick), then close the Stack by clicking on the little number icon in the upper right corner. You can open the Stack at any time for more play by clicking on the number icon again.

    More Aperture Tips and Techniques

    My next Aperture Workshop is May 23, 2011 in Santa Rosa, CA. write me if you're interested in attending.

    To learn more about Aperture 3, check out my Aperture 3 Essential Training on Lynda.com. Also, take a look at our Aperture 3 Learning Center. Tons of free content about how to get the most out of Aperture.


    twitter.jpg Follow me on Twitter

    I've created a step-by-step guide for laying out fine art note cards in Aperture 3 and printing them with your inkjet printer using Red River Paper stock. A few things have changed since I published the original article for laying out cards in Aperture, so I recommend that Aperture 3 users follow the settings in this article.

    The biggest difference that I encountered using Aperture 3.1 and Mac OS X 10.6.5 with an Epson R2400 printer, was that creating a "custom paper size" befuddled the printer causing it to do nothing. To work around this problem, I designed a new template in Aperture 3 that is based on a standard Letter Size sheet (8.5" x 11"). By doing this, you should be able to print these 7" x 10" cards (folded to 5" x 7") with just about any photo printer.

    Here are the steps I used:

    1. In Aperture, create a custom theme
    2. Turn on Show Layout Options
    3. Create a photo box 5.75" x 4.25" and place it like this
    4. Add a text box for the back of the card
    5. Place your type and rotate it 180 degrees
    6. You can choose a type style
    7. Be sure to turn off page numbering
    8. Now, all you have to do is print your card

    I recommend that you turn on Aperture's Proofing Profile (View > Proofing Profile) for the type of paper you're using. It saves you from having to make test prints. Speaking of paper, there are a variety of surfaces to choose from in the Red River Card Shop. You can get high quality envelopes there too. I generally use #7163 for my card projects.

    One finishing touch to consider is creating a handsomely designed 4"x6" insert for your note card. I print these in iPhoto '11 using one of the flat card templates. They look great!

    More Aperture Tips and Techniques

    To learn more about Aperture 3, check out my Aperture 3 Essential Training on Lynda.com. Also, take a look at our Aperture 3 Learning Center. Tons of free content about how to get the most out of Aperture.


    twitter.jpg Follow me on Twitter


    aperture_icon_desktop.jpg

    After just a day of testing, there seems to be many benefits to the Mac OS X 10.6.5 update, including Raw file support for 10 new cameras:

    • Canon EOS 60D
    • Canon PowerShot S95
    • Hasselblad H4D-40
    • Nikon D3100
    • Panasonic Lumix DMC-LX5
    • Sony DSLR-A290
    • Sony DSLR-A560
    • Sony DSLR-A580
    • Sony SLT-A33
    • Sony SLT-A55

    You can see the complete list of supported cameras here.

    Improved Export Speed in Aperture 3.1

    But there's another bonus performance update that you might not have found yet. Thanks to Core Image enhancement under the hood, exporting images in Aperture 3.1 has improved also. This is welcome relief, indeed.

    I tested this by editing sample "referenced" Raw files from a Canon S90 and 5D Mark II on a MacBook Pro 17" 2.5 GHz with 4 GBs Ram. I worked on one set of images with Mac OS X 10.6.4, then performed the same test on similar images (captured in burst mode) in Mac OS X 10.6.5. I applied these adjustments to all images before exporting them as full size Jpegs: Color, Levels, Crop, Vibrancy, Shadows, Recovery, Definition, and Edge Sharpen. I was very careful to make sure that all processing had completed before I initiated export. There were no other apps running during this test.

    Mac OS X 10.6.4 with Aperture 3.1

    Canon S90 .CR2 export to Jpeg --> 13.6 seconds
    Canon 5D Mark II .CR2 export to Jpeg --> 30.2 seconds

    Mac OS X 10.6.5 with Aperture 3.1

    Canon S90 .CR2 export to Jpeg --> 7.3 seconds
    Canon 5D Mark II .CR2 export to Jpeg --> 11.4 seconds

    Since I had a number of burst mode shots in each series, I performed the test on four different images with each version of the operating system, then averaged the numbers.

    So, if you run Aperture, make sure you've updated the app to 3.1 and OS X to 10.5.6. You'll get new Raw profiles plus a nice little performance boost too.

    More Aperture Tips and Techniques

    To learn more about Aperture 3, check out my Aperture 3 Essential Training on Lynda.com. Also, take a look at our Aperture 3 Focus Section. Tons of free content about how to get the most out of Aperture.


    twitter.jpg Follow me on Twitter


    A big part of my assignment here at photokina is to create and publish short videos for Lowepro. My basic rig is the Canon EOS 5D Mark II with the EF 24-105mm f/4 L IS zoom lens and an external lapel mic. With this setup, I can record good video on the noisy, artificially lit, trade floor at photokina. Here's an example. This is a guided tour of the Lowepro Pro Roller Attache x50 narrated by Tim Grimmer.


    I used an 77mm ExpoDisc to fine tune the color using the Custom White Balance setting on the 5D Mark II. With video, it really helps minimize post production by getting the sound and color right at capture. Then I can upload the content, along with the stills into Aperture for trimming and assembly.

    As you can see from the illustration, this short production consists of two still photos and the HD video clip. Very simple. But often simple is good for YouTube productions, especially if they are clean.


    aperture3_video_editing.jpg Video production in Aperture 3. Click on image for full size version.


    I then export a 720p HD version directly out of Aperture and upload to YouTube. Streamlining this workflow allows me to get the sleep I need to be strong the next day, yet produce the content quickly.

    And BTW... photokina is a blast!

    More Aperture Tips and Techniques

    To learn more about Aperture 3, check out my Aperture 3 Essential Training on Lynda.com. Also, take a look at our Aperture 3 Learning Center. Tons of free content about how to get the most out of Aperture.


    twitter.jpg Follow me on Twitter

    Music and audio add presence to our slideshows and movies. The combination of ambient sound, such as waves lapping up on a beach, and a soundtrack, such as a guitar solo, transforms our pictures into experiences.

    Aperture provides two methods for managing these audio tracks, and I want to review them quickly so you can take full advantage of what this application offers for movie making.

    Aperture Soundtracks Two types of soundtracks: Top -- "Secondary Audio Track," which is editable, and Bottom -- Main Audio Track, which has other advantages.

    There are two types of audio tracks for Aperture multimedia presentations: Main Audio Track, and the Secondary Audio Track. Each has their advantages, and I often use them together in my presentations.

    The Main Audio Track is the simplest to use. Click on the "Display Audio Browser" icon in the Aperture interface (music note image) and select a song from your iTunes library. Drag it to the background of your slideshow timeline, and it converts to green (as shown in the bottom image). You can't edit this soundtrack, per se, but you can do two very important things: "Fit Slides to Main Audio Track," and "Align Slides to Beats." Both options are found in the gear popup menu on the toolbar.

    I particularly like "Align Slides to Beats." You can see that I used it in the illustration above. The slides range from 3.9 to 4.1 seconds as Aperture keeps your images and music in sync. Try it, I think you'll like the results.

    If your show goes longer than the song you chose for it, you can add a Secondary Audio Track. This time, when you drag the audio from the browser, drag it to the bottom of the particular slide where you want the track to begin, as show in the top illustration. Unfortunately you can't use "Align Slides to Beats" with secondary tracks, but you can control their length by clicking on the end of the track and dragging.

    You have other options too. Click on the track to highlight it, then choose "Adjust Audio" from the gear menu. You have some useful volume and fade controls available. These are particulary helpful when both soundtracks overlap, and you want to control their respective volumes. (Yes, Adjust Audio is available for the Main track too.)

    With just a little fiddling around with these controls, you can raise the level of your presentation to professional heights.

    More Aperture Tips and Techniques

    To learn more about Aperture 3, check out my Aperture 3 Essential Training on Lynda.com. Also, take a look at our Aperture 3 Learning Center. Tons of free content about how to get the most out of Aperture.


    twitter.jpg Follow me on Twitter

    Aperture 3's slideshow authoring tool allows photographers to mix stills and video to create dynamic presentations. You can playback at full screen in Aperture to share with clients, friends, and family.

    Typically, however, we need to move those presentations off our computer to other devices, such as an iPad, or to YouTube and other online sharing sites. Maintaining that high quality during the export process can be tricky. And if you're not mindful, you might be disappointed with the results.

    Aperture Export Presets The Export dialog box in Aperture 3. You can go with one of these presets, but you may not like the final output.

    In Slideshow mode, when you click the Export button in the upper right corner of the Aperture interface, Apple provides you with a handful of presets for various devices such at the iPod, iPhone, Apple TV, YouTube, 720p, 1080p, and Custom. The first thing iPad users will notice is there's no preset for them. You might be tempted to choose the 720p preset, but unfortunately that preset doesn't work on the iPad. iTunes won't let you copy the movie to the iPad. Plus you're stuck with 30 fps for your frame rate, witch is a bummer if you captured your video in beautiful 24 fps.

    You could go to the next preset up, "MobileMe/YouTube" for standard definition output (640x360 at 30 fps). But I can tell you right now, you probably won't like the results on an iPad, or even YouTube for that matter. The audio will sound fine, but my images were consistently soft.

    I decided to go back to the drawing board to see what kind of vido output I could squeeze out of Aperture. After a few adjustments, I was able to improve my results substantially, but it required a three additional steps. Here's what I did:

    • Create higher quality previews. Since I do use some Ken Burns effect in my shows, I decided that my default 1920x1920 previews might be compromising quality. Aperture uses your previews to create its slideshows. So I changed the Photo Preview (Preferences > Previews) to 2560x2560 at 9 quality. I then had to regenerate those previews at the new settings so Aperture could use them. I selected all of the thumbnails in my presentation, held down the Option key, and chose Photos > Generate Preview. This took a while for Aperture to regenerate the higher quality previews, so I took a break while the computer churned away.
    • Export Using the Custom Setting. My goal was to create a high quality master file at the frame rate I wanted. To do that, I needed to select Custom under the preset menu. I used H.264, 24 fps (to match the video in my presentation) at 1920x1080. Label this file "master" for both playback on your computer, but also for creating smaller versions for other devices.
    • Now Create Your iPad Version Using QuickTime 7. QuickTime 7 is in your Utilities folder. It gives you more flexibility for exporting than the QuickTime Player that is the default for Snow Leopard. After the movie is open, go to File > Export and choose Movie to QuickTime Movie from the popup menu. Click the Options button and make these selections -- Compression: H.264, Quality: High, Frame Rate: (your choice, I use 24 fps), Encoding Mode: Multi-Pass, Dimensions: 640x480 (or what ever you want), and Scale: Letterbox. For Sound, just make sure you go with AAC at whatever settings you want.

    All of these steps take time to process, so make sure you have other tasks lined up to do elsewhere. Once your new movie is rendered, copy it to iTunes or upload to its online destination. On my iPad, I have both versions of the same movie: the Aperture preset for "MobileMe" and my multi-step version. The quality of my version is about twice as good.

    More Aperture Tips and Techniques

    To learn more about Aperture 3, check out my Aperture 3 Essential Training on Lynda.com. Also, take a look at our Aperture 3 Learning Center. Tons of free content about how to get the most out of Aperture.


    twitter.jpg Follow me on Twitter

    Quick Brushes in Aperture 3

    Quick Brushes are a great addition to Aperture 3. They are located in the Adjustments popup menu, inside the Adjustments tab. Quick Brushes are exactly that, when you want to make a specific adjustment... quickly!

    Some of my favorites include: Skin Smoothing, Polarize, Sharpen, and Definition. Being able to apply these types of adjustments to a specific area of the image without having to worry about creating masks is a wonderful enhancement to the post production workflow.

    In this 7-minute video, I walk you through a typical Quick Brush scenario. You can see a larger version of the movie (better for this type of tutorial) by clicking through to YouTube or going to the Lynda.com Podcast page.

    More Aperture Tips and Techniques

    To learn more about Aperture 3, check out my Aperture 3 Essential Training on Lynda.com. Also, take a look at our Aperture 3 Learning Center. Tons of free content about how to get the most out of Aperture.


    twitter.jpg Follow me on Twitter

    aperture_icon.png

    At the start of 2010, I switched from the Managed File approach in Aperture to Referenced Files. I think both systems are good. It depends on your particular situation as to which is best for you.

    But, regardless of your choice, be sure to use the wonderful incremental backup system built into Aperture called the Vault. It's a simple one-click tool that saves all of your work to a separate hard drive. If you're using the Managed File approach, the Vault backs up your masters too. Referenced File users must back up masters separately. Either way, one thing I've discovered is: the work that I do to organize, edit, and add metadata to my images is as valuable to me as the pictures themselves.

    During my week of coping with my Drobo problems, the bright spot was how I had previously organized my files and having the Vault to put everything back together on a separate drive.

    In short, I moved my 2010 Referenced File structure to a hard drive that had an up-to-date 2010 Vault on it. I enabled a Vault Recovery on the drive, and in just a few minutes, Aperture put everything back together for me. All of my work was there, all of the Referenced Files were reconnected, and I was back in business.

    Moral of the story for me is: the Aperture Vault is invaluable, regardless of which library system I'm using.

    More Aperture Tips and Techniques

    To learn more about Aperture 3, check out my Aperture 3 Essential Training on Lynda.com. Also, take a look at our Aperture 3 Learning Center. Tons of free content about how to get the most out of Aperture.


    twitter.jpg Follow me on Twitter


    Ever wonder which focus point your camera used on a particular shot? (Especially a photo where you thought the focus should be somewhere else.) In this short video I demonstrate how Aperture 3 can show you what your camera was thinking when it recorded a particular image. This works with most DSLRs that capture the focus metadata and save it. Take a look. It's handy.

    More Aperture Tips and Techniques

    To learn more about Aperture 3, check out my Aperture 3 Essential Training on Lynda.com. Also, take a look at our Aperture 3 Learning Center. Tons of free content about how to get the most out of Aperture.


    twitter.jpg Follow me on Twitter


    Turning on "highlight hot and cold areas" can help you fine tune exposure adjustments when putting the finishing touches on your pictures. In this 2 minute video, I show you how to use this technique effectively.

    More Aperture Tips and Techniques

    To learn more about Aperture 3, check out my Aperture 3 Essential Training on Lynda.com. Also, take a look at our Aperture 3 Learning Center. Tons of free content about how to get the most out of Aperture.


    twitter.jpg Follow me on Twitter


    The Heads Up Displays, often referred to as the HUDs, are some of the application's most distinctive features. By taking just a few minutes to learn their essential keystrokes and capabilities, you can speed up your workflow considerably.

    In this 2:34 movie, I cover the Inspector, Keywords, and Lift and Stamp Heads Up Displays.


    More Aperture Tips and Techniques

    To learn more about Aperture 3, check out my Aperture 3 Essential Training on Lynda.com. Also, take a look at our Aperture 3 Learning Center. Tons of free content about how to get the most out of Aperture.


    twitter.jpg Follow me on Twitter


    What do you do when your referenced masters need to be moved to a different hard drive to maintain the functionality of your Aperture 3 library? At first this may seem like a daunting task, but with a little luck, the process will be easy and painless. I'll explain in this article.

    Reconnecting Masters in Aperture 3 Click on image for enlarged view.

    I could tell something was amiss with my LaCie Rugged hard drive that contained the master Raw files for my Aperture library. Suddenly it started auto-disconnecting from the computer, even though the cable was intact. I switch from FireWire to USB (Ruggeds have triple interfaces), and at first that seemed to make it happy. But soon the odd behavior resumed. As I've learned in the past, when a hard drive begins to act up, you must move quickly.

    I began the process of moving my nicely organized master files for my Aperture 3 library to a fresh drive. This took a few days to accomplish because the beleaguered drive keep conking out before I could finish the transition. But finally they were all there. Even though the file structure on the new drive, including the name for the drive itself, was identical to the ailing hard drive it was replacing, Aperture showed "missing masters" for all of my referenced files.

    Fortunately, I could use the "Locate Referenced Files" command (under the File menu) to reestablish those connections. The process is simple:

    Steps to Reconnect Master Files

    • Click on the Photos icon in the Library tab of the Aperture Inspector.

    • Click on one thumbnail, then choose Select All from the Edit menu.
    • Go to Locate Referenced Files under the File menu.
    • Establish one photo match between the top and bottom pane of the interface (as shown in the illustration). The top pane is your Aperture library. The bottom pane is the new hard drive with the master files.
    • Click on the Reconnect All button.
    • Take a short coffee break

    When you return, all of your referenced master files will have been reunited with their counterparts in the Aperture library. At this point, I would also create a new Vault and back up your work.

    More Aperture Tips and Techniques

    To learn more about Aperture 3, check out my Aperture 3 Essential Training on Lynda.com. Also, take a look at our Aperture 3 Focus Section. Tons of free content about how to get the most out of Aperture.


    twitter.jpg Follow me on Twitter

    -


    The magnification loupe in Aperture is more versatile than you may realize. In this short video, I show you a few of its tricks.

    This video tutorial is from my Aperture 3 Essential Training on Lynda.com. There are more than 8 hours of hands on training there. Go check it out!

    More Aperture Tips and Techniques

    To learn more about Aperture 3, check out my Aperture 3 Essential Training on Lynda.com. Also, take a look at our Aperture 3 Learning Center. Tons of free content about how to get the most out of Aperture.


    twitter.jpg Follow me on Twitter

    Working in full screen mode enables you to dedicate every pixel of display resolution to your photography. Aperture 3 includes many major improvements to this functionality, so many in fact, that you may not be taking full advantage of its capabilities.

    In this free 5-minute video tutorial from my Aperture 3 Essential Training on Lynda.com, I show you how to quickly master full screen mode to work more efficiently, and, more enjoyable.

    More Aperture Tips and Techniques

    To learn more about Aperture 3, check out my Aperture 3 Essential Training on Lynda.com. Also, take a look at our Aperture 3 Focus Section. Tons of free content about how to get the most out of Aperture.


    twitter.jpg Follow me on Twitter

    There is a fast and easy way to add captions to your images in Aperture 3. And I show you how in this video tutorial that's also part of my Aperture 3 Essential Training on Lynda.com.

    I think the best time to add captions is right after you upload the images. That way the information that accompanies the images is still fresh in your mind.

    More Aperture Tips and Techniques

    To learn more about Aperture 3, check out my Aperture 3 Essential Training on Lynda.com. Also, take a look at our Aperture 3 Focus Section. Tons of free content about how to get the most out of Aperture.


    twitter.jpg Follow me on Twitter

    Aperture 3 not only lets you integrate your still images and movies into professional looking presentations, it also allows you to export your work to a variety of video formats. In this video tutorial from my Aperture 3 Essential Training on Lynda.com, I show you how powerful slideshow authoring is in Aperture.

    More Aperture Tips and Techniques

    To learn more about Aperture 3, check out my Aperture 3 Essential Training on Lynda.com. Also, take a look at our Aperture 3 Focus Section. Tons of free content about how to get the most out of Aperture.


    twitter.jpg Follow me on Twitter

    One of the few times I once had to leave Aperture for Photoshop was to retouch portraits. Well, no more! Thanks to the new Skin Smoothing Quick Brush (along with the existing Retouch brush), I can take care of simple retouching right here in Aperture 3. And I show you how in this video tutorial that's also part of my Aperture 3 Essential Training on Lynda.com.

    The big advantage to not having to roundtrip to Photoshop from Aperture is file size management. All of the adjustments you saw in the video are just kilobytes of metadata. If I were to roundtrip, then the file that comes back from Photoshop is many times bigger than the original Raw file we worked on.
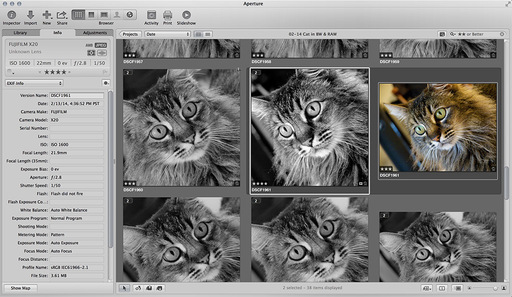
    More Aperture Tips and Techniques

    To learn more about Aperture 3, check out my Aperture 3 Essential Training on Lynda.com. Also, take a look at our Aperture 3 Focus Section. Tons of free content about how to get the most out of Aperture.


    twitter.jpg Follow me on Twitter


    The addition of Curves adjustment to Aperture 3 gives us powerful tonal and color correction. In this 9:00 minute video that's part of my Aperture 3 Essential Training on Lynda.com, I show you how to get started with Curves in Aperture 3.

    More Aperture Tips and Techniques

    To learn more about Aperture 3, check out my Aperture 3 Essential Training on Lynda.com. Also, take a look at our Aperture 3 Focus Section. Tons of free content about how to get the most out of Aperture.


    twitter.jpg Follow me on Twitter


    In a recent article for Macworld Magazine titled How to move from iPhoto '09 to Aperture 3, I describe how to easily transition your images and work from an iPhoto library to Aperture 3. And because the two applications talk to each other so well, you even have the option of sharing the same library of images with both. If you use iPhoto now, I encourage you to read the tutorial.

    iPhoto 09 and Aperture 3 Libraries after Import to Aperture

    Comparison of iPhoto 09 and Aperture 3 libraries after import from iPhoto to Aperture. Click on image for larger view.

    OK, But the Real Question Is...

    As often the case, showing someone how to do something invariably brings up the question: "But why should I do this in the first place?" It's a good question.

    The answer depends on what you need to do with your photographs after you click the shutter. If you're a casual shooter who captures less than a thousand images a year, and shares them primarily through email, Flickr, or the occasional slideshow, then iPhoto is a good application for you. It's easy to understand, has the basic tools your need, and it is included on your Mac when you buy it.

    But if you consider yourself an amateur or pro photographer, iPhoto has some real shortcomings. One area that I find particularly frustrating is how it handles metadata. I can't add standard IPTC fields such as author, copyright, etc. And keywording is less than robust. I also think image editing in iPhoto is just too limited for most passionate photographers. Yes, you get the basic tools, but really, anything beyond simple luminance and color adjustments just isn't there. And finally, iPhoto lacks the "Project based system" of organization that's the heart of Aperture 3. Having these flexible containers to organize your work is important for people who take a lot of photos.

    This is not a knock on iPhoto. It does what it does well. But if you're getting better at your photography and want to see how far you can take your work, Aperture 3 is a better tool. You have control over your metadata, your image editing, organization, and output. For many photographers, the tools inside of Aperture are all they need. And most shooters don't even leverage the totality of what's available.

    Here's the thing though: you're going to need a current Mac with a good graphics card and 4 GBs or RAM, plus at least one external hard drive if you're going to have a good Aperture experience. I'm using a 17" 2.5 GHz Intel Core 2 Duo MacBook Pro with 4 GBs of RAM, and doing just fine with Aperture 3. Don't even try this with an early generation Intel MacBook with 2 GBs or RAM. You'll hate what happens.

    The bottom line is, if you're feeling the limitations of iPhoto, and you like Apple's approach to software, then I would consider the upgrade to Aperture 3. It will give you the tools you need to take your photography to the next level.

    PS: You may wonder why I didn't include Lightroom 3, Photoshop CS5, or other terrific software in this post. The main reason is, I'm talking about moving from iPhoto to the next level. In that case, Aperture is my recommendation. Other scenarios may lead to different applications.

    More Aperture Tips and Techniques

    To learn more about Aperture 3, check out my Aperture 3 Essential Training on Lynda.com. Also, take a look at our Aperture 3 Focus Section. Tons of free content about how to get the most out of Aperture.


    twitter.jpg Follow me on Twitter


    "Show Focus Points" in Aperture 3

    Aperture 3 has a nifty feature that allows you to enable an overlay that shows focus points used by the camera when recording the picture. It also highlights which point was active. Granted, this feature could be viewed as a novelty, but I do find myself checking it.

    Focus Points in Aperture 3

    Click on image to see full size version.

    In this shot, for example, I see all the focus points for the Canon 5D Mark II with the center point outlined in red. That was the point that I used for focusing. What you don't see, however, is where I directed that point when I composed the shot. The overlay pattern is always in the same place, as it appears when I look through the camera's viewfinder. Since I often use focus lock, then recompose, the overlay doesn't show me the actual object that I focused on.
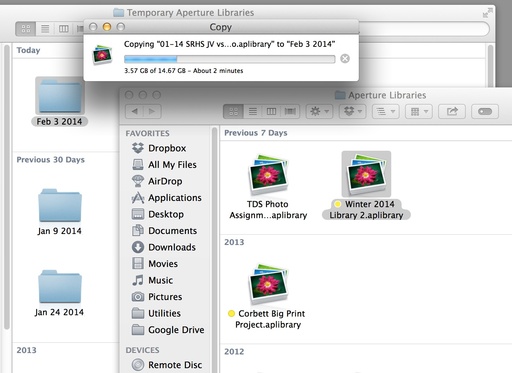
    In order for this to work at all, your camera needs to save the autofocus metadata to EXIF, and of course, it has to be compatible with Aperture 3. I've also learned through testing, that if you use the referenced file approach for library management, your masters have to be available to activate the focus points overlay.

    To enable this feature, just go to View > Show Focus Points, or click on the icon in the metadata inspector (as illustrated in the photo). The keyboard shortcut is Option-F.

    I think Show Focus Points is most handy when you're trying to analyze what went wrong in a misfocused shot. If your subject is on the right, and the red focus point is on the left... well, that might be a clue.

    More Aperture Tips and Techniques

    To learn more about Aperture 3, check out my Aperture 3 Essential Training on Lynda.com. Also, take a look at our Aperture 3 Focus Section. Tons of free content about how to get the most out of Aperture.
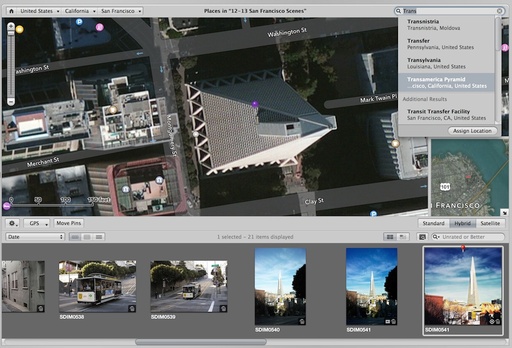

    twitter.jpg Follow me on Twitter


    auto_curves_buttons.jpg

    When Apple added the Curves adjustment brick to Aperture 3, they pulled out all of the stops. In addition to the typical "set a point and drag it" curves dialog, there are two Auto adjustments -- Auto Curves Combined (left button) and Auto Curves Separate (right button). "Combined" makes an auto adjustment based on total luminance without affecting color. "Separate," the flavor that interests me more, also corrects color because Aperture individually evaluates and sets curves for each channel: red, green, and blue. You can see a before and after on the images below (click to enlarge).

    Before Curves Adjustment

    Master file before Auto Curves Separate adjustment in Aperture 3

    Auto Curves Separate Adjustment

    Image after Auto Curves Separate adjustment in Aperture 3

    For my tastes, I get the best results from this useful tool by going to the Advanced tab in Aperture 3 Preferences, and setting the "Auto adjust Black Clip" and "Auto adjust White Clip" to 0%.

    aperture_preferences.jpg

    This prevents overly contrasty auto adjustments that have to be manually corrected later. I'm not implying that Auto Curves Separate is always the final solution. But for many images, it's the only global exposure and color correction you many need. It's worth a close look.
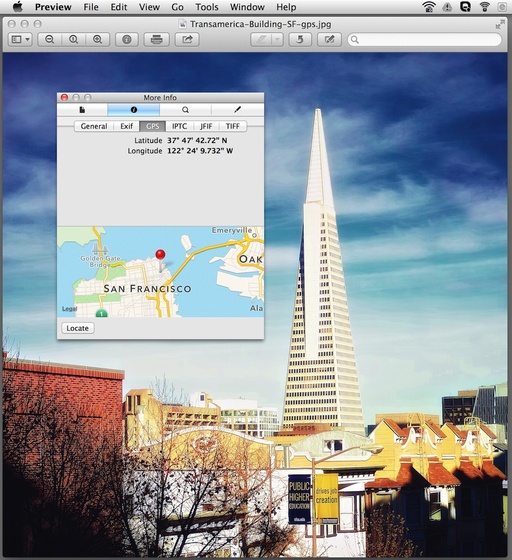
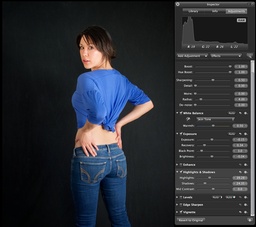
    More Aperture Tips and Techniques

    To learn more about Aperture 3, check out my Aperture 3 Essential Training on Lynda.com. Also, take a look at our Aperture 3 Focus Section. Tons of free content about how to get the most out of Aperture.
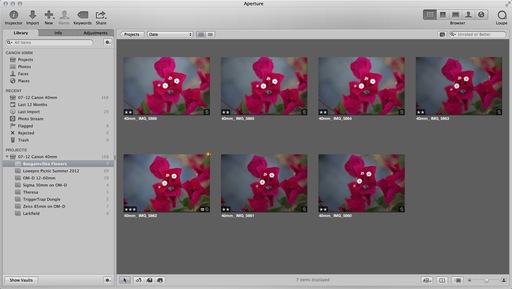

    twitter.jpg Follow me on Twitter


    There are many reasons why I shoot full size HD video with my Canon 5D Mark II, even if the intended output is for YouTube or another web service. Just like in still photography, I like to have a high resolution master that I can go back to if another opportunity presents itself, such as making a DVD.

    A second reason, and one that I don't think many photographers take advantage of, is the ability to grab a single frame from the video and use it as a still photograph. When you shoot 1080p HD video, those frame grabs are 1920x1080, or the equivalent of a 2-megapixel photograph. And they look great.

    The technique is easy, depending on the software you're using. In Aperture 3, all you have to do is scrub to the frame you want. Click on the gear menu, and choose "New Jpeg from Frame."

    Still Frame Grab in Aperture 3

    Aperture creates the image and brings it forward in the browser. At that point, I recommend clicking on the Metadata tab in the Inspector and giving your frame grab a unique file name. Otherwise, it can be confusing while you're browsing thumbnails as to which are movies and which are stills.

    These high quality photos can be used for web pages, Flickr galleries, and even 4x6 prints. And capturing the decisive moment is easy... just scrub to it!

    More Aperture Tips and Techniques

    To learn more about Aperture 3, check out my Aperture 3 Essential Training on Lynda.com. Also, take a look at our Aperture 3 Focus Section. Tons of free content about how to get the most out of Aperture.
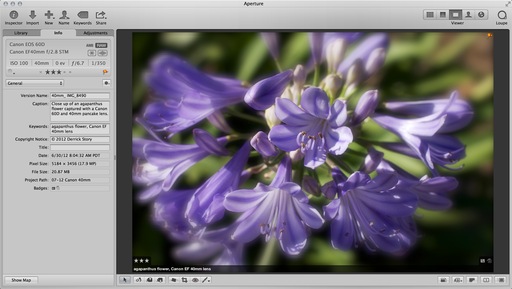

    twitter.jpg Follow me on Twitter


    Happy to see that PictureCode has updated their excellent Noise Ninja plug-in for Aperture 3 that runs in 64-bit mode.

    Noise Ninja 64-bit for Aperture 3

    I just downloaded and tested Noise Ninja 2.0.7, and the entire process went quickly and smoothly. Once you install it, just relaunch Aperture 3 and the new version will appear in your "Edit With" menu. Simple and works great. One down, a few more to go!

    More Aperture Tips and Techniques

    To learn more about Aperture 3, check out my Aperture 3 Essential Training on Lynda.com. Also, take a look at our Aperture 3 Focus Section. Tons of free content about how to get the most out of Aperture.


    twitter.jpg Follow me on Twitter


    In my previous post, Aperture 3.0.1 Fixes a Lot, but Not All, I raised the issue that the IPTC metadata I was entering in Aperture 3 was not appearing in the Photoshop CS4 "File Info" box after export from Aperture. Initially, I thought this was a bug in Aperture.

    But after a little digging, I discovered that Bridge CS4 was displaying my metadata properly. What gives? Why would Bridge show it and Photoshop not?

    It appears that we're in the middle of a standards transition. Looks like Aperture 3 is embracing the current specification, as is Bridge CS4. Photoshop CS4 seems to be following an older approach to displaying metadata.

    Now if you're feeling the urge to get riled up and start pointing fingers, please stay calm. The point of this post is to show Aperture 3 users an easy way to have their metadata appear correctly in Photoshop CS4. Let's start with how I entered the IPTC metadata in Aperture 3 using a custom template (click on image to enlarge view):

    Data in Aperture 3

    If you haven't created a custom metadata template in Aperture 3, it's easy. Just choose "Edit" from the popup metadata menu in the Metadata view.

    I then exported a Jpeg as I normally would. But instead of opening it directly in Photoshop, I opened it in Bridge CS4 first. Nearly all of my IPTC data is there. Great! If I want this same data to appear in Photoshop, all I have to do is edit any of the fields. A one character edit will work, but I filled in the missing "Copyright Info URL" field. Then click on any other thumbnail, and Bridge will ask you if you want the metadata updated for the picture you were perviously viewing. Yes you do! So, click "Apply."

    bridge_metadata.jpg

    You're done! The metadata for the image has been updated with your Aperture IPTC fields. If you want to check your work, open the image in Photoshop, then go to File > File Info (click on image to enlarge):

    Metadata Appears in Photoshop CS4

    Yes, this is a workaround that involves an extra step. But it's easier than having to reenter all of your metadata in Photoshop. And it keeps your information consistent.

    The bottom line is that Aperture 3 is exporting your metadata. And as other applications update to the current standards, this workaround should soon go away.

    More Aperture Tips and Techniques

    To learn more about Aperture 3, check out my Aperture 3 Essential Training on Lynda.com. Also, take a look at our Aperture 3 Focus Section. Tons of free content about how to get the most out of Aperture.


    twitter.jpg Follow me on Twitter


    Aperture 3.0.1 Fixes a Lot, but Not All

    Aperture 3 users can download the 3.0.1 update that improves 15 called-out features including: upgrading older libraries, importing photos, memory management, face recognition processing, roundtripping, accessing libraries on a network volume, Places, and more. A lot of stuff! But it still doesn't address a couple of things on my list. One complaint I have is that exporting is slower on my MBP 2.5 GHz than it was before. But the problem that drives me crazy is that my IPTC metadata doesn't display properly in Photoshop after an export from Aperture.

    Here's the metadata that I entered in Aperture 3.0.1 (click on picture to enlarge):

    Metadata Entered into Aperture 3.1

    And here's what is displayed in Photoshop CS4 after I've exported from Aperture with the metadata box checked: (click to enlarge):

    No Metadata in Photoshop CS4

    Notice all of the blank fields...

    So I'm happy to see an Aperture 3 update so quickly after its release. And I'm looking forward to future updates that will smooth things out even more... especially the metadata export.

    More Aperture Tips and Techniques

    To learn more about Aperture 3, check out my Aperture 3 Essential Training on Lynda.com. Also, take a look at our Aperture 3 Focus Section. Tons of free content about how to get the most out of Aperture.


    twitter.jpg Follow me on Twitter

    -


    As a Canon S90 shooter, I was thrilled to see this top notch compact listed in Aperture 3's Raw support list. I did a few preliminary tests, and I liked what I saw in Aperture. But then I started to wonder: How does Aperture's Raw processing compare to Canon's Digital Photo Professional? After all, there's lots going on behind the scenes here, including lens correction.


    Top image processed in Aperture 3, bottom picture in Canon's Digital Photo Professional. Click on image to enlarge.


    You may recall that I ran a similar test comparing DPP processing to ACR 5.6. In this current test, I tried to take advantage of the unique tools in each application to create the best image possible. I didn't add any sharpening after sampling down, as I normally would, because I wanted to keep the playing field level.

    This shot was captured handheld at 28mm, f/5.6, ISO 100. I recorded the photo in Sparks, NV.

    Aperture 3 Processing

    The top image is processed in Aperture 3. I used the standard Aperture 3 Raw profile for the S90. I then used the following adjustments: Definition, Vibrancy, Levels, Edge Sharpen, and Vignette. You'll notice some distortion in the shot, best illustrated by the orange poll on the left side. Overall, I really liked how Aperture processed this image. It would be nice to have a tool to adjust the distortion in Aperture, but easier asked than programmed, right?

    DPP Processing

    The second image was processed in Canon's Digital Photo Professional. There aren't as many luminance and color controls as in Aperture, but I did have the Lens Aberration Correction control to counter some of the distortion in the image. Interestingly enough, DPP did not correct the distortion as part of the standard Raw processing. I had to enable the Aberration Correction control to straighten out the pole. And it was a bit odd having the Distortion slider hidden behind the Tune button for Aberration Correction. It does work nicely, however.

    Bottom Line

    Overall, I really like having all of the various image tools that are available in Aperture 3. But for certain S90 photos that require distortion control, I'll probably open them in DPP first, correct them, then save out as a Tiff for finishing off in Aperture 3 or Photoshop CS4. For everything else, however, I'm going to stick with Aperture 3.

    More Aperture Tips and Techniques

    To learn more about Aperture 3, check out my Aperture 3 Essential Training on Lynda.com. Also, take a look at our Aperture 3 Focus Section. Tons of free content about how to get the most out of Aperture.

    More Articles About the Canon S90

    Five Lesser Known (but very cool) Features on the Canon S90

    Canon S90 Raw Processing Comparison: DPP vs ACR 5.6 RC

    DigiScoping Pro Basketball with the Canon S90

    Did Canon Really Improve Image Noise with the PowerShot S90?

    "Compacts for Serious Shooters" - Digital Photography Podcast 201

    Is the Canon S90 the New G11?


    twitter.jpg Follow me on Twitter

    -


    Photoshop Is My Aperture 3 Video Editor

    cs4_video_adj.jpg

    Yes you can trim video in Aperture 3, but that's about it. What I needed was a tool for color and luminance adjustments. First I tried roundtripping to iMovie. Quite honestly, that was a disaster. Let's just say that I don't think Aperture and iMovie should see each other any more. I tried to apply filters on export in QuickTime 7. Just too clunky. I even explored some of the free video editors on the Web. Now I know why they are free.

    Then it dawned on me. I have Photoshop CS4... Extended. Up until now, having the Extended version didn't mean much to me. I'm not a scientist and I haven't delved into 3D yet. But I can import video, add adjustment layers to it, then render it out using the standard QuickTime export dialog box. This is exactly what I needed.

    You can pick any frame in your video to view while you make your adjustments. I worked in layers, just as I would normally. But you don't have to. Then simply go to File > Export > Render Video, and save out the adjusted version. Your entire movie will have the luminance and color correction applied.

    I still haven't perfected my workflow for managing videos in Aperture 3. Now that I have Photoshop CS4 for adjusting the movies, I might work like this:

    • Download video from camera to external hard drive that I use for all of my referenced files.
    • If they don't need any luminance or color adjustments, import them into Aperture as referenced files.
    • If they do need adjustment, correct in Photoshop CS4, render out, then import the corrected movies into Aperture 3 as referenced files.
    • Apply metadata, organize, etc. in Aperture 3.

    At that point, I would probably copy the uncorrected master movies on to my Drobo and remove them from my referenced hard drive. I'm sure I'll tweak this workflow some more. But for now, I have deadlines to meet.

    You might be wondering if you can roundtrip to Photoshop CS4 by choosing it for videos in your Aperture 3 preferences. Well, yes and no. Aperture does send the video to Photoshop and it opens correctly. But, you can't use the Save command to roundtrip back. So you have to Export > Render and new file anyway. So, in my opinion, this workflow isn't ready for primetime yet. And from what I've read, you can use Photoshop CS3 Extended for this, but you can't listen to the audio. But it's still preserved.

    All of that being said, I am thrilled to have a way to adjust my videos while still using Aperture 3 as the manager. I'll report more as I discover it.

    More Aperture Tips and Techniques

    To learn more about Aperture 3, check out my Aperture 3 Essential Training on Lynda.com. Also, take a look at our Aperture 3 Focus Section. Tons of free content about how to get the most out of Aperture.


    twitter.jpg Follow me on Twitter

    -


    After 2 years of waiting, we have Aperture 3. And it's beautiful! In this podcast I cover the highlights of this new release, then have 10 tips to help you get started.

    Listen to the Podcast

    You can also download the podcast here (30 minutes). Or better yet, subscribe to the podcast in iTunes.

    More Aperture Tips and Techniques

    To learn more about Aperture 3, check out my Aperture 3 Essential Training on Lynda.com. Also, take a look at our Aperture 3 Focus Section. Tons of free content about how to get the most out of Aperture.

    Monthly Photo Assignment

    Red is the Feb. 2010 Photo Assignment. You can read more about how to submit on our Member Participation page. Deadline for entry is Feb. 28, 2010.

    TDS Workshops Update

    The TDS Hot Air Balloon Photography Workshop in June 2010 has lost its hot air. The organizers cancelled the event for this year. Ack! So I'm working on a different event in the same time slot. Stay tuned for more information. If you'd like to get on the waiting list for upcoming workshops, please send me email with the subject line: "TDS Workshops." Those virtual camera club members who are on the waiting list get first opportunity to register for newly announced workshops. Attendance is limited to 6 for each TDS Workshop to ensure a personalized experience.

    More Ways to Participate

    Want to share photos and talk with other members in our virtual camera club? Check out our Flickr Public Group. It's a blast!


    twitter.jpg Follow me on Twitter

    -


    Podcast Sponsors

    Red River Paper -- Try the $7.99 Sample Kit.

    Make Your Photos Sizzle with Color! -- SizzlPix is like High Definition TV for your photography.


    Technorati Tags: , , , , ,

    Switching Aperture to 32-Bit Mode

    aperture_32bit.jpg

    If you have to switch to 32-bit mode in Aperture to run your plug-ins, which are all 32-bits, you can do so via the Get Info box (File > Get Info). With the application closed, check the "Open in 32-bit mode" box, then relaunch Aperture. All of your current Aperture plug-ins should be available to you then.

    More Aperture Tips and Techniques

    To learn more about Aperture 3, check out my Aperture 3 Essential Training on Lynda.com. Also, take a look at our Aperture 3 Focus Section. Tons of free content about how to get the most out of Aperture.


    twitter.jpg Follow me on Twitter


    Full Screen Browser in Aperture 3

    a3_full_screen_mode.jpg

    One of the pleasant surprises in Aperture 3 is the new Full Screen Browser. To access it from the normal browser view in Aperture, all you have to do is hit the F key. This lets you dedicate every inch of your monitor to your pictures. This feature is a blessing while I'm using my 17" MBP on the road.

    If you want to edit one of the images, just double-click on the thumbnail in the Browser to bring it to full screen, then hit the H key to bring up the Adjustments Inspector. At this point, you can work as normal. Another nice touch is, if you hold down the Shift key while moving any of the sliders in the Adjustments Inspector, the Inspector interface disappears except for the slider you're using. Again, this lets you see more of your image with less of the interface.

    When you're done editing your picture, just double click it to return to the full screen Browser. Hit the F key to return to the normal Aperture 3 interface. Very nice.

    Oh, and one other thing. Those images in the illustration... they are Raw files from my Canon S90. Aperture 3 decodes them wonderfully. I've also talked with LX3 shooters, and they too can decode their Raw files in A3.

    More Aperture Tips and Techniques

    To learn more about Aperture 3, check out my Aperture 3 Essential Training on Lynda.com. Also, take a look at our Aperture 3 Focus Section. Tons of free content about how to get the most out of Aperture.


    twitter.jpg Follow me on Twitter


    Canon T1i Video Edited in Aperture 3

    When Apple enabled video trimming in Aperture 3, my guess is they wanted to enhance the Slideshow module. And that they did. You can now combine still images, video, and separate audio tracks to create beautiful productions.

    After playing with this module for a few hours, however, my message to Apple is that I would prefer even more video functionality (yeah, I know). But quite honestly, the task I often have at hand is to shoot video, cut it, then upload to YouTube -- as quickly as possible. Incorporating still images and soundtracks are fun, but not the normal project.

    This short movie, "Mission St., SF" was captured with a Canon T1i, then imported directly into Aperture 3 for production and export. Click through to YouTube for the HD version.

    So if you have your hopes up that there's a mini Final Cut Pro inside of Aperture, you might want to lower your expectations. The video tools are extremely basic. What you can do, however, is useful.

    • Add and manage DSLR video clips in the Aperture library. And thanks to the improved Import dialog box, you can choose which types of files you want to upload.
    • Select the video clips you want to work with, then go to New > Slideshow where you can organize their sequence, add a soundtrack, add title slides, and choose some basic parameters for your presentation.
    • Trim video clips by double clicking on them. This is very important because the one thing that all videos need is editing.
    • Export your production using one of the 5 presets or custom export settings. I used the HD 720 preset for this short movie.

    I know it seems odd to use the Slideshow module for your video editing. But I think that's due to Apple's original concept for video management in Aperture. I wouldn't be surprised if up the road we see a dedicated module for handling movies. In the meantime, however, this is a huge addition to Aperture 3. And it will make my life more efficient and productive.

    More Aperture Tips and Techniques

    To learn more about Aperture 3, check out my Aperture 3 Essential Training on Lynda.com. Also, take a look at our Aperture 3 Focus Section. Tons of free content about how to get the most out of Aperture.


    twitter.jpg Follow me on Twitter


    Aperture 3 Hits the Streets

    Apple announces the long awaited Aperture 3 professional photo management application with 200 new features. You can read a nice overview on Macworld, then spend some time on the Apple site that does a good job of showing off the new feature set.

    Over the coming weeks, we'll be delving into all the fun nooks and crannies here, including managing HD video, audio, new image editing presets, and much more. Stay tuned!

    More Aperture Tips and Techniques

    To learn more about Aperture 3, check out my Aperture 3 Essential Training on Lynda.com. Also, take a look at our Aperture 3 Focus Section. Tons of free content about how to get the most out of Aperture.


    twitter.jpg Follow me on Twitter


    2010: Year of Software Decisions

    As I look into my crystal ball for 2010, I predict we'll have new versions of many of the heavy-hitter software applications that we depend on for photo management and processing. How those new releases match up with the way we shoot will impact people on both sides of the equation.

    Sometime during 2010, my guess is that we'll see Photoshop CS5 with updated versions of Adobe Camera Raw and Bridge. Lightroom 3 will probably come out of beta and on to the shelves. And Aperture 3 will most likely debut too. The big question is, how will those new applications match up to our evolving photography?

    For example, I want one application that has Raw support for all of my cameras. I want to be able to catalog my video as well as my still pictures in the same environment. And I want integration with the other applications and services I use.

    What's on your application wish list for 2010? If you have specifics that are important to you, please share them in the comments below.

    Happy New Year! (It's going to be an interesting one...)


    twitter.jpg Follow me on Twitter

    -


    It's Time for Aperture 3

    aperture_icon.png

    On Feb. 12, 2008, Apple released Aperture 2. Now, more than a year and a half later, it's time for Aperture 3. Here's why I think we'll see the next generation by the end of 2009.

    • iLife 09, which was a massive undertaking by Apple, is now signed, sealed, and delivered. There are shared resources within Apple for iPhoto and Aperture, so it's difficult for them to release both products within a short time span.
    • Snow Leopard is already at 10.6.1. You can bet that Aperture 3 is going to leverage technologies within the latest operating system. So, Snow Leopard had to hit the streets before Aperture 3. Now that it's on the prowl, the cage door is swinging open.
    • Lightroom 3 is around the corner. Chances are good that we'll see Lightroom 3 in the not-too-distant future. You just know that Apple wants to have Aperture 3 out first.
    • The grumble effect. Once we get deep into the product cycle, users start grumbling about an update. Whether it's coincidence or not, when the complaining reaches a certain pitch, we usually see a release. Not sure if this is chicken or egg, but the grumble effect is in force right now.

    So, assuming that I'm right and we'll see Aperture 3 by the end of the year, what's it going to have? I wish I knew. My guess is that we'll see some of the technologies introduced in iPhoto '09, plus some new things that we aren't even imagining right now. I'm assuming we'll have more localized edits, better speed, and continued integration with other Apple technologies. I'm confident that it will be a solid release.

    And I can't wait to try it.

    More Aperture Tips and Techniques

    To learn more about Aperture 3, check out my Aperture 3 Essential Training on Lynda.com. Also, take a look at our Aperture 3 Focus Section. Tons of free content about how to get the most out of Aperture.


    twitter.jpg Follow me on Twitter

    -